
Healthy coconut rough is a simple, no-bake slice that brings together wholefood ingredients to create a delicious treat that feels indulgent but is still grounded in nourishment. It’s the kind of recipe that’s perfect to keep in the freezer for when you want something sweet after a meal or a quick energy boost without reaching…
coconut
Banana Walnut Granola
This banana walnut granola is a delicious way to use up ripe bananas and makes a nourishing breakfast or snack. Lightly spiced with cinnamon, naturally sweetened, and full of texture from oats, buckinis, seeds and nuts—it’s a homemade pantry staple that’s both satisfying and versatile. Health benefits Bananas are rich in potassium and fibre, and…
Mango Macadamia Gluten-free Granola
This mango macadamia gluten-free granola is a naturally sweet, crunchy, and nutrient-packed breakfast option that’s completely gluten-free (and doesn’t contain oats). Made with real mango puree, macadamia nuts, and a mix of wholesome seeds, it’s bursting with tropical flavour and nourishing goodness. Health benefits Rich in healthy fats from macadamias and coconut, this granola supports…
Healthy Raw Apricot Coconut Slice
This Healthy Raw Apricot Coconut Slice is the perfect energy-boosting snack, ideal for both adults and kids, especially before sports or high-energy activities. Packed with organic dried apricots, almonds, and coconut oil, it’s a wholesome, high-energy treat that fuels your day with essential nutrients. The mix of natural sugars and healthy fats makes it a…
Dream Cake
Dream Cake, or Drømmekage, is a traditional Danish treat that pairs a soft, buttery vanilla cake with a rich, caramelised coconut topping. This healthier version uses wholemeal spelt flour and natural sweeteners, making it a more nourishing indulgence that doesn’t compromise on flavour. It’s a recipe I’ve recently developed for EatWell Wellbeings magazine and I…
Apple Pie Granola
This Apple Pie Granola is sweetened with pureed fruit which makes for a crispy crunchy granola that my whole family adores. I love having a muesli or granola ready made in my pantry… in fact I’m lost without it. But I also like to mix it up flavour wise and I’ve realised my kids get…
Lime Coconut Honey Bliss Bites
These Lime Coconut Honey Bliss Bites are so incredibly easy to make and super nourishing and immune supportive. Healthy treats do not get any easier than this!! Health benefits The almond meal is a source of protein and essential fats. The coconut and coconut oil are immune supportive. The principle medium-chain-fatty-acids (MCFA’s) in coconut oil…
Apricot Coconut Cookies
Enjoy in the beautiful flavours of our easy-to-make Apricot Coconut Cookies. These scrumptious treats are not only delicious but also packed with wholesome ingredients. Perfect as a post-school snack or a lunchbox surprise for kids (if nuts allowed or make the variation), these cookies are sure to become a favourite in your household. Health benefits…
Lime Coconut Jellies
I’m always experimenting with jelly flavours and these Lime Coconut Jellies came about as I really love the flavour of zesty lime paired with creamy coconut. These low sugar treats are super nourishing and so delicious. The lime coconut flavours are so tropical and fresh and take me to white, pristine beaches on a warm,…
Passionfruit Coconut Tea Cake
This Passionfruit Coconut Tea Cake is beautifully moist and bursting with flavour. I love the combination of passionfruit and coconut in a cake. This is one cake that will leave you feeling very satisfied. Naturally dairy and gluten-free, this is a great choice to make when there are a number of dietary requirements for your…
Lemon Coconut Slice
This zesty lemon coconut slice is an easy, low-sugar treat that’s perfect for lunchboxes or snacks, and it’s a staple in the Harding household. With simple steps, it’s a great recipe to get the kids involved—little ones can help mix and press the base, while older kids and teens can tackle the whole thing (with a bit of oven supervision). Whether you’re baking solo or with the family, this recipe is sure to become a favourite!
Take a look at the variations (below the main recipe) for suggestions to alter the recipe to suit your specific dietary requirements.
For more easy to make, delicious healthy sweet recipes, click HERE.
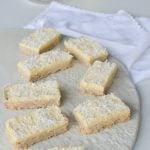
Lemon Coconut Slice
This lemon coconut slice is the perfect mix of zesty lemon and creamy coconut in an easy-to-make treat. It’s a wholesome, homemade alternative to store-bought snacks.
Servings: 12
Ingredients
- 150 g butter or coconut oil
- 85 g rice malt syrup, honey or maple syrup (¼ cup approx.)
- 1 lemon/s – zest (juice reserved for icing)
- 120 g wholemeal spelt flour (1 cup)
- 90 g rolled oats (1 cup)
- 100 g desiccated coconut (1 cup)
Lemon Buttercream (see below note)
- 70 g butter – at room temperature (important it's not over softened or too cold)
- 20 ml lemon juice – no more or it may split
- 3 tbsp rice malt syrup or honey
- 3 tbsp tapioca flour – or arrowroot
- 2 tbsp desiccated coconut – for decorating, optional
Instructions
- Preheat your oven to 180°C/350°F (fan forced).
- Melt your butter (or coconut oil) in a large pot. If using a Thermomix 90, 1 minute, speed 3.
- Add the sweetener and mix to combine by hand or in a food processor. If using a Thermomix 30 seconds, temp 90, speed 4.
- Add all of the other ingredients and process or mix well until combined. If using a Thermomix, reverse speed 4, 30 seconds.
- Press firmly into a lined slice tin (approx. 17 x 27cm) and bake for 10-12 minutes. Take care not to overcook this as it can dry out. If your oven runs hot, reduce the temperature to 160°C.
- Allow to cool in the tin (it firms as it cools) and once cooled, pop it into the fridge to chill for 30 minutes or more.
Lemon Buttercream
- Beat the icing by mixing all of the ingredients together in a small bowl until smooth and creamy. Thermomix butterfly, 20 seconds, speed 3.
- Spread over the chilled slice.
- Sprinkle over a little extra desiccated (or shredded) coconut.
- Chill for 10 more minutes in the freezer, remove from the tin and carefully slice into squares by pressing straight down with a large sharp knife.
- Refrigerating before slicing makes it much easier to cut without crumbling.
Troubleshooting the icing…
- If it's grainy or curdled – means the mixture is too cold. It usually needs warming up (either with a hair dryer or a warm towel wrapped around the bowl). Once it is a slightly warmer temperature, whip it up again with an electric beater / Thermomix.
- If it it is very thin – usually means that the butter/ mixture is too warm and needs cooling down. Putting the bowl in the fridge for 15 minutes or so and then beating it afterwards should fix it perfectly. You can also add a bit more tapioca to thicken it.
Store
- Store in the fridge or freeze in an airtight container. The butter icing will soften when left at room temperature.
- I enjoy these straight from the fridge or freezer. When packing into school lunches, pack against an ice brick.
Notes
Gluten-free
Substitute the spelt with your favourite gluten-free flour and the oats can be replaced by quinoa flakes.Dairy-free or vegan
Replace the butter in the base with coconut oil (this will produce a tougher/ crisper slice). For the icing a cashew cream would be the best choice.Low-fructose
Use brown rice syrup as your sweetener.Let me know how you love this zesty and delicious treat. I’d really appreciate it if you could leave a short comment and 5 stars!
Maple Chai Chia Pudding
This gluten-free Maple Chai Chia Pudding with Rhubarb and Apple Compote is a delicious and really nourishing start to the day (or snack or dessert). I love this flavour combination so much. The creamy, earthy chai flavours combined with the acidity of the rhubarb is perfect for the cooler months. If you don’t feel like…
Peach Ginger Coconut Smoothie
The Peach Ginger Coconut Smoothie is a blend of fresh peaches, ginger, and coconut yogurt. This refreshing gluten-free and dairy-free smoothie is perfect for a quick breakfast, snack, or healthy dessert. Late last year my niece got married in Brisbane and we had the most wonderful weekend with family celebrating. My hubby loves food as…
Mango Lime Coconut Chia Pudding
This vegan Mango, Lime, Coconut Chia Pudding is easy to make as a nourishing and delicious breakfast, snack or dessert. They make a nice change from overnight oats too. It’s a great recipe to create for your family during the summer months and I love to make this when I need to use up over…
Mango Macadamia Muesli
This Mango Macadamia Muesli is sweetened with pureed fruit which makes for a crispy crunchy granola that my whole family adores. I love having a muesli or granola ready made in my pantry…in fact, I’m lost without it. But I also like to mix it up flavour wise and I’ve realised my kids get over…
Chocolate Party Cake
My Chocolate Party Cake is an easy to make, gluten-free, allergy friendly cake that is perfect for parties. Don’t let the ingredients fool you – the kids will be none the wiser to this rich, moist, and delicious cake. Best of all, it is actually best eaten the next day so you can happily pre-prepare…
Healthy Lamington Parfait
This healthy lamington parfait is a modern twist on a classic Australian dessert. It’s layered with almond cake, raspberry coulis, and a rich chocolate sauce, all topped with creamy whipped cream and toasted coconut. Perfect for entertaining or as a treat, it’s a delicious way to enjoy a wholesome dessert. This deconstructed Healthy Lamington Parfait…
Healthy Chocolate Coconut Slice
This is such a yummy, old-fashioned style Chocolate Slice – it reminds me a lot of the one my nan always made me, only a little healthier. This Healthy Chocolate Coconut Slice is a lovely chocolatey treat to stock your freezer with, so if you have hungry kids at home looking for a snack or need an easy lunchbox filler, you’ll have this on hand ready to go!
Food memories are the best. As a kid I used to bake with my nan every weekend, we even occasionally ‘invented’ recipes. The ones that worked out, she carefully wrote on a note pad and sticky taped it into her recipe notebook. I still have that notebook, though the tape is browned and dried and the binding has seen better days.
Anyway, enough nostalgia…though I do hope that one of my recipes will perhaps form memories and be carried down in your family.
Health benefits
This healthy chocolate coconut slice is made with wholemeal spelt flour, rolled oats, and desiccated coconut, this slice provides fibre and slow-releasing energy. The cacao powder is rich in antioxidants, while the choice of natural sweeteners like honey or rice malt syrup makes it a healthier alternative to refined sugar treats.
Ingredients
This recipe uses spelt flour, oats, cacao powder, and coconut. Butter or coconut oil adds richness, and the bittersweet chocolate icing made with raw cacao powder (or cocoa powder), rice malt syrup or honey, milk and coconut oil brings a decadent touch that can be adjusted to suit your taste.
How to make this healthy chocolate coconut slice
Melt the butter or coconut oil, stir in the sweetener, and mix with the dry ingredients until combined. Press the mixture into a tin lined with baking paper and bake in a fan-forced oven as instructed below. Chill before adding the rich bittersweet chocolate icing made with cacao powder, rice malt syrup or honey, milk and coconut oil and sprinkle with coconut for a beautiful finish. This can also be made in your food processor and we’ve included the Thermomix method too if you have one.
Serving suggestions and how to store
Enjoy this slice as a mid-morning snack or a healthier dessert option. It’s also perfect for school lunchboxes being nut-free and egg-free. Store in an airtight container in the fridge to keep it fresh for up to a week or freeze it for longer storage. It can be packed or eaten from frozen. Refrigerating before slicing ensures clean, crumb-free cuts.
Vary this healthy chocolate coconut slice to suit
For a gluten-free option, swap spelt flour for your favourite gluten-free flour and replace oats with quinoa flakes. Make it dairy-free or vegan by using coconut oil instead of butter. Choose brown rice syrup for a low-fructose version.
Want more great recipes like this one? SUBSCRIBE NOW
For more delicious, easy to make prep-ahead heathy snack recipes, click HERE.

Chocolate Coconut Slice
This Chocolate Coconut Slice is a delicious, very easy to make, low sugar lunchbox treat or snack. Sure to become a favourite with young and old alike!
Servings: 12
Ingredients
- 150 g butter or coconut oil
- 85 g rice malt syrup, honey or maple syrup (¼ cup approx.)
- 30 g cacao powder - unsweetened Dutch process or raw
- 120 g wholemeal spelt flour (1 cup)
- 90 g rolled oats (1 cup)
- 100 g desiccated coconut (1 cup)
Bittersweet Chocolate Icing (see note below)
- 30 g cacao powder - unsweetened Dutch process or raw (¼ cup)
- 2 tbsp coconut oil
- 2 tbsp rice malt syrup or honey
- 1 tbsp milk (of choice)
- 10 g desiccated coconut (2 tbsp)
Instructions
- Preheat your oven to 180°C/350°F (fan-forced).
- In a large pot over medium heat, melt your butter (or coconut oil). If using a Thermomix 90, 1 minute, speed 3.
- Turn off the heat and add the sweetener, mixing to combine. If using a Thermomix 30 seconds, temp 90, speed 4.
- Add all of the other ingredients and mix well until combined. If using a Thermomix reverse speed, 30 seconds.
- Press firmly into a lined tin (approx. 17 x 27cm) and bake for 10-12 minutes. Take care not to overcook this as it can dry out. If your oven runs hot, reduce the temperature to 160°C.
- Once cooled, pop it into the fridge to chill for 30 minutes or more.
Bittersweet Chocolate Icing
- Make the icing by beating all of the ingredients together in a small bowl until smooth and creamy. If using a Thermomix butterfly, 1 minute, speed 3.
- Spread over the chilled slice and sprinkle over a little extra desiccated (or shredded) coconut.
- Chill for 10 more minutes in the freezer, remove from the tin and carefully slice into squares by pressing straight down with a large sharp knife.
Store
- Store in the fridge or freeze in an airtight container.
Note
- The icing above is very rich (for dark chocolate lovers only). You can leave it off, top it with melted chocolate or a chocolate butter cream. This recipe works really well as a super healthy ganache too.
- Refrigerating before slicing makes it much easier to cut without crumbling.
Notes
Gluten-free
Substitute the spelt with your favourite gluten-free flour and the oats can be replaced by quinoa flakes.Dairy-free or vegan
Replace the butter with coconut oil (this will produce a tougher/ crisper slice).Low-fructose
Use brown rice syrup as your sweetener.I'd love to hear how you like this slice. Post a comment below or rate this recipe.
Carrot Cake Chia Pudding
This Carrot Cake Chia Pudding is an easy and healthy recipe that tastes just like a carrot cake! Have it for breakfast, dessert or a snack. My kids love this before they go to sports training (either first up in the morning or after school). It’s great to have in the fridge to grab and…
Gingerbread Loaf with Caramel Drizzle
This healthy Gingerbread Loaf with Caramel Drizzle is a low-sugar, wholegrain version of the classic, making it a perfect treat for any occasion. The recipe is versatile, offering options to cater to different dietary preferences. If you love ginger, you’ll love this loaf and whilst it’s sweet, it’s not sickly sweet. Health benefits This loaf…
Mango Whip with Salted Macadamia Caramel
My sons most favourite fruit is mango…just as well we live in Queensland, and we have inherited an old mango tree in our small backyard too. My daughter is not so much a fan, unless it’s made into something like this Mango Whip with Salted Macadamia Caramel. Then she’s happy to eat it. One of…
Coconut Caramel Slice
This new healthy Coconut Caramel Slice recipe is sure to become a firm favourite. It makes a decent sized batch so my kids are always happy to have this treat in the freezer. The nut-free version is perfect for school lunches packed from frozen. I’ve designed it to suit many dietary intolerances and it’s sweet,…
Strawberry Cream Gummies
These easy to make Strawberry Cream Gummies are a delicious, gut healing treat that my whole family loves (including Bonnie Blue my 6 month old puppy). She knows what’s good for her!
I regularly make gummies treats for my family to support their gut health and immune system. The limit is your imagination when making different flavoured gummies. If you’re after more ideas, check out my Lemon Turmeric, and Top Deck (chocolate) gummy recipes too.
Health benefits
Gelatin is made from the bone and connective tissue of animals that has been dried and turned into a powder.
The biggest benefit of eating Gelatin, in my opinion, is that it is a gut healer, which means better nutrient absorption (so greater nourishment) all round. Also, if your gut is functioning well, then your nervous system is better supported too. Gelatin also reduces inflammation, improves joint integrity, and for the vain amongst you – it improves the condition of your skin, hair and nails. In fact, it’s said to be better then botox (and erase wrinkles, stretch marks and cellulite) – now I’ve got your attention!
Ingredients
To make these gummies, you’ll need coconut milk as the base, along with maple syrup for a hint of sweetness (optional). Frozen strawberries, once defrosted, provide the flavour. Gelatin, a key ingredient, helps the gummies set and gives them that satisfying, chewy texture.
How to make these strawberry cream gummies
Start by warming the coconut milk and maple syrup in a small pot. Bloom the gelatin in the mixture, stirring until fully dissolved. Blend the strawberries into a smooth pulp, then mix with boiling water, vanilla, and the remaining gelatin. Layer the coconut cream and strawberry mixtures in a tray, swirling them together for a pretty effect. Refrigerate for about 30 minutes to set, then slice and enjoy!
Serving suggestions and how to store
These gummies make a great snack, and they’re perfect for lunchboxes. Keep them in an airtight container in the fridge or freezer for easy access. If you freeze them, they stay firm and can be packed into lunchboxes with an ice brick to keep them cool.
Vary this to suit your dietary needs
For a different twist, swap the strawberries for raspberries for a “raspberries and cream” variation. If you’re looking for a fructose-friendly option, use rice malt syrup instead of maple syrup and choose raspberries instead of strawberries. Adjust the sweetness to your preference by adding more sweetener if desired.

Strawberry Cream Gummies
These easy to make Strawberry Cream Gummies are a delicious, gut healing treat that my whole family loves. Check out the Raspberry Cream Gummy variation too.
Servings: 20 pieces
Ingredients
- 400 ml canned coconut milk
- 2 tbsp maple syrup - optional
- 125 g strawberries (1 cup -heaped) frozen then defrosted berries provide the best flavour
- 250 ml boiling water (1 cup)
- 1 tsp vanilla - essence or paste
- 4 tbsp grass-fed or organic gelatin
Instructions
- In a small pot, heat the coconut milk and maple syrup over a low heat until luke warm (don't over heat it).
- Add 2 tablespoons of the gelatin and allow to bloom, mixing it well to combine. Continue to mix over the very low heat until it dissolves.
- In a food processor or blender, blend the strawberries until it forms a pulp. You can strain off the seeds if you wish, for a really smooth gummy (I personally don't bother).
- Add the boiling water and vanilla, blend again then add the remaining 2 tablespoons of gelatin and process for a minute or so until the gelatin has dissolved.
- Line a slice tray with baking paper. Pour in the coconut cream layer. Then gently pour over the strawberry layer (swirling as you pour creates the pattern on the top).
- Pop into the fridge for about 30 minutes to set.
- Slice and enjoy.
Thermomix
- Heat the coconut milk and maple syrup 3 mins, 60, speed 3. Add 2 tablespoons of the gelatin and mix 1 min, speed 5. Pour into a lined slice tray.
- Rinse the bowl and process the strawberries 1 min speed 8. Add the boiling water, mix 10 seconds speed 4. Add the remaining gelatin and blend 1 minute, speed 5.
- Then gently pour over the strawberry layer (as above). Pop into the fridge for about 30 minutes to set.
Store
- In an airtight container in the fridge or freezer. Can be packed from frozen into the lucnhbox (against an ice brick to keep it chilled).
Tip
- If using silicon moulds to set your gummies, freeze them to make removing them from the mould clean and simple.
Notes
Raspberries and Cream
Replace the strawberries with raspberries.Fructose friendly
Choose raspberries and replace the maple syrup with rice malt syrup.Sweeter
My kids are fine with little or no sweetener. But feel free to adjust the sweetness to suit your taste and add more maple syrup (or rice malt) if you prefer a sweeter gummy.Let me know how your family enjoys this delicious and healing treat. Leave a comment below or rate the recipe.
Orange Almond Coconut Granola
I’ve always had batches of my Nourishing Toasted Muesli in the pantry for days when we don’t have time to cook eggs or prepare another breakfast. But lately my kids have been fussing over it and that’s always a sign that it’s time for me to change things up a bit…and this sensational Orange Almond Coconut Granola was born!
With oranges in season, I thought I’d inject some seasonal flavours into breakfast. It’s funny, because when I first made this a few months back, my kids were actually hesitant to try it. But when they did, they admitted that they really loved it and it’s become a firm favourite.
My son has it dry or with coconut yoghurt and orange segments (he’s just not a fan of dairy). The rest of us love it with milk, natural yoghurt and orange. It’s also great as part of a smoothie bowl as a snack!
Click for other Granola recipes or Muesli recipes.
Health benefits
This low sugar granola is packed with more nutrition than anything in the supermarket and has a super quick prep time. The rolled oats are a fibre packed, mineral rich wholegrain. In herbal medicine oats are a nerve restorative so great for supporting the nervous system function and digestion also. Almonds add in more fibre, protein and good fats as well as a range of essential micronutrients including antioxidants.
Ingredients
This granola is made with oats, almonds, shredded coconut, macadamia nut oil, fresh orange zest and juice, rice malt syrup or maple syrup (or even honey), and a hint of vanilla extract, giving it a rich and nutty flavour with a citrusy zing.
How to make Orange Almond Granola
Start by pulsing half of the oats and all of the almonds until coarsely chopped. Mix with the remaining oats and coconut on a baking tray (baking sheet) and spread in a thin, even layer. In a large bowl or blender combine the macadamia oil (or coconut oil), orange juice and zest, syrup, and vanilla. Then pour over the oat mixture and mix well. Bake in the preheated oven stirring occasionally, until golden and crisp. Let the granola cool fully (it firms up as it cools).
Serving suggestions and how to store
Serve with fresh fruit – I love orange segments and strawberries, plus your favourite milk, and unsweetened yogurt. It’s great for breakfast or as a snack. Store in an airtight container in a cool pantry for up to a month.
Vary this to suit your dietary needs
More breakfast inspo
Find an awesome range of brekkie inspo in my ebook ‘Rise and Shine a Well Nourished Breakfast‘ – designed with mad mornings in mind, it will ensure your brekkie is as good as it gets. Click HERE to shop.
Remember to take a look at the variations (below the main recipe) for suggestions to alter the recipe to suit your specific dietary requirements (gluten-free, nut-free, fructose friendly).
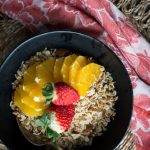
Orange, Almond, Coconut Granola
This orange almond coconut granola brings a refreshing citrus twist to your breakfast routine. With the natural sweetness of orange and the crunch of almonds, this homemade granola is a nutritious way to start your day, packed with fibre and healthy fats.
Servings: 28 serves
Ingredients
- 800 g rolled oats (8 cups)
- 280 g raw almonds (2 cups)
- 200 g shredded coconut (2 cups)
- 120 ml macadamia nut oil (½ cup)
- 2 orange/s - zest and juice
- 170 g rice malt syrup or maple syrup (½ cup)
- 2 tsp vanilla - essence or paste
Instructions
- Pre-heat your oven to 160°C / 320°F (fan-forced).
- In a food processor add 360g (4 cups) of the rolled oats and all of the almonds. Pulse until the almonds are chopped up (but not milled to a meal, you want chunks). If using a Thermomix, turbo (pulse) function and check through the lid (about 5 quick pulses).
- Place this and the rest of the oats and coconut into a large baking tray. It should form a thin layer (approx. 1-2cm deep) so use two baking trays if necessary.
- Mix the macadamia oil, orange juice and orange zest, rice malt or maple syrup and vanilla together in a jug (or your food processor). If using a Thermomix 30 seconds, speed 4.
- Pour over the dry mix and give it a good stir so that all the dry ingredients are coated.
- Bake for 15 minutes. Stir well and bake another 15 mins. Repeat if necessary until the mixture is crisp and dry.
- Stir again and allow to cool completely.
Store
- In an airtight container in a cool pantry for up to a month.
Serve
- With orange segments (and fresh strawberries), your favourite milk and unsweetened yoghurt.