
This orange self saucing pudding is a warm, comforting dessert with a soft, spiced sponge and a naturally sweet citrus sauce that forms underneath as it bakes. It’s simple to prepare and made with more wholesome ingredients, making it a beautiful option when you want something sweet but still grounded in real food. The fresh…
orange
Blueberry Orange Overnight Oats
Another quick and easy, delicious brekkie recipe, these Blueberry Orange Overnight Oats are a healthy, fibre rich way start to the day. Health benefits Oats are a really nourishing, mineral rich grain that are high in fibre and protein. In herbal medicine they are also restorative to the nervous system. The chia provide more nourishment…
Orange Choc Chip Muffins (Grain-free)
These deliciously moist, grain-free healthy Orange Choc Chip Muffins are a beautiful combination of flavours that my family just loves. Be generous with your orange zest but do avoid the bitter white pith – a microplane grater is best to finely remove the zest from the orange. You can choose whether you use milk chocolate…
Poached Spiced Oranges
These delicious Poached Spiced Oranges are so easy to make and are a lovely light dessert to end a meal, perfect for impressing guests or treating yourself. With the warming combination of cinnamon, cardamom, and star anise, the oranges are gently poached in a sweet, spiced syrup, creating a dish that’s both delicious and satisfying….
Orange Kale Quinoa Salad
This Orange Kale Quinoa Salad is a substantial side and so tasty and super nourishing. My kids declared this hands-down the most delicious way to eat kale! Having a quick and easy salad to whip up in less than 30 minutes is going to be a sanity saver and with multiple fruit options, it is…
Orange Pineapple Smoothie
This Orange Pineapple Smoothie is a citrusy and bright breakfast (or anytime) smoothie that’s delicious and nourishing. I know you’ll love this as much as I do…it’s tasty and just feels good. Health benefits The bioflavonoid bromelain in pineapple is a proteolytic enzyme (meaning it breaks down proteins). It is thought to boost immune function…
Orange Almond Coconut Granola
I’ve always had batches of my Nourishing Toasted Muesli in the pantry for days when we don’t have time to cook eggs or prepare another breakfast. But lately my kids have been fussing over it and that’s always a sign that it’s time for me to change things up a bit…and this sensational Orange Almond Coconut Granola was born!
With oranges in season, I thought I’d inject some seasonal flavours into breakfast. It’s funny, because when I first made this a few months back, my kids were actually hesitant to try it. But when they did, they admitted that they really loved it and it’s become a firm favourite.
My son has it dry or with coconut yoghurt and orange segments (he’s just not a fan of dairy). The rest of us love it with milk, natural yoghurt and orange. It’s also great as part of a smoothie bowl as a snack!
Click for other Granola recipes or Muesli recipes.
Health benefits
This low sugar granola is packed with more nutrition than anything in the supermarket and has a super quick prep time. The rolled oats are a fibre packed, mineral rich wholegrain. In herbal medicine oats are a nerve restorative so great for supporting the nervous system function and digestion also. Almonds add in more fibre, protein and good fats as well as a range of essential micronutrients including antioxidants.
Ingredients
This granola is made with oats, almonds, shredded coconut, macadamia nut oil, fresh orange zest and juice, rice malt syrup or maple syrup (or even honey), and a hint of vanilla extract, giving it a rich and nutty flavour with a citrusy zing.
How to make Orange Almond Granola
Start by pulsing half of the oats and all of the almonds until coarsely chopped. Mix with the remaining oats and coconut on a baking tray (baking sheet) and spread in a thin, even layer. In a large bowl or blender combine the macadamia oil (or coconut oil), orange juice and zest, syrup, and vanilla. Then pour over the oat mixture and mix well. Bake in the preheated oven stirring occasionally, until golden and crisp. Let the granola cool fully (it firms up as it cools).
Serving suggestions and how to store
Serve with fresh fruit – I love orange segments and strawberries, plus your favourite milk, and unsweetened yogurt. It’s great for breakfast or as a snack. Store in an airtight container in a cool pantry for up to a month.
Vary this to suit your dietary needs
More breakfast inspo
Find an awesome range of brekkie inspo in my ebook ‘Rise and Shine a Well Nourished Breakfast‘ – designed with mad mornings in mind, it will ensure your brekkie is as good as it gets. Click HERE to shop.
Remember to take a look at the variations (below the main recipe) for suggestions to alter the recipe to suit your specific dietary requirements (gluten-free, nut-free, fructose friendly).
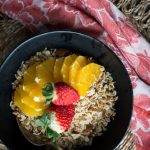
Orange, Almond, Coconut Granola
This orange almond coconut granola brings a refreshing citrus twist to your breakfast routine. With the natural sweetness of orange and the crunch of almonds, this homemade granola is a nutritious way to start your day, packed with fibre and healthy fats.
Servings: 28 serves
Ingredients
- 800 g rolled oats (8 cups)
- 280 g raw almonds (2 cups)
- 200 g shredded coconut (2 cups)
- 120 ml macadamia nut oil (½ cup)
- 2 orange/s - zest and juice
- 170 g rice malt syrup or maple syrup (½ cup)
- 2 tsp vanilla - essence or paste
Instructions
- Pre-heat your oven to 160°C / 320°F (fan-forced).
- In a food processor add 360g (4 cups) of the rolled oats and all of the almonds. Pulse until the almonds are chopped up (but not milled to a meal, you want chunks). If using a Thermomix, turbo (pulse) function and check through the lid (about 5 quick pulses).
- Place this and the rest of the oats and coconut into a large baking tray. It should form a thin layer (approx. 1-2cm deep) so use two baking trays if necessary.
- Mix the macadamia oil, orange juice and orange zest, rice malt or maple syrup and vanilla together in a jug (or your food processor). If using a Thermomix 30 seconds, speed 4.
- Pour over the dry mix and give it a good stir so that all the dry ingredients are coated.
- Bake for 15 minutes. Stir well and bake another 15 mins. Repeat if necessary until the mixture is crisp and dry.
- Stir again and allow to cool completely.
Store
- In an airtight container in a cool pantry for up to a month.
Serve
- With orange segments (and fresh strawberries), your favourite milk and unsweetened yoghurt.
Notes
Nut-free
Replace the almonds with sunflower seeds and the macadamia nut oil with coconut oil.Gluten/grain-free
Replace the rolled oats with a gluten and grain-free rolled seed like rolled (flaked) quinoa or millet.Coconut-free
Replace the coconut with slivered or flaked almonds.Fructose friendly
Choose rice malt as your sweetener (you can also reduce the orange juice if you need to).Cardamon infused
Add a tablespoon of ground cardamon if it's flavour you enjoy (I personally love it).Add cranberries or goji
This is lovely with dried cranberries or goji berries too.I'm fairly certain this is going to become a very popular brekkie and I'd love to hear how you like it. Post a comment below and let me know. I'd love to hear from you.
Orange Fennel Mint Salad
This Orange Fennel Mint Salad is a delicious dish perfect for any season. The crisp fennel, sweet orange, and fresh mint come together with a creamy yoghurt-based dressing for a light, nutritious side salad.
Christmas day for us is a day of grazing. My whole family are food lovers, so as much as there is excitement around presents, there is also a lot of anticipation for the feast ahead. Christmas lunch generally starts around mid-day with some simply prepared seafood – fresh prawns, oysters, and half shell scallops (this is my favourite way to eat them, recipe here). The main fare happens mid arvo with traditional meats but most of my time and effort in the kitchen goes into preparing beautiful sides, salads and sauces.
This fresh, flavour packed salad is a delicious accompaniment to Christmas meats. The fennel and mint as well as adding amazing flavour, are both brilliant digestive herbs so very helpful as part of a feast!!
Health benefits
Fennel is rich in fibre and vitamin C, promoting gut health and immune support, while the fresh mint aids digestion. The yoghurt in the dressing adds a creamy texture and calcium content, with an option for coconut yogurt to keep it dairy-free.
Ingredients
For the salad: thinly sliced red onion, large fennel bulb, fresh mint leaves, and a large orange with a sharp knife. The vinaigrette requires full-fat natural yogurt (or coconut yogurt), orange juice, olive oil, red wine vinegar, sea salt, and a pinch of paprika. Baby spinach can be added as an optional leafy green.
How to make Orange Fennel Mint Salad
Whisk all dressing ingredients until smooth. Toss the sliced onion and fennel with half the dressing and let rest for 30 minutes. Arrange orange slices and mint leaves on top of the fennel mixture, drizzle with remaining dressing, and serve immediately.
Serving suggestions and how to store
This orange salad is best served fresh, but you can prepare the fennel and onion mixture ahead of time. Store leftovers in an airtight container in the fridge for up to a day.
Vary this Orange Fennel Mint Salad to suit your needs
For a dairy-free or vegan version, use coconut yoghurt or cashew nut cream in the dressing. Replace red onion with thinly sliced radish if preferred.
Take a look at the variations (below the main recipe) for suggestions to alter the recipe to suit many specific dietary requirements.
For lots more sides and salad inspo, take a look at my hugely popular ebook ˜Well Nourished Sides and Salads’– where vegetables become the hero of the dish! It’s great value at just $9.95, click HERE to take a look.

Orange, Fennel and Mint Salad
Simple, clean flavours that compliment many meals and meats, this Orange, Fennel and Mint Salad is easy to make and super delicious.
Servings: 4
Ingredients
- 1 red onion/s (small) halved & thinly sliced
- 2 bulb/s fennel -halved & thinly sliced
- ½ bunch/s fresh mint leaves - leaves picked from stems
- 1 orange/s -peeled, halved & thinly sliced
Dressing
- 1 tbsp natural, Greek or coconut yoghurt
- 2 tbsp orange juice
- 1 tbsp extra virgin olive oil -extra virgin
- 1 tbsp red wine vinegar
- Pinch sea salt
- ¼ tsp sweet paprika
Optional:
- 100 g baby spinach (approx. or any leafy green)
Instructions
- Make your dressing by combining all of the ingredients together in a bowl and whisking to combine.
- Place the onion and fennel in a bowl and toss through half of the dressing. Allow to rest for 30 minutes (or more).
- Prepare your orange and mint leaves, arrange on top of the fennel and onion, drizzle with the remaining dressing and serve immediately.
TIP-
- You can bulk this salad out with shredded lettuce or baby spinach to make a bigger salad.
- If oranges are out of season, replace with nectarines or peaches. Pomegranate pearls are also beautiful in this salad.
Notes
Onion-free
Replace the onion with four radishes, sliced thinly.Dairy-free and vegan
Replace the natural yoghurt with coconut yoghurt (or cashew nut cream).I'd love to hear how you enjoy this salad. Post a comment and rate this recipe below.
Blood Orange Jelly
This refreshing home made Blood Orange Jelly (or orange jello depending on where you live in the world) is a delicious and healthy treat, made with fresh orange juice and coconut water. It’s a great option for a light dessert or a snack, and it’s easy to customise for various dietary preferences. I especially love to make this when juicy blood oranges are in season.
My kids number one favourite treat right now is any type of jelly and they’ve rated this, their absolute favourite flavour (for the moment anyway).
Health benefits
Oranges are packed with vitamin C and antioxidants, when oranges and lemons are in season, their nutrient levels are at their best so that’s the time to make this jelly. The addition of coconut water also offers natural electrolytes. The gelatin used here supports gut health, joint function, and skin elasticity, making this not only delicious but also nourishing.
Gelatin is made from the bone and connective tissue of animals that has been dried and turned into a powder. I have written about the benefits of gelatin in this post about bone broth. As I’ve always stated, eating whole food sources of any nutrient is best, so consuming bone broth regularly is the most nutrient dense way to consume gelatin. But for a tasty treat, making a batch of jelly is a delicious way to include additional gelatin in your diet.
I like to use THIS gelatin to make gummies or jelly.
Ingredients
This orange jelly recipe calls for freshly squeezed blood orange juice (or regular orange juice), coconut water, a bit of rice malt syrup or honey for sweetness (optional), lemon juice, and grass-fed or organic gelatin. For a smoother jelly, you can strain the juice, though leaving the pulp adds extra fibre.
How to make this blood orange jelly
Start by warming the coconut water and optional sweetener in a small pot. Sprinkle the gelatin over the liquid gradually, stirring after each addition. Once dissolved, combine the coconut water mixture with the freshly squeezed orange and lemon juices. Pour into molds or a bowl and refrigerate until set.
Serving suggestions and how to store
Serve the jelly chilled, either on its own or with fresh fruit or whipped cream. Store in an airtight container in the fridge to maintain freshness.
Vary this blood orange jelly to suit your needs
To make this blood orange jelly recipe low-fructose, use rice malt syrup as the sweetener. For a coconut-free version, substitute the coconut water with water kefir or kombucha. Vegetarians and vegans can try setting the jelly with agar-agar instead of gelatin, though adjustments may be needed for the best results.
Take a look at the variations (below the main recipe) for suggestions to alter the recipe to suit many specific dietary requirements.
For more delicious, healthy and easy to make wholefood treats, click HERE.

Blood Orange Jelly
A jelly made with fresh fruit and gelatin is a far cry (health wise) from the processed version. Best of all, it really is very easy to make, no more so than my Blood Orange Jelly.
Servings: 4
Ingredients
- 500 ml freshly squeezed blood orange juice (or regular orange juice) (2 cups)
- 120 ml coconut water (½ cup)
- 1-2 tbsp rice malt syrup or honey (optional)
- 1 lemon/s -juice
- 3 tbsp grass-fed or organic gelatin
Instructions
- Place the coconut water and sweetener into a small pot and heat for a minute to lukewarm.
- Sprinkle the gelatin over the liquid, stirring after each tablespoon. For a traditional jelly set use 2 tablespoons, for a firmer, more gummy-lolly-like consistency, add 3 tablespoons.
- If the gelatin doesn't completely dissolve, you can pop your pot back on the heat for a minute (only heat to luke warm), stirring well.
- Juice your oranges and lemons and mix with the coconut water mixture. Personally, I don't strain any bits of pulp, but feel free to if you want a jelly with a really smooth consistency.
- Pour into a bowl or moulds, and set in the fridge.
Store
- Airtight in the fridge.
Notes
Low-fructose
Choose rice malt syrup as your sweetener.Coconut-free
Replace the coconut water with water keffir or kombucha.Vegetarian and vegan
Set with agar-agar (I haven't recipe tested this as yet).Other jelly recipes you might like:
I love to receive your feedback and welcome any questions. Post your comment or questions below.
Lemon Turmeric Jellies
I’m always experimenting with jelly flavours and trying to cram as much nutrition into one small treat as possible. So these Lemon Turmeric Jellies came about after my husband came down with man flu and I went on a mission to keep the rest of us from succumbing.
These lemon turmeric jellies are a refreshing, immune-boosting treat packed with antioxidants and anti-inflammatory benefits. They’re easy to make, with a zesty lemon flavour and a hint of spice from ginger and turmeric.
Health benefits of lemon jellies
The ginger and turmeric root are powerful anti-inflammatory and warming immune supportive herbs in these gut loving lemon gummies. The coconut water is hydrating and the kombucha and kefir are supportive to a healthy gut microflora. While lemon adds a vitamin C boost.
Gelatin is made from the bone and connective tissue of animals that has been dried and turned into a powder. I have written about the benefits of gelatin in this post about bone broth.
The biggest benefit of eating gelatin, in my opinion, is that it is a gut healer, which means better nutrient absorption (so greater nourishment) all round. Also, if your gut is functioning well, then your nervous and immune systems are better supported.
I like to use THIS gelatin to make healthy lemon gummies or lemon jelly.
Ingredients
These gummies are made with simple, natural ingredients like fresh turmeric root (or powder), fresh ginger, fresh lemon juice, raw honey and grass-fed gelatin, these jellies are a healthy, gluten-free snack.
How to make Lemon Turmeric Jellies
Start by simmering the turmeric and ginger in water to release their flavours and goodness, then mix in coconut water, lemon juice, and honey. Add gelatin to set the mixture, and let it chill in the fridge until firm.
Serving suggestions and how to store
Serve these anti-inflammatory jellies as a midday snack or a post-meal treat. Store in an airtight container in the fridge for up to a week or in the freezer for longer.
Vary the lemon jellies to suit your needs
For a low-fructose gummy, use rice malt syrup instead of honey. If you’re not a fan of coconut, swap coconut water for kombucha or water kefir, and you can easily sub fresh turmeric with powdered.
Take a look at the variations (below the main recipe) for suggestions to alter the recipe to suit many specific dietary requirements.
For more delicious, healthy and easy to make wholefood treats, click HERE.
Or for more healthy gummie recipes, click HERE.
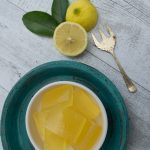
Lemon Jellies
A beautiful, immune supportive treat, these Lemon Jellies have been a hugely popular recipe. They are great for helping to prevent illness, as well as being an easy food to eat if you are feeling under the weather.
Servings: 8
Ingredients
- 250 ml water (1 cup)
- 2 cm ginger root -peeled & sliced
- 1 cm fresh turmeric root -peeled & sliced or ½ tsp ground
- 250 ml coconut water (1 cup) or kombucha or water kefir
- 1-4 tbsp honey - Manuka or raw (amount depends on the level of sweetness you like)
- 1 lemon/s (large) juice (or 2 small)
- 2 - 3 tbsp grass-fed or organic gelatin
*Note about honey - only raw, unheated and unprocessed honey has medicinal properties. A good quality Manuka honey is the very best option.
Instructions
- Place the water, ginger and turmeric root into a small pot and bring to the boil, reducing to a simmer for approx. 5 minutes.
- Take off the heat off and allow to cool for 5 minutes.
- Remove the solids (strain) and stir in the coconut water (kombucha or water kefir) honey, lemon and optional Camu powder. Taste to check that you are happy with the flavour (sour/sweet balance). I should be luke warm before adding your gelatin.
- Now sprinkle the gelatin over the liquid, allow it to sit and bloom (go wrinkly) for a few minutes then whisk to mix through. For a traditional jelly set use 2 tablespoons, for a firmer, more gummy-lolly-like consistency, add 3 tablespoons.
- If the gelatin doesn't completely dissolve, you can pop your pot back on the heat for only 1 minute (only heat to luke warm), stirring well.
- Pour into a lined slice tray or moulds, and set in the fridge.
Thermomix
- Place the water, ginger and turmeric root into the bowl heat 5 mins, varoma, speed 1.
- Add the honey or rice malt syrup, mix 30 seconds speed 3.
- Remove the solids and add the coconut water, kombucha or water kefir, honey (and optional camu camu). Mix 10 seconds, speed 3.
- Now add the gelatin, allow to bloom, mix 1 minute, temp 37, speed 2 or until the gelatin is dissolved.
Store
- Store in an airtight container in the fridge or freezer.
Tip
- If using silicon moulds to set your gummies, freeze them to make removing them from the mould clean and simple.
- If your Jellies don't set, its because the liquid was either too hot or too cold (it needs to be luke warm) or the brand you are using has a different liquid to gelatin ratio. All is not lost, simply add back to the pot, gently heat to luke warm and add more gelatin.