
These healthy carrot cake muffins are everything you love about classic carrot cake but in a simple, wholesome muffin form that’s naturally sweetened, moist, and full of warming spices. They make the perfect afternoon tea treat, lunchbox filler, or even a healthier option for celebrations when topped with the optional cream cheese yoghurt frosting. Health…
slice
Healthy Puffed Rice Bars (chocolate)
These healthy puffed rice bars are a simple and delicious homemade snack that’s perfect for kids’ lunchboxes (there is a nut-free variation), busy afternoons, or a wholesome sweet treat. Unlike store-bought bars that are often loaded with refined sugar and additives, this recipe is made with real food ingredients like puffed rice, almond meal, coconut,…
Healthy Raw Apricot Coconut Slice
This Healthy Raw Apricot Coconut Slice is the perfect energy-boosting snack, ideal for both adults and kids, especially before sports or high-energy activities. Packed with organic dried apricots, almonds, and coconut oil, it’s a wholesome, high-energy treat that fuels your day with essential nutrients. The mix of natural sugars and healthy fats makes it a…
Chocolate Muesli Slice (Gluten-free)
This easy to make, delicious gluten-free Chocolate Muesli Slice is going to become your new favourite. It’s got a lovely almost cornflake like crunch and it freezes perfectly for fast lunchbox packing. The use of ground seeds not only provides a gluten and nut-free flour, but these are highly nutritious so a fantastic source of…
Peanut Butter Oat Slice
This quick and easy to make Peanut Butter Oat Slice is a sustaining, filling brekkie or afternoon tea. It’s simple, nourishing and delicious. Bonus points is that it freezes well too. Simply pop in the oven or on the sandwich press to reheat it. Health benefits Oats are a really nourishing, mineral rich grain that…
Apple Caramel Crumble Slice
This Apple Caramel Crumble Slice is a delicious combination of flavours and so easy to make with variations for gluten-free, dairy-free, nut-free and vegan. It has a slightly nutty and oaty main base and top crumble, sweetened with a lovely caramel and lightened with fresh baked apple. Perfect for morning or afternoon tea when you…
Zucchini Haloumi Asparagus Slice
This Zucchini Haloumi Asparagus Slice with a herb salad is a lovely light meal or snack. My kids love a ‘savoury slice’ more so than a frittata or quiche, especially in their school lunch. I think because it tends to hold together better and they like the addition of extra carbs. For a bit of…
Lemon Coconut Slice
This zesty lemon coconut slice is an easy, low-sugar treat that’s perfect for lunchboxes or snacks, and it’s a staple in the Harding household. With simple steps, it’s a great recipe to get the kids involved—little ones can help mix and press the base, while older kids and teens can tackle the whole thing (with a bit of oven supervision). Whether you’re baking solo or with the family, this recipe is sure to become a favourite!
Take a look at the variations (below the main recipe) for suggestions to alter the recipe to suit your specific dietary requirements.
For more easy to make, delicious healthy sweet recipes, click HERE.
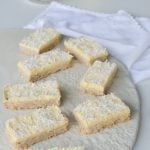
Lemon Coconut Slice
This lemon coconut slice is the perfect mix of zesty lemon and creamy coconut in an easy-to-make treat. It’s a wholesome, homemade alternative to store-bought snacks.
Servings: 12
Ingredients
- 150 g butter or coconut oil
- 85 g rice malt syrup, honey or maple syrup (¼ cup approx.)
- 1 lemon/s – zest (juice reserved for icing)
- 120 g wholemeal spelt flour (1 cup)
- 90 g rolled oats (1 cup)
- 100 g desiccated coconut (1 cup)
Lemon Buttercream (see below note)
- 70 g butter – at room temperature (important it's not over softened or too cold)
- 20 ml lemon juice – no more or it may split
- 3 tbsp rice malt syrup or honey
- 3 tbsp tapioca flour – or arrowroot
- 2 tbsp desiccated coconut – for decorating, optional
Instructions
- Preheat your oven to 180°C/350°F (fan forced).
- Melt your butter (or coconut oil) in a large pot. If using a Thermomix 90, 1 minute, speed 3.
- Add the sweetener and mix to combine by hand or in a food processor. If using a Thermomix 30 seconds, temp 90, speed 4.
- Add all of the other ingredients and process or mix well until combined. If using a Thermomix, reverse speed 4, 30 seconds.
- Press firmly into a lined slice tin (approx. 17 x 27cm) and bake for 10-12 minutes. Take care not to overcook this as it can dry out. If your oven runs hot, reduce the temperature to 160°C.
- Allow to cool in the tin (it firms as it cools) and once cooled, pop it into the fridge to chill for 30 minutes or more.
Lemon Buttercream
- Beat the icing by mixing all of the ingredients together in a small bowl until smooth and creamy. Thermomix butterfly, 20 seconds, speed 3.
- Spread over the chilled slice.
- Sprinkle over a little extra desiccated (or shredded) coconut.
- Chill for 10 more minutes in the freezer, remove from the tin and carefully slice into squares by pressing straight down with a large sharp knife.
- Refrigerating before slicing makes it much easier to cut without crumbling.
Troubleshooting the icing…
- If it's grainy or curdled – means the mixture is too cold. It usually needs warming up (either with a hair dryer or a warm towel wrapped around the bowl). Once it is a slightly warmer temperature, whip it up again with an electric beater / Thermomix.
- If it it is very thin – usually means that the butter/ mixture is too warm and needs cooling down. Putting the bowl in the fridge for 15 minutes or so and then beating it afterwards should fix it perfectly. You can also add a bit more tapioca to thicken it.
Store
- Store in the fridge or freeze in an airtight container. The butter icing will soften when left at room temperature.
- I enjoy these straight from the fridge or freezer. When packing into school lunches, pack against an ice brick.
Notes
Gluten-free
Substitute the spelt with your favourite gluten-free flour and the oats can be replaced by quinoa flakes.Dairy-free or vegan
Replace the butter in the base with coconut oil (this will produce a tougher/ crisper slice). For the icing a cashew cream would be the best choice.Low-fructose
Use brown rice syrup as your sweetener.Let me know how you love this zesty and delicious treat. I’d really appreciate it if you could leave a short comment and 5 stars!
Banana Rhubarb Raspberry Slice
This Banana Rhubarb Raspberry Slice not only looks amazing, it tastes sensational. The sweetness of the ripe bananas paired with the tartness of the rhubarb really is a match made in heaven.
My kids are both back at school as of today and seeing as this Banana Rhubarb Raspberry Slice is their current favourite snack, it’s only fitting that I share it here in the membership. I can’t wait to hear how you love this, I hope it will be added to your planner and become your family’s new favourite too. Feel free to experiment with other fruits for the topping or if you prefer, you could just make the banana cake part.
Health benefits
This slice is packed with fibre from the bananas, wholemeal spelt flour, and raspberries, supporting digestive health. The rhubarb contributes calcium and vitamin K, while the bananas provide potassium for heart health. With minimal added sugar, this slice is a wholesome alternative to traditional sweet treats.
Ingredients
How to make this banana rhubarb raspberry slice
This banana bread begins with blending the wet ingredients, including mashed bananas, eggs, butter, vanilla extract and milk, into a smooth mixture. Dry ingredients such as wholemeal spelt flour, bicarb, and cinnamon are folded into the wet mix, creating a light batter. The batter is poured into a prepared slice tin and topped with thin slices of rhubarb and raspberries. Bake until the centre is set and golden brown.
Serving suggestions and how to store
Serve this slice warm as a comforting snack or dessert with a dollop of Greek yogurt or coconut yogurt. It also pairs well with a hot cup of tea. Store leftovers in an airtight container in the fridge for up to a week or freeze individual portions for convenience.
Vary banana rhubarb raspberry slice to suit
For a dairy-free version, swap butter with coconut oil or macadamia nut oil. Use your preferred gluten-free flour blend to make it gluten-free. To replace eggs, try chia eggs for a plant-based alternative. Feel free to experiment with different seasonal fruits like blueberries, apples, or pears for variety. For a protein boost, mix in nuts or seeds, or sprinkle them on top before baking.
Tip
Ensure the bananas are very ripe, as their natural sweetness is key to the flavour of this slice, with minimal added sugar used.
For more delicious, easy to make healthy cake recipes and other sweet treats, click HERE.

Banana Rhubarb Raspberry Slice
This Banana Rhubarb Raspberry Slice not only looks amazing, it tastes amazing. The sweetness of the ripe bananas paired with the tartness of the rhubarb is a match made in heaven. Wow your family with this easy to bake recipe.
Servings: 8
Ingredients
- 125 g butter - at room temperature
- 25 g coconut sugar or rapadura - 2 tbsp (optional)
- 2 egg/s
- 250 g banana/s - they need to be very ripe (1 cup approximately)
- 1 tsp vanilla - powder, extract or essence
- 100 ml milk (of choice)
- 1 tsp ground cinnamon
- 1 tsp bicarbonate of soda
- ¼ tsp sea salt
- 200 g wholemeal spelt flour (1¾ cups approximately)
- 2 stem/s rhubarb - finely sliced
- 140 g fresh raspberries (can use frozen if you like)
Instructions
- Pre-heat the oven to 180°C/ 350°F (fan-forced). Line a slice tin (approx. 17 x 27cm) with baking paper.
- Mix the butter, sugar, eggs, bananas, vanilla, milk and cinnamon in a high speed blender for a minute. Thermomix, 1 minute, speed 5.
- Add the bicarb and salt and blend for a couple of seconds. Add the flour and fold through the mixture. Thermomix, flour symbol, a couple of turns until the flour is mostly incorporated into the wet. Finish with a spatula if necessary.
- Place in a lined slice tin and top with finely sliced rhubarb and raspberries. Bake for 20 minutes or until the centre is cooked.
Store
- Airtight in the fridge or freezer.
Notes
Dairy-free
Replace the butter with coconut oil or macadamia nut oil (the coconut oil does toughen it when it cools, but it's still delicious).Gluten-free
Replace the flour with your favourite GF flour.Egg-free
Rach tested egg-free for me and I'm happy to announce chia eggs were a success.Different fruit
You can absolutely switch up the fruit to suit your tastes and what's in season.Boost the protein
Add any nuts or seeds to the batter or top.Tip
The bananas need to be very ripe or it won't be sweet enough as there's very little added sugar.I really can't wait to hear how you love this slice. Post a comment below and feel free to rate the recipe too.
Banana Chocolate Swirl Cake
This Banana Chocolate Swirl Cake uses the natural sweetness of ripe bananas and paired with chocolate and peanut butter, it’s a flavour match made in heaven (there’s a delicious nut-free version too). This cake not only tastes amazing but looks fabulous with the added marbled effect throughout. Plus, it is super simple and fuss-free to…
Healthy Chocolate Coconut Slice
This is such a yummy, old-fashioned style Chocolate Slice – it reminds me a lot of the one my nan always made me, only a little healthier. This Healthy Chocolate Coconut Slice is a lovely chocolatey treat to stock your freezer with, so if you have hungry kids at home looking for a snack or need an easy lunchbox filler, you’ll have this on hand ready to go!
Food memories are the best. As a kid I used to bake with my nan every weekend, we even occasionally ‘invented’ recipes. The ones that worked out, she carefully wrote on a note pad and sticky taped it into her recipe notebook. I still have that notebook, though the tape is browned and dried and the binding has seen better days.
Anyway, enough nostalgia…though I do hope that one of my recipes will perhaps form memories and be carried down in your family.
Health benefits
This healthy chocolate coconut slice is made with wholemeal spelt flour, rolled oats, and desiccated coconut, this slice provides fibre and slow-releasing energy. The cacao powder is rich in antioxidants, while the choice of natural sweeteners like honey or rice malt syrup makes it a healthier alternative to refined sugar treats.
Ingredients
This recipe uses spelt flour, oats, cacao powder, and coconut. Butter or coconut oil adds richness, and the bittersweet chocolate icing made with raw cacao powder (or cocoa powder), rice malt syrup or honey, milk and coconut oil brings a decadent touch that can be adjusted to suit your taste.
How to make this healthy chocolate coconut slice
Melt the butter or coconut oil, stir in the sweetener, and mix with the dry ingredients until combined. Press the mixture into a tin lined with baking paper and bake in a fan-forced oven as instructed below. Chill before adding the rich bittersweet chocolate icing made with cacao powder, rice malt syrup or honey, milk and coconut oil and sprinkle with coconut for a beautiful finish. This can also be made in your food processor and we’ve included the Thermomix method too if you have one.
Serving suggestions and how to store
Enjoy this slice as a mid-morning snack or a healthier dessert option. It’s also perfect for school lunchboxes being nut-free and egg-free. Store in an airtight container in the fridge to keep it fresh for up to a week or freeze it for longer storage. It can be packed or eaten from frozen. Refrigerating before slicing ensures clean, crumb-free cuts.
Vary this healthy chocolate coconut slice to suit
For a gluten-free option, swap spelt flour for your favourite gluten-free flour and replace oats with quinoa flakes. Make it dairy-free or vegan by using coconut oil instead of butter. Choose brown rice syrup for a low-fructose version.
Want more great recipes like this one? SUBSCRIBE NOW
For more delicious, easy to make prep-ahead heathy snack recipes, click HERE.

Chocolate Coconut Slice
This Chocolate Coconut Slice is a delicious, very easy to make, low sugar lunchbox treat or snack. Sure to become a favourite with young and old alike!
Servings: 12
Ingredients
- 150 g butter or coconut oil
- 85 g rice malt syrup, honey or maple syrup (¼ cup approx.)
- 30 g cacao powder - unsweetened Dutch process or raw
- 120 g wholemeal spelt flour (1 cup)
- 90 g rolled oats (1 cup)
- 100 g desiccated coconut (1 cup)
Bittersweet Chocolate Icing (see note below)
- 30 g cacao powder - unsweetened Dutch process or raw (¼ cup)
- 2 tbsp coconut oil
- 2 tbsp rice malt syrup or honey
- 1 tbsp milk (of choice)
- 10 g desiccated coconut (2 tbsp)
Instructions
- Preheat your oven to 180°C/350°F (fan-forced).
- In a large pot over medium heat, melt your butter (or coconut oil). If using a Thermomix 90, 1 minute, speed 3.
- Turn off the heat and add the sweetener, mixing to combine. If using a Thermomix 30 seconds, temp 90, speed 4.
- Add all of the other ingredients and mix well until combined. If using a Thermomix reverse speed, 30 seconds.
- Press firmly into a lined tin (approx. 17 x 27cm) and bake for 10-12 minutes. Take care not to overcook this as it can dry out. If your oven runs hot, reduce the temperature to 160°C.
- Once cooled, pop it into the fridge to chill for 30 minutes or more.
Bittersweet Chocolate Icing
- Make the icing by beating all of the ingredients together in a small bowl until smooth and creamy. If using a Thermomix butterfly, 1 minute, speed 3.
- Spread over the chilled slice and sprinkle over a little extra desiccated (or shredded) coconut.
- Chill for 10 more minutes in the freezer, remove from the tin and carefully slice into squares by pressing straight down with a large sharp knife.
Store
- Store in the fridge or freeze in an airtight container.
Note
- The icing above is very rich (for dark chocolate lovers only). You can leave it off, top it with melted chocolate or a chocolate butter cream. This recipe works really well as a super healthy ganache too.
- Refrigerating before slicing makes it much easier to cut without crumbling.
Notes
Gluten-free
Substitute the spelt with your favourite gluten-free flour and the oats can be replaced by quinoa flakes.Dairy-free or vegan
Replace the butter with coconut oil (this will produce a tougher/ crisper slice).Low-fructose
Use brown rice syrup as your sweetener.I'd love to hear how you like this slice. Post a comment below or rate this recipe.
Coconut Caramel Slice
This new healthy Coconut Caramel Slice recipe is sure to become a firm favourite. It makes a decent sized batch so my kids are always happy to have this treat in the freezer. The nut-free version is perfect for school lunches packed from frozen. I’ve designed it to suit many dietary intolerances and it’s sweet,…
Apple Crumble Cake
This wholesome Apple Crumble Cake combines the warmth of cinnamon, the sweetness of apples, and the nutty crunch of almonds in the crumble topping.
We’re right on the cusp of shifting from winter to new season summer produce. Every year, I find it’s about now that the once crisp, bursting with flavour apples I’ve been buying are just not tasting so great. Some just don’t have the flavour, others are floury and not enjoyable to eat. But I never throw them, I just re-invent them like I’ve done here with this Apple Crumble Cake.
Truth is, once cooked and combined with other flavours they are quite delicious. If the apples are particularly floury, I’ll often mix them with a stronger flavoured fruit like rhubarb or berries of some kind and they are transformed. So like so many of my recipes, this soft buttery cake is a great base for experimenting with fruits and flavours.
For more apple recipes, take a look at this Apple Pie recipe or pears, check out this Pear, Yoghurt, Ginger Cake.
Health Benefits
This Apple Crumble Cake recipe is not only a delicious treat but is also healthier than many apple cakes. Made with wholemeal spelt flour, it provides more fibre, vitamins, and minerals compared to refined flours, supporting digestive health and helping to stabilise blood sugar levels. The apples add natural sweetness and are rich in antioxidants and dietary fibre. Coconut sugar or rapadura, used as a sweetener, is less processed and has a lower glycemic index than refined sugars, making it a better choice for sustained energy. Additionally, the flaked almonds offer healthy fats, protein, and vitamin E, contributing to health and overall vitality.
Ingredients in this Apple Crumble Cake
The ingredients in this Apple Crumb Cake are thoughtfully chosen to create a balance of taste, texture and nutrition.
- Wholemeal spelt flour – Higher in fibre and nutrients compared to refined wheat flour.
- Melted Butter – Adds richness and moisture to the crumble and cake.
- Coconut sugar or rapadura – Natural, unrefined sweeteners with a lower glycemic index.
- Natural yoghurt (or plain greek yogurt) – Provides a tangy flavour, creamy texture, and beneficial probiotics.
- Rice malt syrup or honey – Natural sweeteners, offering a healthier alternative to refined sugars.
- Fresh Granny Smith apples – Tart, fibre-rich, and full of antioxidants (you can also use other apples like gala apples or pink lady apples but I think Granny Smith taste best).
- Ground cinnamon – Adds warmth and spice to the cake.
- Flaked almonds – Introduce a satisfying crunch and healthy fats.
How to make this easy Apple Cake
To make this Apple Crumble Cake, start by preheating your oven and lining a slice tin with baking paper. Begin with the crumble by mixing the butter, sweetener, spelt flour, and cinnamon in a food processor or by hand until a heavy crumb forms. Fold in the flaked almonds and set the mixture aside. For the cake, mix the melted butter with yoghurt, sweetener, and egg until creamy and well combined. Add the cinnamon, baking powder, bicarbonate of soda, and sea salt, mixing thoroughly. Gently fold in the flour until just combined. Pour the cake batter into the prepared baking dish, spread the diced apple evenly over the top, and finish by sprinkling the streusel topping, pressing it down slightly. Bake for 35-40 minutes, or until a skewer inserted into the middle comes out clean.
This Apple Crumble Cake recipe also includes a Thermomix method.
Vary this Apple Cake to suit your dietary needs
Check out the variations below the main recipe for tips on how to adapt this Apple Cake to your specific dietary needs. Includes dairy-free, gluten-free, egg-free and nut-free. You could also make this cake into muffins. Simply divide the batter into muffin cases and top with the apple and crumb topping. Also reduce the cook time to 20-25 minutes.
Serving suggestions and how to store it
For a delicious treat, serve this Apple Crumble Cake warm with a dollop of cream, crème fraîche (sour cream), natural yoghurt or plain Greek yoghurt. Or for dessert, you could top it with a scoop of vanilla ice cream.
To store, allow the cake to cool to room temperature and then to chill fully in the fridge, which helps achieve clean, crumb-free slices. Once chilled, slice the cake and snap freeze the pieces on a tray before transferring them to an airtight container for longer storage. Alternatively, separate slices with baking paper and freeze airtight. This method ensures the cake stays fresh and easy to enjoy whenever you like.

Apple Crumble Cake
This healthy, wheat-free Apple Crumble Cake is easy to make and delicious with variations for gluten-free, nut-free, egg-free (vegan) and frutose friendly.
Servings: 8 serves
Ingredients
Crumble
- 70 g butter - diced and room temp
- 3 tbsp coconut sugar or rapadura
- 115 g wholemeal spelt flour (1 cup)
- ½ tsp ground cinnamon
- 20 g flaked almonds (¼ cup)
Cake
- 70 g butter - melted
- 165 g natural, Greek or coconut yoghurt
- 115 g rice malt syrup or honey (⅓ cup)
- 1 egg/s
- 1 tsp ground cinnamon
- 1½ tsp baking powder
- ¼ tsp bicarbonate of soda
- ¼ tsp sea salt
- 200 g wholemeal spelt flour (approx. 1¾ cups)
- 3 apple/s (Granny Smiths if you are buying especially) peeled and 1cm dice
Instructions
- Preheat your oven to 170°C/340°F (fan forced). Line a slice tin with baking paper. My slice tin is approx. 17cm x 27cm.
Start with the crumble.
- In a food processor or by hand, combine the butter, sweetener, spelt and cinnamon until a heavy crumb forms.
- Then fold in the flaked almonds and set aside.
Now make the cake.
- In a food processor or with an electric mixer, mix the butter with the yoghurt, sweetener and egg until creamy and well combined.
- Add the cinnamon, baking powder, bicarb and sea salt. Mix together.
- Fold in the flour until just combined.
- Place the cake batter into the tin. Spread the apple over it and top with the crumble. Press down a little.
- Cook for 35-40 minutes or until a skewer inserted into he middle comes out clean.
Thermomix
- Mix the crumble 1 minute, speed 5. Then fold in the flaked almonds, 5 seconds, reverse speed 4. Set aside.
- Without washing the bowl, melt the butter, 1 min, temp 90, speed 3.
- Add the yoghurt, sweetener and egg and mix 30 seocnds, speed 4 until creamy and well combined.
- Add the cinnamon, baking powder, bicarb and sea salt. Mix 5 seconds, speed 3.
- Fold in the flour until just combined. Use the flour symbol for 3-4 turns.
- Place the cake batter into the tin. Spread the apple over it and top with the crumble. Press down a little.
- Cook for 35-40 minutes or until a skewer inserted into the middle comes out clean.
Serve
- Warm with cream, creme fraiche or yoghurt.
Store
- Chill fully in the fridge (this will help you to get nice crumb free slices), slice and snap freeze on a tray before storing in an airtight container.
Notes
Gluten-free
Sub with a good quality gluten-free flour. Or approx. 2/3 almond meal with 1/3 buckwheat flour.Dairy-free
Substitute the butter with macadamia nut oil and the yoghurt with coconut yoghurt.Egg-free
Substitute the egg with a chia egg.Nut-free
Omit the flaked almonds, it will still be lovely. Or swap for sunflower seeds.Vegan
Chose the dairy-free and egg-free versions and rice malt as your sweetener.Fructose friendly
Choose rice malt as your sweetener (in the crumble and cake). Top with a low-fructose berries instead of apple.Add a twist
Add berries or rhubarb to the apple or swap apples for pears.I really can't wait to hear how you love this cake. Post a comment below and feel free to rate the recipe too. It helps it to reach and be enjoyed by others.
Healthy Chocolate Caramel Muesli Bar
I have a sneaking suspicion that this weeks Chocolate Caramel Muesli Bar is going to be popular. I’ve had a few requests for a healthy caramel slice recipe and though it looks nothing like the sugar laden three layer slice, it is a super delicious, nourishing caramel choc treat.
As a kid I spent every weekend at my nan’s house and we cooked and baked together- a lot! Most of my childhood memories are centred around tending to our chickens and ducks, digging for potatoes (my favourite job as the kids in my favourite Enid Blighton book ‘The Faraway Tree’ used to dig for new potatoes) and long sessions of cooking in her old wood-fired stove, always experimenting, always creating ‘new’ recipes and searching for delicious flavour combo’s.
However as an adult, whilst I’ve always loved cooking meals, it wasn’t until I had kids (and they started school) that I baked again. Once my youngest noticed all the biscuits and crackers her friends had in their lunchbox (and wanted the same) I realised the only thing I could do was to get my bake on again. The rest they say, is history!
A healthy-ish treat
I always try to inject as much nutrition as I can into all of my recipes, including sweet treats. I’ve made this Chocolate Caramel Muesli Bar wheat-free and nut-free so it’s good for a school lunchbox snack. The seeds and wholegrains really help to add protein, fibre, good fats and a bit of sustenance to this sweet treat. The cacao adds antioxidants, and using rice malt syrup or honey as a sweetener helps avoid the refined sugars typically found in store-bought bars. My kids feel like they’ve hit the jackpot with this slice – it’s a new favourite.
Ingredients
The base of this sticky muesli bar recipe is made with pantry staples including butter, oats, spelt flour, mixed seeds, and cacao powder. The caramel layer is a simple mix of rice malt syrup (or your preferred sweetener), coconut milk, and a pinch of sea salt for balance. It’s all-natural, with no preservatives or artificial ingredients.
How to make Healthy Chocolate Caramel Muesli Bar
To make these bars, you’ll start by cooking a simple sweet caramel sauce in a small saucepan while mixing the base ingredients. Press most of the oat mixture into a baking pan lined with baking paper (parchment paper), layer with the gooey caramel, then crumble the remaining oat mix on top. Bake until golden, let it cool, and refrigerate to firm up before slicing into bars.
Serving suggestions and how to store
These bars are perfect as a snack and in the school lunchbox. Store them in an airtight container in the fridge, or freeze for longer storage—they’re great to pack in a lunchbox straight from the freezer.
Vary this healthy chocolate caramel muesli bar to suit your needs
For a gluten-free version, simply swap the spelt flour for gluten-free flour and the oats for quinoa flakes. To make it dairy-free, replace the butter with coconut oil. You can even add nuts like hazelnuts or pecans for a nuttier twist, or use regular cream if you’re not avoiding coconut.
Take a look at the variations (below the main recipe) for suggestions to alter the recipe to suit many dietary requirements.
For more delicious, easy to make healthy bars, slices and sweet treats, click HERE.

Chocolate Caramel Muesli Bar
This healthy Chocolate Caramel Muesli Bar is a delicious, wholesome treat that satisfies your sweet tooth. Packed with oats, seeds, and a thin layer of caramel, it’s the perfect snack for school lunches or a snack. Plus, it's super easy to make!
Servings: 18 slices
Ingredients
Base / crumble
- 125 g butter -cubed
- 170 g rice malt syrup, honey or maple syrup (½ cup)
- ½ tsp bicarbonate of soda
- 120 g mixed seeds (1 cup approx.) I used sunflower seeds and pepitas
- 120 g wholemeal spelt flour (1 cup)
- 200 g rolled oats (2 cups) or quinoa flakes (or a mixture)
- 30 g cacao powder (4 tbs approx.) unsweetened Dutch process or raw
Caramel
- 115 g rice malt syrup, honey or maple syrup (⅓ cup)
- 120 ml canned coconut milk (½ cup) preferably full-fat, I use Ayam brand
- 1/8 tsp sea salt
Instructions
- Pre-heat the oven to 180℃ / 350℉ (fan-forced).
- Begin with the caramel.
- In a small saucepan mix the sweetener, coconut milk and sea salt and bring to a bubbling simmer. Simmer rapidly (it looks a bit foamy on top) for about 10 + minutes or until the caramel starts to thicken. Remove from the heat and allow to cool (it will further thicken as it cools).
- Whilst the caramel cooks/cools, make the slice.
- In a small pot melt the butter and sweetener, mixing to combine. Add the bicarb and stir well.
- Place the seeds in a food processor and grind into a meal. Add the flour, oats (or quinoa flakes) and cacao and mix until well combined.
- Add the butter/ sweetener mix and process to combine. The mixture should come together into a coarse dough.
- Line a small tin (27cm x 18cm) with baking paper. Press ⅔ of the mixture into the base of the tin and press down very firmly with wet hands. I like to make sure the outer edges sit a little higher than the middle so I get an even coverage without the caramel making its way down the sides.
- Top with the caramel. It is not a thick layer as a traditional slice would be, rather a randomly gooey, thin layer. More caramel means a lot of sugar which is why I've kept it minimal.
- Crumble the remaining dough over the caramel pressing lightly.
- Bake for approximately 20 minutes or until just golden brown.
- Allow to cool in the pan, refrigerate until firm and then cut into slices (chilling it allows for it to be sliced without crumbling).
Thermomix Method
Caramel
- Heat the sweetener, coconut milk and sea salt, 10-15 minutes, temp varoma, speed 3 (cap ajar or off so the steam can escape) or until it thickens (this can vary a bit). You can set this aside to cool and use the bowls without washing it.
Base
- Grind your seeds and set aside. No need to rinse the bowl.
- Melt the butter and sweetener 1 minute, temp 90, speed 3 or until melted and combined. Add the bicarb and mix 5 seconds speed 3.
- Add the rest of the base ingredients and the butter/sweetener and mix 15 seconds, speed 4. You may need to scrape the sides a few times to fully combine.
- Assemble as above.
Store
- Airtight in the fridge or freezer. You can pack in school lunch boxes from frozen.
Notes
Gluten-free
Substitute the spelt for gluten-free flour and the oats with quinoa flakes (rolled quinoa). Many fans have reported this is great made with buckwheat flour.Dairy-free
Substitute the butter with coconut oil.Vegan
Chose rice malt or maple syrup as your sweetener. Substitute the butter with coconut oil.Nutty
The seeds can be substituted with any nuts. I love this with chopped hazelnuts or pecans or walnuts.Coconut-free
Replace the coconut milk in the caramel with regular cream.After more healthy lunchbox inspiration?
My best selling ebook The Well Nourished Lunchbox has you covered and is choc-a-block full of healthy lunchbox inspiration - and not just sweet but heaps of savoury crackers, sandwich-free lunch recipes and so much more. In fact, it's 150 pages of goodness! Click HERE to find out more about this fabulous ebook (and read the many, many reviews).I'd love to hear how your kids like this slice? I have a feeling it is going to be very popular. Comment and/or rate this recipe below (it really helps my recipes to reach more people so thanks in advance).
Fruit Crumble Muesli Bar
This Fruit Crumble Muesli Bar is the perfect balance of wholesome ingredients and natural sweetness, making it a go-to snack for busy days or a treat in the kids’ lunchboxes. It’s a versatile recipe that’s easy to adapt with your favorite seasonal fruits, and the base doubles as both a crunchy foundation and a crumbly topping. Plus, it’s super easy to make and packed with nutrients from oats, seeds, and fruit.
I love to make this slice if I need to use up over ripe fruit. I’m not a fan of using dried fruit (like dates/sultanas etc) in baking as I find it gives me a big sugar rush (followed by brain fog and energy slump) and I’ve also noticed my kids desire for sugar increases if they eat dried fruit. So I prefer to use fresh fruit in my baking and this Fruit Crumble Muesli Bar is one of my families favourite whole food treats.
I tend to choose fruits that have seen better days to make this recipe – like over ripe plums, pears, strawberries, raspberries or blueberries. Or floury apples often end up in this bar (I love them combined with rhubarb or berries to make berry crumble bars).
For more delicious, easy to make healthy snacks and treats, click HERE.

Fruit Crumble Muesli Bar
Nut and dried fruit-free, this Fruit Crumble Muesli Bar is a delicious, nourishing edition to any lunchbox. It freezes well also, so it's great to batch-bake.
Servings: 12
Ingredients
Base / crumble
- 125 g butter or coconut oil -cubed
- 170 g rice malt syrup, honey or maple syrup (½ cup)
- ½ tsp bicarbonate of soda
- 120 g mixed seeds (1 cup approx.) I used sunflower seeds and pepitas
- 120 g wholemeal spelt flour (1 cup)
- 200 g rolled oats (2 cups) or quinoa flakes (or a mixture)
- 50 g desiccated coconut (½ cup)
- 1 tsp ground cinnamon
Filling
- 1 cup/s your choice of seasonal fruit (fresh plum, apricot, nectarine, peach, berries, apple, pear, cherries) -finely diced or sliced
- 2 tbsp rice malt syrup, honey or maple syrup (optional)
- 1 tbsp butter
- 1 tbsp chia seeds
Instructions
- Pre-heat the oven to 180℃ / 350℉ (fan-forced).
- In a small pot melt the butter and sweetener, mixing to combine. Add the bicarb and stir well.
- I pulse the seeds in a food processor to break them up and make a finer slice (but you don’t have to). Mix the seeds, flour, oats (or quinoa), coconut and cinnamon in a bowl.
- Add the butter/ sweetener mix and stir to combine.
- Line a small tin (27cm x 18cm) with baking paper. Press ⅔ of the mixture into the base of the tin and press down firmly with wet hands and bake for 10 minutes. The remaining ⅓ will form the crumble top (so set aside until after the fruit is ready).
- Whilst this is baking, put all the filling ingredients into the small pot (that you used in the first stage, no need to wash). I’ve used cherries and plums in this photograph as they are in season right now
- Simmer until the fruit starts to soften, stirring occasionally.
- Once the base is cooked, top with the fruit mixture and with wet hands, place with the rest of the crumble over the fruit.
- Bake for approximately 20 minutes or until just golden brown.
- Allow to cool in the pan, refrigerate until firm and then cut into slices (cooling it allows for it to be sliced without crumbling).
Thermomix Method
- Melt the butter and sweetener 1 minute, temp 90, speed 3 or until melted and combined. Add the bicarb and mix 5 seconds speed 3. Set aside.
- Pulse the seeds, turbo button 3-4 times (check through the lid after each pulse to chop as required). Add the rest of the crumble ingredients and the butter/sweetener and mix 15 seconds, speed 3. You may need to scrape the sides to fully combine.
- The filling can also be cooked in the TMX, all of the ingredients into the bowl, temp 90, 100, reverse speed 1. The time depends upon the fruit (softer fruit needs less time), approx 3-5 minutes.
- Assemble as above.
Store
- Airtight in the fridge or freezer. You can pack in school lunch boxes from frozen. I also love this heated up with fresh cream – very indulgent!!
Slice gone 'green' (or flecked green)
- You may have noticed that your seed containing cakes, slices or cookies turn or fleck 'green'. I can explain...Sunflower seeds contain chlorogenic acid which reacts with the baking powder and bicarb when it's heated and turns various shades of green when cooled. To reduce the ‘shrek-look’ you can reduce the baking powder or bicarb (by about a third) or add 2 tsp lemon juice or vinegar to the wet ingredients. But remember - even if they do turn green, they are completely safe to eat.
Notes
Gluten and grain-free
Substitute the spelt for gluten free flour and the oats with quinoa flakes (rolled quinoa).Dairy-free
Substitute the butter with coconut oil.Vegan
Choose rice malt or maple syrup as your sweetener. Substitute the butter with coconut oil.Nutty
The seeds can be substituted with any nuts. I love this with chopped almonds and pecans or walnuts.Fructose friendly
Choose rice malt syrup for your sweetener and low fructose fruits for the filling (raspberries, rhubarb is my fave).Coconut-free
Replace the coconut with ¼ cup of ground seeds or nut meal (if nut free isn't important).After more healthy lunchbox inspiration?
My best selling ebook The Well Nourished Lunchbox has you covered and is choc-a-block full of healthy lunchbox inspiration - and not just sweet but heaps of savoury crackers, sandwich-free lunch recipes and so much more. In fact, it's 150 pages of goodness! Click HERE to find out more about this fabulous ebook (and read the many, many reviews).I think this is one of my favourite snacks - would love to hear how you and your kids like it? Comment and rate this recipe below.
Raw Coffee Slice
This Raw Coffee Slice is a rich and creamy treat that’s perfect for coffee lovers. With a nutty hazelnut base, a creamy coffee cashew layer, and a choice of dark chocolate toppings, it’s a deliciously indulgent dessert that’s both gluten-free and can be made vegan.
With the silly season fast approaching, I thought it timely to share a decadent desert that is perfect for entertaining (or even Christmas day). Dessert is something I always look to pre-prepare and this can be made weeks ahead if necessary. When I have friends over I really don’t want to spend a minute more than necessary in the kitchen (I hate missing out)!
I know I share lots of kid friendly recipes here (and if you check below I have a chocolate variation that is more family friendly). But sometimes it’s nice to have something just for the grown-ups. Having said that – my daughter is crazy for coffee flavoured anything (she’ll even try to sip black, unsweetened coffee if given the chance). I think I may have developed my kids taste for ‘bitters’ a bit too much!!
Health benefits
Made with raw cashews and hazelnuts, this slice is packed with healthy fats, fibre, and magnesium to support health and energy levels. Coffee offers an antioxidant boost, while the dark chocolate topping adds richness and a dose of flavonoids.
Ingredients
For the base, you’ll need hazelnuts, rice malt syrup (or honey/maple syrup), and cacao powder. The filling combines soaked cashews, your choice of sweetener, coconut oil, and espresso coffee. For the topping, use melted dark chocolate or make a raw chocolate alternative if you prefer.
How to make Raw Coffee Slice
To make the base, grind hazelnuts until they form a meal, then mix with sweetener and cacao until combined. Press into a lined tin and freeze. For the filling, drain and blend cashews, adding sweetener, coconut oil, and coffee, blending until smooth. Spread over the base and freeze until set. Top with melted chocolate or raw chocolate and chill until firm.
Serving suggestions and how to store
Cut into squares once set and store in an airtight container in the fridge for up to a week or in the freezer for longer storage. These are delicious straight from the freezer for a treat!
Vary this Raw Coffee Slice to suit your needs
For a vegan option, use rice malt or maple syrup and raw chocolate. If you’re not a coffee fan, replace it with extra cacao and water for a double chocolate flavour. For a coconut-free version, swap coconut oil with cacao butter.
Take a look at the variations (below the main recipe) for suggestions to alter the recipe to suit many specific dietary requirements.
For more delicious, easy to make healthy sweet recipes, click HERE.

Raw Coffee Slice
I think Chocolate and Coffee are a match made in heaven. This nourishing Raw Coffee Slice is a guilt-free slice of heaven. Gluten, dairy, refined sugar and grain-free.
Servings: 12 squares
Ingredients
Base
- 200 g hazelnuts
- 85 g rice malt syrup, honey or maple syrup (¼ cup)
- 1 tbsp cacao powder (unsweetened Dutch process or raw)
Filling
- 350 g raw cashew nuts (soaked for minimum 2-3 hours)
- 85 g rice malt syrup, honey or maple syrup (¼ cup)
- 70 g coconut oil (⅓ cup)
- 50-70 ml espresso coffee -cooled (approx. 2 shots)
Chocolate topping (2 choices)
Melted Chocolate
- 150 g dark chocolate -melted
Instructions
Base
- Grind the hazelnuts in a food processor or powerful blender until a meal forms. If using a Thermomix, 5 seconds, speed 7.
- Add the sweetener and cacao and mix until well combined. If using a Thermomix, 10 seconds, speed 4.
- Press into a lined 20 x 30cm slice tin and put in the freezer whilst you make the filling.
Filling
- Drain the liquid from your cashews and rinse well.
- Process to form a paste. If using a Thermomix, seconds, speed 7.
- Add the rest of the ingredients and process until smooth and creamy. If using a Thermomix, 1 minute, speed 7. You may need to scrape the sides a few times.
- Spread the filling over the base and put back in the freezer to set (about 20 minutes).
Chocolate topping
- Either melt the dark chocolate in a bowl over a pot of hot water or make the raw chocolate by combining all the ingredients together.
- Once the filling is set, pour over the melted chocolate and set in the freezer (approx. 5 minutes).
- Cut it into squares and store in the freezer until ready to serve.
Store
- Store in an airtight container in the fridge or freezer.
Notes
Don't like coffee?
Replace it with a heaped tablespoon of cacao and 70ml water for a double chocolate slice.Vegan and dairy-free
Choose raw chocolate on top. For vegan choose rice malt or maple syrup as your sweetener.Fructose friendly
Choose rice malt syrup as your sweetener.Coconut-free
Replace the coconut oil with cacao butter.I love receiving your feedback, post a comment below.
Healthy Nut Butter Brownie
This healthy nut butter brownie is a delicious way to satisfy your chocolate cravings with a nutritious twist! Made with a base of almond or cashew butter, a touch of tahini, and sweetened naturally, these brownies are rich, fudgy, and perfect as a wholesome treat.
It’s a super simple and a delicious school holiday sweet treat that the kids can easily make themselves. After the first batch my 12 yr old declared a pinch of sea salt would make them better. So the next lot we added the sea salt and I agree, they were even more delicious (so my little protégé is tracking well – ha ha)!
Health benefits
These gluten-free, grain-free brownies are packed with healthy fats from nut butter, which can help keep you satisfied without a sugar spike. With dark chocolate and optional cacao powder for an antioxidant boost, they’re a more nourishing way to indulge in a chocolatey treat. Plus, the egg adds a small dose of protein, helping balance these brownies out for a more filling snack.
Ingredients
For this recipe, you’ll need these wholesome ingredients – your favourite nut butter (such as almond or cashew), hulled tahini, an egg, a liquid sweetener like rice malt syrup, honey, or pure maple syrup, a touch of bicarbonate of soda, sea salt, and dark chocolate chips or chunks. If you need a dairy-free option, choose a dairy-free chocolate or cacao nibs.
How to make healthy nut butter brownie
Preheat your oven to 180°C (fan-forced) and line a loaf tin with baking paper. Blend all ingredients except the chocolate (pieces or chips) in a food processor until well combined, or mix by hand in a medium bowl if your nut butter is soft enough. Taste the batter and adjust sweetness if desired. Fold in the chocolate chips, pour into your baking dish lined with parchment paper, and bake for 15–17 minutes or until golden on top. Let cool slightly before slicing into 8–10 squares.
Serving suggestions and how to store
Enjoy these nut butter brownies on their own or paired with a dollop of yogurt or a side of fresh berries. Or for dessert you could serve with ice-cream or cream. Store in an airtight container at room temperature for up to 2 days, or freeze for up to a month for a convenient snack option.
Vary this healthy nut butter brownie to suit your needs
For a double-chocolate version, add 30g of raw cacao or unsweetened cocoa powder to the batter. Make it dairy-free by choosing a dairy-free chocolate. If you prefer a sesame-free option, simply replace tahini with more nut butter. For a fructose-friendly treat, stick with rice malt syrup as your sweetener. While peanut butter can be used, almond or cashew butter generally yields the best texture. Sorry, this is not suitable for vegan. For more brownie recipes, click HERE.
Take a look at the variations (below the main recipe) for suggestions to alter the recipe to suit many specific dietary requirements.
For more easy to make, delicious, healthy sweet recipes, click HERE.

Healthy Nut Butter Brownie
Seriously simple, this nourishing Nut Butter Brownie is so delicious and as easy as can be to make.
Servings: 10
Ingredients
- 260 g nut butter (1 cup) eg; almond, cashew, ABC, hazelnut (not peanut)
- 1 tbsp hulled tahini
- 1 egg/s
- 85 g rice malt syrup, honey or maple syrup (¼ cup)
- ½ tsp bicarbonate of soda
- Pinch sea salt
- 50 g dark chocolate -buttons (or chopped up squares, I've used Green and Blacks dark chocolate chopped up). For dairy-free use a dairy-free chocolate or cacao nibs.
Instructions
- Pre-heat oven to 180°C/ 350°F (fan forced). Line a large loaf tin (I used 24 x 13cm) with baking paper.
- Add all the ingredients except the chocolate into a food processor and blend until combined. If using a Thermomix, blend 10 seconds, speed 5.
- If your nut butter is soft enough, you can also mix this by hand with a bit of muscle.
- I recommend tasting the batter to check it will be sweet enough for your tribe. You can add more if you think you need to, or add more chocolate chunks.
- Fold in the chocolate. If using a Thermomix reverse, 5 seconds, speed 4.
- Press into the base of the tin and bake for 15-17 minutes until they have risen and are golden brown on top.
- Allow to cool a little and slice into 8-10 squares.
Store
- In an airtight container for 2 days or freeze for up to a month.
Notes
Double-choc
Add 30g of raw cacao or Dutch process cocoa to the batter.Dairy-free
Choose a dairy-free chocolate.Sesame-free
Replace the tahini with nut butter.Fructose friendly
Choose rice malt syrup as your sweetener.Peanut butter
I think the other nut butters listed produce the best texture. If you're after a nut-free sweet treat, my beautiful ebook "The Well Nourished Lunchbox" contains over 50 nut free recipes - you can find out more about it HERE.I'd love to hear how you like this simple, yet delicious treat. Post a comment or rate this recipe.
Healthy Raspberry and Coconut Slice
This Healthy Raspberry and Coconut Slice is a deliciously simple treat that satisfies your sweet tooth while still being packed with wholesome ingredients. It’s gluten-free, and can easily be made nut-free, making it a versatile dessert option for a variety of dietary needs.
My nana was instrumental in developing my passion for food and cooking. So many of my childhood memories are centre around food and cooking in her old kitchen. My nan used to pick me up from school every Friday and in summer, we stopped at the corner deli for an ice block and in winter, we stopped at Peters by the Sea in Scarborough for hot chips (which I always got wrapped in paper, even after cups had become the norm because it somehow felt more special).
Our weekends together were centred around gardening, tending to the chooks and ducks and cooking – loads of cooking. One of the many things we used to make was an old fashioned Raspberry Coconut Slice. So it’s long overdue I put my healthy spin on this classic. I hope you like it.
Health benefits
This slice is not only a tasty dessert but also packed with nutrients. The almond meal provides healthy fats and protein, while the chia seeds and raspberries add a boost of fibre and antioxidants. The use of coconut oil adds medium-chain fatty acids, which can support metabolism and energy levels.
Ingredients
The base of this slice is made with coconut oil, almond meal (or a nut-free alternative), desiccated coconut, and a touch of natural sweetener like rice malt syrup or honey. The raspberry layer is kept simple with just raspberries and chia seeds, while the coconut topping gives it a delicious crunch with shredded coconut and egg whites.
How to make healthy raspberry and coconut slice
Start by mixing the base ingredients together and pressing them into a baking tray. Bake until golden, then set aside to cool. For the raspberry layer, mash the raspberries and mix with chia seeds in a small bowl, then spread this over the base. The coconut topping is just egg whites, coconut, and a sweetener of your choice, which you’ll spread on top and lightly grill until golden (watching it carefully so it doesn’t burn). Cool in the fridge before slicing for a nice crumb free slice. If you own a Thermomix, we’ve also included Thermomix instructions for this recipe.
Serving suggestions and how to store
Serve this raspberry coconut slice as a healthy dessert or a snack with a cup of tea. It’s perfect for lunchboxes or afternoon treats. Store it in an airtight container in the fridge for up to a week, or freeze it to enjoy later.
Vary this healthy raspberry and coconut slice to suit
For a nut-free version, swap the almond meal for wholemeal spelt or a gluten-free flour. If you’re avoiding gluten, simply use the almond meal or gluten-free flour option. To make this slice fructose-friendly, choose rice malt syrup as your sweetener.
Take a look at the variations (below the main recipe) for suggestions to alter the recipe to suit your specific dietary requirements.
For more delicious, easy to make and healthy sweet treats, click HERE.

Healthy Raspberry and Coconut Slice
My healthy version of the classic Raspberry and Coconut Slice, this is an easy to make, low sugar treat.
Servings: 12 slices
Ingredients
Base
- 100 ml coconut oil (½ cup) melted
- 115 g rice malt syrup or honey (⅓ cup)
- 125 g almond meal (1¼ cup) see below for nut-free
- 140 g desiccated coconut (2 cups)
- 1 egg/s -beaten
Raspberry layer
- 100 g frozen raspberries (1 cup) defrosted
- 1 tbsp chia seeds
Coconut topping
- 140 g shredded coconut (2 cups)
- 1 egg/s -the white only
- 2 tbsp rice malt syrup or honey
Instructions
- Preheat the oven to 180℃/350℉ (fan forced).
- Line a 20 x 30cm (approx.) baking pan with baking paper.
- Make the base by mixing all of the ingredients together until well combined (by hand or in a food processor). If using a Thermomix 10-15 secs speed 4.
- Press into the baking tray to form an even layer (I used the back of a large, wet spoon and press firmly).
- Bake for 15-20 minutes until golden and set. Set aside to cool.
- For the raspberry layer mash the raspberries roughly and mix through the chia. Set aside.
- For the coconut topping, combine the egg white and sweetener by whisking with a fork. Mix in the shredded coconut.
- Now assemble by spreading the raspberries over the base and top with the coconut mixture.
- Pop under a grill for a couple of minutes, watching it carefully so it doesn't burn. It should only take a few minutes.
- Chill in the fridge to fully set, then cut into squares. If you try to cut without chilling it will crumble.
Store
- Store airtight in the fridge or freezer. I hope you enjoy this yummy slice.
Notes
Nut-free
Sub the almond meal with the same quantity of wholemeal spelt flour or a gluten-free or grain-free flour.Gluten-free
Choose the almond meal option or gluten-free flour option (above).Fructose friendly
Choose Rice malt syrup as your sweetener.Short cut
You can use a good quality raspberry jam instead of making the chia jam. For 150 pages of nut-free recipes and lunchbox inspiration, take a look at my best selling ebook The Well Nourished Lunchbox. Click HERE to find out more.Do you have a childhood recipe that you'd like me to take a look at making a healthy version. If so, post a comment below and I'll add it to my 'to do' list.

Protein Power Bars
These protein power bars are a fantastic on-the-go snack loaded with healthy fats, protein, and fibre. They’re easy to make, require no baking, and are endlessly versatile, making them a perfect addition to your snack rotation.
This is a great school holiday slice for you to whip up for, or with the kids. We love these after a workout or as an afterschool snack. It’s super simple to make, no-bake and tastes so good!
Health benefits
This no-bake protein bar recipe is packed full of nutrition. Oats are a nourishing, high fibre, nerve supporting food. The nuts, seeds and coconut provide good fats, protein and energy (of the slow release kind). The cinnamon further stabilises blood sugars and the cacao is antioxidant. If you choose the gluten and grain-free version, the protein content increases. This recipe is easily adapted to gluten-free, dairy-free,
Check out the variations below the main recipe for tips on how to adapt it to your specific dietary needs.
For more delicious, healthy and easy to make wholefood treats, click HERE.
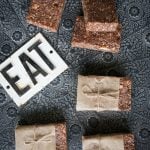
Protein Power Bars
These Protein Power Bars as really simple to make and a healthy, delicious snack to keep in the freezer for hungry kids (or adults). They are really sustaining and sure to become a favourite treat.
Servings: 12
Ingredients
- 150 g butter or coconut oil -melted
- 170 g rice malt syrup or honey (½ cup)
- 30 g cacao powder (¼ cup) unsweetened Dutch process or raw
- 1 tsp ground cinnamon
- 130 g rolled oats (1½ cups approx.) or rolled quinoa (or half oats, half rolled quinoa - see below for gluten and grain-free)
- 230 g raw nuts and/or seeds (1½ cups approx.) I used walnuts, hazelnuts, almonds, sunflower seeds
- 1 tbsp chia or flax seeds -preferably ground
- 100 g desiccated coconut (1 cup)
Instructions
- In a small pot, combine the butter or coconut oil, sweetener, cacao and cinnamon over a low heat, stirring until combined (a few minutes).
- For a tastier slice, toast the oats, nuts, seeds and coconut in a large pan over a low heat for 5-10 minutes, stirring often (the coconut will colour). Or if you’d prefer, simply combine the dried ingredients raw.
- Allow to cool a little (if you’ve chosen to toast) and then pulse (quickly) in your food processor a couple of times to chop the nuts a little.
- Add the wet ingredients and mix together until well combined.
- Use a big wet serving spoon to press firmly into a small slice tin lined with baking paper (parchment paper).
- Place in the freezer for about 20 minutes to set.
- Once set firm, remove from the tin and cut into squares.
Thermomix Method
- Melt your butter or coconut oil, 1 minute, speed 4, temp. 90. Add the sweetener, cacao and cinnamon and mix 1 minute, speed 4, temp. 90.
- Add the dried mix, mix 10 seconds, speed 4. Then process by using the turbo button to pulse a couple of times until the nuts are roughly chopped (to your preferred consistency).
- Follow from step 5 above.
Store
- Store in an airtight container in the freezer for up to 3 months. They will fall apart if not kept cool (especially the coconut oil version) so serve or pack from frozen and keep in a container with an icepack if storing out of the fridge.
Notes
Dairy-free
Use coconut oil instead of butter.Gluten and grain-free
Replace the oats with rolled quinoa and/ or millet.Low-fructose
Choose the rice malt syrup instead of honey.Vegan
Choose rice malt or maple syrup as your sweetener. Use coconut oil instead of butter.Nut-free
Use only seeds. For 150 pages of nut-free recipes, take a look at my super popular ebook 'The Well Nourished Lunchbox'. Click HERE to find out more and read the rave reviews.Coconut-free
Replace the desiccated coconut with the same quantity or nut meal.Cacao-free
Replace the cacao with carob powder.I'd love to hear how you like this delicious bar. Post a comment or rate this recipe.
Mint Chocolate Fudge
Before kids, my husband and I lived in Ireland and made many life-long, dear Irish friends. After we left Ireland we backpacked through South America where we decided to ‘just get married.’ Now when you’re travelling, you have no idea what the date is, so we were really thrilled when we realised that we just happen to share our vows on St. Patricks Day (a lovely co-incidence).
So given today’s double special occasion, I thought I should share another of my favourite treats, a raw, gluten-free, dairy-free Mint Chocolate Fudge that I can’t make too often because I just can’t stop eating it! This green delight is for all my nearest and dearest Irish mates too – Happy St. Patricks Day.
Health benefits
Macadamia Nuts contain numerous health benefiting nutrients, minerals, antioxidants and vitamins that are essential for optimum health and wellness. They are a great source of protein, fibre and essential fats (and are my favourite tasting nut). The health benefits of coconut I’ve written about here and coconut oil here. A little spinach adds anther source of plant-based nutrition and is a wonderful natural ‘green’ colouring.
Ingredients
The mint layer uses desiccated coconut, macadamia nuts, peppermint oil (or peppermint extract), and a sweetener of your choice. The chocolate layer is made from cacao butter or coconut oil, cacao powder, and your preferred natural sweetener.
How to make healthy Mint Chocolate Fudge
Process the coconut and macadamia nuts into a smooth paste, then blend in the sweetener, peppermint oil, and optional spinach. Spread this minty mixture into a tray lines with baking paper (parchment paper) and freeze. Melt the cacao butter or coconut oil with cacao powder and sweetener, pour it over the mint layer, and freeze until set.
Serving suggestions and how to store
Store this fudge recipe in the fridge or freezer as it melts easily in warmer temperatures. Serve directly from frozen for the best texture and flavour.
Vary this mint chocolate fudge to suit
For a fructose-friendly version, use rice malt syrup. Make your own raw chocolate to keep it dairy-free and vegan. If you’re out of macadamias, cashews work just as well. No mint oil? Try using peppermint essence or even fresh mint!
Take a look at the variations (below the main recipe) for suggestions to alter the recipe to suit your specific dietary requirements.
For more delicious, healthy sweet treats, click HERE.

Mint Chocolate Fudge
This Mint Chocolate Fudge is the perfect blend of creamy macadamia and coconut, with a refreshing mint layer topped off by a rich chocolate coating. A healthier alternative to store-bought treats, it's perfect for when you're craving something indulgent but wholesome.
Servings: 12
Ingredients
Mint Layer
- 160 g desiccated coconut (2 cups)
- 300 g macadamia nuts (2 cups)
- 10-15 drop/s food grade peppermint oil or peppermint essence (I like a strong minty flavour, but you can adjust this to suit your taste by adding and tasting)
- 85 g rice malt syrup, honey or maple syrup (¼ cup)
- 1 handful/s baby spinach -stalks removed (optional)
Chocolate layer
- 200 g cacao butter (1 cup) OR raw, extra virgin coconut oil (or a combination of 100 gram of each), melted. I used 100% coconut oil for this slice. You could also just melt dark chocolate if you'd prefer.
- 30 g cacao powder (⅓ cup) unsweetened Dutch process or raw
- 2-4 tbsp rice malt syrup, honey or maple syrup (you can adjust the sweetness to your taste)
Instructions
- In a powerful blender or food processor, process the coconut and macadamia nuts, scraping the sides ever few seconds. You are looking to make a smooth paste. Don’t over process or it may separate. If you have a Thermomix, blend 30 seconds, speed 7-8.
- Add the sweetener, peppermint oil, and spinach and blend until the spinach has been fully pureed, though. You don't have to add the spinach if you'd prefer a white over green mint layer. If you have a Thermomix blend 30 seconds, speed 5-6.
- Spread over a small slice tin lined with baking paper (approx. 17 x 27cm) and freeze until firm to touch (approx. 30 minutes).
- Make your raw chocolate once the mint layer is set by combining all of the ingredients over a very low heat, whisking together well. If you have a Thermomix, heat temp 37, 1 minute, speed 4.
- Pour immediately over the mint layer and return to the freezer to set (approx. 10 minutes).
Store
- Cut and store in the fridge or freezer. Like most raw treats it doesn't hold up in the heat so serve from frozen.
Notes
Fructose friendly
Choose rice malt syrup as your sweetener.Dairy-free
Make your own raw chocolate for the chocolate layer.Vegan
Choose rice malt or maple syrup as your sweetener. Make your own raw chocolate for the chocolate layer.Macadamia Nut-free
Cashew nuts work well too.No mint oil
You can sub peppermint essence or even fresh mint to replace the spinach (I haven't recipe tested this, but keen to next time I make it).I'd love to hear how you like this - its a personal fave. Post a comment or rate this recipe.
Berry Nice Brownies (sweet potato brownie)
These gluten and grain free brownies aka ‘Berry Nice Brownies’, are made with sweet potatoes, and are a deliciously fudgy treat with a secret healthy twist. Packed with natural sweetness from sweet potatoes and optional bursts of berries, they’re the perfect delicious indulgence that your family will love—especially when served warm with cream and fresh berries. They are SO easy to make and being nut-free they are perfect for school lunchbox treats too. They just taste so good, check out the comments below, I’m not the only one who loves this recipe.
Most sweet potato brownies require cooked sweet potato puree – but this recipe uses grated raw sweet potato which eliminates the more time consuming step of cooking the sweet potato and pureeing it, making these a whole lot quicker to make than many sweet potato brownie recipes!
Health benefits
Using sweet potato as the base, these brownies provide a wholesome protein and fibre rich alternative to traditional recipes. Sweet potatoes are nutrient-dense and naturally sweet, making them a great way to reduce refined sugars while still enjoying a moist, chocolatey treat. This easy to make brownie is full of nutrition including about 2.5 grams protein per serve.
Ingredients in these gluten and grain-free brownies
You’ll need raw grated sweet potato, butter or coconut oil, rice malt syrup or honey, eggs, vanilla, cocoa powder, coconut flour, and a handful of fresh or frozen raspberries (or cherries) to top it off. These ingredients come together to create a brownie that’s rich, moist, and full of flavour.
How to make this healthy brownie recipe
In a large mixing bowl mix the grated sweet potato with melted butter, sweetener, eggs, and pure vanilla extract until smooth. Then, fold in the cacao, baking powder, and coconut flour. Pour the batter into a baking pan (tin) lined with baking paper (parchment paper), top with berries, and bake at 180℃ for 25 minutes. Let the brownies cool before slicing—they firm up and have a beautiful moist texture once chilled. If you own a Thermomix, we’ve also included Thermomix instructions for this recipe.
Serving suggestions and how to store
These paleo gluten and grain-free brownies are best enjoyed at room temperature or slightly warmed with a dollop of cream or coconut cream and fresh berries. Store them in the fridge for up to a week, or freeze them for later when you need a quick, satisfying snack or school lunchbox treat.
Vary these gluten and grain-free brownies to suit your dietary needs
For a low-fructose option, swap the sweetener for rice malt syrup. To make it dairy-free, use coconut or macadamia nut oil instead of butter. If you prefer a coconut-free version, replace the coconut flour with spelt flour. You can also experiment with other grated veggies like beetroot, carrot, or zucchini for a fun twist! Or add in half a cup of dark chocolate chips for a double choc chip brownie! For a sweet salty twist, add a pinch of sea salt.
Take a look at the variations (below the main recipe) for suggestions to alter the recipe to suit your specific dietary requirements.
For more delicious, healthy and easy to make wholefood treats, click HERE.

Berry Nice Brownies
These Berry Nice Brownies are one of the most popular recipes on this website. They just tick every box, delicious, easy to make plus they contain a serve of veggies!
Servings: 12 slices
Ingredients
- 200 g sweet potato/s (approx 2 cups) raw, peeled, grated & extra moisture squeezed from it
- 125 g butter or coconut oil (½ cup) melted
- 170 g rice malt syrup, honey or maple syrup (½ cup)
- 2 egg/s (large sized)
- 2 tsp vanilla -powder, extract or essence
- 30-60 g cacao powder (¼-½ cup) unsweetened Dutch process or raw (the more you use, the richer the brownie)
- 2 tsp baking powder
- 1 tsp bicarbonate of soda
- 2 tbsp coconut flour
- 50 g raspberries (½ cup approx.) fresh or frozen or pitted cherries are lovely too (estimate about one berry per slice)
Instructions
- Preheat your oven to 180℃/350°C (fan forced).
- In a large bowl, blender or processor, mix together the sweet potato, butter or oil, sweetener, eggs and vanilla until combined.
- Add the cacao, bicarbonate of soda and baking powder and combine.
- Finally, stir in the coconut flour. Coconut flour absorbs a lot of liquid so you should only need the two tablespoons. Your batter should be the consistency of a very thick, airy (cake like) batter. Let it sit for a minute and if it still seems a little wet, add more coconut flour teaspoon by teaspoon.
- Line a small slice tin (approx. 17 x 27cm in size) with baking paper.
- Pour the batter into the tin and top with the raspberries or cherries (optional).
- Bake for 25 minutes or until the centre is firm to touch or a skewer inserted comes out clean. Cool completely before slicing. It will firm up once chilled.
- Enjoy at room temperature or warm with double cream or coconut cream and fresh berries.
Thermomix Method
- Preheat your oven to 180℃.
- Grate your sweet potato, 5 seconds, speed 5. Place in a lined or fine sieve and press to remove the moisture (roughly)
- Melt your butter or oil (if required) 1 minute, temp 90, speed 3.
- Add back the sweet potato, sweetener, eggs, vanilla, and mix to combine 10 seconds, speed 4.
- Add the cacao, bicarb and baking powder and mix 5 seconds, speed 3.
- Add the coconut flour and mix 5 seconds, speed 3. Coconut flour absorbs a lot of liquid so you should only need the two tablespoons. Your batter should be the consistency of a thick, airy (cake like) batter. Let it sit for a minute and if it still seems a little wet, add more coconut flour teaspoon by teaspoon.
- Continue from point 6 above.
Store
- Store in the fridge in an airtight container or you can also freeze them.
Notes
Low-fructose
Sweeten with rice malt syrup.Dairy-free
Use macadamia nut oil or coconut oil rather than butter.Coconut-free
Replace the coconut flour with double the amount of spelt flour.Another vegetable
I've also substituted the sweet potato with grated beetroot, carrot, zucchini or pumpkin - all equally delicious.No berries
My son has recently decided he doesn't like fruit cooked into anything (kids!!) so these are now no longer 'berry nice' and simply 'very' nice brownies! Feel free to leave the berries off if you'd rather. "OMG OMG OMG....just stumbled across your recipe in Haven magazine last night for "Berry Nice Brownies"....made them tonight and they were a HUGE hit for my hubby's birthday - kids and husband LOVED it ! Yum !!! So pleased I found your site !!"Mish's Thermie Gold Coast
These are a favourite in our household, how about yours? Love to hear your feedback in the comments below (if you could rate this recipe that would be fabulous too).
Cacao Rough (Raw Vegan Chocolate Slice)
This Cacao Rough (raw vegan chocolate slice) is the ultimate treat for anyone looking for a quick and easy chocolate fix that’s also nourishing! Made with wholesome ingredients, it’s perfect for satisfying your sweet tooth while still keeping things healthy. Plus, it’s raw, vegan and gluten-free making it suitable for a variety of diets and a bit of a change from many dried fruit, high sugar energy ball or bar recipes about.
I think they are so delicious – a bit of a cross between a coconut rough and chocolate crackle. There’s something distinctly nostalgic about these beauties.
Health benefits
This delicious chocolate slice features almond meal for a protein boost (about 2 grams protein per serve), good fats and mood elevating amino acids and minerals. While cacao powder offers antioxidants that many chocolate lovers appreciate. The coconut oil adds healthy fats, and chia seeds are a great source of omega-3 fatty acids, making this treat both tasty and nourishing. Plus it’s refined sugar-free for the win! Many people find dried fruit, particularly medjool dates, really set off sugar cravings and energy/concentration slumps. That’s why you largely won’t find date loaded sweet recipes here at Well Nourished.
Ingredients
To whip up this scrumptious dairy-free treat, you’ll need almond meal, cacao powder, your choice of sweetener (like rice malt syrup, honey, or maple syrup), shredded coconut, coconut oil, optional chia seeds, and vanilla. Feel free to add extras like cacao nibs or a pinch of sea salt for that perfect sweet and salty combo.
How to make this raw vegan chocolate slice
Simply blend the almond meal, sweetener, coconut, coconut oil, chia seeds, raw cacao powder, and vanilla in a food processor, high speed blender or a mixing bowl until well combined. Press the mixture firmly into a lined tray with a spatula, sprinkle with cacao nibs and salt (optional), then pop it in the freezer for 10-15 minutes to set. The prep time is just so quick! Once firm, slice it into squares, and it’s ready to enjoy!
If you own a Thermomix, we’ve also included Thermomix instructions for this recipe.
Serving suggestions and how to store
These little squares of goodness are perfect for a quick snack or dessert – or anytime you have a chocolate craving! Store them in an airtight container in the fridge for up to a week or freeze them for longer-lasting treats. Just remember, they need to stay chilled or they might melt on warmer days.
Timesaving tip
I often double this recipe to make a bigger batch (trust me, you’ll be wanting more)!
Vary this raw vegan chocolate slice to suit your needs
For a refreshing twist, add peppermint essence for a minty flavour. If you want to go nut-free, substitute the almond meal with ground sunflower seeds. You can also make it low-fructose by using rice malt syrup, or swap cacao for carob powder if you prefer. And don’t forget, doubling the recipe is always a good idea—trust me, you’ll want more!
Check out the variations below the main recipe for tips on how to adapt it to your specific dietary needs.
AND if you love this but want more gut healing support, try these Peppermint Belly Bliss Bites.
For more delicious, healthy and easy to make wholefood treats, click HERE.
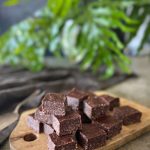
Cacao Rough
This delicious Cacao Rough is the most satisfying chocolate treat. It is easy to make and the most delicious raw chocolate slice I have ever tried.
Servings: 20 squares
Ingredients
- 100 g almond meal (1 heaped cup)
- 30 g cacao powder (¼ cup) unsweetened Dutch process or raw
- 85 g rice malt syrup, honey or maple syrup (¼ cup)
- 50 g shredded coconut (1 cup)
- 100 g coconut oil (½ cup)
- 20 g chia seeds (¼ cup) optional
- 1 tbsp vanilla -powder, extract or essence
Optional extras
- 1 tbsp cacao nibs - add a nice crunch
- Pinch sea salt -optional but I quite like a sweet and salty taste
Instructions
- In a food processor combine on low speed the almond meal, sweetener, coconut, coconut oil, chia seeds, cocoa and vanilla until just combined (if using a Thermomix speed 4, for 5 seconds).
- You can also mix by hand, just make sure the coconut oil is in its liquid form.
- Press the mixture firmly into a small lined tray (approx. 17 x 27cm). Sprinkle with the optional cacao nibs and sea salt if you like and press into the mixture with the back of a spoon.
- Place in the freezer to set for 10-15 minutes.
- Once set, remove from the tin and chop into little squares.
Store
- Store in an airtight container in the fridge or freezer.
Notes
Peppermint slice
Add a few drops of peppermint essence for a delicious mint chocolate flavour.Hazelnut
Use hazelnut meal for a chocolate hazelnut slice.Add crunch
Mix in 1/4 cup of Buckinis (activated buckwheat groats).Low-fructose
Choose rice malt syrup as your sweetener.Nut-free
Replace the almond meal with toasted and ground sunflower seeds.Vegan
Choose rice malt or maple syrup as your sweetener.Cacao-free
Replace the cacao with carob powder.I LOVE these - how about you? Post a comment or rate this recipe below. For 10 more Guilt-free Chocolate recipes, subscribe to my FREE newsletter.
Healthy Chocolate, Almond and Coconut Bars
These healthy Chocolate, Almond and Coconut Bars are the best heathy raw chocolate slice recipe – perfect when you’re craving something sweet but still want a wholesome snack. They’re packed with nourishing ingredients and so simple to make, making them an ideal option for busy days when you need a quick energy boost. Plus, with a rich layer of dark chocolate on top, they feel indulgent whilst they are packed full of nutrition.
Health benefits
This gluten-free recipe uses whole foods like almond meal and coconut to provide healthy fats and fibre, while dark chocolate adds a touch of antioxidants. The almonds provide mood and energy elevating proteins, minerals and fats. The coconut oil is are amazing for the brain, immune and metabolic health. You can also adjust the sweetness to suit your taste preferences, making it a flexible and satisfying snack. This is a whole food treat that is very satisfying and tastes amazing!
Ingredients
The star ingredients in this heathy raw chocolate slice recipe include almond meal, desiccated coconut and nut butter, which come together to create a rich and delicious base. You’ll also need a natural sweetener like honey, maple syrup, or rice malt syrup, along with coconut oil, vanilla extract, and a hint of coconut flour for structure. To finish it off, melt dark chocolate (or chocolate chips) to top the bars to form the chocolate layer.
How to make this heathy raw chocolate slice recipe
Making healthy raw treat is super easy! Just blend all the ingredients, except for the chocolate, in a food processor until everything comes together in a sticky paste. Press the mixture into a lined tin that’s approximately and refrigerate until firm. After that, melt the dark chocolate and spread it over the top. Pop the tray back into the fridge until the chocolate is just set, then slice and enjoy! The best part is no oven is required and they take just 15 minutes to prepare! If you own a Thermomix, we’ve also included Thermomix instructions for this recipe.
Serving suggestions and how to store
This heathy raw chocolate slice recipe are great as a healthy, low sugar bar or dessert and pair perfectly with a hot cup of tea or coffee. Keep them stored in an airtight container in the fridge to maintain their firmness, or pop them in the freezer if you want to keep them longer.
Vary this heathy raw chocolate slice recipe to suit
For a low-fructose option, use rice malt syrup and make my raw chocolate for the topping. If you love Nutella, try swapping the almond meal for hazelnut meal and using hazelnut butter for a rich, nutty twist. Looking for a nut-free snack? Check out my no-bake muesli bar recipe or my healthy chocolate coconut slice for delicious alternatives.
Take a look at the variations (below the main recipe) for suggestions to alter the recipe to suit your specific dietary requirements.
For more delicious, healthy and easy to make wholefood treats, click HERE.
Cacao Rough
This delicious Cacao Rough is the most satisfying chocolate treat. It is easy to make and the most delicious raw chocolate slice I have ever tried.
Servings: 20 squares
Ingredients
- 100 g almond meal (1 heaped cup)
- 30 g cacao powder (¼ cup) unsweetened Dutch process or raw
- 85 g rice malt syrup, honey or maple syrup (¼ cup)
- 50 g shredded coconut (1 cup)
- 100 g coconut oil (½ cup)
- 20 g chia seeds (¼ cup) optional
- 1 tbsp vanilla -powder, extract or essence
Optional extras
- 1 tbsp cacao nibs - add a nice crunch
- Pinch sea salt -optional but I quite like a sweet and salty taste
Instructions
- In a food processor combine on low speed the almond meal, sweetener, coconut, coconut oil, chia seeds, cocoa and vanilla until just combined (if using a Thermomix speed 4, for 5 seconds).
- You can also mix by hand, just make sure the coconut oil is in its liquid form.
- Press the mixture firmly into a small lined tray (approx. 17 x 27cm). Sprinkle with the optional cacao nibs and sea salt if you like and press into the mixture with the back of a spoon.
- Place in the freezer to set for 10-15 minutes.
- Once set, remove from the tin and chop into little squares.
Store
- Store in an airtight container in the fridge or freezer.
Notes
Peppermint slice
Add a few drops of peppermint essence for a delicious mint chocolate flavour.Hazelnut
Use hazelnut meal for a chocolate hazelnut slice.Add crunch
Mix in 1/4 cup of Buckinis (activated buckwheat groats).Low-fructose
Choose rice malt syrup as your sweetener.Nut-free
Replace the almond meal with toasted and ground sunflower seeds.Vegan
Choose rice malt or maple syrup as your sweetener.Cacao-free
Replace the cacao with carob powder.I LOVE these - how about you? Post a comment or rate this recipe below. For 10 more Guilt-free Chocolate recipes, subscribe to my FREE newsletter.
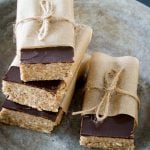
Healthy Chocolate, Almond and Coconut bars
One of my all time favourite chocolate-y treats these Healthy Chocolate, Almond and Coconut bars are easy to make, nutritious and delicious.
Servings: 12 bars
Ingredients
- 300 g almond meal (2½ firmly packed cups)
- 80 g desiccated coconut (1 cup approx.) or shredded
- 130 g nut butter (½ cup) I like the ABC nut spread
- 4 tbsp rice malt syrup, honey or maple syrup -adjust the amount to make these more, or less sweet to suit your taste
- 100 g coconut oil (½ cup)
- 1 tbsp vanilla
- 1 tbsp coconut flour
- 100 g dark chocolate -melted
Instructions
- Mix all ingredients (except the chocolate) together in a food processor/mixer until well combined and forming a rough paste.
- If you have a Thermomix, mix 30 seconds, speed 4.
- Pour into a slice tin (approx. 17 x 27cm) lined with baking paper (parchment paper).
- Refrigerate until set (about an hour).
- Once set, melt the chocolate in a bowl placed over a pot of simmering water, stirring continually. Spread evenly with a spatula over the almond mix and refrigerate again until the chocolate is just set (10 minutes). You an also melt chocolate in the thermomix (see basic cookbook for directions).
- Remove from the tin and slice into small bars.
- Remember to keep these in the fridge or freezer. As with any raw coconut oil based product, they'll melt if not kept cold!
Store
- Store in an airtight container in the fridge.
Tip
- To get a good cut on the slice without cracking the chocolate, take out of the fridge or freezer for about 30 mins (approx) before slicing and you can also use a hot knife.
Notes
Low-fructose and dairy-free or vegan
Choose rice malt syrup for your sweetener for low fructose. Even though the 85% chocolate is very low in fructose, you may like to make some dairy-free raw chocolate for the top. Here is the recipe.Nutella like
Swap the almonds for ground hazelnuts and use hazelnut butter for a match made in heaven. Want something grainy and nut free? Check out my No Bake Muesli Bar here, or my biscuity Healthy Chocolate Coconut Slice, here.Nut-free
This is not the recipe for you. For 150 pages of nut-free recipes, take a look at my super popular ebook 'The Well Nourished Lunchbox'. Click HERE to find out more and read the rave reviews.These are so divine. I'd love you to try them then tell me what you think by posting a comment.
Carrot Cake Slice
This healthy Carrot Cake Slice recipe is a wholesome, nut-free treat that’s perfect for lunchboxes or an afternoon snack. Packed with grated carrot, mixed seeds, and just the right amount of sweetness, it’s a delicious way to sneak in some extra nutrition while still satisfying your sweet tooth. Guaranteed to delight even fussy little (and big) people.
Health benefits
This healthy carrot cake recipe is so nourishing and tastes so good. Carrots are full of beta-carotene, which is great for immune health, while the mixed seeds add a boost of fibre, healthy fats, and important minerals like zinc. Plus, using wholemeal spelt flour provides extra fibre and nutrients, making this slice a nutritious alternative to traditional carrot cake. The orange zest is a great immune booster too.
Ingredients
The star of the show is, of course, the carrot, paired with currants or sultanas for natural sweetness. Wholemeal spelt flour and mixed seeds add texture and a healthy twist, while spices like cinnamon, nutmeg or ground ginger give it a warm, comforting flavour. This recipe keeps it simple with pantry staples, but it makes the best carrot cake.
How to make this Carrot Cake Slice
It’s as easy as mixing your grated carrot, dried fruit, and dry ingredients in one bowl, while beating your eggs, butter, and orange zest in another. Combine everything, pour the batter into a slice tin (lined with parchment paper), and bake until firm and golden. You’ll have a deliciously moist slice in no time. We’ve also included a Thermomix method if you use one.
Time saving tip
I use a lot of ground seeds in my baking. One, because my lunchbox treats need to be nut free and secondly because seeds are very nutritious. For example, pepitas are a rich source of zinc, a mineral that often assists fussy eaters. So instead of supplementing to improve their desire and palate for food, include pepitas where you can. My kids aren’t a fan of their flavour so I grind them. If you plan to use them this way, you can grind a small batch of one or a mixture of seeds to keep in the fridge in an airtight glass container ( a jar is good).
Carrot Cake Slice has gone ‘green’ (or flecked green)
You may have noticed that your seed containing cakes or cookies turn or fleck ‘green’. I can explain…Sunflower seeds contain chlorogenic acid which reacts with the baking powder and bicarb when it’s heated and turns various shades of green when cooled.
To reduce the ‘shrek-look’ you can reduce the baking powder or bicarb (by about a third) or add 2 tsp lemon juice or vinegar to the wet ingredients. But remember – even if they do turn green, they are completely safe to eat. You might even like to use this as a way to turn cakes green on purpose?
Serving suggestions and how to store
Enjoy this refined sugar free carrot cake slice plain or top it with a simple buttercream icing (or cream cheese frosting) and top with shredded coconut for an extra treat. It’s also lovely served with a dollop of Greek yogurt for dessert. Store any leftovers in an airtight container in the fridge for a few days, or freeze them for later. It’s a great make-ahead option for busy mornings or lunchbox fillers. I generally pack from frozen and let it thaw in the lunchbox (but I live in a very warm climate).
Vary this Carrot Cake Slice to suit your needs
For a dairy-free version, swap the butter for macadamia oil or coconut oil. If you need a gluten-free carrot cake, replace the spelt with a mix of rice and buckwheat flour, or go grain-free with almond meal (or almond flour). For carrot cake cupcakes, pour the batter into a lined muffin tin.
Take a look at the variations (below the main recipe) for suggestions to alter the recipe to suit your specific dietary requirements.
For more delicious, healthy and easy to make wholefood treats, click HERE.

Carrot Cake Slice
This delicious Carrot Cake Slice is easy to make and with a serve of vegetables, is a great edition to the kids lunchbox.
Servings: 8
Ingredients
- 1 carrot/s -large (about 140g) grated
- 70 g currants (½ cup) or sultanas or raisins
- 115 g wholemeal spelt flour (1 cup)
- 70 g mixed seeds (½ cup) ground. I grind sunflower, sesame, linseeds and pumpkin seeds but any combo will work. Can also use a nut meal, but no longer nut-free.
- 60 g coconut sugar or rapadura (¼ cup)
- 1 tsp bicarbonate of soda (please measure carefully)
- 1 tsp baking powder
- 1-2 tsp ground spices (whatever you like eg; cinnamon, nutmeg, cardamom, ginger, mixed spice)
- 120 g butter (½ cup) melted (or macadamia oil)
- 3 egg/s
- 1 orange/s - zest (take care not to include the white pith which can be bitter)
Instructions
- Preheat your oven to 150℃/300°F (fan forced). Line a small 20 x 30cm tin with greaseproof paper.
- Grate the carrots.
- In a mixing bowl mix the carrot, dried fruit, and all dry ingredients.
- In a small bowl or jug beat the eggs, butter or oil and zest together.
- Add to the dry ingredients and mix until just combined.
- Pour into the tin and bake for 20 - 25 minutes or until firm to touch in the middle.
Thermomix method
- Grind your seeds, 30 sec, speed 8. Set aside. If you are grinding your own gluten or grain-free flour do this now also.
- Weigh and grate your chopped carrot, 5 seconds, speed 5. Set aside.
- Melt the butter, 1 minute, 80 degrees, speed 4.
- Add the eggs and zest and mix 30 seconds, speed 5.
- Add the carrot and dried fruit and mix, 30 seconds, reverse speed 3.
- Add the flour, seeds, sugar, spices, bicarb and baking soda. Mix 5-10 seconds until just combined (scraping the sides), speed 4. Don't over-mix as it will become tough.
Ice it
- You can add any icing - I love a simple buttercream with 70 g butter (at room temperature, 20 ml lemon juice (no more or it may split) 3 tbsp rice malt syrup or honey plus 3 tbsp tapioca flour (or arrowroot).
Store
- In an airtight container or it can be frozen in an airtight container or bag.