• Skip to primary navigation
  • Skip to main content
  • Skip to primary sidebar
  • Skip to footer

Well Nourished HomepageWell Nourished

Simple recipes, whole foods, inspired health

  • Family Members
    • Recipe Filter
    • Quick Access Shopping List
    • Membership Tutorials
    • How to be Well Nourished
    • About Well Nourished
    • Where to Shop and what to Buy
    • FAQ
  • Family Members
    • Meal Plans
      • G’s Spring Meal Plan
      • G’s Autumn Meal Plan
      • My Weekly Planner
      • Quick Access Shopping List
      • Ingredient Alert
      • Prep Ahead Plans
      • Hosting Event Plans
      • Wellness & Health Plans
    • Recipe Filter
    • Courses & Community
    • Tips for family’s
      • Getting Kids On-board
      • Planning for Picky Eaters
      • New to Meal Planning
      • Meal Planning Tips & Tricks
    • Nourishing Resources
    • Members Offers
    • What’s New This Week
    • Events
    • Membership Tutorials
    • About Well Nourished
    • FAQ
  • Recipes
    • Meals
      • 30 Minute Meals
      • Budget Friendly
      • Chicken & Turkey
      • Fish & Seafood
      • Freezable Meals
      • Make-ahead Meals
      • Meat
      • Pasta and Noodles
      • Pork recipes
      • Slow Cooked
      • Vegetarian
    • Sweet Recipes
      • Baked Sweets
      • Desserts
      • Ice-blocks
      • No-bake Sweets
    • Breakfast
    • Healthy Lunchbox
    • After School Snacks
    • Savoury Snacks
    • Sides & Salads
      • Salads
      • Side Dishes
    • Soups
    • Drinks & Smoothies
    • Dips
    • Holidays & Entertaining
    • Sauces & Dressings
    • Sourdough Baking
    • Fermenting
    • Staples
    • Members only
    • Members only
  • Shop
    • Membership and Programs
    • Ebooks
    • Free Stuff
  • Affiliates
  • About
    • About Well Nourished
    • Testimonials
    • Join the Family
    • FAQ
  • Resources
    • Find a Practitioner
    • Find whole food
      • ACT
      • NSW
      • NT
      • SA
      • QLD
      • TAS
      • VIC
      • WA
    • Products and Services I Value
    • Whole foods pantry list
    • Ingredients Glossary
  • Wellness Hub
    • Inflammation
    • Perimenopause & Menopause
    • Healthy Kids
      • Healthy Baby
      • Healthy Toddler
      • Healthy Child
      • Immune support for kids
      • Digestion & Food Allergies
      • Healthy Lunchboxes
    • Budgeting & Planning
    • Digestion & Intolerance
    • Immune Health
    • Food as Medicine
    • Foods to Avoid
    • Healthy Habits
    • Sugar
    • Carbs, Protein, Fats
      • Carbohydrates
      • Fats
      • Protein
    • Healthy Food Choices
    • Healthy Home
    • Stress & Mood Disorders
    • Healthy Mind
    • Maternal health
    • Health Challenges
  • Login
    • Well Nourished Family
    • Courses & Community
    • Affiliate Login
  • My account

slowcooked

Beef Fillet with Garlic Tahini Sauce

October 15, 2019 | Red Meat, Slow Cooked, Holidays & Entertaining

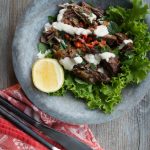
With the festive season sneaking up quicker than I’d like (seriously, where has this year gone??), I thought I’d share one of our go-to recipes when feeding a crowd… Beef Fillet with Garlic Tahini Sauce. We tend to make it as it’s quick and easy and you can rest it for as long as you like so it’s pretty forgiving. We have even rested it for several hours and had it just warm and it was divine.

In case you’ve not heard, in just two weeks I’m launching the Well Nourished Family membership. I’m bursting with excitement and I really can’t wait to share all of the delicious details. It’s been a long time coming… over a year of working with a fabulous team, to develop the technology to make meal planning and eating well a whole lot easier and very well nourished.

I’ve been flat out creating exclusive, members only recipes and developing everything you need to feed you and your tribe ‘well’. The ‘Well Nourished Family’ not only includes customisable and done-for-you weekly meal plans, but event plans too.  I’ve got you sorted for Kids Parties, Christmas Day feasting, and entertaining friends and family with absolute ease. Plus shopping lists, kitchen storage and waste reducing tips and much, much more.

Click to find out more HERE.

But in the meantime, I hope you love this supremely tender cut of beef fillet with garlic tahini sauce as much as my meat loving family does.

Health benefits

Beef fillet is a rich source of protein, iron, and essential vitamins like B12. The garlic tahini sauce adds healthy fats and calcium from the yoghurt and tahini, making this a nutrient-dense dish.

Ingredients

The beef fillet is seasoned simply with olive oil, salt, and pepper to highlight its natural deliciousness. The sauce is a mixture of yoghurt, tahini paste, and garlic cloves.

How to make this gluten-free beef recipe

Begin by seasoning and searing the beef fillet in a hot oven proof pan or skillet until caramelised on all sides. Finish it in the oven to cook to your preferred liking, using a meat thermometer for precision (I like this medium rare). Rest the beef before slicing to lock in the juices. Mix the garlic tahini sauce ingredients and serve alongside the beef for a perfect pairing.

Serving suggestions and how to store

Serve this dish warm with your favourite sides, such as roasted vegetables, a fresh salad, or creamy mashed potatoes. Leftovers are versatile—use them in sandwiches, wraps, pita or salads. Store in an airtight container in the fridge for up to three days.

Vary this to suit your dietary needs

For a dairy-free version, replace the yoghurt with coconut yoghurt or cashew cream. If sesame-free, swap the tahini for horseradish cream. For garlic-free, use ground cumin and a pinch of cayenne in the sauce instead.

This Beef Fillet with Garlic Tahini Sauce is so quick & easy to make & is one of the most delicious ways to eat beef.
Print Recipe
5 from 2 votes

Beef Fillet with Garlic Tahini Sauce

Prep Time15 minutes mins
Cook Time1 hour hr
Total Time1 hour hr 15 minutes mins
Course: Main Course
Servings: 8
Author: Georgia Harding

Ingredients

  • 1.2 kg Scotch Fillet - or rib eye
  • 2 tbsp extra virgin olive oil - extra virgin
  • 1 tsp sea salt - or to taste
  • ground black pepper - to taste

Sauce

  • 1 clove/s garlic - minced
  • 1 tbsp hulled tahini 
  • 250 g natural or Greek yoghurt (1 cup)

Instructions

  • Pre-heat the oven to 150°C / 300°F (fan-forced).
  • Rub the fillet in the olive oil so it is well coated. Then season with the sea salt and pepper.
  • Heat a cast iron or oven proof pan over a moderately high heat and sear the beef on all sides so it is dark brown and caramelised on all edges. Use tongs to turn it.
  • Then, simply place in the oven to roast (uncovered) for about an hour or until almost cooked to your liking.
  • I have a meat thermometer which I think is invaluable for getting this perfect. I cook this to med-rare, then wrap it tightly in foil to rest for about 30 minutes or more. This is really important and makes it super moist.
  • To make the tahini sauce, mix all the ingredients together in a serving bowl.

Serve

  • When ready to serve, slice the beef and then pour over the pan juices and juices from the foil wrapping.
  • Enjoy immediately with the tahini sauce and your favourite sides and salads.
  • My family also love this with various mustards.

Store

  • In an airtight container in the fridge.
  • Left overs are great to make a roast beef sandwich, roll, wrap or salad.
Notes

Dairy-free

Replace the yoghurt with coconut yogurt or cashew cream.

Sesame-free

Omit the tahini and replace with horseradish cream. 

Garlic-free

Omit the garlic and replace it with 1 tsp of ground cumin and a pinch or cayenne.
 

I'd love to hear how you enjoy this. Post a comment below and don't forget to rate the recipe too. Cheers!

steaks

Beef Massaman

June 5, 2019 | Make-ahead Meals, Red Meat, Freezable Meals, Slow Cooked, Members only

Beef Massaman is a rich and delicious Thai-inspired curry that’s perfect for lazy dinners or special occasions. With tender, slow-cooked beef, spices, and a creamy coconut sauce, this dish is hearty, comforting, and satisfying. Pair it with rice, quinoa, or cauliflower rice for a complete meal. This Beef Massaman curry is one of my family’s…

This content is for members only – but right now, you can unlock it all with 80% off your first 3 months! Get instant access to 1,200+ healthy, delicious recipes, customisable meal plans, shopping lists, ad-free browsing, live chat with a naturopath, and our easy-to-use app. No contracts. Cancel anytime.

Claim your discount now!

Already a member? Log in here

Easy Lamb Harira

June 6, 2018 | Budget Friendly, Make-ahead Meals, Red Meat, Freezable Meals, Slow Cooked, Soups

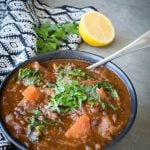
Lamb Harira is a hearty, flavour-packed soup-stew that’s especially nourishing during the colder months. With warming herbs and spices, it’s comfort in a bowl, and the best part is how simple it is to prepare. Just 15 minutes of hands-on time in one casserole dish, then let the oven do the work while it slowly braises into something rich and super satisfying. If you prefer, this recipe is also easily adapted for the slow cooker, making it as fuss-free as it is delicious.

Health benefits

This is one nutritionally balanced meal – lots of plant based fibre and available, gut healing protein thanks to the lamb (on the bone) and broth. The addition of the spices further supports the digestive and immune systems, with a boost of liver supporting greens (kale and parsley or coriander) to finish it off.

Ingredients

Key ingredients include lamb shanks, a blend of lentils, kale, and an aromatic mix of cumin, turmeric, cinnamon, and ginger. Tomato passata and chicken stock or bone broth create a rich base for the dish.

How to make this easy lamb harira

Start by pre-heating your oven and combining all the ingredients (except the kale and lemon) in a large ovenproof dish. Add the lamb shanks and cook in a low oven for several hours until the lamb is tender and falling off the bone. Stir in the kale at the end, and let it wilt before serving with a squeeze of lemon and fresh coriander (cilantro) or parsley.

Serving suggestions and how to store

Serve this hearty stew in a big bowl with a wedge of lemon and a sprinkle of fresh herbs. Leftovers can be stored in an airtight container in the fridge or freezer. You may need to add more liquid when reheating, as the lentils will continue to absorb moisture.

Vary this lamb harira to suit your dietary needs

For a vegetarian/vegan version, replace the lamb with mushrooms or chickpeas and use vegetable stock instead of bone broth. To make this onion and garlic-free, substitute with fennel and add extra cumin and chilli powder for flavour. Make it spicy by serving with chilli flakes for an extra kick.

Take a look at the variations (below the main recipe) for suggestions to alter the recipe to suit your specific dietary requirements. There are also instructions to make it vegetarian too!


For more delicious, easy to make, healthy slow cooker recipes, click HERE.

Easy Lamb Harira - This tasty, hearty Lamb Harira soup is a nourishing meal that's great to make ahead as the flavours just get better and better with time. You can make it a couple of days ahead of eating and it can also be frozen.
Print Recipe
4.85 from 38 votes

Lamb Harira

This Easy Lamb Harira is a rich and delicious Moroccan-inspired stew. It's a one-pot wonder made with tender lamb shanks, lentils, and a warming blend of spices. This dish is slow-cooked to perfection, making it a hearty and nourishing option for the whole family.
Prep Time15 minutes mins
Cook Time3 hours hrs
Total Time3 hours hrs 15 minutes mins
Course: Soup, Main Course
Servings: 6
Author: Georgia Harding

Ingredients

  • 1 onion/s (large) diced
  • 4 clove/s garlic -chopped
  • 2 carrot/s (large) diced
  • 2 stick/s celery -diced
  • 1 sweet potato/s -peeled and diced
  • 680 g tomato passata (puree)
  • 1 tsp ground cumin
  • 1 tsp ground turmeric
  • 1 tsp ground cinnamon
  • ½ tsp ground nutmeg
  • ½ tsp ground ginger
  • 200 g puy (French) lentils (1 cup)
  • 100 g split red lentils (½ cup)
  • 1 tsp sea salt - or to taste
  • ground black pepper
  • 1 ltr chicken broth or stock
  • 2 lamb shanks
  • 1 bunch/s kale -leaves torn off the stems (stems diced)
  • ½ bunch/s fresh coriander leaves -or flat leaf parsley leaves, to serve
  • 1 lemon/s -cut into quarters, to serve
Metric - US Customary

Instructions

  • Pre-heat the oven to 250℃/480℉ (fan-forced).
  • In a large oven proof casserole dish with lid, add all of the ingredients except the shanks and kale (add the stems though).
  • Mix well to combine. Add the shanks and submerge them in the liquid.
  • Cover the dish (with a lid or foil) and put in the oven, turning the temperature down to 150℃/300℉ immediately.
  • Cook for 3-4 hours or until the lamb falls off the bone.
  • Remove the dish from the oven, stir in the kale, replace the lid and allow to sit for 5-10 minutes so the kale wilts.

Slow Cooker

  • This can certainly cooked in a slow cooker. However, as the speed and temperature varies between the many brands of slow cookers, base the amount of liquid you add and the cook time on a similar style of recipe in the guide book for your specific slow cooker. The general rule of thumb is to halve the liquid and double the cook time, but understanding your own slow cooker is the best guide.

Serve

  • With a wedge of lemon and garnished with coriander or parsley.

Make-ahead

  • Re-heat in a pot over a low heat until just hot.

Store

  • If you are storing or freezing it, strip the meat from the bones of the shanks and discard the bones (or freeze them to re-use to make a bone broth - there will still be some goodness remaining).
  • Store in an airtight container in the fridge or freezer.
  • You may need to add more liquid (water or stock) when reheating. 

Grab Bag Formula Method

  • If you've done the **Grab Bag Formula Short Course, this is the method to convert this recipe...
  • Place all your prepared ingredients (except the kale, coriander and lemon) into the Grab Bag.
  • Carefully seal your Grab Bag. I close most of the seal then press out as much air as I can then complete the seal. Place the Grab Bag in the freezer.
  • To cook, remove the Grab Bag from the freezer, place on a baking tray and thaw in the fridge overnight.
  • Tip the contents of the Grab Bag into a large oven proof dish (with a tight fitting lid) or Dutch oven. It may still be a bit frozen; that’s okay.
  • Place the lid on the pot, set your oven to 150°C/300°F (fan-forced) and cook for 4-5 hours.
  • If there is a lot of liquid, remove the lid and cook for a further 20-30 minutes to reduce and thicken the sauce.
  • Remove the dish from the oven, stir in the kale, replace the lid and allow to sit for 5-10 minutes so the kale wilts. Taste and adjust the seasoning and spiciness.
  • ** The Grab Bag Formula Short Course is available to purchase for just AU$46 HERE.
    OR
    If you are a full-access Well Nourished Family member, the course is included in your membership and you can access in the members portal - HERE.

Notes

Vegetarian and Vegan Harira

Replace the lamb with 250grams (approx. 2 cups) diced mushrooms (or chickpeas) and the bone broth with vegetable stock. Cook for 2-3 hours.

Onion and Garlic-free

Replace both with finely diced fennel, a extra teaspoon of cumin and chilli powder to taste. 

Make it spicy

You can serve this with chilli flakes - we always do. 

Leftovers

Leftovers are fabulous the next day and this is a great dish to make ahead or freeze (in an airtight container). My kids love it in a thermos for their school lunch. 


I'd love to hear how you and your family enjoy this delicious, super nourishing meal. Let me know what you think- post a comment below and rate this recipe! 

Lamb Shoulder with Mint Chutney

November 23, 2016 | Make-ahead Meals, Red Meat, Slow Cooked

This is the last of the series of recipes I have developed for JamieOliver.com and his series of ’10 recipes to save your life’. Slow cooked Lamb Shoulder with a mint chutney is probably one of my most cooked meals when entertaining a crowd as it can be prepared ahead and requires little time of me in the kitchen once the guests arrive (I hate missing out). This makes it a timely recipe ahead of the festive season and one I know you are just going to love.

The chutney is optional but highly recommended. We make it spicy, but you can always leave out the chilli if spice isn’t your thing. It does seem to loose some of it’s spiciness when combined with the lamb (my kids handle a two chilli chutney fyi).

Health benefits

Lamb is a great source of protein, zinc, and vitamin B12, which supports energy levels and immunity. Unlike store-bought marinades, this homemade version uses fresh herbs and minimal salt, making it a healthier choice. The fresh mint sauce not only adds a burst of flavour but also aids digestion, making this meal as nutritious as it is delicious.

Ingredients

For this recipe, you’ll need a bone-in lamb shoulder, which gives the best flavour and texture. Fresh rosemary, garlic cloves, and lemon infuse the lamb with rich, savoury notes, while the mint chutney adds brightness. The ingredients are simple but deliver big on taste.

How to make this slow-roasted lamb shoulder

To make this dish, you’ll slow-cook the lamb shoulder over lemon halves, which act like a natural rack and infuse the meat with subtle citrus notes. After cooking the lamb for 4 hours, blend up the mint chutney in a food processor. Once the lamb is tender, remove the foil, grill the top for a crispy finish, and serve with the chutney.

Serving suggestions and how to store

Serve this lamb shoulder with a simple side salad or steamed veggies dressed with olive oil, lemon juice, and seasoning. Store any leftover meat in an airtight container in the fridge, and reheat it in the oven, covered, for 15 minutes at 150℃. This lamb is perfect for making ahead for a stress-free gathering.

Vary this to suit your dietary needs

For a garlic-free version, replace garlic with cumin powder and a pinch of chilli flakes in the baste. You can also swap the garlic inserted into the lamb with anchovy fillets, and omit the garlic in the mint chutney.

Take a look at the variations (below the main recipe) for suggestions to alter the recipe to suit your specific dietary requirements.


For moreeasy to make, delicious meal recipes, click HERE.

Lamb shoulder with mint chutney - My Lamb Shoulder with Mint Chutney is so quick easy to make & is a great dish to entertain with. The lamb melts in your mouth & the mint chutney is divine.
Print Recipe
4.92 from 12 votes

Lamb shoulder with Mint Chutney

This lamb shoulder with mint chutney is a tender, fall-apart roast that’s easy to prepare and perfect for feeding a crowd. The slow-cooked lamb is infused with garlic and rosemary, while the fresh mint chutney adds a zesty kick. It’s a hearty, delicious meal that pairs beautifully with simple salads or roasted veggies.
Prep Time15 minutes mins
Cook Time4 hours hrs
Total Time4 hours hrs 15 minutes mins
Course: Main Course
Servings: 4

Ingredients

  • 1 lamb shoulder (1.5-2kg approx.) bone in (if it has the shank attached, have your butcher cut the tendon at the base so it doesn't pop up when it is cooking and pierce the foil)
  • 1 lemon/s -halved and bases trimmed so they can sit flat, flesh side up
  • 6  clove/s garlic -peeled and halved (or quartered if large)
  • 160 ml water (â…” cup)

Baste

  • 2 tbsp fresh rosemary leaves - chopped finely
  • 1 clove/s garlic - peeled and crushed
  • 1 tbsp extra virgin olive oil - extra virgin
  • 1 tsp sea salt - or to taste
  • ground black pepper - to taste

Mint Chutney

  • 1 bunch/s fresh mint leaves - large (1 cup firm packed), leaves picked off the stems
  • 1 clove/s garlic - crushed
  • 1 red chilli/s - whole
  • ½ tsp sea salt - or to taste
  • 1 lemon/s - juice
  • 1 tsp red wine vinegar

Instructions

  • Preheat the oven to 250℃/480℉ (fan-forced).
  • Prepare the baste by mixing all of the ingredients together in a small bowl.
  • Place the lemon halves in a large roasting tray, flesh side up.  Sit the lamb on top of the lemons (so the lemon acts like a rack).
  • Pierce the flesh of the lamb with a pairing knife 12-14 times. Push the slivers of garlic into the holes.
  • Rub the lamb with the marinade and add the water to the bottom of the tray.
  • Now cover with foil making sure the edges are sealed well. I use at least 3 pieces of foil and tuck it under the tray so it is firmly sealed. The lamb needs to steam to make it fall apart when it's done. Any gaps in the foil it can dry out so take your time and seal it carefully.
  • Put it in the oven and immediately turn it down to 150℃/ 290℉. Cook for 4 hours.
  • Whilst that's cooking make the chutney by combining the mint, garlic, chilli and salt in a food processor and processing to a paste. Mix in the lemon juice and vinegar and store in the an airtight container in the fridge until the lamb is ready to serve.
  • When the lamb is ready, remove the foil and put it under the grill for 5-10 minutes or until the top is crispy.
  • Rest the lamb for a few minutes before serving with the mint chutney and tongs to pull apart the meat.

Make-ahead

  • If you want to make this ahead, cook it for the full 4 hours, but don't remove the foil until you are ready to serve.
  • Reheat it in a 150℃ oven (still covered) for 15 minutes, then remove the foil and put it under the grill for 5-10 minutes or until the top is crispy.

Store

  • Any leftover meat in an airtight container in the fridge.

Notes

Serve

I love this with a big fresh salad or steamed veggies simply dressed with lemon juice, olive oil, salt and pepper. My ebook 'Well Nourished - Sides and Salads' has plenty of fabulous accompaniments to this delicious meal - it's a bargain at $9.95. Check it out HERE.

Garlic-free

Replace the garlic in the baste with 1 tsp of cumin powder and a good pinch of chilli flakes. Replace the garlic (that's inserted into the meat) with pieces of anchovy fillets. Omit the garlic in the mint chutney.
 

I'd love to hear how you like this, one of my families all time favourite meals. Post a comment below or rate this recipe.

Mum’s Lemon Chicken

November 4, 2015 | Budget Friendly, Make-ahead Meals, Chicken, Vegetarian

On a recent trip to Perth, my mum cooked me many delicious dinners, but this one was a standout. She threw it together (she’s a kitchen freestyler, just like me) and it was so good I knew I had to share it with you. It’s budget friendly, incredibly easy to make and tastes divine. When I tested the recipe at home, my whole family adored it – so here it is: my mum’s Lemon Chicken.

My mum has always been a great cook; well except for a short time when she was following the Pritikin Diet. She stopped cooking in fat and if you’ve ever eaten a roast chicken, skin removed and cooked in nothing but water, you’ll know just how ordinary it is – chicken and potatoes definitely need fat and salt to taste good! As you can tell, I’m a little scarred by that fat-free stage of my childhood!

This lemon chicken recipe is a crowd-pleaser, bursting with flavour and perfect for family dinners or meal prep. With succulent drumsticks roasted to perfection and infused with zesty lemon, smoked paprika, and aromatic herbs, it’s an easy one-pan dish that brings comfort to the table. Plus, it’s versatile enough to pair with a variety of sides, making it a fantastic addition to your weekly meal rotation.

Health benefits

This lemon chicken is not only delicious but also packed with nutrition. Chicken drumsticks are a great source of protein, essential for muscle repair and growth. The addition of turmeric adds anti-inflammatory benefits, while the colourful veggies like carrots, celery, and potatoes provide carbohydrates, fibre, vitamins, and minerals that support overall health. Plus, using natural sweeteners like honey or rice malt syrup keeps it refined sugar-free.

Ingredients

To create this easy baked lemon chicken dish, gather chicken drumsticks (or Marylands or bone-in chicken thighs), butter, ghee, or coconut oil, rice malt syrup or honey, smoked paprika, diced red onions, chicken broth or stock, sliced garlic cloves, diced celery sticks, sliced carrots, peeled and roughly diced potatoes, ground cumin, grated fresh turmeric (or dried), chopped fresh rosemary (or dried), a pinch of chilli flakes (optional), lemon slices, and sea salt and freshly ground black pepper to taste.

How to make baked lemon chicken 

Begin by preheating your oven to 180°C (350°F). In a big bowl, toss the chicken with the sweetener, smoked paprika, and a pinch of sea salt. In a large baking dish over medium heat, sauté the diced onion in butter or ghee until translucent. Push the onion aside and brown the chicken on all sides before removing it from heat. Add the chicken stock, garlic, celery, carrots, potatoes, cumin, turmeric, rosemary, and optional chilli flakes, mixing gently. Arrange lemon wedges among the chicken and bake for 1 hour until the chicken is tender.

Serving suggestions and how to store

Serve this lemon baked chicken with all the delicious pan juices over a bed of wilted greens, cauliflower rice, quinoa, or your choice of mashed potatoes for a comforting meal. Or simply serve with a side salad. Store any leftovers in an airtight container in the fridge for up to 3 days or freeze for longer storage. Reheat covered in a low oven until hot.

Vary lemon chicken to suit your dietary needs

Feel free to customise this recipe to fit your dietary preferences! For a vegetarian version, swap the chicken for large halved field mushrooms and add canned chickpeas towards the end of cooking. If you’re avoiding onions, replace them with finely diced fennel. To make it garlic-free, simply omit the garlic or add an extra teaspoon of ground cumin for flavour. Additionally, you can experiment with different vegetables to tailor the dish to your liking!

Take a look at the variations (below the main recipe) for suggestions to alter the recipe to suit your specific dietary requirements.


For more healthy, delicious and easy to make meals – click HERE.

How to eat whole foods on a tight budget ($10 a day), with limited time to cook & only a small, basic kitchen. I show you how I did this
Print Recipe
4.88 from 24 votes

Mums Lemon Chicken

This is my kind of meal, one with a little bit of prep that I can throw in the oven and forget until it's cooked. This one pan Lemon Chicken is a delicious, nourishing meal.
Prep Time15 minutes mins
Cook Time1 hour hr
Total Time1 hour hr 15 minutes mins
Course: Main Course
Servings: 4

Ingredients

  • 12 chicken drumsticks (or Marylands)
  • 2 tbsp butter, ghee or coconut oil
  • 1 tbsp rice malt syrup or honey
  • 1 tbsp smoked paprika
  • 2 red onion/s -peeled and diced
  • 250 ml chicken broth or stock (1 cup)
  • 2 clove/s garlic -peeled and sliced
  • 2 stick/s celery -diced
  • 2 carrot/s -sliced
  • 2 potato/s (Dutch cream or Kipfler) peeled and roughly diced
  • 1 tsp ground cumin
  • 1 tsp fresh turmeric root -grated (or ½ teaspoon dried)
  • 1 tsp fresh rosemary leaves -chopped (or ½ teaspoon dried)
  • Pinch chilli flakes (optional)
  • 1 lemon/s (large) -sliced into about 8 wedges**
  • Sea salt and freshly ground black pepper -to taste
Metric - US Customary

Instructions

  • Preheat your oven to 180°C / 350°F (fan-forced).
  • In a big bowl, toss the chicken with the sweetener, paprika and a pinch of sea salt to coat it.
  • Place a large baking dish (I use a cast iron one) on your stove top and over a low to moderate heat, sauté the onion in a little butter to ghee (or olive oil for dairy-free) until just translucent.
  • Push the onion to the side (away from the heat), turn up the heat and brown your chicken on all sides. Remove from the heat.
  • Add the bone broth, garlic, celery, carrots, potatoes, cumin, turmeric, rosemary and optional chilli flakes.
  • Gently mix it through the chicken and season again if needed.
  • Arrange the lemon wedges, flesh side down between the pieces of chicken. **** If your lemon has a really thick pith / white part (more than 5mm) then don't add as the pith can impart a bitter flavour to the pan juices. Instead add a little lemon juice to the pan juices after cooking.
  • Pop in the preheated oven and bake for 1 hour.

Serve with all of the delicious pan juices...

  • On a bed of greens (they will wilt under the casserole).
  • With fresh parsley or peas. I love a green hit with any meal. 
  • On cauliflower rice, quinoa or rice (for gluten-free) or cous cous (if okay with gluten).
  • Over mashed potato or sweet potato.

Extra fast, lazy version

  • Just throw it all in the roasting pan and straight into the oven. You may need to pop it under the grill prior to serving to crisp up and brown the chicken. 

Make-ahead

  • Re-heat (covered) in a low oven until just hot.

Store

  • Store in an airtight container in the fridge.
  • Can also be frozen.

Grab Bag Formula Method

  • If you've done the **Grab Bag Formula Short Course, this is the method to convert this recipe...
  • Place the drumsticks first then the rest of the ingredients (except the lemon juice) into the Grab Bag.
  • Carefully seal your Grab Bag. I close most of the seal then press out as much air as I can then complete the seal. Place the Grab Bag in the freezer.
  • To cook, remove the Grab Bag from the freezer, place on a baking tray and thaw in the fridge overnight.
  • Tip the contents of the Grab Bag into a large oven proof dish (with a tight fitting lid) or Dutch oven. It may still be a bit frozen; that’s okay.
  • Place the lid on the pot, set your oven to 160°C/320°F (fan-forced) and cook for 2½ hours.
  • Add the lemon juice to the pan juices and season. Taste and adjust as needed.
  • ** The Grab Bag Formula Short Course is available to purchase for just AU$46 HERE.
    OR
    If you are a full-access Well Nourished Family member, the course is included in your membership and you can access in the members portal - HERE.

Notes

Vegetarian

Replace the chicken with large field mushrooms (halved), reduce the cook time to 45 minutes and add in a can of drained chickpeas for the last 15 minutes of cooking. Also use vegetable stock. Serve with rice or quinoa to ensure a complete protein.

Onion-free

Replace the red onion with one finely diced bulb of fennel.

Garlic-free

You can simply omit the garlic or add an extra teaspoon of ground cumin.

Fructose-friendly

Choose rice malt as your sweetener. 

Different veggies

Feel free to experiment with different vegetables.
 

I hope you love this dish as much as I do and I'd love to hear from you. Write a comment or rate this recipe.

Middle Eastern Beef Brisket

October 21, 2015 | Make-ahead Meals, Red Meat, Freezable Meals, Slow Cooked

This Middle Eastern beef brisket is a flavour-packed dish that transforms a budget friendly cut of meat into a tender, aromatic feast. It is really quick to prepare, but does require a lot of time to cook, so plan ahead for this meal.

The basic recipe will leave you with a ‘pulled’ style of meat which you can serve with salad, in a burger, wrap or tortilla, or on a bed of creamy mashed potato. The tahini sauce adds a lovely earthy-citrus hit to balance the richness of the meat. I hope you enjoy this really versatile and very satisfying meal.

Health benefits

Beef brisket is rich in protein and essential nutrients like iron and zinc, which are vital for overall health. The combination of spices not only adds depth of flavour but also provides antioxidant benefits, while tahini adds healthy fats and calcium, making this dish both nutritious and satisfying.

Ingredients

To make this Middle Eastern beef brisket, you’ll need a blend of spices (smoked paprika, cumin, coriander, cinnamon, cardamom, and cloves), a 1 kg beef brisket, chicken stock or bone broth, onion, garlic cloves, and a simple tahini sauce made with hulled tahini, lemon juice, and water.

How to make Middle Eastern Beef Brisket

Preheat your oven to 150°C (300°F) and mix the spices, salt, and pepper in a small bowl. Rub the brisket with the spice blend and place it in a Dutch oven or casserole dish. Add sliced onions, garlic, and pour in the stock until it almost covers the meat. Cover tightly and slow cook for about 4 hours, turning the brisket halfway through. Finish by uncovering and increasing the heat to caramelise the meat for about 20-30 minutes, then drizzle with homemade tahini sauce before serving.

Serving suggestions and how to store

Serve this brisket buffet-style or on a platter, allowing everyone to create their own meals in lettuce cups, tortillas, or over grains (like couscous or rice). Store leftovers in an airtight container in the fridge for up to 3 days, or freeze shredded meat for future meals. Reheat gently in the oven or on the stove with a splash of broth.

Vary Middle Eastern Beef Brisket to suit your dietary needs

This pulled beef recipe is gluten-free, dairy-free, nut-free and grain-free. For those with specific dietary needs, you can easily modify this recipe: omit the onion for fennel, replace garlic with chilli flakes for a kick, or substitute tahini with almond butter for a sesame-free option. Additionally, feel free to adjust the spices according to your flavour preferences! 

Take a look at the variations (below the main recipe) for suggestions to alter the recipe to suit many specific dietary requirements.


For more delicious, easy to make slow cooked meals click HERE.

Middle Eastern Beef Brisket - this budget friendly, easy to prepare meal is versatile and delicious. Gluten-free, dairy-free & grain-free.
Print Recipe
4.74 from 38 votes

Middle Eastern Beef Brisket

This Middle Eastern Beef Brisket features on my dinner table very regularly. I love it because I can simply prepare it and then let it slow cook in my oven so dinner is done when I'm late home from after school activities. 
Prep Time10 minutes mins
Cook Time5 hours hrs
Total Time5 hours hrs 10 minutes mins
Course: Main Course
Servings: 4

Ingredients

  • 2 tsp smoked paprika
  • 2 tsp ground cumin
  • 1 tsp ground coriander
  • 1 tsp ground cinnamon
  • 1 tsp ground cardamom
  • ¼ tsp ground cloves
  • Sea salt and freshly ground black pepper - to taste
  • 1 kg beef brisket (approx.)
  • 370 ml chicken broth or stock (1½ cups) or water
  • 1 onion/s - halved and sliced
  • 2 clove/s garlic - sliced

Tahini Sauce

  • 3 tbsp hulled tahini 
  • 1 lemon/s (small) juice
  • ¼ tsp ground cumin
  • Pinch sea salt
  • water - to thin sauce
Metric - US Customary

Instructions

  • Preheat your oven to 150°C/300°F (fan-forced).
  • In a small bowl mix together the spices, salt and pepper.
  • Rub the beef with about 1½ tablespoons of the spice blend to coat it and place in a medium sized Dutch oven, casserole dish (with a lid) or roasting pan. Place the remaining spice mix in a small jar for your next brisket.
  • Add the garlic, onion and pour over the stock (it should cover or almost cover the meat).
  • Cover with a lid or foil wrapped tightly to seal.
  • Cook for about 2 hours, turn the meat and cook for another 2 hours (approx. total 4 hours cook time). Remove from the oven and rest with the lid on for 30 minutes.
  • It is cooked perfectly when the meat easily pulls apart. If you have a larger or particularly tough cut it may need a slightly longer cook time
  • If there is lots of excess liquid int he pot, remove the lid or foil and turn the oven up to 200°C. Pull the meat apart and cook for approximately 20 minutes to caramelise and thicken the sauce (only if required).
  • To make your tahini sauce, combine all of the tahini sauce ingredients together. Add the water tablespoon by tablespoon until you have a slightly runny sauce that can be drizzled over the meat.

Slow Cooker

  • This can certainly cooked in a slow cooker. However, as the speed and temperature varies between the many brands of slow cookers, base the amount of liquid you add and the cook time on a similar style of recipe in the guide book for your specific slow cooker. The general rule of thumb is to halve the liquid and double the cook time, but understanding your own slow cooker is the best guide.

Serve this buffet style so you can build your own meal. Here are some ways we eat this...

  • In a lettuce cup with julienne vegetables
  • In a burger, wrap or tortilla with lots of salad/grated veggies
  • On a creamy mashed potato or cauliflower puree with steamed green vegetables
  • Over rice, quinoa or cous cous.
  • Or any way you like really

Make-ahead

  • Re-heat (covered) in a low oven until just hot or in a pot with a splash of bone broth.

Store

  • Store in an airtight container in the fridge.
  • Shredded meat can also be frozen.

Grab Bag Formula Method

  • If you've done the **Grab Bag Formula Short Course, this is the method to convert this recipe...
  • Place the beef brisket, spices, seasoning, stock, onion and garlic into your Grab Bag. Carefully seal your Grab Bag. I close most of the seal then press out as much air as I can then complete the seal. Place the Grab Bag in the freezer.
  • To cook, remove the Grab Bag from the freezer, place on a baking tray and thaw in the fridge overnight.
  • Tip the contents of the Grab Bag into a large oven proof dish (with a tight fitting lid) or Dutch oven. It may still be a bit frozen; that’s okay.
  • Place the lid on the pot, set your oven to 150°C/300°F (fan-forced) and cook for about 2 hours. Turn the meat and cook for another 2-3 hours (total 4-5 hours cook time). It is cooked when the meat easily falls apart when pulled at. Remove the lid and turn the oven up to 200°C. Pull the meat apart and cook for approximately 30 minutes to caramelise and thicken the sauce.
  • ** The Grab Bag Formula Short Course is available to purchase for just AU$46 HERE.
    OR
    If you are a full-access Well Nourished Family member, the course is included in your membership and you can access in the members portal - HERE.

Notes

Onion-free

Replace the onion with a small bulb of finely diced fennel.

Garlic-free

Replace the garlic with a pinch of chilli flakes. 

Sesame-free

Replace the tahini with almond butter.


This recipe is a firm family favourite. If you like it as much as we do, add a comment or rate this recipe. 

Rustic Tarragon Chicken

September 24, 2013 | Make-ahead Meals, Chicken, Freezable Meals, Slow Cooked

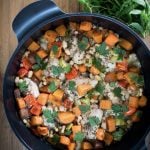
This Rustic Tarragon Chicken is the perfect comfort meal, packed with hearty veggies, tender chicken, and a deliciously fragrant herb sauce. It’s an easy, one-pot dish that’s simple to throw together, making it great for busy weeknights or lazy weekends. With just a few basic ingredients, you’ll have a nourishing and delicious dinner on the table in no time! Remember it’s supposed to be rustic so don’t get hung-up on chopping everything up perfectly.

Health benefits

This dish is loaded with a nutritious rainbow of veggies and lean protein from chicken thighs, making it a wholesome, balanced meal. The combination of antioxidant rich tarragon, garlic, and fresh parsley brings plenty of flavour and nourishment. The chicken broth adds more protein, minerals and gelatinous, gut healing goodness. 

Ingredients

The key ingredients for this dish are chicken thighs or drumsticks, fresh or dried tarragon, cannellini beans, and a mix of vegetables like onions, garlic cloves, carrots, capsicum, celery, and sweet potatoes. You’ll also need some chicken stock, dry white wine, and seasonings like sea salt and black pepper to tie everything together.

How to make this tarragon chicken recipe

Start by sautéing the onion and garlic in a deep pan or casserole dish, then brown the chicken on all sides. Add the veggies, beans, tarragon, wine, and stock, season to taste, and pop it in the oven with the lid on for about an hour. When it’s done, finish it off with fresh parsley for a burst of flavour and serve it up!

Serving suggestions and how to store

Serve this rustic tarragon chicken over mashed potatoes, cauliflower puree, or steamed greens like broccoli or kale for a complete meal. Leftovers can be stored in an airtight container in the fridge and will keep for up to three days. You can also freeze it for longer storage and just reheat it when needed.

Vary this to suit your dietary needs

For a vegetarian or vegan version, swap out the chicken for tofu, chickpeas, or mushrooms and use vegetable stock instead. If you’re avoiding legumes, simply omit the beans. You can also easily substitute any of the veggies or herbs to suit your tastes, and thyme makes a lovely alternative to tarragon if preferred.

Check out the variations below the main recipe for tips on how to adapt it to your specific dietary needs.

This Rustic tarragon chicken recipe is a nourishing one pan, complete meal, fast and simple to make! Plus it can be pre-prepared and reheated as needed.
Print Recipe
4.80 from 5 votes

Rustic Tarragon Chicken, a nourishing one pan bake

This Rustic Tarragon Chicken is a nourishing, easy to prepare one pan bake and is delicious. 
Prep Time15 minutes mins
Cook Time1 hour hr
Total Time1 hour hr 15 minutes mins
Course: Main Course
Servings: 4

Ingredients

  • 1 onion/s -roughly chopped
  • 2 clove/s garlic -chopped
  • 700 g chicken thighs -or drumsticks
  • 400 g can cannellini beans -drained and rinsed
  • 2 carrot/s -peeled and roughly diced
  • 2 stick/s celery -diced
  • 1 red capsicum/s -diced
  • 2 sweet potato/s (small) washed and diced
  • 3 tbsp fresh tarragon leaves -picked and chopped or 1 tbsp dried
  • 60 ml dry white wine (¼ cup)
  • 120 ml chicken broth or stock (½ cup) - or vegetable stock
  • Sea salt and freshly ground black pepper -to taste

Serve

  • ¼ bunch/s fresh parsley leaves -to serve

Instructions

  • Preheat your oven to 180℃/350℉ (fan-forced).
  • Use an oven proof deep pan (with a lid) or a casserole dish. On a stove top, begin with softening the onion and garlic in a little coconut oil or butter over a moderate heat.
  • Push aside and brown the chicken. Take off the heat.
  • Now add the cannellini beans, vegetables, tarragon, wine, stock, and seasoning. Mix together roughly to make sure the herbs are evenly distributed.
  • Place on the lid and throw in the oven for 50 - 60 minutes or until the meat is cooked.
  • Finish with parsley leaves (which adds a real freshness to the dish and more nourishment).

Slow Cooker

  • This can certainly cooked in a slow cooker. However, as the speed and temperature varies between the many brands of slow cookers, base the amount of liquid you add and the cook time on a similar style of recipe in the guide book for your specific slow cooker. The general rule of thumb is to halve the liquid and double the cook time, but understanding your own slow cooker is the best guide.

Time-saving tip

  • If you are pushed for time and want to pre-prepare this meal, don't worry about sautéing the onion, garlic, and meat. Just throw all together, cover and refrigerate until you're ready to bake. You will just need to bake it for an extra 10-20 minutes to ensure the meat is cooked. I also often take the lid off for the last 10 -15 minutes to brown the chicken.

Grab Bag Formula Method

  • If you've done the **Grab Bag Formula Short Course, this is the method to convert this recipe...
  • Place all the tarragon chicken ingredients (except the lime and fresh coriander) into the Grab Bag.
  • Carefully seal your Grab Bag. I close most of the seal then press out as much air as I can then complete the seal. Place the Grab Bag in the freezer.
  • To cook, remove the Grab Bag from the freezer, place on a baking tray and thaw in the fridge overnight.
  • Tip the contents of the Grab Bag into a large oven proof dish (with a tight fitting lid) or Dutch oven. It may still be a bit frozen; that’s okay.
  • Place the lid on the pot, set your oven to 150°C/300°F (fan-forced) and cook for 2 hours.
  • If there is a lot of liquid, remove the lid, increase the oven to 200°C/380°F and cook for a further 15-20 minutes to reduce and thicken the sauce (the sauce flavour really develops too).
  • Finish with parsley leaves. Season again if necessary (sea salt lifts the flavours in this so make sure you add it).
  • ** The Grab Bag Formula Short Course is available to purchase for just AU$46 HERE.
  • OR
  • If you are a full-access Well Nourished Family member, the course is included in your membership and you can access in the members portal - HERE.

Serve

  • Over chopped salad greens, chopped kale, steamed broccoli and mashed (pureed) cauliflower or potato.

Make-ahead

  • Re-heat (covered) in a low oven until just hot.

Store

  • Store in an airtight container in the fridge.
  • Can also be frozen.

Notes

Vegetarian and vegan

Replace the chicken with 300g of firm tofu or chickpeas and 300g of mushrooms. Choose vegetable stock. Cook for 1 hour.

Legume-free

Simply omit the beans.

Onion-free

Replace the onion with a small bulb of diced fennel. 

Garlic-free

Simply omit the garlic or replace with a pinch of chilli. 

Different vegetables

If you dislike or don't have a particular vegetable, just substitute it or leave it out. This is a very versatile dish - anything goes!

Don't like Tarragon?

Simple, thyme is a delicious alternative.


Love you to try this tasty dish and let me know how you like it? Did you make any changes, love you to share?

Lamb, Bacon and Lentil Pot

June 19, 2013 | Budget Friendly, Make-ahead Meals, Red Meat, Freezable Meals, Vegetarian, Slow Cooked

This Lamb, Bacon, and Lentil Stew is a hearty, delicious dish perfect for cozy family dinners. With tender lamb shanks, smoky bacon, and a mix of veggies, it’s a delicious, no-fuss, one pot meal that practically cooks itself – ideal for busy nights when you want something comforting and nutritious.

This gluten free, healthy lamb shank recipe is so simple to make, it’s sure to become a family favourite. You don’t really need a whole shank per person here, especially if they are large. I’m all for spending extra money on quality meat, buying less of it (so it’s still affordable) and bulking it out with other good stuff. You know I’m all for variety too, so including the lentils for extra protein is a winner.

You can either throw it in the slow cooker or cook in the oven at a low temperature (like below). The meat just melts in your mouth and the flavour of the lamb with bacon and rosemary is a match made in heaven.

Health benefits

This Lamb Bacon Lentil stew combines protein-rich lamb and lentils with a variety of vegetables, making it a well-rounded meal. The slow-cooked ingredients provide a rich flavour and satisfying texture, perfect for nourishing the whole family. The gut healing chicken broth I’ve raved about here, and by slow cooking the shanks this way, even more, immune boosting, nutritious goodies are added. The onion, garlic, vegetables and rosemary give further immune support too. This lamb shank recipe is a great option for those who don’t tolerate tomatoes but are after a hearty stew.

This recipe has about 38-42 grams of protein per serve.

Ingredients

To make this dish, you’ll need lamb shanks, bacon, brown lentils, carrots, celery, mushrooms, onions, garlic, rosemary, red wine, and chicken stock. Optional extras include zucchini, eggplant, or parsnips for added variety.

How to make Lamb, Bacon and Lentil Stew

Start by browning the lamb shanks in a large ovenproof dish, then add all the remaining ingredients. Season everything well, ensuring the lamb shanks are submerged in liquid. Cover with a lid and cook in a 160℃/320℉ oven for about 3 hours. The slow cooking ensures tender lamb that falls off the bone.

Serving suggestions and how to store

Serve this lamb bacon lentil stew with mashed potatoes to soak up the rich juices plus steamed veggies or a fresh salad. Store any leftovers in an airtight container in the fridge for up to 3 days, or freeze for up to 3 months. Reheat in a low oven until warm.

Vary this to suit your dietary needs

For a vegetarian version, swap the lamb and bacon for extra lentils, mushrooms, and smoked paprika for a smoky flavour. If you’re avoiding legumes, leave out the lentils and add more vegetables like parsnips or sweet potatoes.

Enjoy this hearty lamb, bacon, lentil stew. A delicious, nourishing protein-packed one pot meal, perfect for a comforting family dinner.
Print Recipe
4.80 from 30 votes

Lamb, Bacon and Lentil Stew

This Lamb, Bacon, and Lentil Pot is the ultimate comfort dish, packed with tender lamb shanks, smoky bacon, and hearty lentils. It's a one-pot wonder that's easy to prepare and perfect for those days when you want a wholesome, nourishing meal with minimal effort.
Prep Time10 minutes mins
Cook Time3 hours hrs
Total Time3 hours hrs 10 minutes mins
Course: Main Course
Servings: 4

Ingredients

  • 2 onion/s -peeled and sliced
  • 2 clove/s garlic -sliced
  • 400 g can brown lentils -drained and rinsed or 1 cup cooked brown lentils
  • 3 carrot/s -sliced roughly
  • 4 rasher/s bacon -diced roughly
  • 100 g mushrooms -Swiss brown or button, sliced (1 cup)
  • 3 stick/s celery -sliced roughly
  • 2 tbsp fresh rosemary leaves -chopped (or 1 tablespoon of dried)
  • Sea salt and freshly ground black pepper
  • 60 ml red wine (¼ cup)
  • 250 ml chicken broth or stock (1 cup)
  • 4 lamb shanks -small, or two large ones (depending upon your appetite)

Optional extras

  • 1 zucchini/s - or eggplant or parsnip, diced

Instructions

  • Preheat your oven to 160℃/320℉ (fan-forced).
  • In a large oven proof dish (I like my cast iron pot), place the lamb shanks and brown quickly on the stove top (in a little olive oil or ghee) over a medium high heat. This is not essential and I have to confess, I'm a bit lazy and tend to take the just throw it all in approach.
  • Next, add all of the ingredients, season and stir to combine. Make sure the lamb shanks are toward the bottom of the dish and covered with the liquid and other ingredients.
  • Place the lid on the pot and cook for 3 hours. I aim for 3 hours, as the longer it cooks the more tender the lamb. I tend to put it in the oven before school pick up and it's ready in time for dinner. It's very forgiving so can easily cook for longer. *
  • Sprinkle with finely chopped parsley (good way to hide this very nutritious green) and serve alone or with one of the following...

Slow Cooker

  • This can certainly cooked in a slow cooker. However, as the speed and temperature varies between the many brands of slow cookers, base the amount of liquid you add and the cook time on a similar style of recipe in the guide book for your specific slow cooker. The general rule of thumb is to halve the liquid and double the cook time, but understanding your own slow cooker is the best guide.

Serving suggestions

  • Steamed and buttered vegetables.
  • Mashed potato, sweet potato or pumpkin (soaks up the delicious juices).
  • Pureed or mashed cauliflower.
  • Cauliflower, broccoli and lemon salad.
  • Green beans, steamed and dressed with lemon juice, zest and EV olive oil.
  • A simple bowl of greens or a salad.

Make-ahead

  • Re-heat in a low oven until just hot.

Store

  • Airtight in the fridge and can also be frozen (remove the bone to freeze).

Grab Bag Formula Method

  • If you've done the **Grab Bag Formula Short Course, this is the method to convert this recipe...
  • Place all of the ingredients (other than those for serving) into the Grab Bag.
  • Carefully seal your Grab Bag. I close most of the seal then press out as much air as I can then complete the seal. Place the Grab Bag in the freezer.
  • To cook, remove the Grab Bag from the freezer, place on a baking tray and thaw in the fridge overnight.
  • Tip the contents of the Grab Bag into a large oven proof dish (with a tight fitting lid) or Dutch oven. It may still be a bit frozen; that’s okay. Place the lid on the pot, set your oven to 160°C/320°F (fan-forced) and cook for 3½-4 hours. The thicker the lamb shanks the longer it will need to cook.
  • ** The Grab Bag Formula Short Course is available to purchase for just AU$46 HERE.
    OR
    If you are a full-access Well Nourished Family member, the course is included in your membership and you can access in the members portal - HERE.

Notes

Vegetarian is Possible

Double the lentils, use vegetable stock, add 300g mushrooms and add a tablespoon of smoked paprika (to add a smoky flavour like bacon). You could also add tempeh if you'd like and cook for only 1 hour.

Legume-free

Leave out the lentils and add in extra veggies. I love adding parsnip and sweet potatoes but you can add whatever you like really.

Onion-free

Replace the onion with a small bulb of diced fennel. 

Garlic-free

Replace the garlic with a good pinch of chilli flakes.

Green boost

Stir in a bunch of kale (leaves trimmed and diced) at the very end of cooking (last 5 mins).

Wine-free

Replace the red wine with more stock or broth and a tsp of balsamic vinegar. 


Let me know what your think.  I love receiving your comments.

One Pan Moroccan Dinner

June 10, 2013 | Make-ahead Meals, Chicken, Freezable Meals, Slow Cooked

This One Pan Moroccan Dinner is a delicious and hearty dish that brings together tender meat, veggies, and warming spices all in one pot. It’s a fuss-free, set-and-forget recipe that’s perfect for busy nights or when you want a nourishing, comforting meal without much effort.

Health benefits

This healthy Moroccan-inspired meal has everything you need to nourish the family. Protein, especially if on the bone will introduce those bone derived nutrients I posted on here. The spices improve digestion and offer immune support. The vegetables are of course full of fibre, vitamins, minerals and protective Phyto (plant) chemicals.

Ingredients in the One Pan Moroccan Dinner

You’ll need a mix of your favourite meat (or plant-based alternatives), chickpeas, veggies like carrots, celery, and zucchini, plus spices such as cumin, cinnamon, and coriander. The addition of fresh parsley and a squeeze of lemon at the end brightens the dish.

Instructions to make One Pan Moroccan Dinner

Start by sautéing onions and garlic, then brown your chosen meat. Add in the veggies, chickpeas, spices, and tomato passata, and let it slow cook in the oven for 1-3 hours, depending on the meat. Finish with fresh herbs and lemon juice for that zesty hit of flavour.

Serving suggestions and how to store

Serve this Moroccan dish with couscous, rice, or mashed potatoes. It stores well in the fridge for up to three days, and any leftovers can be frozen in an airtight container for easy future meals.

Vary this to suit your dietary needs

For a gluten-free option, pair it with rice or mashed potatoes. Make it vegetarian or vegan by swapping the meat for chickpeas and tofu. You can also omit legumes or garlic as needed, or switch up the veggies based on what you have on hand.

One-pan Moroccan dinner with spiced vegetables, chicken, and a blend of aromatic flavors—easy and delicious.
Print Recipe
4.80 from 5 votes

One pan Moroccan dinner

This delicious, one pan meal is super simple to make and so, so tasty. 
Prep Time15 minutes mins
Cook Time2 hours hrs
Total Time2 hours hrs 15 minutes mins
Course: Main Course
Servings: 4

Ingredients

  • 500 g meat of choice -approx. such a whole chicken thighs, chicken legs or diced lamb, lamb shanks or casserole chops (see below for vegetarian)
  • 1 onion/s -roughly chopped
  • 2 clove/s garlic -chopped
  • 425 g can chickpeas -drained and rinsed (or cannellini beans)
  • 2 carrot/s -peeled and roughly diced
  • 2 stick/s celery -chopped
  • 1 zucchini/s -diced (or grated for fussy people)
  • 1 red capsicum/s -diced
  • 75 g peas (½ cup) fresh or frozen
  • 2 tsp ground cumin
  • 1 cinnamon quill
  • 1 tsp ground coriander
  • 1 lemon/s -zest (peel off a few strips with your peeler)
  • chilli flakes -to taste
  • Sea salt and freshly ground black pepper -to taste
  • 680 g tomato passata (puree)

Serve...

  • ¼ bunch/s fresh parsley leaves
  • 1 lemon/s -juice

Optional extras

  • 1 tsp dulse flakes
Metric - US Customary

Instructions

  • Preheat your oven to 150℃/300℉ (fan-forced).
  • Use either an oven proof deep pan (with a lid) or a casserole dish.
  • On a stove top, begin with softening the onion and garlic in a little-refined coconut (tasteless), butter or ghee over a low heat. Push aside and slightly brown the meat of your choice. Take off the heat. Now add the rest of the ingredients. 
  • Mix together roughly, place on the lid and throw in the oven for 1-3 hours (depending upon the cut and size of the meat) or until the meat is tender. Chicken will cook in an hour, lamb will do better with a longer cook time.
  • Finish with the fresh herbs and lime or lemon juice which adds a real freshness to the dish.

Slow Cooker

  • This can certainly cooked in a slow cooker. However, as the speed and temperature varies between the many brands of slow cookers, base the amount of liquid you add and the cook time on a similar style of recipe in the guide book for your specific slow cooker. The general rule of thumb is to halve the liquid and double the cook time, but understanding your own slow cooker is the best guide.

Serve

  • Serve with cous cous or one of the variations below.

Make-ahead

  • Re-heat (covered) in a low oven until just hot.

Store

  • Store in an airtight container in the fridge.
  • Can also be frozen.

Grab Bag Formula Method

  • If you've done the **Grab Bag Formula Short Course, this is the method to convert this recipe...
  • Place all your prepared ingredients (except the parsley and lemon juice) into the Grab Bag.
  • Carefully seal your Grab Bag. I close most of the seal then press out as much air as I can then complete the seal. Place the Grab Bag in the freezer.
  • To cook, remove the Grab Bag from the freezer, place on a baking tray and thaw in the fridge overnight.
  • Tip the contents of the Grab Bag into a large oven proof dish (with a tight fitting lid) or Dutch oven. It may still be a bit frozen; that’s okay.
  • Place the lid on the pot, set your oven to 150°C/300°F (fan-forced) and cook for 1½-3½ hours (depending upon the cut and size of the meat) or until the meat is tender. Chicken will cook quicker than the lamb.
  • Taste and adjust the seasoning and spiciness. Lastly finish with the fresh herbs and lemon juice which adds a real freshness to the dish.
  • ** The Grab Bag Formula Short Course is available to purchase for just AU$46 HERE. OR If you are a full-access Well Nourished Family member, the course is included in your membership and you can access in the members portal - HERE.

Notes

Gluten free

Serve with brown rice or mashed potato.

Vegetarian and vegan

Double the chickpeas or and add in 2-300g of diced organic firm tofu. Cook for 1 hour.

Grain-free

Serve on mashed potato or sweet potato.

Legume-free

Leave out the chickpeas.

Garlic-free

Replace the garlic with a teaspoon (extra) of ground cumin and a pinch of chilli flakes. 

Onion-free

replace the onion with a small bulb fennel, diced

Different vegetables

Substitute any of the vegetables. Root vegetables work well. If using broccoli or cauliflower mix through about 10-15 minutes before the end of the cooking time (I really dislike soggy cruciferous).


Time saving tip

If you are pushed for time or want to pre-prepare this meal in the morning so you can throw it in the oven later that evening, don't worry about sautéing the onion, garlic, and meat. Just throw all together, cover and refrigerate until you're ready to bake. You will just need to bake it for an extra 10-20 minutes if it's straight out of the fridge, to ensure the meat is cooked. I have even pre-cooked this the day before and just reheated it prior to eating.

Money saving

I find organic chicken drumsticks or drumettes cost the same as conventional free-range thighs. I stock up on these for casseroles as the bone-derived nutrients add so much goodness to a slow cooked casserole.

I welcome your feedback!  Please comment, ask questions or make suggestions of your own below. 

  • <
  • Page 1
  • Page 2

Primary Sidebar

Join the community

Social Media

Join over 140,000 followers

Nourish Your Inbox

Nourish Your Inbox!

Christmas Meal Planning Ebook

Sign up today for your FREE:
• Chocolate Ebook
• Subscribers Only Special Offers
• Practical Health & Nutrition Tips
• New Whole Food Recipes

WN App

Join the Family

Join the Family

Join The Family

The Well Nourished Family Membership is your complete solution to your families health and wellbeing. With 1200+ whole food recipes and SO MUCH MORE. Join for a limited time for over 80% OFF!

JOIN & SAVE 80%

Upgrade Your Membership – Recipe Only

Health Programs & Courses – Public

Health Programs & Courses

Health Programs & Courses

Whether you’re looking for effortless meal creation, lunchbox inspiration or strategies to raise adventurous eaters, our expert-led resources will guide you every step of the way.

Find Out More

Programs and Courses – FAM only

Affiliate promo – public

Become an Affiliate

Looking to partner with a respected, Australian-run health and wellness brand to expand your reach and your income?

Find out More

Featured Lunchbox Ebook – Public

From the Shop

See More

Footer

Logos

Well Nourished HomepageWell Nourished

As featured on

Footer-social

Connect with us

  • About Well Nourished
  • Sitemap
  • Contact
  • Privacy Policy
  • Website Terms of Use
  • Affiliates

© Well Nourished 2026

A Firstnature site

Not feeling quite yourself?
If you're dealing with skin flares, gut issues, fatigue or joint pain, this five-minute quiz will help you understand what's actually driving it.
TAKE QUIZ

Rate This Recipe

Your vote:


A rating is required
A name is required
An email is required