• Skip to primary navigation
  • Skip to main content
  • Skip to primary sidebar
  • Skip to footer

Well Nourished HomepageWell Nourished

Simple recipes, whole foods, inspired health

  • Family Members
    • Recipe Filter
    • Quick Access Shopping List
    • Membership Tutorials
    • How to be Well Nourished
    • About Well Nourished
    • Where to Shop and what to Buy
    • FAQ
  • Family Members
    • Meal Plans
      • G’s Spring Meal Plan
      • G’s Autumn Meal Plan
      • My Weekly Planner
      • Quick Access Shopping List
      • Ingredient Alert
      • Prep Ahead Plans
      • Hosting Event Plans
      • Wellness & Health Plans
    • Recipe Filter
    • Courses & Community
    • Tips for family’s
      • Getting Kids On-board
      • Planning for Picky Eaters
      • New to Meal Planning
      • Meal Planning Tips & Tricks
    • Nourishing Resources
    • Members Offers
    • What’s New This Week
    • Events
    • Membership Tutorials
    • About Well Nourished
    • FAQ
  • Recipes
    • Meals
      • 30 Minute Meals
      • Budget Friendly
      • Chicken & Turkey
      • Fish & Seafood
      • Freezable Meals
      • Make-ahead Meals
      • Meat
      • Pasta and Noodles
      • Pork recipes
      • Slow Cooked
      • Vegetarian
    • Sweet Recipes
      • Baked Sweets
      • Desserts
      • Ice-blocks
      • No-bake Sweets
    • Breakfast
    • Healthy Lunchbox
    • After School Snacks
    • Savoury Snacks
    • Sides & Salads
      • Salads
      • Side Dishes
    • Soups
    • Drinks & Smoothies
    • Dips
    • Holidays & Entertaining
    • Sauces & Dressings
    • Sourdough Baking
    • Fermenting
    • Staples
    • Members only
    • Members only
  • Shop
    • Membership and Programs
    • Ebooks
    • Free Stuff
  • Affiliates
  • About
    • About Well Nourished
    • Testimonials
    • Join the Family
    • FAQ
  • Resources
    • Find a Practitioner
    • Find whole food
      • ACT
      • NSW
      • NT
      • SA
      • QLD
      • TAS
      • VIC
      • WA
    • Products and Services I Value
    • Whole foods pantry list
    • Ingredients Glossary
  • Wellness Hub
    • Inflammation
    • Perimenopause & Menopause
    • Healthy Kids
      • Healthy Baby
      • Healthy Toddler
      • Healthy Child
      • Immune support for kids
      • Digestion & Food Allergies
      • Healthy Lunchboxes
    • Budgeting & Planning
    • Digestion & Intolerance
    • Immune Health
    • Food as Medicine
    • Foods to Avoid
    • Healthy Habits
    • Sugar
    • Carbs, Protein, Fats
      • Carbohydrates
      • Fats
      • Protein
    • Healthy Food Choices
    • Healthy Home
    • Stress & Mood Disorders
    • Healthy Mind
    • Maternal health
    • Health Challenges
  • Login
    • Well Nourished Family
    • Courses & Community
    • Affiliate Login
  • My account

vegan

Green Bean and Almond Salad

April 2, 2014 | Salads, Side dishes

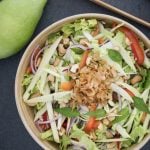
This Green Bean and Almond Salad is a simple, delicious combination of flavours. It is a great salad to make when entertaining as you can prepare it and quickly assemble it just prior to serving. So many ‘green’ fussy kids I’ve had to dinner have loved this salad; it’s sure to become a family favourite.

Why is it healthy?

Green beans are a fantastic source of fibre and protective antioxidants (carotenoids and flavonoids especially). Almonds are a rich source of protein, monounsaturated fats, many fat soluble vitamins and a plethora of minerals. The lemon juice and zest are full of immune supportive vitamin C and phytonutrients.

Ingredients

To whip up this refreshing salad, you’ll need 500 g of green beans, flaked almonds, and crumbled feta cheese. For the dressing, mix together red wine vinegar, the lemon zest and juice of a lemon, extra virgin olive oil and sea salt and freshly ground black pepper to taste.

How to make this green bean salad

This salad has a really short prep time. Simply boil a pot of water. Start by topping and tailing the green beans, then steam them over the boiling water for just two minutes to maintain their crunch. Drain and rinse them under cold water to stop the cooking process. Toast the nuts under a slow grill, being careful not to burn them. In a small jar, combine the dressing ingredients. Then in a salad bowl or serving plate toss the green beans, toasted almonds and crumbled feta together, drizzling the dressing just before serving.

Serving suggestions and how to store

This salad pairs beautifully with grilled meats like lamb, chicken, or fish. For an extra pop of flavor, consider adding pomegranate seeds or cherry tomatoes. Or my Red Onion Pickle is so good with this salad. Leftovers can be stored in an airtight container in the fridge, making them great for lunch boxes the next day.

Vary this to suit your dietary needs

For a dairy-free and vegan option, simply replace the feta with cashew nut cheese. If you’re nut-free, swap the almonds for toasted sunflower seeds. You can replace the almonds with pecans, hazelnuts or walnuts. You can also add baby spinach for extra greens or substitute green beans with lightly steamed snow peas or sugar snap peas if they’re out of season. Take a look at the variations (below the main recipe) for suggestions to alter the recipe to suit many specific dietary requirements.

For lots more sides and salad inspo, take a look at my hugely popular ebook ˜Well Nourished Sides and Salads’– where vegetables become the hero of the dish! It’s great value at just $9.95, click HERE to take a look.

Green Bean and Almond Salad
Print Recipe
4.75 from 4 votes

Green Bean and Almond Salad

This vibrant Green Bean and Almond Salad is a delightful combination of fresh flavours and textures that makes for a perfect side dish or light meal. Packed with nutrients and simple to prepare, it's a go-to option for busy weeknights or gatherings.
Prep Time10 minutes mins
Cook Time5 minutes mins
Total Time15 minutes mins
Course: Salad
Servings: 4

Ingredients

  • 500 g green beans -top and tailed
  • 20 g flaked almonds (¼ cup)
  • 100 g feta cheese -crumbled

Dressing

  • 1 tsp red wine vinegar
  • 1 lemon/s -zest finely grated plus 1 tbs juice
  • 2 tbsp extra virgin olive oil -extra virgin
  • Sea salt and freshly ground black pepper -to taste
Metric - US Customary

Instructions

  • Top and tail your beans (my daughter does this for me) and steam for two minutes. Remove and rinse well under cold water to stop the beans from cooking. This is the only tricky part of this recipe…you really don't want to overcook the beans!
  • Under a slow grill, toast the almonds watching them carefully (I hate it when I burn the buggers).
  • Mix your dressing by combining well (shake together in a small jar).
  • Assemble and dress just prior to serving.

Notes

Dairy-free and vegan

Replace the feta with a cashew nut cheese.

Nut-free

Replace the almonds with toasted sunflower seeds.

Different nuts

You can replace the almonds with pecans, hazelnuts or walnuts. 

Add Pomegranate

This salad is lovely with pomegranate seeds added.

Make it go further

Add 2 cups of baby spinach leaves and cherry tomatoes.

Make a meal of it

This is delicious with grilled lamb, chicken or fish. If green beans are out of season? Replace with lightly steamed snow peas or sugar snap peas.

Leftovers

Leftovers are great for lunch boxes.

Love to receive feedback on this recipe. Please post a comment below...

Moroccan Carrot Salad

March 18, 2014 | Vegetarian, Salads

This vegan, gluten, grain and dairy-free Moroccan Carrot Salad is a real hit with adults and kids alike. It is easy to make, sweet, fresh and super nutritious. I think it is perfect with grilled or BBQ’d meat for a mid-week meal or a gathering.

Why is it healthy?

The carrots provide an antioxidant and beta-carotene hit. Capsicum and lime are a wonderful source of vitamin C and the coriander and parsley are nutritious detoxifiers. The cinnamon is also wonderful for stabilising blood sugar cravings. A lot of nutrition from one simple little salad.

Ingredients

The base of this salad is made with fresh carrots, red onion, capsicum, coriander (cilantro) or fresh mint and your choice of nuts or seeds, with optional dried fruit for sweetness. The spiced dressing, featuring cinnamon, cumin, and lime juice (or lemon juice) adds a Moroccan-inspired twist that’s both sweet and tangy.

How to make this Moroccan Carrot Salad recipe

Make this carrot salad recipe by roasting the nuts and seeds lightly, then combine all the salad ingredients in a large bowl. Shake up the dressing in a small jar, toss it through the salad, and you’re ready to go. It’s an easy, quick dish that bursts with flavour.

Serving suggestions and how to store

This carrot salad is best served fresh but stores well in an airtight container in the fridge. It’s perfect alongside grilled meats, roasted vegetables, or as a light lunch on its own. For added protein, throw in some grilled chicken, eggs, or tempeh.

Vary this Moroccan Carrot Salad to suit your needs

To make it low-fructose, swap the sugar for rice malt syrup and leave out the dried fruit. For nut-free, stick to seeds. If you’re onion-free, radish is a great crunchy substitute. You can even add beetroot for extra color and nutrition, or sneak in a grated apple for the kids!

Take a look at the variations (below the main recipe) for suggestions to alter the recipe to suit many specific dietary requirements.

This vegan, gluten, grain and dairy free Moroccan Carrot Salad is a real hit with adults and kids alike. It is sweet, fresh and super nutritious.
Print Recipe
4.82 from 11 votes

Moroccan Carrot Salad

This Moroccan carrot salad is a vibrant and delicious dish that pairs perfectly with a variety of meals. With its blend of sweet, savoury and spiced flavours, it's a refreshing side or light meal that’s quick to prepare and full of nutritious ingredients.
Prep Time15 minutes mins
Total Time15 minutes mins
Course: Salad
Servings: 4

Ingredients

  • 4 carrot/s (large) peeled and grated
  • 40 g flaked almonds (½ cup) or sunflower seeds or pepitas (or a mixture)
  • 20 g currants -sultanas or raisins (optional) (2 tbsp)
  • 1 red onion/s (small) halved and sliced or 4 spring onions, white part finely sliced
  • 1 red capsicum/s -thinly sliced
  • ½ bunch/s fresh coriander leaves -or parsley or mint leaves (or a mixture), leaves picked

Dressing

  • 30 ml extra virgin olive oil -extra virgin (2 tbsp)
  • 1 lime/s -juice (zest optional) or lemon juice
  • 5 g coconut sugar or rapadura (1 tsp)
  • 1 tsp ground cinnamon
  • ½ tsp ground cumin
  • Sea salt and freshly ground black pepper -to taste
  • ¼ tsp ground ginger (optional)
  • chilli flakes -to taste (optional)

Instructions

  • Lightly toast the nuts and/or seeds under a slow grill (watch carefully so as not to burn). Mix all salad ingredients together in a serving bowl.
  • Add all of the dressing ingredients to a small jar, make sure the lid is on tightly and shake well to combine. Toss the dressing through the salad just prior to serving.

Store

  • Store in an airtight container in the fridge.

Notes

Low-fructose

Use stevia or rice malt syrup as a sweetener in the dressing (to replace the rapadura or coconut sugar) and omit the dried fruit.

Nut-free

Omit the nuts and just use seeds.

Onion-free

Replace the onion with 5 thinly sliced radish. 

Fructose friendly

Omit the dried fruit and replace the sugar with rice malt syrup. 

Add beetroot

Add a small peeled and grated beetroot to this salad for more nutrition and extra deliciousness.

Fussy kids

Finely chop the coriander, parsley or mint leaves (or omit). A grated apple may help fussy eaters enjoy this salad even more.

Make a meal of it

Add some grilled meat, boiled or poached eggs or tempeh. Feta or goat cheese works well too!
 
For lots more sides and salad inspo, take a look at my hugely popular ebook ˜Well Nourished Sides and Salads’- where vegetables become the hero of the dish! It’s great value at just $9.95, click HERE to take a look.
 

I'd love to receive your feedback and comments. Please post your comments below!


Lemon Macadamia Cookie

March 12, 2014 | After School Snacks, Baked Sweets

This Lemon Macadamia Cookie recipe is a delicious, healthier alternative to any store-bought cookie, perfect for a quick snack or treat. The combination of zesty lemon and rich macadamia nut oil gives these cookies a burst of flavour and a light, chewy texture. They’re easy to make and naturally gluten-free, dairy-free, grain-free, egg-free and low fructose making them a great option for everyone.

This recipe is a personal favourite – they are so quick to make and taste just divine. However a warning is appropriate…you will not stop at one (at least I can’t)!

Health benefits

Well, firstly almonds are a rich source of protein, essential fats, and fibre. They also contain antioxidants and mood elevating amino acids. The macadamia nut oil is a very stable, primarily monounsaturated fat with an impressive fatty acid and mineral profile.  It adds a delicious, buttery flavour to the mix too. Lemon zest is a concentrated source of vitamins, minerals, antimicrobial and antioxidant compounds.

Ingredients

The blend of almond flour (meal), macadamia nut oil, vanilla extract and a touch of lemon juice and zest creates a delightful balance of nutty and zesty flavours. You can choose between rice malt syrup, honey, or maple syrup as your sweetener, adjusting it to suit your preferred level of sweetness.

How to make Lemon Macadamia Cookie

Line a baking sheet (tray) with baking paper (parchment paper). Then simply combine all ingredients in a large bowl or food processor, form the cookie dough into balls, flatten and cook until golden brown. These cookies have a super short prep time (just 10 minutes) and are perfect for when you’re craving something homemade but don’t want to spend hours in the kitchen. If you own a Thermomix, we’ve also included Thermomix instructions for this recipe.

Serving suggestions and how to store

These refined sugar free cookies are best enjoyed fresh out of the oven (once cooled a little as they firm up as they cool down) but store beautifully in the fridge or freezer, making them a great make-ahead option. Enjoy them with a cuppa or as a sweet treat in lunchboxes or after school.

Vary Lemon Macadamia Cookies to suit

This Lemon Macadamia Cookie recipe is already gluten-free and dairy-free. For a low-fructose option, use brown rice syrup as your sweetener. Vegans can easily substitute with rice malt or maple syrup to keep the recipe plant-based. Adjust the sweetness to your taste for a cookie everyone can enjoy.

Take a look at the variations (below the main recipe) for suggestions to alter the recipe to suit many specific dietary requirements.

For more delicious, healthy and easy to make wholefood treats, click HERE.

This lemon macadamia cookie recipe is so quick to make and taste divine. They are gluten-free, dairy-free, grain-free and fructose free. Try stop at one!
Print Recipe
5 from 3 votes

Lemon Macadamia Cookie

This Lemon Macadamia cookie recipe is gluten-free and dairy free and are just so delicious. They are easy to make and also freeze really well too. 
Prep Time10 minutes mins
Cook Time15 minutes mins
Total Time25 minutes mins
Course: Snack
Servings: 12 cookies

Ingredients

  • 150 g almond meal (1¼ firmly packed cups) 
  • 55 g macadamia or coconut oil (¼ cups) - melted
  • 85 g rice malt syrup, honey or maple syrup (¼ cup approx.)
  • 1 tsp vanilla -powder, extract or essence
  • 1 lemon/s -finely grated zest of whole lemon plus 1 tbsp juice (very important or they will spread)
  • 12 macadamia nuts (optional) to finish

Instructions

  • Preheat your oven to 150℃/300°F (fan-forced).
  • In a mixing bowl or food processor, combine all of the ingredients above until well combined (if using a Thermomix, mix 5-10 seconds, speed 5).
  • If the dough feels too moist or oily, add more almond meal until it is thick and comes together easily.
  • Roll tablespoons of the mix with wet hands or just drop blobs onto a tray lined with baking paper.
  • Flatten with and top with a macadamia nut.
  • Bake for 15 minutes or until just starting to brown lightly on top. 
  • Allow to cool on the tray (they will firm up as they cool). Enjoy!

Store

  • Airtight in the fridge or freezer.

Notes

Low-fructose

Choose brown rice syrup as your sweetener.

Vegan

Choose rice malt or maple syrup as your sweetener.

Nut-free

Sorry, this is not the recipe for you (but there are plenty of nut-free options on the website). For 150 pages of nut-free recipes, take a look at my super popular ebook 'The Well Nourished Lunchbox'. Click HERE to find out more and read the rave reviews.


What do you think of these beauties? I'd love your feedback in the comments below! 

Asian Noodle Soup (supercharged gluten and grain free version)

February 27, 2014 | Make-ahead Meals, Chicken, Freezable Meals, Soups

This Asian Noodle Soup is dairy-free, gluten-free and grain-free and one of the most nutritious and nourishing meals about. When the weather is hot and humid as it is at this time of year, I often crave a simple soup. Not a heavy chunky or blended soup but an Asian style spicy broth.

As I like to make everything I feed my family as nourishing and tasty as possible, I’m always looking for new and interesting ways to do so. So here it is and as always, with lots of versions to suit your taste and dietary requirements.

Health benefits

Starting with bone broth, the most nourishing  ‘super food’ and digestive tonic of all. For all you need to know about bone broth and how to make it click here. Next is one of my favourite ingredients – rehydrating and mineral rich coconut water! For why it is so very nutritious, click here. A good dose of protein (about 35-40 grams per serve) and stacks of vegetables…what more could you ask for from a meal?

Ingredients

The mix of fresh ginger, garlic, fish sauce, and kaffir lime leaves adds incredible depth to the broth. Whether you use zucchini noodles or opt for rice noodles, this recipe is super versatile. You can adjust the noodles and vegetables to suit your preferences or dietary requirements. I love this made with bok choy or baby spinach, shiitake mushrooms, broccoli and snow peas or beans)

How to make this

Start by simmering your chicken in a delicious broth of chicken stock, ginger, garlic, red onion, and kaffir lime leaf. Once cooked, shred the chicken and set it aside. Add your vegetables, noodles, and coconut water to the broth, bringing everything to a simmer before seasoning with lime juice, fish sauce, and chilli to taste. Divide the broth, chicken, and veggies between bowls and garnish with fresh herbs for a refreshing finish.

Serving suggestions and how to store

Serve this soup steaming hot with fresh chilli and a generous handful of Vietnamese mint, Thai basil or coriander (cilantro). If you have any leftovers, store them in an airtight container in the fridge or freezer for a quick and easy meal later. It’s perfect for meal prep!

Vary this to suit your dietary needs

For a gluten-free version, opt for gluten-free noodles, or go grain-free with zoodles or konjac noodles. Vegetarians can swap the chicken for tofu or egg, and vegans can add extra mushrooms and tempeh, using a vegetable broth and sea salt in place of fish sauce.

Take a look at the variations (below the main recipe) for suggestions to alter the recipe to suit your specific dietary requirements.

Asian Noodle Soup
Print Recipe
4.84 from 6 votes

Asian Noodle Soup - (supercharged gluten and grain free version)

This Asian noodle soup is the perfect comfort dish when you're craving something nourishing and delicious. Loaded with fresh veggies, tender chicken, and the unique balance of coconut water and lime, it’s a simple and wholesome meal that’s perfect for any time of year. Plus, you can easily tweak the ingredients to suit your dietary needs.
Prep Time15 minutes mins
Cook Time15 minutes mins
Total Time30 minutes mins
Course: Soup, Main Course
Servings: 4

Ingredients

  • 400 ml chicken broth or stock -or chicken stock
  • 330 ml coconut water
  • 1 tbsp ginger root -peeled and finely grated
  • 2 clove/s garlic -peeled and finely sliced
  • 1 red onion/s -peeled, halved and finely sliced
  • 1 tbsp fish sauce
  • 1 kaffir lime leaf (optional but recommended)
  • 500 g chicken thigh or breast
  • 2-3 cup/s vegetables (I've used sliced carrot, broccoli florets, shitake mushrooms, snow peas)
  • 200 g noodles (of your choice) (I used a mix of zucchini noodles and a small pack of konjac noodles which are grain free and very much like a rice noodle, available in the health section of the supermarket or health food shops).  You could also use rice noodles which are available in the Asian section of the supermarket.
  • 1 lime/s -juice
  • 1 red chilli/s -or chilli flakes, to taste
  • ¼ bunch/s fresh Vietnamese mint leaves -or regular mint, coriander leaves and Thai basil are delicious (but optional)

Instructions

  • In a medium size pot, add the broth, ginger, garlic, red onion, kaffir lime leaf and fish sauce and bring to a slow simmer.
  • Drop in your chicken and simmer until the chicken is cooked through. Remove the chicken to a plate and shred or slice. Set aside.
  • Now add your vegetables and simmer for a few minutes until they are just starting to soften. If you are using zucchini noodles, add these now too.  
  • Add the coconut water and lime juice and bring back up to a simmer and take off the heat immediately.
  • Taste it and make sure it has a nice balance of sweetness (from the coconut water), saltiness from the fish sauce and sour from the lime juice. Adjust any of the flavours if needed.
  • In a deep bowl place your rinsed and drained konjac noodles (or softened rice noodles). Pour over the broth and divide your vegetables and chicken (returning any juices from cutting) between the bowls.  
  • Garnish with chilli and fresh Asian herbs.

Tip

  • You can also make this using left over cooked chicken. If you do this you can skip the second stage of the method.

Make ahead

  • Re-heat in a pot over a low heat until just hot.

Store

  • Store in an airtight container in the fridge or freezer.

Notes

Gluten-free

Choose a gluten-free noodle.

Grain-free

Choose a grain-free noodle like zoodles.

Coconut-free

Replace the coconut water with more broth.

Vegetarian

You can substitute the chicken with egg (I'd make a thin omelette and add that sliced) and replace the fish sauce with a good pinch of sea salt. Use a vegetable broth to replace the chicken broth.

Vegan

Add extra mushrooms and tempeh and replace the fish sauce with a good pinch of sea salt. Use a vegetable broth to replace the chicken broth.

Onion and garlic-free

Replace the onion and garlic with an extra 2 cm piece of ginger.
 

Like this recipe or have a question? Post in the comments below.

Healthy Mayonnaise Recipe (and loads of ways to use it)

February 25, 2014 | Dips, Sauces and Dressings, Staples

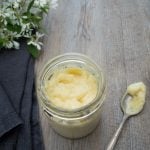
Mayonnaise is a fabulous and versatile condiment to have in the fridge. In this post I’m going to discuss why this homemade healthy mayonnaise recipe is good for you, give you a recipe and of course several variations and ways for using it.

Once I learned just how damaging vegetable oils are, mayonnaise was the one food I just couldn’t find that was made with an oil I was happy to ingest (or expose my kids to). I had periodically made mayonnaise in the past, but like any busy mum, sometimes the little things have got to give, and that was often mayo.

At the end of the day, it does only take 5 minutes to make and should last 7-14 days (the fresher your egg yolks, the longer it will last so perhaps go by their expiry date). According to Sally Fallon, from “Nourishing Traditions”… if you stir a tablespoon of whey into your homemade mayonnaise, and leave it out of the fridge for about 7 hours, then refrigerate it, it will last for a couple of months (and provide a dose of probiotics too).

*Since writing this post there are a few store bought brands that are free of vegetable oils – Gevity Good Guts Mayo and also Undivided Food Co make a great mayo and aioli. 

So why you should avoid shop bought varieties and make your own ‘healthy’ mayo?

Let’s start with the cheap and nasty vegetable oils (technically seed oils) most mayo’s are made with. I’ve spoken already extensively about why vegetable oils are dangerous to our health (catch up on why here).

I am yet to find a mayonnaise made with any of the oils I feel happy ingesting – that is extra virgin olive oil, macadamia nut oil or avocado oil (if you have please let me know). Also, commercial mayonnaise has become a dumping ground for sugar with many ‘lite’ or ‘low fat’ varieties containing as much sugar as a can of Coke. Once more, to  allow for storage, commercial mayo’s are pasteurised to destroy bacteria (good and bad).

Home made mayo on the other hand provides a good dose of healthy fat, a little protein and if you choose to ferment it (by adding whey), some probiotic digestive support too. More on how to source whey HERE.

Ingredients

You’ll need one egg yolk, dijon mustard, lemon juice (or apple cider vinegar), your preferred oil (like olive or macadamia oil), sea salt, and black pepper. Optional ingredients include whey for added probiotics or garlic to turn it into aioli. Remember you oil will take on the flavour of the oil you use, so choose and oil you enjoy the flavour of.

How to make this healthy mayonnaise recipe

In a food processor, mix the egg yolk, mustard, lemon juice, and seasoning. Slowly drizzle the oil in while the processor runs, ensuring it emulsifies properly. If your mayo separates, don’t worry—just start over with a new egg yolk and reintroduce the mixture slowly.

To make mayonnaise with an immersion blender, start by placing the egg yolk, mustard, lemon juice (or vinegar), salt, and pepper into a tall, narrow container. Pour the oil on top but don’t stir. Insert the immersion blender all the way to the bottom of the container, then turn it on and hold it still for about 10-15 seconds until the mayonnaise starts to form. Once it begins to emulsify, slowly lift the blender upwards, blending the remaining oil until smooth and creamy. Adjust seasoning to taste and your homemade mayo is ready!

Ways to use your homemade mayonnaise

  • I often use it to bind boiled egg or tuna in my kids sandwich, sushi or fresh spring rolls.
  • As a salad dressing.  Nothing like a good old coleslaw or potato salad made with real mayo (my Middle Eastern Potato salad is the bomb if you’d like the recipe, click here).  I also mix a tablespoon of mayo with the zest and juice of one lemon to dress salads.  This is especial nice over roast or steamed vege salads.
  • Mix it with pesto to make a creamy dipping or pasta sauce.
  • Make a tartare sauce – mix in lemon zest and diced caper berries for a delicious fish sauce.
  • Serve with a baked potato.

How to store this healthy mayonnaise recipe

Keep it in an airtight container in the fridge, and it should last up to 14 days, depending on the freshness of the eggs. For an even longer shelf life, ferment it by adding whey.

Vary this to suit your dietary needs

For a vegan version, try this Cashew Cream recipe (savoury version). You can also add roasted garlic for a delicious aioli, or blend in pesto for a creamy dip. If you’re out of mayo, Greek yogurt or labne can be a fantastic substitute!

Take a look at the variations below for all the details as well as suggestions to alter the recipe to suit your specific dietary requirements.

Mayonnaise
Print Recipe
3.40 from 5 votes

Healthy Mayonnaise Recipe (and loads of ways to use it)

Homemade mayonnaise is a quick and easy condiment that not only tastes better than store-bought but also gives you control over the ingredients. With just a few pantry staples, you can whip up a healthier version that’s free of questionable oils and excess sugar. Once you make your own mayo, you'll never look back!
Prep Time10 minutes mins
Total Time10 minutes mins
Course: Side Dish
Servings: 1 cup

Ingredients

  • 1 egg/s -room temperature, yolk separated from the white
  • 1 tsp dijon mustard
  • 1 tbsp lemon juice -or apple cider vinegar
  • 250 ml oil of choice (1 cup) extra virgin olive oil or macadamia nut oil (remember the mayo will take on the flavour of the oil you choose to use)
  • Sea salt and freshly ground black pepper -to taste
  • 1 tbsp whey (optional), link to whey above.
Metric - US Customary

Instructions

Make with a food processor

  • In a food processor mix the egg yolk, mustard, lemon juice or vinegar, seasoning and whey (if you choose to).
  • Whilst the blade is moving, begin to add your oil in a very slow trickle over the next 4-5 minutes.
  • If you add it too fast the mayonnaise will separate. If this happens, remove the split mix into another jug.  Put another egg yolk into your processor and very gradually add the split mixture, drop by drop.  This should salvage it.
  • You can also beat by hand, though it's best to have someone else pouring the oil as you beat.

Thermomix

  • Measure out your oil into a clean jar that you will use for storing the mayonnaise. Insert butterfly into your thermomix bowl.
  • Add egg yolk, mustard, lemon juice, seasoning and whey (if using) into thermomix bowl. Blend 10 seconds, speed 4, MC on.
  • Turn the MC upside down in the lid. Put the thermomix onto speed 4, and over the next 3 minutes, slowly drizzle the oil over the MC so that the oil drips into the bowl.

Make with an immersion blender

  • Start by placing the egg yolk, mustard, lemon juice (or vinegar), salt, pepper and whey if using into a tall, narrow container.
  • Pour the oil on top but don't stir. Insert the immersion blender all the way to the bottom of the container, then turn it on and hold it still for about 10-15 seconds until the mayonnaise starts to form.
  • Once it begins to emulsify, slowly lift the blender upwards, blending the remaining oil until smooth and creamy. Adjust seasoning to taste and your homemade mayo is ready!

Store

  • Store in an airtight container in the fridge. The shelf life of this mayonnaise will depend on the freshness of the egg you have used so check the use-by date on the carton. If a freshly collected backyard chook egg, you can probably allow 4 weeks.

Notes

Egg-free and vegan

Jo from Quirky Cooking has that covered, find the fabulous recipe here.

Garlic Aioli

Mix in crushed garlic or I prefer roasting a clove and squeezing the delicious mushy centre into my mayo.

If you don't have any ready-made, you might like to substitute with...

Natural or Greek yoghurt or labne is my favourite mayo substitute when I need to make one of the above but haven't any mayo ready to go.


Any questions or ways you use mayonnaise? Love you to post a comment below...

Raw Strawberry Cheesecake (vegan)

February 11, 2014 | No-bake Sweets, Desserts

Valentines Day is upon us, so I thought I’d share this easy to prepare low-fructose, gluten free raw vegan strawberry cheesecake.  Nothing says I love you like chocolate and strawberries…or this delicious, healthy dessert.

This vegan Raw Strawberry Cheesecake is a no-bake dessert that’s not only delicious but also super easy to whip up. With a nutty, chocolatey base and a creamy strawberry filling, it’s the perfect summer treat. Whether you’re hosting guests or treating yourself, this cheesecake is sure to impress. It’s also dairy-free, gluten-free and grain-free and suitable for vegan and paleo diets.

A treat that is also nourishing!

Yep, this is so healthy, you serve it up to your loved one for breakfast! The base is a combination of nuts and flaxseed for healthy oils, minerals and fibre. The cacao contributes antioxidant rich chocolate flavour and the coconut products are antimicrobial, anti-inflammatory and healing to the digestive system. The filling is a dairy free combination of cashew nuts (more essential minerals, protein, fats and fibre), highly nutritious coconut water and antioxidant-rich strawberries.

Ingredients

Hazelnut meal, flaxseed, cacao powder, desiccated coconut, coconut oil, rice malt syrup (or honey or maple syrup) for the crust. Raw cashews, fresh strawberries, chia seeds, vanilla extract, and coconut water form the cheesecake filling ingredients. This all comes together to create a luscious, refined-sugar-free raw dessert that tastes amazing.

How to make this vegan cheesecake

Start by preparing the base, mixing together your hazelnut meal, flaxseed, cacao, and coconut with coconut oil and sweetener until it forms a sticky dough. For the filling, blend soaked cashews, strawberries, chia seeds and coconut water in a blender or food processor  until it has a smooth, creamy texture. Layer the chocolate base in glasses, top with the creamy strawberry mixture, and chill until set! If you own a Thermomix, we’ve also included Thermomix instructions for this recipe.

Serving suggestions and how to store

Serve this raw cheesecake chilled, garnished with fresh strawberries or even some shaved dark chocolate for an extra indulgence. To make it extra decadent you could whip up some coconut cream to serve too. Store any leftovers in an airtight container in the fridge for up to 3 days.

Vary this raw strawberry cheesecake to suit

Substitute hazelnut meal with almond meal or swap cashews for macadamias for a different twist. If you’re vegan, stick to using maple syrup or rice malt syrup as your sweetener for a completely plant-based dessert. Check out the variations below the main recipe for tips on how to adapt it to your specific dietary needs.

For more delicious, healthy and easy to make wholefood treats, click HERE.

Vegan Strawberry cheesecake
Print Recipe
5 from 2 votes

Raw Strawberry Cheesecake

This Raw, vegan Strawberry Cheesecake is a simple, healthy dessert that is sure to become a crowd pleaser. 
Prep Time15 minutes mins
Chill1 hour hr
Total Time1 hour hr 15 minutes mins
Course: Dessert
Servings: 4 small serves

Ingredients

Base

  • 80 g hazelnut meal (½ cup)
  • 15 g flaxseed (2 tablespoons) ground
  • 15 g cacao powder (2 tablespoons)
  • 15 g desiccated coconut (2 tablespoons)
  • 30 g coconut oil (2 tablespoons)
  • 65 g rice malt syrup, honey or maple syrup (3 tablespoons)

Strawberry cream filling

  • 150 g raw cashew nuts (1 cup) raw and soaked for 2-3 hours in water and drained
  • 150 g fresh hulled strawberries (the more flavoursome the strawberries, the better this will be)
  • 1 tbsp chia seeds -preferably white
  • 1 tbsp rice malt syrup, honey or maple syrup
  • 1 tsp vanilla -powder, extract or essence
  • 3 tbsp coconut water

Instructions

For the base

  • In a bowl or food processor, combine your hazelnut meal, flaxseed meal, raw cacao and coconut. If using a Thermomix, 30 seconds speed 6.
  • Add the coconut oil and rice malt syrup and mix until well combined and the mixture holds together when pressed. If using a Thermomix, 20 seconds, speed 4.

For the filling

  • Process the soaked (drained) cashews until smooth and creamy. If using a Thermomix, 1 minute speed 6 (scraping the sides).
  • Add the strawberries and process again. If using a Thermomix, 10 seconds speed 6.
  • Add the chia, vanilla, and  coconut water and process until smooth. If using a Thermomix, 10 seconds speed 6.
  • Assemble in a small glass by pressing the chocolate base into the glass and top with the strawberry cream.
  • Chill until set, garnish with heart shaped strawberry halves and serve immediately.

Store

  • Store in an airtight container in the fridge.

Notes

Another nut combo

You can sub the hazelnut meal for almond meal and macadamia nuts can sub the cashew nuts

Vegan

Choose rice malt or maple syrup as your sweetener.
 

I love to receive feedback on all of my recipes and posts.  You can leave your comment below...

Best Basil Pesto (and the healthiest)

January 30, 2014 | After School Snacks, Savoury Snacks, Dips

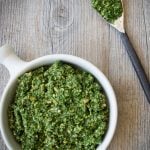
My Best Basil Pesto recipe is a delicious, nutrient-packed twist on the classic pesto, combining fresh basil, kale, and toasted nuts or seeds. Whether you’re using it as a dip, tossing it through pasta, or spreading it on toast, this pesto is bursting with flavour and can be tailored to suit various dietary preferences. 

So what makes this pesto so healthy?

Let’s start with the hero of the dish, basil. Basil is a rich source of many essential vitamins and minerals and antioxidant flavonoids, two of which have been shown to protect cells and DNA from radiation. Seeing as we are surrounded by radiation from the various forms of (mostly wireless) technology to which we have grown accustomed, this is surely a good thing.

Kale, well other than being the most fashionable vegetable on the planet right now, it is very nourishing (especially in the calcium and iron department) and adds another dimension of health giving nutrients. For this reason, I add it to my pesto as it’s flavour sits well behind the very pungent basil. For kids, this means they don’t know they are eating a vegetable they might ordinarily, never touch.

One more ‘Well Nourished’ touch is that I add sunflower seeds, again, more nutrition than using just one nut! Though I have added a nut-free version below for school lunch box inclusion.

This homemade basil pesto is so much better than store-bought for several reasons. First, it’s fresher, allowing you to control the quality and quantity of ingredients like fresh basil, kale, and olive oil. You skip the preservatives and crappy vegetable oils often found in store-bought versions, ensuring a healthier, more delicious pesto. Plus, you can customise it to your taste—whether you prefer a chunkier texture, extra garlic, or a dairy-free version. The flexibility to tailor it to dietary needs, what you have in the pantry and use seasonal ingredients makes it far more nutritious and delicious than anything you’ll find on the shelf!

Ingredients

You’ll need fresh basil, kale, garlic cloves, parmesan (or nutritional yeast for a dairy-free option), sunflower seeds, cashews, olive oil, and a squeeze of lemon juice. Optional extras like chilli or capsicum can give it an extra kick!

How to make this pesto sauce

Simply blend or pulse all your ingredients in a food processor or mortar and pestle to your desired texture. For a coarse pesto, pulse less; for a smoother finish, pulse more. Finish it with a generous squeeze of lemon juice and season to taste.

If you own a Thermomix, we’ve also included Thermomix instructions for this recipe.

Serving suggestions and how to store the best basil pesto recipe

Drizzle with olive oil and store in an airtight container in the fridge for up to a week, or store in the freezer in a jar or ice cube trays for easy use. Try it mixed through pasta, as a dip, on grilled meats, or in sandwiches—the options are endless!

Vary this to suit your dietary needs

For a dairy-free or vegan pesto, swap out the parmesan for nutritional yeast. Nut-free? Replace the cashews with more sunflower seeds. You can even replace the sunflowers and cashew nuts with almonds, walnuts or pine nuts. You can also substitute kale with spinach for a milder flavour!

Take a look at the variations (below the main recipe) for suggestions to alter the recipe to suit your specific dietary requirements.

This is the best basil pesto recipe, definitely the most nourishing! Gluten-free, grain-free, nut and dairy-free options & vegan version too
Print Recipe
4.50 from 10 votes

Best Basil Pesto (and the healthiest)

This basil pesto recipe is certainly the best tasting and the most nourishing recipe about! It's a great way to include healthy greens in your families diet. 
Prep Time15 minutes mins
Total Time15 minutes mins
Course: Appetizer, Snack
Servings: 1 cup

Ingredients

  • 1 clove/s garlic -peeled and crushed
  • 50 g parmesan cheese -finely grated (dairy free version below)
  • 1 bunch/s fresh basil leaves
  • 2 stem/s kale (leaves torn from the stems)
  • 30 g sunflower seeds (¼ cup) lightly toasted
  • 30 g raw cashew nuts (¼ cup) lightly toasted
  • Sea salt and freshly ground black pepper -to taste
  • 3 tbsp extra virgin olive oil -extra virgin
  • ½ lemon/s juice, zest optional

Optional Extras

  • 1 red chilli/s (or even half a red capsicum for a vitamin C boost)

Instructions

  • You can make this in a mortar and pestle but I prefer to use my Thermomix (or any good food processor will do the job) as I like a textured pesto.  I tend to use the pulse (turbo) function so I can control the texture I'm after.  If you like a course pesto like me, process less, for a smooth pesto, process more.
  • You can grate and crush your parmesan and garlic by hand or in your food processor. If using a Thermomix 10 seconds, speed 6.
  • Add the basil and kale. Pulse until almost chopped. If using a Thermomix 2-3 pulses.
  • Then add the cashews and sunflower seeds. A couple more pulses should see it combined nicely. If using a Thermomix 2-3 pulses.
  • Lastly, season well and mix with your lemon juice and EV olive oil. If using a Thermomix 10 seconds, reverse speed 3.

Store

  • Drizzle with a little olive oil to seal it and prevent it discolouring.
  • Store in an airtight container in the fridge.
  • Can also be frozen in a airtight container or even in ice-cube trays (and then cubes put into an airtight container once frozen).

Notes

Dairy-free and vegan

Omit the parmesan. I'd suggest adding a couple of tablespoons of nutritional yeast for cheese flavour and even a handful of ground macadamia nuts to replace the parmesan, but that's optional too.

Replace the kale with spinach

Which is also very nutritious and I think has a much milder flavour than kale.

Nut-free

Replace the cashews with the same amount of sunflower seeds.

Different nuts

This is also great made with pine nuts, or walnuts or almonds too.

Ways to eat it...

  • As a delicious, nourishing dip. It often features in my kids lunch boxes (the nut free version) with raw veggie sticks.
  • Mixed through pasta or zucchini noodles (for a grain and gluten free option). Add a little extra olive oil to the pesto to coat the pasta evenly and I also often toss through some chopped tomato to create a special meal. A pesto noodle salad is great for school lunch boxes.
  • With Quinoa or brown rice for added flavour and nutrition.
  • Use as a dressing to liven up steamed veggies or create a special salad. Mix one tablespoon of pesto with one tablespoon of olive oil and a little extra lemon juice (if you like) and mix through the vegies or salad leaves.
  • In a sandwich or on toast (with avocado - yum). Add a poached egg for a protein hit!
  • Spread over grilled haloumi.
  • In a tuna vegetable bake or a casserole.
  • Over grilled or BBQ'd meat or fish.
  • On top of a slice of tomato and slice of buffalo mozzarella i.e. Caprese style.
  • On pizza.
  • In a jacket potato or mixed through diced potatoes for an exciting potato salad
  • I could go on and on here…you are only limited by your imagination. Any Mediterranean flavoured meal will suit a blob of this nourishing Basil pesto.


Share how you eat pesto. Post a comment below, it's simple.

Hazelnut Chai Spice Cookies

January 20, 2014 | After School Snacks, Baked Sweets

These Hazelnut Chai Spice Cookies are the perfect blend of warm, cozy spices and nutty goodness. They’re a simple, wholesome treat you can whip up in no time, making them a great snack or treat option. With flavours of cinnamon, cardamom, and ginger, these cookies are ideal for the colder months or whenever you crave something warming.

They are also gluten-free, dairy-free, grain-free, egg-free and low fructose. They only take minutes to make and are the perfect after school snack or weekend treat for the kids.

Health benefits

Made with hazelnut meal and natural sweeteners, these cookies offer a nutrient-dense alternative to traditional treats. The hazelnuts are a rich source of protein, essential fats, and fibre. They also contain antioxidants and many minerals. The coconut oil is so very nourishing. The cinnamon stabilises blood sugar levels for a sustained release of energy. The ginger and cardamon are warming spices that support digestion.

Ingredients

You’ll need hazelnut meal, coconut oil, rice malt syrup or honey, vanilla extract, cinnamon, cardamom, ground ginger, and a bit of tea or water to bring it all together. This mix creates a rich, spiced flavour profile with a chewy texture.

How to make Hazelnut Chai Spice Cookies

In a medium bowl or food processor, combine all the ingredients until well mixed. Roll tablespoons of the mixture into balls and place them on a baking sheet (tray) lined with baking paper (parchment paper). Flatten each one with a fork and sprinkle a little extra cinnamon on top if you like. Bake at 150℃ for around 15 minutes until golden. They firm up as they cool.

Serving suggestions and how to store

These cookies are best enjoyed fresh out of the oven (once cooled) but can be stored in an airtight container in the fridge or freezer. They make a great addition to your afternoon tea or as a sweet treat any time of day.

Vary these Hazelnut Chai Spice Cookies to suit your needs

To make these Hazelnut Chai Spice Cookies low-fructose, opt for brown rice syrup instead of honey. For a vegan option, choose rice malt or maple syrup as your sweetener. You can even throw in some cacao nibs or dark chocolate for a chai-spiced chocolate twist! No hazelnut meal? Almond flour or meal works just as well.

Take a look at the variations (below the main recipe) for suggestions to alter the recipe to suit your specific dietary requirements.

For more delicious, healthy and easy to make wholefood treats, click HERE.

Hazelnut Chai Cookie
Print Recipe
5 from 5 votes

Hazelnut Chai Spice Cookies

The chai and hazelnut flavours in this Hazelnut Chai Spice Cookies are a match made in heaven. They are easy to make and really delicious!
Prep Time10 minutes mins
Cook Time15 minutes mins
Total Time25 minutes mins
Course: Snack
Servings: 12 cookies

Ingredients

  • 150 g hazelnut meal (1¼ firmly packed cups)
  • 55 g coconut oil (¼ cups) melted if solid
  • 85 g rice malt syrup or honey (¼ cup approx.)
  • 1 tsp vanilla -powder, extract or essence
  • 1 tsp ground cinnamon
  • 1 tsp ground cardamom
  • ½ tsp ground ginger
  • 1 tbsp tea -or water (this is important or they will spread)

Instructions

  • Preheat your oven to 150℃/300°F (fan-forced).
  • In a mixing bowl or food processor, combine all of the ingredients above until well combined (if you have a Thermomix mix 5-10 seconds, speed 5).
  • Roll tablespoons of the mix in your hands and place them onto a tray lined with baking paper (parchment paper).
  • Flatten with the back of the fork. Sprinkle a little extra cinnamon on top (optional).
  • Bake for 15 minutes or until starting to brown on top.

Store

  • In an airtight container in the fridge or freezer.

Notes

Low-fructose

Use the brown rice syrup, not honey.

Vegan

Choose rice malt or maple syrup as your sweetener.

Choc-Chip Chai

Add cacao nibs or a piece of dark chocolate. SO yum!

No hazelnut meal?

You can use almond meal instead.

Coconut-free

Replace with macadamia nut oil.
 

I love these cookies, I hope you do to? As always I'd love your feedback. Please post a comment or rate this recipe below.

Summer Berry Spritz

January 6, 2014 | Drinks & Smoothies

This Summer Berry Spritz is a refreshing, hydrating drink perfect for hot days. Packed with the natural sweetness of berries and the subtle citrusy kick from lemongrass, it’s a light and delicious way to stay cool. Whether you’re enjoying a picnic or just need a quick refreshment, this spritz is your summer go-to.

Health benefits

The coconut water is nature’s power-ade, naturally hydrating and rich in electrolytes and I’ve written about its wonderful benefits here.  The berries are fabulous antioxidants and the lemongrass is antimicrobial.

Ingredients

You’ll need chilled coconut water, frozen mixed berries, fresh mint leaves, and some lemongrass stalks. These simple ingredients come together to create a delicious, hydrating beverage with minimal effort.

How to make Summer Berry Spritz

Divide the coconut water, fresh berries or frozen, mint, and lemongrass stalks between glasses. Once the berries start to soften, use the bruised end of the lemongrass to prod and release their flavours. Add more ice if needed and serve immediately for a cooling summer drink.

Serving suggestions and how to store

This spritz is best served fresh to enjoy the full flavour of the berries and herbs. If you have leftovers, you can store the mixture in the fridge for a few hours, but give it a good stir before serving. This spritz is perfect for outdoor gatherings or as a quick pick-me-up on a hot day.

Vary this to suit your dietary needs

If you don’t have lemongrass, lime wedges work just as well for a zesty twist. You can also recycle the lemongrass by steeping it in hot water to make a fragrant tea. Looking for a cocktail? Just add a shot of vodka for an instant summer-ready beverage!

Summer berry spritzer
Print Recipe
5 from 1 vote

Summer Berry Spritz

A refreshing, rehydrating summer mocktail or even cocktail, this Summer Berry Spritz is really delicious. 
Prep Time5 minutes mins
Total Time5 minutes mins
Course: Drinks
Servings: 4

Ingredients

  • 700 ml coconut water -chilled
  • 50 g frozen mixed berries (½ cup)
  • 4 sprigs fresh mint leaves
  • 4 stick/s lemongrass -washed and the fat end crushed and bruised (I just bash it with the rolling pin)

Instructions

  • Divide your ingredients between the glasses.
  • As the berries start to soften, prod them with the bruised end of the  lemongrass stalk. This realises the lovely flavours of both the berries and the lemongrass.
  • Add more ice if required and serve immediately.

Notes

No lemon grass?

You could substitute with quarters of lime.

Recycle

Waste not! Recycle the lemon grass by folding it up and placing in a plunger and cover with boiling water to make lemongrass tea.

Make a Cocktail

Add a shot of vodka for a refreshing, sugar-free summer cocktail.
 

Love your feedback on this refreshing little number! Post a comment. 

Pomegranate Maple Spiced Walnut Salad

December 11, 2013 | Vegetarian, Salads

This Pomegranate Maple Spiced Walnut salad recipe makes a simple yet fabulous edition to the Christmas table. Nothing screams Christmas to me like pomegranate. It lends such a beautiful colour, texture and flavour to a salad and really compliments traditional Christmas meats. Once more it is so very healthy and nourishing.

I am especially fond of this flavoursome fruit as I grew up with a pomegranate tree in my Nans backyard – in fact, not only did it provide much childhood nourishment, but also shade from the hot Perth sun. We had many Christmas celebrations under its canopy, so lots of nostalgia for me from these beautiful red pearls of sweet juice.

This salad is especially good for feeding a group because it can  be largely pre-prepared and simply assembled just prior to serving.

Health benefits

This Pomegranate Maple Spiced Walnut salad packs a punch with its mix of nutrient-rich greens, healthy fats from walnuts and olive oil, and a variety of vitamins and antioxidants from the pomegranate seeds. Plus, it’s light, fresh, and super satisfying.

Ingredients in this Pomegranate Maple Spiced Walnut Salad

You’ll need baby spinach, pomegranate seeds, soft goat’s cheese, and homemade candied walnuts for this salad. The candied walnuts are tossed in a mix of coconut oil, maple syrup, and spices, adding a delicious crunch. The dressing is a simple yet delicious blend of extra virgin olive oil and raspberry vinegar.

How to make this healthy, delicious pomegranate salad recipe

Start by making the candied walnuts—toss them in coconut oil, syrup, and spice, then bake on baking paper (parchment paper) for 15 minutes at 150°C. For the dressing, shake olive oil, raspberry vinegar, and seasoning in a jar. When you’re ready to serve, place the spinach in a large salad bowl, drizzle over the dressing and toss, then top with candied walnuts, pomegranate seeds and goat’s cheese.

Serving suggestions and how to store

This Pomegranate Maple Spiced Walnut salad recipe is best served fresh, but you can prep the walnuts and dressing in advance to save time. Store the walnuts in an airtight container and the dressing in the fridge. If you have leftovers, keep them chilled and enjoy them within a day or two.

Vary Pomegranate Maple Spiced Walnut Salad recipe to suit

For a dairy-free or vegan option, replace the goat’s cheese with a plant-based alternative. If you’re looking for a fructose-friendly version, opt for rice malt syrup instead of maple syrup. No pomegranate? Swap it out for seasonal fruits like plums or pears. This salad even works great as a Boxing Day meal by adding leftover turkey or ham! I’ve also made it with rocket (arugula) instead of spinach and it’s delicious.

Take a look at the variations (below the main recipe) for suggestions to alter the recipe to suit many specific dietary requirements.

This Pomegranate Maple Spiced Walnut Salad recipe is simple, healthy & very delicious. Its perfect for a Christmas feast.
Print Recipe
5 from 1 vote

Pomegranate Maple Spiced Walnut Salad

This Pomegranate Maple Spiced Walnut Salad is a simple yet vibrant dish that's perfect for any occasion. With fresh spinach, juicy pomegranate seeds, creamy goat’s cheese, and crunchy candied walnuts, it’s a balance of sweet, savoury, and tart flavours that’s sure to impress.
Prep Time15 minutes mins
Cook Time15 minutes mins
Total Time20 minutes mins
Course: Salad
Servings: 4

Ingredients

  • 50 g baby spinach (approx.) washed and dried
  • 1 pomegranate -seeds
  • 100 g soft goats cheese (or you could use feta cheese)

Candied Walnuts (make in advance)

  • 60 g walnuts (1 cup)
  • 1 tbsp coconut oil -or macadamia nut oil
  • 2 tbsp rice malt syrup or maple syrup
  • 1 tsp mixed spice

Dressing (make in advance)

  • 6 tbsp extra virgin olive oil -extra virgin
  • 3 tbsp raspberry vinegar (you can sub red wine vinegar)
  • Sea salt and freshly ground black pepper -to taste

Instructions

Prepare the candied walnuts

  • Preheat your oven to 150 ℃/ 290℉.  Line a small baking sheet (tray) with baking paper (parchment paper).
  • Mix the oil and sweetener of your choice with the mixed spice and toss through the walnuts to coat them evenly.
  • Lay them in a single layer on the baking tray and bake for 15 minutes.
  • Allow to cool completely and store in an airtight container until the salad is ready to assemble.

Prepare your dressing

  • Shake the oil, vinegar, and seasoning in a jar until combined.
  • Taste and adjust the seasoning and / or vinegar to taste.  Set aside.

Then assemble the salad just prior to serving

  • Place the spinach leaves in the serving bowl and toss with the dressing to coat the leaves.
  • Top with the candied walnuts, pomegranate and goat's cheese.
  • Serve immediately. Enjoy!

Notes

Dairy-free and vegan

Replace the cheese with a vegan cheese.

Fructose friendly 

Choose rice malt syrup as your sweetener.

No Pomegranate 

Replace with sweet plums or pear (depending on your seasonal availability).

Boxing day salad

Make this salad on boxing day and add leftover turkey, ham or both to make a post-Christmas, refreshing salad meal.
For lots more sides and salad inspo, take a look at my hugely popular ebook ˜Well Nourished Sides and Salads’- where vegetables become the hero of the dish! It’s great value at just $9.95, click HERE to take a look.
 

I'd love to hear what you think of this salad? I just love its simplicity and flavours. Post a comment or rate this recipe below. 

Almonds – The Ultimate Snack (and three recipes)

December 5, 2013 | After School Snacks, Savoury Snacks

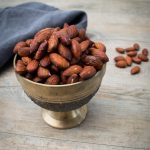
Roasted almonds are a quick, healthy, and delicious snack, but with these three flavour options—Tamari, Indian Spiced, and Sweet Spiced—you can easily switch things up. Whether you’re in the mood for something savoury, spicy, or a little sweet, this recipe has you covered.

Coming into the festive season, I thought I’d share some simple and delicious ways to prepare almonds for a healthy snack. These are just so easy to make and you can store them for long periods of time in airtight containers or jars (in the fridge or freezer is best). Double or triple the recipe to make in bulk. These are so much more delicious than anything you can buy.

They are also lovely tossed through salads (or the sweet almonds can be added to desserts).

Health benefits

Almonds are a delicious and highly nutritious food and you’ll see them feature in many of my recipes. The health benefits of protein and fibre rich almonds are many. Several studies have concluded that including almonds in your diet is protective against heart disease and diabetes. Recent research has found that including a handful of almonds in the diet of the participants, reduced hunger and did not contribute to weight gain. In fact, quite the opposite. Many studies suggest that those who include nuts in their diet regularly are less likely to gain weight.

But not all almonds are created equal, so when buying them, try to buy only raw and unsalted varieties (then flavour/ roast them yourself). The almonds in many of the ‘snack’ mixes are often roasted in vegetable oil or at very high temperatures (which is damaging to the fats in the nut) – that is they are quite processed.

Ingredients

For this recipe, you’ll need raw almonds and a few simple pantry staples like tamari, coconut oil, spices, and a sweetener of your choice. Each variation—Tamari, Indian Spiced, and Sweet Spiced—brings its own unique flavour twist to toasted almonds. And they all taste incredible!

How to make these toasted almonds (three ways)

Preheat your oven to 150°C and spread the almonds in a single layer on a baking tray. For the Tamari Almonds, toast the almonds for 5 minutes, drizzle with tamari, and roast for another 15-20 minutes. For Indian Spiced Almonds, mix coconut oil with spices, coat the almonds, and roast for 20 minutes. For Sweet Spiced Almonds, coat with coconut oil, sweetener, and spices, and roast for 20-30 minutes until crunchy.

Serving suggestions and how to store

Enjoy these roasted almonds as a snack on their own, or toss them into salads, grain bowls, or trail mix. Store them in an airtight container (a glass jar works well) in the pantry, fridge, or freezer to keep them fresh and crunchy.

Vary this to suit your dietary needs

For a soy-free option, replace tamari with coconut aminos and sea salt. If you’re avoiding coconut, swap the coconut oil for macadamia nut oil or olive oil. To keep it fructose-friendly, use rice malt syrup as the sweetener. And remember, you can apply these flavour mixes to any nut or seed you like – walnuts, hazelnuts, pecans and more! Take a look at the variations (below the main recipe) for suggestions to alter the recipe to suit your specific dietary requirements.

Roasted almonds
Print Recipe
5 from 2 votes

Roasted Almonds - three ways

Almonds are a great go-to snack for anyone looking for a nutrient-dense option. Roasting them with different spices and flavours not only adds variety but makes them even more enjoyable as a satisfying snack. Here are three moorish flavour combinations, feel free to increase the quantities as needed. 
Prep Time5 minutes mins
Cook Time20 minutes mins
Total Time25 minutes mins
Course: Snack
Servings: 1 cup

Ingredients

  • 150 g raw almonds (1 cup)

Tamari Almonds

  • 2 tbsp tamari (enough to just cover the nuts, not soak them)

Indian Spiced Almonds

  • 1 tbsp coconut oil (melted if solid)
  • ½ tsp garam masala
  • ½ tsp ground cumin
  • 1 pinch sea salt
  • 1 pinch cayenne pepper -optional for a bit of heat

Sweet Spiced Almonds

  • 1 tbsp coconut oil (melted if solid) or macadamia nut oil
  • 2 tbsp rice malt syrup, honey or maple syrup
  • ½ tsp ground cinnamon
  • ½ tsp mixed spice

Instructions

Tamari Roasted Almonds

  • Place raw almonds on a tray lined with baking paper (in a single layer).
  • Roast in a preheated oven (150℃ fan-forced)) for about 5 minutes.
  • Remove from the oven and drizzle with the tamari (enough to just cover the nuts, not soak them).
  • Return to the oven for another 15-20 minutes or until the almonds are crunchy and the tamari has formed a crunchy, salty coating.

Indian Spiced Almonds

  • Place almonds on a tray lined with baking paper. (in a single layer).
  • Mix together coconut oil (melted if solid), garam masala, cumin powder and a good pinch of sea salt and mix through the almonds until well coated.
  • For a bit of spice, add a pinch of cayenne pepper or chilli flakes too.
  • Roast in a preheated oven (150℃) for about 20 minutes or until the almonds are crunchy.

Sweet Spiced Almonds

  • Place raw almonds on a tray lined with baking paper (in a single layer).
  • Mix together coconut oil (melted if solid) or macadamia nut oil,  rice malt syrup (fructose free), honey or maple syrup, cinnamon and mixed spice.
  • Stir through the almonds until they are well coated.
  • Roast in a preheated oven (150℃) for about 20-30 minutes or until the almonds are crunchy.
  • As they cool the coating will harden to form a crunchy coating. Warning - these are very moreish!

Store

  • In an airtight container or jar in a cool pantry or the fridge or freezer.

Notes

Soy-free

Choose coconut aminos and sea salt to replace the tamari.

Coconut-free

Choose macadamia nut or olive oil instead of coconut oil.

Fructose-friendly

Choose rice malt syrup as your sweetener.

Any nut or seed will do

These mixes can be applied to any nut or seed.


Love to hear what you think of these flavour combinations?  Post a comment below.


Pine Lime Splice

December 3, 2013 | Drinks & Smoothies

This Pineapple Lime Smoothie is the perfect blend of tropical flavours to refresh and hydrate you on a warm day. With the tangy sweetness of pineapple, a splash of lime, and the hydrating goodness of coconut water, it’s an easy, delicious way to give yourself a little taste of summer any time of year.

Following on from my ‘Coconut Water‘ post, I thought I’d share one of my favourite summer smoothie combos – my Pine Lime Spice is simply delicious and a whole lot more medicinal than you’d think. I love the taste of coconut water though I know a few people who just don’t. So if you want to benefit from the impressive mineral profile and hydration from coconut water – without the taste, then try it in this delicious rehydration drink (or mixer).

Health benefits

The pineapple is very anti-inflammatory (thanks to the bromelain in it), supports digestion and reduces mucous production (this is a great drink if you have a cold, especially with the mint and ginger added). It is also a very rich source of Vitamin C along with the lime.  The coconut water, I’ve written about here.  Most of all, it is refreshing and  delicious!

How to make Pine Lime Slice

It’s as simple as blending! Toss your coconut water, pineapple chunks, fresh lime juice, vanilla, ice, and any optional ingredients like mint or ginger into a high-speed blender, and blend until smooth. Pour it into your favourite glass and enjoy right away.

Serving suggestions and how to store

Serve this vegan, dairy-free and gluten-free smoothie immediately for the best flavour, or freeze any leftovers into ice-block moulds for a refreshing snack later on. It’s also perfect as a quick and nutritious frozen popsicle treat on a hot day.

Vary Pine Lime Splice to suit your needs

If you want a minty twist, throw in a few sprigs of fresh mint. For more anti-inflammatory goodness, add some ginger or turmeric. If you’re not a fan of coconut water, swap it for nut milk (or greek yogurt), or for an adult version, add a shot of vodka for a tropical cocktail.

Pine lime splice
Print Recipe
4.80 from 5 votes

Pine Lime Splice

This Pine Lime Splice is one delicious, healing drink. It's so versatile so check out my variations to discover lots of ways to enjoy it. 
Prep Time5 minutes mins
Total Time5 minutes mins
Course: Drinks
Servings: 4

Ingredients

  • 350 ml coconut water (approx.)
  • ½ cup/s ice
  • 4-5 cm pineapple -diced and cored
  • ½ lime/s -juice
  • 1 tsp vanilla -powder, extract or essence
  • 3 sprigs fresh mint leaves - optional but delicious
  • 1 tbsp ginger root - optional but reccomended

Instructions

  • Throw it all into powerful blender or food processor and process at the highest speed until smooth and creamy.
  • Serve immediately.

Store

  • Leftovers can be frozen into little cups or ice-block moulds for a fast, healthy snack another day.

Notes

Make it minty

Add a few sprigs of fresh mint it's super delicious.

More anti-inflammatory

Add a little ginger and/or turmeric (about ½ tsp ground ginger and /or turmeric)/

Coconut-free

Replace the coconut water with a nut milk.

Ice blocks

Freeze it into ice block moulds for a refreshing, healthy, frozen treat. Even add cubes of pineapple into the mould for a bit of texture.

A tropical cocktail

Add a shot of vodka for a tropical inspired cocktail.

Add Protein

Mix in your favourite vanilla protein powder or this Power Booster.
 

How do you like this tropical delight? Love to hear what you think?


Download your FREE Immune Health Plan ebook – A practical guide filled with simple tips to help support your immune system so you and your family stay fighting fit this winter.

Cacao Rough (Raw Vegan Chocolate Slice)

November 27, 2013 | After School Snacks, No-bake Sweets

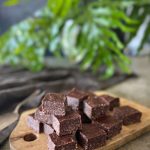
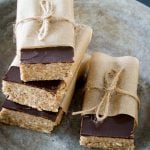
This Cacao Rough (raw vegan chocolate slice) is the ultimate treat for anyone looking for a quick and easy chocolate fix that’s also nourishing! Made with wholesome ingredients, it’s perfect for satisfying your sweet tooth while still keeping things healthy. Plus, it’s raw, vegan and gluten-free making it suitable for a variety of diets and a bit of a change from many dried fruit, high sugar energy ball or bar recipes about.

I think they are so delicious – a bit of a cross between a coconut rough and chocolate crackle. There’s something distinctly nostalgic about these beauties.

Health benefits

This delicious chocolate slice features almond meal for a protein boost (about 2 grams protein per serve), good fats and mood elevating amino acids and minerals. While cacao powder offers antioxidants that many chocolate lovers appreciate. The coconut oil adds healthy fats, and chia seeds are a great source of omega-3 fatty acids, making this treat both tasty and nourishing. Plus it’s refined sugar-free for the win! Many people find dried fruit, particularly medjool dates, really set off sugar cravings and energy/concentration slumps. That’s why you largely won’t find date loaded sweet recipes here at Well Nourished. 

Ingredients

To whip up this scrumptious dairy-free treat, you’ll need almond meal, cacao powder, your choice of sweetener (like rice malt syrup, honey, or maple syrup), shredded coconut, coconut oil, optional chia seeds, and vanilla. Feel free to add extras like cacao nibs or a pinch of sea salt for that perfect sweet and salty combo.

How to make this raw vegan chocolate slice

Simply blend the almond meal, sweetener, coconut, coconut oil, chia seeds, raw cacao powder, and vanilla in a food processor, high speed blender or a mixing bowl until well combined. Press the mixture firmly into a lined tray with a spatula, sprinkle with cacao nibs and salt (optional), then pop it in the freezer for 10-15 minutes to set. The prep time is just so quick! Once firm, slice it into squares, and it’s ready to enjoy!

If you own a Thermomix, we’ve also included Thermomix instructions for this recipe.

Serving suggestions and how to store

These little squares of goodness are perfect for a quick snack or dessert – or anytime you have a chocolate craving! Store them in an airtight container in the fridge for up to a week or freeze them for longer-lasting treats. Just remember, they need to stay chilled or they might melt on warmer days.

Timesaving tip

I often double this recipe to make a bigger batch (trust me, you’ll be wanting more)!

Vary this raw vegan chocolate slice to suit your needs

For a refreshing twist, add peppermint essence for a minty flavour. If you want to go nut-free, substitute the almond meal with ground sunflower seeds. You can also make it low-fructose by using rice malt syrup, or swap cacao for carob powder if you prefer. And don’t forget, doubling the recipe is always a good idea—trust me, you’ll want more!

Check out the variations below the main recipe for tips on how to adapt it to your specific dietary needs.

AND if you love this but want more gut healing support, try these Peppermint Belly Bliss Bites.

For more delicious, healthy and easy to make wholefood treats, click HERE.

This raw vegan chocolate slice recipe is also dairy, gluten and fructose free and so simple to make. It's a delicious sweet treat.
Print Recipe
4.80 from 44 votes

Cacao Rough

This delicious Cacao Rough is the most satisfying chocolate treat. It is easy to make and the most delicious raw chocolate slice I have ever tried. 
Prep Time5 minutes mins
Chill30 minutes mins
Total Time35 minutes mins
Course: Snack
Servings: 20 squares

Ingredients

  • 100 g almond meal (1 heaped cup)
  • 30 g cacao powder (¼ cup) unsweetened Dutch process or raw
  • 85 g rice malt syrup, honey or maple syrup (¼ cup)
  • 50 g shredded coconut (1 cup)
  • 100 g coconut oil (½ cup)
  • 20 g chia seeds (¼ cup) optional
  • 1 tbsp vanilla -powder, extract or essence

Optional extras

  • 1 tbsp cacao nibs - add a nice crunch
  • Pinch sea salt -optional but I quite like a sweet and salty taste

Instructions

  • In a food processor combine on low speed the almond meal, sweetener, coconut, coconut oil, chia seeds, cocoa and vanilla until just combined (if using a Thermomix speed 4, for 5 seconds).
  • You can also mix by hand, just make sure the coconut oil is in its liquid form.
  • Press the mixture firmly into a small lined tray (approx. 17 x 27cm). Sprinkle with the optional cacao nibs and sea salt if you like and press into the mixture with the back of a spoon.
  • Place in the freezer to set for 10-15 minutes.
  • Once set, remove from the tin and chop into little squares.

Store

  • Store in an airtight container in the fridge or freezer.

Notes

Peppermint slice

Add a few drops of peppermint essence for a delicious mint chocolate flavour.

Hazelnut

Use hazelnut meal for a chocolate hazelnut slice.

Add crunch

Mix in 1/4 cup of Buckinis (activated buckwheat groats). 

Low-fructose

Choose rice malt syrup as your sweetener.

Nut-free

Replace the almond meal with toasted and ground sunflower seeds.

Vegan

Choose rice malt or maple syrup as your sweetener.

Cacao-free

Replace the cacao with carob powder.


I LOVE these - how about you? Post a comment or rate this recipe below. For 10 more Guilt-free Chocolate recipes, subscribe to my FREE newsletter.

Chia Berry Ripe

November 14, 2013 | Breakfast, After School Snacks, No-bake Sweets

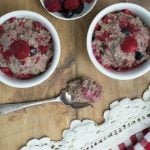
This Chia Berry Ripe is a delicious and nutritious treat that combines the goodness of chia seeds with chocolate berry flavour. Perfect for breakfast or a snack, this easy-to-make dish is packed with fibre, antioxidants, and healthy fats, making it a fantastic option to fuel your day. It’s deliciously sweet enough for a dessert too (my husband thinks it tastes like a cherry ripe, hence the name).

Health benefits

Chia seeds are a powerhouse of nutrition, offering a rich source of omega-3 fatty acids, protein, and dietary fibre, which can help keep you full and satisfied. The addition of berries and cacao powder adds antioxidants and vitamins, supporting overall health and wellness, while coconut milk and coconut water provide hydration and creaminess.

Ingredients

You’ll need fresh berries (raspberries and blueberries work well), chia seeds, cacao powder, rice malt syrup, maple syrup or honey, vanilla paste or powder, ground cinnamon, canned coconut milk, coconut water, and optional lemon zest for extra zing.

How to make this berry chia seed pudding recipe

To prepare this gluten-free, vegan chia pudding recipe, simply combine all the ingredients in a large jar or bowl, stirring or shaking until well mixed. Let it chill in the fridge for at least a few hours or overnight, allowing the chia seeds to absorb the liquid and thicken. If desired, you can give it a stir after an hour to enhance flavour distribution.

Texture Tip

I find people generally either love or struggle with the gelatinous, slightly grainy texture of chia. If you don’t like the texture, try to blend it smooth or use ground chia seeds to make it.

Serving suggestions and how to store

Enjoy your Chia Berry Ripe as is or topped with extra berries and a drizzle of cashew nut cream for added richness. It’s also delicious with toasted flaked coconut sprinkled on top. Store any leftovers in an airtight container in the fridge for up to three days, adjusting the consistency with a splash of milk if it thickens too much.

Vary this chia seed pudding recipe to suit your dietary needs

For a coconut-free version, simply substitute the coconut milk with your favourite nut milk or dairy milk. If you’re looking for a low-fructose option, sweeten it with rice malt syrup. For those who prefer a smoother texture, consider blending the mixture or using ground chia seeds to create a creamier consistency. Feel free to replace the cacao with chocolate protein powder or add in some hemp seeds to increase the protein in this chia pudding.

Take a look at the variations (below the main recipe) for suggestions to alter the recipe to suit your specific dietary requirements.

More Chia Pudding recipes HERE. 

Healthy choc berry chia pudding
Print Recipe
4.84 from 6 votes

Chia Berry Ripe

This is the most delicious flavour combination for a healthy chia pudding - named after the infamous 'cherry ripe' chocolate bar. 
Prep Time10 minutes mins
Soak2 hours hrs
Total Time2 hours hrs 10 minutes mins
Course: Breakfast, Dessert, Snack
Servings: 2

Ingredients

  • 50 g berries (½ cup) I use frozen or fresh raspberries and blueberries but any will do, smashed up a bit to release their juice
  • 45 g chia seeds (¼ cup)
  • 1 tbsp cacao powder (unsweetened Dutch process or raw)
  • 2 tbsp rice malt syrup or maple syrup (or to taste)
  • 2 tsp vanilla -paste or powder
  • ½ tsp ground cinnamon
  • 270 ml canned coconut milk (1 cup approx.)
  • 125 ml coconut water (½ cup)
  • 1 lemon/s -zest finely grated (optional)

Instructions

  • In a large jar place all of the ingredients and stir or shake to combine well.
  • Place it in the fridge for at least a few hours (I leave it overnight).
  • You can shake or stir it after an hour or so, just to make sure the flavours are well distributed.
  • The longer it is left , the thicker it becomes. Adjust the consistency with more milk if it become too thick.

Serve

  • Enjoy as it is or topped with more berries and cashew nut cream (recipe here). A little toasted flaked coconut is also delicious.

Store

  • Store in an airtight container in the fridge.

Notes

Coconut-free

Replace the coconut milk with a nut milk or dairy milk.

Low-fructose

Sweeten with rice malt syrup.

Boost the protein

Stir through your favourite protein powder. I love using this collagen protein—it’s flavourless, so it works beautifully across all kinds of recipes without altering the taste. You can also add hemp seeds or the Power Booster recipe.
 
"The best Chia Pudding flavour combination ever!"
Sally


Love to hear if you like this delicious chia pudding.  Post a comment or rate this recipe below!

Chicken and Mushroom Brown Rice Risotto

November 5, 2013 | Make-ahead Meals, Chicken, Freezable Meals

This gluten-free Chicken and Mushroom Brown Rice Risotto is a comforting and nutritious twist on a classic favorite. Unlike traditional risotto that relies on arborio rice, this version uses wholesome brown rice for added fibre and flavour, making it a delicious and satisfying meal. It’s easy to prepare, allowing you to precook the rice and whip up this risotto in just 10 minutes.

I first made this many years ago. A restaurateur friend of mine teased me about messing with a ‘classic.’ Once he tasted it he was grateful I dared to mess!

Health benefits

This chicken risotto is packed with nutritious ingredients like chicken, mushrooms, chicken broth and fresh vegetables, providing a great source of protein and vitamins. The use of brown rice adds more fibre, promoting digestive health, while the addition of fresh herbs and greens boosts its nutrient profile.

Ingredients

You’ll need dried porcini mushrooms, butter, garlic, a large onion, celery sticks, boneless chicken thighs, assorted mushrooms, fresh thyme, zucchini, dry white wine, leftover cooked brown rice, chicken stock or bone broth, grated parmesan cheese, and baby spinach, topped off with flat-leaf parsley for garnish.

How to make this Chicken and Mushroom Brown Rice Risotto

To create this risotto, start by soaking the porcini mushrooms in boiling water. Sauté the garlic, onion, and celery in butter, then add diced chicken until it turns opaque. Incorporate chopped porcini and assorted mushrooms, zucchini, and thyme, and cook until soft. Next, add the pre-cooked brown rice, a splash of white wine, reserved porcini liquid, and chicken stock, simmering until the stock is absorbed. Stir in spinach and cheese until melted and wilted, season with sea salt and black pepper then serve topped with fresh parsley.

Serving suggestions and how to store

Pair this hearty risotto with a crisp salad for a complete meal. Store any leftovers in an airtight container in the fridge for up to three days or freeze for later enjoyment. Reheat gently on the stovetop, adding a splash of broth if needed to restore creaminess.

Vary this brown rice risotto to suit your needs

For a dairy-free version, substitute the butter with ghee or olive oil and replace cheese with cashew cream and nutritional yeast. To make it vegetarian, increase the mushroom content and add walnuts, swapping chicken broth for vegetable stock. Vegan options can also be achieved with the same substitutions, and for those with onion or garlic sensitivities, fennel or chili powder can be excellent alternatives.

Print Recipe
4.75 from 8 votes

Chicken and Mushroom Brown Rice Risotto

A delicious, nutty Chicken and Mushroom Brown Rice risotto that's easier to make than traditional risotto and more nutritious. 
Prep Time20 minutes mins
Cook Time25 minutes mins
Total Time35 minutes mins
Course: Main Course
Servings: 4

Ingredients

  • 10 g dried porcini mushrooms
  • 1 tbsp butter
  • 1 clove/s garlic -diced
  • 1 onion/s (large) diced
  • 2 stick/s celery -finely diced
  • 500 g boneless and skinless chicken thighs -diced
  • 200 g mushrooms -sliced (an assortment is nice, Swiss brown, shiitake, oyster)
  • 1 tbsp fresh thyme leaves
  • 1 zucchini/s -julienned or ribboned
  • 60 ml white wine (¼ cup)
  • 2 cup/s leftover cooked brown rice (1 cup or 185 g when uncooked)
  • 250 ml chicken broth or stock (1 cup)
  • 100 g parmesan cheese -grated (1 cup)
  • 30 g baby spinach (optional)
  • ½ bunch/s flat leaf parsley -chopped
  • Sea salt and freshly ground black pepper -to taste

Serve

  • Salad (to serve)

Instructions

  • Place the porcini mushrooms in a small bowl and just cover with a little boiling water. Set aside.
  • In a large non-stick pan, melt the butter over a low heat. Add the garlic, onion and celery and cook with the lid on for a few minutes just to sweat and soften (not too brown).
  • Add the chicken and continue to cook for a few more minutes until the chicken just starts to turn opaque.
  • Remove the porcini mushrooms from the water, reserving the soaking water.
  • Chop the porcini mushrooms then add to the pan with the rest of the mushrooms, zucchini, and thyme leaves and cook for a few minutes until the mushroom starts to soften.
  • Add the rice and a splash of white wine, the reserved porcini liquid, followed by the stock and simmer for 5 minutes, stirring often until the stock is almost all absorbed.
  • Turn off the heat and stir in the spinach and cheese. Once the spinach has wilted and the cheese melted through the dish, top with parsley and serve immediately.

Thermomix method

  • If cooking the brown rice in the Thermomix, add enough water to cover the blades. Place the rice in the basket and cook 20 minutes (if un-soaked) or 18 minutes if soaked, Varoma temp, speed 4.
  • Place the porcini mushrooms in a small bowl and just cover with a little boiling water. Set aside.
  • In a dry thermomix bowl, grate the parmesan, 10 seconds, speed 7-8. Set aside. 
  • Now chop the garlic, 3 seconds, speed 7. Add the onion and celery and chop 10 seconds, speed 4. 
  • At this point I personally transfer it to the stove top as the volume of chicken and mushrooms makes it very hard to cook evenly in the the thermomix. Also it's not like a regular risotto that requires lots of stirring. Once the chicken and mushrooms are cooked, it is only 5 minutes away from serving. 

Make-ahead

  • Re-heat in a pot over a low heat until just hot.

Store

  • Store in an airtight container in the fridge or freezer.

Notes

Dairy-free

Replace the butter with ghee or macadamia or olive oil and the cheese with cashew nut cream (savoury version) and nutritional yeast.

Vegetarian

Replace the chicken with an extra cup of mushrooms and a handful or two of walnuts. Replace the chicken broth with vegetable stock.

Vegan

Use dairy-free and vegetarian options.

Onion-free

Replace the onion with a small bulb of finely diced fennel. 

Garlic-free

Replace the garlic with a pinch of chilli powder.
 

I prefer this brown rice version more than regular risotto - do you agree?  Post your thoughts in the comments below.

Asian Mango Salad

October 30, 2013 | Vegetarian, Salads

I love this time of year when the beautiful Queensland mangoes appear at my local farmers market. So, today I thought I’d share a family favourite – a very healthy Asian Mango Salad recipe. 

This fresh and vibrant Asian Mango Salad is the perfect combination of sweet, salty, and tangy flavours. With a mix of crunchy cabbage, juicy ripe mangos, and fresh herbs, it’s a deliciously light and refreshing dish that’s ideal for warm days or as a side dish to your favourite grilled protein.

As soon as my kids see mangoes in store this is what they request. I make it with both green (as photographed) and regular, sweet mangos. Just make sure that if you are using regular mango, that the flesh is firm and they are not overripe. Overripe fruits are best kept for smoothies.

Why is it so healthy?

As well as containing a rainbow of plant-based (Phyto) nutrients, the mango supports healthy digestion. Lots more antioxidant and phytonutrients are in the vegetables. The cashew nuts add a little protein and good fats. The mint and coriander are very detoxifying and cleansing. And the lime juice is rich in vitamin C. 

Ingredients

For this salad, you’ll need a small wombok or white cabbage, red onion (or green onion), red capsicum (bell pepper), fresh mint and coriander (cilantro), a mango, toasted cashew nuts (or peanuts) and optional red chili and fried shallots. For the dressing, combine fresh lime juice and zest, fish sauce, rice wine vinegar and rice malt syrup (or honey or maple syrup).

How to make this Thai Mango Salad recipe

Simply toss together all the salad ingredients in a bowl. For the dressing, shake all ingredients together in a jar until well combined, and adjust the flavour to your liking. Dress the salad just before serving to keep it fresh and crisp, and finish with fried shallots and chilli for added crunch and spice.

Serving suggestions and how to store

Serve this Asian Mango Salad alongside grilled chicken, fish, or pork, or enjoy it as a light vegetarian meal. It’s best eaten fresh, but you can store leftovers in the fridge for up to a day. Just keep the dressing separate until ready to serve.

Vary this Asian mango salad recipe to suit your needs

For a nut-free option, swap the cashews for toasted sunflower seeds. Make it vegan by replacing the fish sauce with a pinch of sea salt. If you can’t find mango, julienned apple makes a great substitute for a similar sweet-tangy flavor.

Take a look at the variations (below the main recipe) for suggestions to alter the recipe to suit any specific dietary requirements.

For lots more sides and salad inspo, take a look at my hugely popular ebook ˜Well Nourished Sides and Salads’– where vegetables become the hero of the dish! It’s great value at just $9.95, click HERE to take a look.

Asian Mango Salad
Print Recipe
5 from 4 votes

Asian Mango Salad

This delicious, zesty Asian Mango Salad is one of my favourites. It's bursting with flavour and so very nourishing. 
Prep Time15 minutes mins
Total Time15 minutes mins
Course: Salad
Cuisine: Asian
Servings: 4

Ingredients

Salad

  • 1 wombok cabbage (small or half a large) or white cabbage, finely shredded
  • 1 red onion/s -small or a bunch of spring onions, finely sliced
  • 1 red capsicum/s -thinly sliced
  • 1 bunch/s fresh mint leaves -or Vietnamese mint, leaves picked
  • 1 bunch/s fresh coriander leaves -leaves picked
  • 1 mango/s (green or regular), julienned
  • 75 g raw cashew nuts (1 cup) lightly toasted, or can sub peanuts
  • 1 red chilli/s -sliced (optional)
  • 2 tbsp fried shallots -to finish (optional)

Dressing

  • 1 lime/s -juice and zest
  • 2 tbsp fish sauce
  • 2 tbsp rice wine vinegar
  • 1-2 tbsp rice malt syrup (or the sweetener of your choice)

Instructions

  • Simply combine all of the salad ingredients in a salad bowl.
  • Combine all of the dressing ingredients well (shaking together in a little jar is easiest)- taste it and make sure you are happy with the balance between the sweet / salty / sour flavours. If it is too sour you may like to add a little more fish sauce (saltiness) or sweetener.
  • Dress and toss the salad just prior to serving.
  • Garnish with the shallots/ optional chilli. 

Notes

Nut-free

Replace the cashews with toasted sunflower seeds.

Make a meal of it

Add grilled fish, chicken or pork, or a can of tuna. Boiled egg, grilled tofu or tempeh are good choices for vegetarians.

Vegan and seafood-free

Replace the fish sauce with sea salt to taste. 

Onion-free

Simply omit the onion/spring onion/fried shallots.

Can't source mango

This is also lovely with julienne apple.


I love this salad - do you?  I'd love to receive your feedback in the comments below.


Cashew Nut Cream

October 17, 2013 | Dips, Sauces and Dressings

Cashew nut cream is a deliciously creamy and versatile alternative to dairy cream, perfect for adding richness to both sweet and savoury dishes. With just a few simple ingredients, it’s easy to whip up and can be customised to suit your taste or dietary needs.

Health benefits

This basic cashew cream is a great gluten-free, plant-based option that’s packed with healthy fats, making it a nourishing addition to many recipes. Cashews are a source of healthy monounsaturated fats, magnesium and a great source of protein. Plus this is really delicious. It’s a good choice for those looking to reduce dairy or incorporate more plant-based foods into their diet.

Ingredients

All you need is 60g of raw cashew nuts and some filtered water to make a basic cashew nut cream. You can also adjust the flavour with vanilla and sweeteners, or add lemon juice and herbs or nutritional yeast for a savoury twist or cheesy flavour.

How to make this cashew nut cream recipe

To make this vegan cashew cream, first, grind the raw cashews into a fine meal using a high-speed blender or food processor. Soak them in water for 2-6 hours, then drain and blend until a smooth texture. Add water a tablespoon at a time until you reach your desired consistency. Customise with sweeteners, vanilla extract, herbs, or salt depending on how you plan to use it (if you are after a sweet or savoury cream). If you own a Thermomix, we’ve also included Thermomix instructions for this recipe.

Serving suggestions and how to store

Cashew nut cream is perfect as a dairy-free topping or sauce for desserts, soups, or savoury dishes (like a pasta sauce or white sauce). It keeps well in an airtight container in the fridge for up to 3 days or can be frozen for longer storage.

Vary this cashew nut cream recipe to suit your needs

Make it sweet with vanilla and maple syrup for desserts, or turn it into a savoury cashew cream with miso paste or herbs. If you need a faster version, you can simmer the cashews for 5 minutes instead of soaking them, though it won’t be raw.

Cashew Nut Cream
Print Recipe
No ratings yet

Cashew Nut Cream

A delicious, dairy-free alternative to regular cream, this Cashew Nut Cream is a must for all dairy-free and vegan cooks. 
Prep Time5 minutes mins
Total Time2 hours hrs 5 minutes mins
Course: Side Dish
Servings: 1 cup

Ingredients

  • 60 g raw cashew nuts (½ cup)
  • Filtered water -see below

Instructions

  • Grind the cashews to a fine meal in a high-speed blender (thermomix 5 seconds, speed 8). Place the cashew nuts into a small bowl and pour over  enough water to cover them well. Allow to soak for 2-6 hours (but no longer than 8).
  • Strain the water from the nuts and place in a high-speed blender.
  • Blend at the highest speed until smooth and creamy (if using a Thermomix, blend 30 seconds, speed 8). You really need a good blender like a Vitamix or Thermomix to achieve a really creamy consistency and you may need to scrape down the sides a few times too.
  • Add extra water, tablespoon by tablespoon to reach the desired consistency. The more water you add the thinner the cream or the less you add the thicker the cream.
  • Eat it as is, or choose your flavour...

Make it sweet

  • Add  ½ teaspoon of vanilla and 1-2 tablespoons of rice malt syrup (fructose free) or maple syrup. Mix through until well combined.

Make it sour

  • To make sour cream, add sea salt and a little lemon juice to taste.

Make it savoury

  • Mix through a little miso paste or nutritional brewers yeast or onion powder or fresh herbs and seasoning. I make this quite thick like a cream cheese for a delicious butter spread replacement.

Fast track it

  • If you've cut yourself short or don't have the time or patience to wait for the nut meal to soak, you can gently simmer it for 5 minutes (though it is no longer raw).

Store

  • Airtight in the fridge for up to 3 days.
  • Can also be frozen.

Notes

Have you tried cashew nut cream before?  How do you use it or anything else to add?


Strawberry Chia Pudding

October 9, 2013 | Breakfast, After School Snacks, No-bake Sweets

This Strawberry Chia Pudding recipe is a super simple, healthy, and delicious treat that’s perfect for breakfast, dessert or even an afternoon snack. Made with fresh strawberries, creamy coconut milk, and chia seeds, this recipe comes together in minutes and thickens beautifully in the fridge for a satisfying, naturally sweet pudding. It’s also the perfect no-prep, make ahead brekkie for those days where you need to get going quickly.

Health benefits

The strawberries are a delicious berry with a great antioxidant profile. The coconut milk contains fats which support the immune system, brain, and digestion. Read more about the health benefits of coconut here. The chia seeds are a fibre rich, high protein source of omega-3s and are responsible for the gelatinous consistency. This gluten-free, vegan pudding will keep you full and energised!

Ingredients

For this recipe, you’ll need fresh strawberries, canned coconut milk, chia seeds, and your choice of natural sweetener like honey, maple syrup, or rice malt syrup. A touch of vanilla extract and lime zest adds extra flavour, making this pudding both refreshing and satisfying.

How to make strawberry chia seed pudding

Making strawberry chia pudding is as easy as tossing everything into a blender and giving it a good blitz until smooth. Then, pop it in the fridge for at least 4 hours (or overnight) to let the chia seeds work their magic. If it gets too thick, just stir in a bit of coconut milk or water to loosen it up. With such a short prep time and easy method, anyone can make and enjoy this!

Serving suggestions and how to store

Serve this pudding in a glass, jar or bowl, topped with extra fresh strawberries (or banana), Greek yogurt or a sprinkle of your favourite granola for a bit of crunch. It stores well in an airtight container in the fridge for up to 4-5 days, making it a great make-ahead option for busy mornings or meal prepping. It can also be frozen.

Vary this to suit your dietary needs

If you’re avoiding coconut, swap the coconut milk for almond milk, oat milk, or any dairy alternative. You can also adjust the sweetness to your liking by using more or less syrup or even adding a touch of stevia for a sugar-free option. Feel free to add in vanilla protein powder or some hemp seeds to increase the protein in this chia pudding.

More Chia Pudding recipes HERE. 

Strawberry Chia pudding
Print Recipe
4.77 from 13 votes

Strawberry Chia Pudding

This zesty, delicious strawberry chia pudding has such lovely balance of flavours and it's so simple to make. 
Prep Time5 minutes mins
Total Time4 hours hrs 5 minutes mins
Servings: 4

Ingredients

  • 400 g fresh strawberries (approx.) hulled
  • 400 ml canned coconut milk
  • 85 g rice malt syrup, honey or maple syrup (¼ cup) or more or less to taste
  • 1 tsp vanilla -powder, essence or paste
  • 100 g chia seeds (½ cup)
  • 1 lime/s -zest

Instructions

  • Throw it all in a blender and blend on a very high speed until well mixed. Thermomix 30 seconds, speed 6.
  • Refrigerate for 4-24 hours. The longer it is refrigerated, the thicker it becomes.
  • If you find it has become too thick, mix through a little more coconut milk or water to thin it out.
  • Serve in a glass garnished with fresh strawberries.

Tip

  • Some kids (or even adults), don't like the 'tapioca-like' texture of the chia seed. If this is the case just process it for longer or until it smoothes out.

Store

  • Store in an airtight container in the fridge.

Notes

Coconut-free

Replace the coconut milk with a nut milk or dairy milk.

Boost the protein

Stir through your favourite protein powder. I love using this collagen protein—it’s flavourless, so it works beautifully across all kinds of recipes without altering the taste. You can also add hemp seeds or the Power Booster recipe.


I'd love to hear how you enjoyed this delicious chia pudding - post a comment or rate this recipe below.

Rustic Tarragon Chicken

September 24, 2013 | Make-ahead Meals, Chicken, Freezable Meals, Slow Cooked

This Rustic Tarragon Chicken is the perfect comfort meal, packed with hearty veggies, tender chicken, and a deliciously fragrant herb sauce. It’s an easy, one-pot dish that’s simple to throw together, making it great for busy weeknights or lazy weekends. With just a few basic ingredients, you’ll have a nourishing and delicious dinner on the table in no time! Remember it’s supposed to be rustic so don’t get hung-up on chopping everything up perfectly.

Health benefits

This dish is loaded with a nutritious rainbow of veggies and lean protein from chicken thighs, making it a wholesome, balanced meal. The combination of antioxidant rich tarragon, garlic, and fresh parsley brings plenty of flavour and nourishment. The chicken broth adds more protein, minerals and gelatinous, gut healing goodness. 

Ingredients

The key ingredients for this dish are chicken thighs or drumsticks, fresh or dried tarragon, cannellini beans, and a mix of vegetables like onions, garlic cloves, carrots, capsicum, celery, and sweet potatoes. You’ll also need some chicken stock, dry white wine, and seasonings like sea salt and black pepper to tie everything together.

How to make this tarragon chicken recipe

Start by sautéing the onion and garlic in a deep pan or casserole dish, then brown the chicken on all sides. Add the veggies, beans, tarragon, wine, and stock, season to taste, and pop it in the oven with the lid on for about an hour. When it’s done, finish it off with fresh parsley for a burst of flavour and serve it up!

Serving suggestions and how to store

Serve this rustic tarragon chicken over mashed potatoes, cauliflower puree, or steamed greens like broccoli or kale for a complete meal. Leftovers can be stored in an airtight container in the fridge and will keep for up to three days. You can also freeze it for longer storage and just reheat it when needed.

Vary this to suit your dietary needs

For a vegetarian or vegan version, swap out the chicken for tofu, chickpeas, or mushrooms and use vegetable stock instead. If you’re avoiding legumes, simply omit the beans. You can also easily substitute any of the veggies or herbs to suit your tastes, and thyme makes a lovely alternative to tarragon if preferred.

Check out the variations below the main recipe for tips on how to adapt it to your specific dietary needs.

This Rustic tarragon chicken recipe is a nourishing one pan, complete meal, fast and simple to make! Plus it can be pre-prepared and reheated as needed.
Print Recipe
4.80 from 5 votes

Rustic Tarragon Chicken, a nourishing one pan bake

This Rustic Tarragon Chicken is a nourishing, easy to prepare one pan bake and is delicious. 
Prep Time15 minutes mins
Cook Time1 hour hr
Total Time1 hour hr 15 minutes mins
Course: Main Course
Servings: 4

Ingredients

  • 1 onion/s -roughly chopped
  • 2 clove/s garlic -chopped
  • 700 g chicken thighs -or drumsticks
  • 400 g can cannellini beans -drained and rinsed
  • 2 carrot/s -peeled and roughly diced
  • 2 stick/s celery -diced
  • 1 red capsicum/s -diced
  • 2 sweet potato/s (small) washed and diced
  • 3 tbsp fresh tarragon leaves -picked and chopped or 1 tbsp dried
  • 60 ml dry white wine (¼ cup)
  • 120 ml chicken broth or stock (½ cup) - or vegetable stock
  • Sea salt and freshly ground black pepper -to taste

Serve

  • ¼ bunch/s fresh parsley leaves -to serve

Instructions

  • Preheat your oven to 180℃/350℉ (fan-forced).
  • Use an oven proof deep pan (with a lid) or a casserole dish. On a stove top, begin with softening the onion and garlic in a little coconut oil or butter over a moderate heat.
  • Push aside and brown the chicken. Take off the heat.
  • Now add the cannellini beans, vegetables, tarragon, wine, stock, and seasoning. Mix together roughly to make sure the herbs are evenly distributed.
  • Place on the lid and throw in the oven for 50 - 60 minutes or until the meat is cooked.
  • Finish with parsley leaves (which adds a real freshness to the dish and more nourishment).

Slow Cooker

  • This can certainly cooked in a slow cooker. However, as the speed and temperature varies between the many brands of slow cookers, base the amount of liquid you add and the cook time on a similar style of recipe in the guide book for your specific slow cooker. The general rule of thumb is to halve the liquid and double the cook time, but understanding your own slow cooker is the best guide.

Time-saving tip

  • If you are pushed for time and want to pre-prepare this meal, don't worry about sautéing the onion, garlic, and meat. Just throw all together, cover and refrigerate until you're ready to bake. You will just need to bake it for an extra 10-20 minutes to ensure the meat is cooked. I also often take the lid off for the last 10 -15 minutes to brown the chicken.

Grab Bag Formula Method

  • If you've done the **Grab Bag Formula Short Course, this is the method to convert this recipe...
  • Place all the tarragon chicken ingredients (except the lime and fresh coriander) into the Grab Bag.
  • Carefully seal your Grab Bag. I close most of the seal then press out as much air as I can then complete the seal. Place the Grab Bag in the freezer.
  • To cook, remove the Grab Bag from the freezer, place on a baking tray and thaw in the fridge overnight.
  • Tip the contents of the Grab Bag into a large oven proof dish (with a tight fitting lid) or Dutch oven. It may still be a bit frozen; that’s okay.
  • Place the lid on the pot, set your oven to 150°C/300°F (fan-forced) and cook for 2 hours.
  • If there is a lot of liquid, remove the lid, increase the oven to 200°C/380°F and cook for a further 15-20 minutes to reduce and thicken the sauce (the sauce flavour really develops too).
  • Finish with parsley leaves. Season again if necessary (sea salt lifts the flavours in this so make sure you add it).
  • ** The Grab Bag Formula Short Course is available to purchase for just AU$46 HERE.
  • OR
  • If you are a full-access Well Nourished Family member, the course is included in your membership and you can access in the members portal - HERE.

Serve

  • Over chopped salad greens, chopped kale, steamed broccoli and mashed (pureed) cauliflower or potato.

Make-ahead

  • Re-heat (covered) in a low oven until just hot.

Store

  • Store in an airtight container in the fridge.
  • Can also be frozen.

Notes

Vegetarian and vegan

Replace the chicken with 300g of firm tofu or chickpeas and 300g of mushrooms. Choose vegetable stock. Cook for 1 hour.

Legume-free

Simply omit the beans.

Onion-free

Replace the onion with a small bulb of diced fennel. 

Garlic-free

Simply omit the garlic or replace with a pinch of chilli. 

Different vegetables

If you dislike or don't have a particular vegetable, just substitute it or leave it out. This is a very versatile dish - anything goes!

Don't like Tarragon?

Simple, thyme is a delicious alternative.


Love you to try this tasty dish and let me know how you like it? Did you make any changes, love you to share?

Healthy Chocolate, Almond and Coconut Bars

September 17, 2013 | After School Snacks, No-bake Sweets

These healthy Chocolate, Almond and Coconut Bars are the best heathy raw chocolate slice recipe – perfect when you’re craving something sweet but still want a wholesome snack. They’re packed with nourishing ingredients and so simple to make, making them an ideal option for busy days when you need a quick energy boost. Plus, with a rich layer of dark chocolate on top, they feel indulgent whilst they are packed full of nutrition.

Health benefits

This gluten-free recipe uses whole foods like almond meal and coconut to provide healthy fats and fibre, while dark chocolate adds a touch of antioxidants. The almonds provide mood and energy elevating proteins, minerals and fats. The coconut oil is are amazing for the brain, immune and metabolic health. You can also adjust the sweetness to suit your taste preferences, making it a flexible and satisfying snack. This is a whole food treat that is very satisfying and tastes amazing!

Ingredients

The star ingredients in this heathy raw chocolate slice recipe include almond meal, desiccated coconut and nut butter, which come together to create a rich and delicious base. You’ll also need a natural sweetener like honey, maple syrup, or rice malt syrup, along with coconut oil, vanilla extract, and a hint of coconut flour for structure. To finish it off, melt dark chocolate (or chocolate chips) to top the bars to form the chocolate layer.

How to make this heathy raw chocolate slice recipe

Making healthy raw treat is super easy! Just blend all the ingredients, except for the chocolate, in a food processor until everything comes together in a sticky paste. Press the mixture into a lined tin that’s approximately and refrigerate until firm. After that, melt the dark chocolate and spread it over the top. Pop the tray back into the fridge until the chocolate is just set, then slice and enjoy! The best part is no oven is required and they take just 15 minutes to prepare! If you own a Thermomix, we’ve also included Thermomix instructions for this recipe.

Serving suggestions and how to store

This heathy raw chocolate slice recipe are great as a healthy, low sugar bar or dessert and pair perfectly with a hot cup of tea or coffee. Keep them stored in an airtight container in the fridge to maintain their firmness, or pop them in the freezer if you want to keep them longer.

Vary this heathy raw chocolate slice recipe to suit

For a low-fructose option, use rice malt syrup and make my raw chocolate for the topping. If you love Nutella, try swapping the almond meal for hazelnut meal and using hazelnut butter for a rich, nutty twist. Looking for a nut-free snack? Check out my no-bake muesli bar recipe or my healthy chocolate coconut slice for delicious alternatives.

Take a look at the variations (below the main recipe) for suggestions to alter the recipe to suit your specific dietary requirements.

For more delicious, healthy and easy to make wholefood treats, click HERE.

This raw vegan chocolate slice recipe is also dairy, gluten and fructose free and so simple to make. It's a delicious sweet treat.
Print Recipe
4.80 from 44 votes

Cacao Rough

This delicious Cacao Rough is the most satisfying chocolate treat. It is easy to make and the most delicious raw chocolate slice I have ever tried. 
Prep Time5 minutes mins
Chill30 minutes mins
Total Time35 minutes mins
Course: Snack
Servings: 20 squares

Ingredients

  • 100 g almond meal (1 heaped cup)
  • 30 g cacao powder (¼ cup) unsweetened Dutch process or raw
  • 85 g rice malt syrup, honey or maple syrup (¼ cup)
  • 50 g shredded coconut (1 cup)
  • 100 g coconut oil (½ cup)
  • 20 g chia seeds (¼ cup) optional
  • 1 tbsp vanilla -powder, extract or essence

Optional extras

  • 1 tbsp cacao nibs - add a nice crunch
  • Pinch sea salt -optional but I quite like a sweet and salty taste

Instructions

  • In a food processor combine on low speed the almond meal, sweetener, coconut, coconut oil, chia seeds, cocoa and vanilla until just combined (if using a Thermomix speed 4, for 5 seconds).
  • You can also mix by hand, just make sure the coconut oil is in its liquid form.
  • Press the mixture firmly into a small lined tray (approx. 17 x 27cm). Sprinkle with the optional cacao nibs and sea salt if you like and press into the mixture with the back of a spoon.
  • Place in the freezer to set for 10-15 minutes.
  • Once set, remove from the tin and chop into little squares.

Store

  • Store in an airtight container in the fridge or freezer.

Notes

Peppermint slice

Add a few drops of peppermint essence for a delicious mint chocolate flavour.

Hazelnut

Use hazelnut meal for a chocolate hazelnut slice.

Add crunch

Mix in 1/4 cup of Buckinis (activated buckwheat groats). 

Low-fructose

Choose rice malt syrup as your sweetener.

Nut-free

Replace the almond meal with toasted and ground sunflower seeds.

Vegan

Choose rice malt or maple syrup as your sweetener.

Cacao-free

Replace the cacao with carob powder.


I LOVE these - how about you? Post a comment or rate this recipe below. For 10 more Guilt-free Chocolate recipes, subscribe to my FREE newsletter.

This healthy raw chocolate slice recipe is vegan, gluten, dairy & fructose free. It' an easy to make, delicious and nutritious snack.
Print Recipe
4.77 from 30 votes

Healthy Chocolate, Almond and Coconut bars

One of my all time favourite chocolate-y treats these Healthy Chocolate, Almond and Coconut bars are easy to make, nutritious and delicious. 
Prep Time15 minutes mins
Total Time1 hour hr 15 minutes mins
Course: Snack
Servings: 12 bars

Ingredients

  • 300 g almond meal (2½ firmly packed cups)
  • 80 g desiccated coconut (1 cup approx.) or shredded
  • 130 g nut butter (½ cup) I like the ABC nut spread
  • 4 tbsp rice malt syrup, honey or maple syrup -adjust the amount to make these more, or less sweet to suit your taste
  • 100 g coconut oil (½ cup)
  • 1 tbsp vanilla
  • 1 tbsp coconut flour
  • 100 g dark chocolate -melted

Instructions

  • Mix all ingredients (except the chocolate) together in a food processor/mixer until well combined and forming a rough paste.
  • If you have a Thermomix, mix 30 seconds, speed 4.
  • Pour into a slice tin (approx. 17 x 27cm) lined with baking paper (parchment paper).
  • Refrigerate until set (about an hour).
  • Once set, melt the chocolate in a bowl placed over a pot of simmering water, stirring continually. Spread evenly with a spatula over the almond mix and refrigerate again until the chocolate is just set (10 minutes). You an also melt chocolate in the thermomix (see basic cookbook for directions).
  • Remove from the tin and slice into small bars.
  • Remember to keep these in the fridge or freezer. As with any raw coconut oil based product, they'll melt if not kept cold!

Store

  • Store in an airtight container in the fridge.

Tip

  • To get a good cut on the slice without cracking the chocolate, take out of the fridge or freezer for about 30 mins (approx) before slicing and you can also use a hot knife.

Notes

Low-fructose and dairy-free or vegan

Choose rice malt syrup for your sweetener for low fructose. Even though the 85% chocolate is very low in fructose, you may like to make some dairy-free raw chocolate for the top. Here is the recipe.

Nutella like

Swap the almonds for ground hazelnuts and use hazelnut butter for a match made in heaven.
Want something grainy and nut free? Check out my No Bake Muesli Bar here, or my biscuity Healthy Chocolate Coconut Slice, here.

Nut-free

This is not the recipe for you. For 150 pages of nut-free recipes, take a look at my super popular ebook 'The Well Nourished Lunchbox'. Click HERE to find out more and read the rave reviews.


These are so divine. I'd love you to try them then tell me what you think by posting a comment.

Puy Lentil Salad

September 10, 2013 | Budget Friendly, Vegetarian, Salads

This Puy Lentil Salad is a simple yet satisfying dish that’s perfect for a light lunch or a hearty side. Made with protein-packed lentils, fresh herbs, and a tangy lemon dressing, it’s a delicious way to enjoy healthy, whole foods. Plus, it comes together in no time, making it an ideal choice for busy days.

Why is it so good?

The puy lentils (also called french green lentils) are a great pantry staple as they have a long shelf life, don’t need to be soaked (though I still do, even if just for a few hours) and cook quickly in a pot of water. They are a great source of fibre and vegetarian source of protein. They have an impressive mineral content including iron. Combined with the seeds, they form a ‘complete’ protein source. The parsley and tomatoes contain antioxidants and health giving plant chemicals. The lemon and lemon zest enhance immune health and the olive oil assists in the absorption of fat-soluble vitamins.

Ingredients

This salad features earthy Puy lentils, juicy cherry tomatoes, fresh parsley, and crunchy toasted sunflower seeds, all brought together with a crumbled feta topping. The zesty dressing made from lemon juice, olive oil, and a splash of red wine vinegar adds the perfect tangy kick.

How to make Puy Lentil Salad

Making this Lentil Salad recipe is quick and easy! Cook the lentils in a saucepan until they are tender, then simply toss them with the sliced red onion, halved cherry tomatoes, parsley leaves, and toasted sunflower seeds. Crumble the feta on top, then mix up the lemon vinaigrette and drizzle it over the salad. Give everything a good toss, and you’re ready to serve.

Serving suggestions and how to store

Serve this French lentil salad as a side dish with grilled meats or as a vegetarian main course. It also makes a great packed lunch—just store it in an airtight container in the fridge, and it will stay fresh for a few days. For the best flavour, wait to add the dressing until just before serving if you’re making it ahead.

Vary this to suit your dietary needs

This salad is easy to adapt to different dietary needs. For a dairy-free or vegan version, skip the feta and try adding some toasted cashews or a vegan cheese instead. If you’re not a fan of onions, thinly sliced radishes make a great alternative. And to make it more substantial, mix in a can of tuna for a quick, protein-rich meal. You can also add in extra veggies like cucumber, celery, kale, spinach, basil or grated carrot.

Puy Lentil salad
Print Recipe
5 from 2 votes

Puy Lentil Salad

This simple Puy Lentil salad is fibre rich, delicious and a substantial side or meal.
Prep Time10 minutes mins
Total Time10 minutes mins
Course: Salad
Servings: 4

Ingredients

  • 200 g puy (French) lentils (cooked**to yield approx. 2 cups)
  • 1 red onion/s -halved and sliced
  • 10 cherry tomatoes -halved
  • 1 bunch/s flat-leaf parsley -leaves picked
  • 30 g sunflower seeds (¼ cup) toasted
  • 100 g feta cheese -crumbled

Dressing

  • 1 lemon/s -zest and juice
  • 60 ml extra virgin olive oil -extra virgin (¼ cup)
  • 1 tbsp red wine vinegar (or chardonnay vinegar)
  • Sea salt and freshly ground black pepper -to taste

Instructions

  • Combine all ingredients in a salad bowl. Mix the dressing together in a jar or small bowl.  Pour over the lentil mix and toss well to coat. 
  • Leftovers will keep in an airtight container, refrigerated for a few days.
  • Cook your lentils (link to cooking instructions below)**

Store

  • Store in an airtight container in the fridge.

Notes

Dairy-free and vegan

Leave out the feta. You might like to substitute with raw or toasted cashew nuts or a vegan cheese.

Onion-free

Replace the onion with 5 thinly sliced radish.

More substantial

I love a can of tuna mixed through leftovers for a fast, healthy lunch.
**Cooking instructions for the lentils HERE.
 
For lots more sides and salad inspo, take a look at my hugely popular ebook ˜Well Nourished Sides and Salads’- where vegetables become the hero of the dish! It’s great value at just $9.95, click HERE to take a look.
 

You can post a comment or question below!

Herbalicious

August 22, 2013 | Dips

Herbalicious is a versatile, herb-packed sauce that can elevate just about any dish with fresh, vibrant flavours. It’s easy to whip up, combining a medley of fresh herbs with garlic, capers, lemon, and olive oil for a zesty boost to meat, pasta, or veggies. Perfect for when you want to bring a garden-fresh punch to your meal!

This is my go-to sauce when I need to turn a bland meal into something really special. Having a herb garden helps. It’s also great when you have bought herbs for another dish and have some left over but don’t quite know what to do with them. Anything goes here, you really can’t go wrong.

Health Benefits

This salsa verde recipe is brimming with nutrient-rich herbs and leafy greens, offering a simple way to add variety and flavour to your meals. It’s a delicious way to sneak in some extra greens and herbs. All of the herbs all have their own medicinal qualities and are extremely nutritious. They are green and possess all of the nutritional benefits of green leafy vegetables. I’ve touted the benefits of leafy greens here. All of these herbs are also very immune supportive. The olive oil is essential for the absorption of fat-soluble vitamins from the mix and the garlic, lemon juice and zest gives it even more of an immune kick.

Ingredients

To make this, you’ll need a mix of fresh herbs like parsley, basil, coriander (fresh cilantro), oregano, and more. Cloves garlic, capers, lemon zest and juice (or lime juice and zest), and olive oil bring everything together. The best part? You can customise the herb blend based on what you have on hand!

How to make this Salsa Verde recipe (green salsa)

Simply toss your garlic, herbs, leaves, and capers into a food processor, Thermomix or high speed blender and pulse until finely chopped. Then, mix in the olive oil, lemon zest, and juice until you’ve got the perfect consistency. Season with salt and pepper, and it’s ready to use!

Serving suggestions and how to store

Herbalicious is incredibly versatile – drizzle it over protein (grilled meats, fish or eggs), toss it through pasta or rice, use it as a salad dressing or serve as a dip with tortilla chips. It also works wonders as a spread for sandwiches or in a burger. Store it in an airtight container in the fridge, or freezer for later use.

Vary this Salsa Verde recipe to suit your needs

If you want to make it spicy, just add a red chilli or  jalapeño. To bulk it up into a pesto, mix in some nuts and grated Parmesan. Get the kids involved too – let them help pick the herbs, and they’ll be more likely to give this “green power ranger sauce” a try!

Healthy salsa verde
Print Recipe
No ratings yet

Herbalicious

Herbalicious is a delicious salsa verde that is a great accompaniment to any meat, chicken or fish. It takes a simple meal to the next level (taste and nutrition wise).
Prep Time10 minutes mins
Total Time10 minutes mins
Servings: 1 cup

Ingredients

  • 1 sprig rosemary -leaves pulled off the stem (if you have it, not essential)
  • 1 clove/s garlic -crushed
  • 1 tbsp capers -drained
  • 2 cup/s mixed fresh herbs and leaves (approx. of mixed leaves like parsley, basil, coriander, oregano, chives, thyme, sage, tarragon, lemon sorrel, kale and or spinach.  I like to use mostly a selection of as many different herbs so that no one flavour dominates. Though if you love a particular flavour, then let it shine! The kale or spinach should add a bit of bulk but no real flavour)
  • 1 lemon/s -zest and juice
  • 60 ml extra virgin olive oil (¼ cup) extra virgin
  • Sea salt and freshly ground black pepper

Instructions

  • In a processor or Thermomix, place the garlic, herbs (picked off the woody stems), leaves and capers and pulse until finely chopped.
  • Add the lemon juice, zest and olive oil and mix through the chopped greens until combined. Thermomix 30 seconds, speed 2.
  • Taste, season and add more olive oil or lemon juice if necessary until the flavour is just right.

Use it...

  • Over any meat, chicken or fish, grilled, barbequed or roasted.
  • Mixed through, pasta, rice or quinoa.
  • As a salad dressing or over steamed vegetables.
  • Stirred through tuna in a sandwich or salad.
  • Drizzle over eggs at breakfast, it's seriously versatile.
  • I just wouldn't use it with any Asian-inspired dish or a dish that already has very strong flavours.

Store

  • Store in an airtight container in the fridge.
  • Can also be frozen.

Notes

Make it spicy

By adding a red chilli or  jalapeño.

Make it go further

Add nuts and parmesan to make a pesto or a thicker accompaniment.

Kids in the Kitchen

Get the kids to pick the leaves off the stems into the salad spinner and let them wash and spin the leaves.  They are more likely to try it if they've been involved in making it and once they do try it, I'm sure most will love it.  You can also cut a deal with fussy small people to try it and then name it.  Kids often respond to fun names.  My son calls this his green power ranger sauce (for super fast legs and super-strong muscles).


I'd love to hear what your kids come up with (even the not so complimentary ones)! Post a comment below.

Warming Minestrone Soup

August 15, 2013 | Budget Friendly, Make-ahead Meals, Pasta and Noodles, Pork recipes, Freezable Meals, Vegetarian, Soups

Celebrate the end of winter with one last bowl of nourishing warming Minestrone Soup to farewell this season’s best. This is actually more a meal than a soup. I love to make this when I have a glut of vegetables in the fridge or if I’m after a hearty, but simple warming meal. It’s another delicious and nutritious one pot wonder.

Health benefits

The sheer variety of seasonal vegetables combined with cannellini beans is enough to make this a very healthy, fibre loaded meal. If you use a homemade bone broth for the stock, then you are going to derive a dose of collagen and gut-healing nutrients from this minestrone. For more about the healing powers of bone broth, see here.

Ingredients

This vegetable soup comes together with everyday ingredients like onion, garlic, carrots, celery, and zucchini, along with pantry staples like canned diced tomatoes (or crushed tomatoes) and cannellini beans. Add in some fresh basil for flavour, and don’t forget the broken spaghetti (or small pasta) to make it more filling. If you’re using bacon, it adds a lovely smoky taste, but the recipe is easy to adapt.

How to make this Warming Minestrone Soup recipe

Start by softening the onion, cloves garlic, bacon, carrot and celery stalks in a pot, then add in the tomatoes and wine for extra depth of flavour. Toss in your canned beans, zucchini, stock, and pasta, stir and let it all simmer at a medium heat until the pasta is al dente. Finish with some leafy greens, sea salt and black pepper and you’re done! Simple, nourishing, and delicious.

Serving suggestions and how to store

Garnish your minestrone with fresh basil (or fresh parsley would work too), a drizzle of olive oil, and serve with a sprinkle of parmesan cheese. This soup stores well in the refrigerator for up to three days or can be frozen for later—perfect for meal prep! Just reheat gently on the stove when you’re ready to enjoy.

Vary this to suit your dietary needs

Make this vegetarian or vegan by swapping out the bacon for extra beans and using vegetable broth or stock. For a gluten-free option, use gluten-free pasta or quinoa, or skip the pasta entirely. Dairy-free? Just leave off the cheese. You can even blend the soup for picky eaters or omit any veggies that might cause complaints!

Check out the variations below the main recipe for tips on how to adapt it to your specific dietary needs.

Winter minestrone soup with vegetables, beans, and herbs—a hearty, nourishing, and warming meal.
Print Recipe
4.92 from 12 votes

Warming Minestrone Soup

This Warming Minestrone Soup is packed with hearty veggies, beans, and pasta, making it a cozy and filling meal. Perfect for chilly days or when you need something nourishing, it's a family-friendly soup that can be easily adapted to suit everyone’s taste and dietary needs.
Prep Time15 minutes mins
Cook Time30 minutes mins
Total Time45 minutes mins
Course: Soup
Cuisine: Italian
Servings: 6

Ingredients

  • 1 onion/s (large) peeled and finely diced
  • 2 clove/s garlic -peeled and chopped
  • 4 rasher/s bacon -diced
  • 2 carrot/s -peeled and diced
  • 2 stick/s celery -sliced
  • 1 bunch/s fresh basil leaves -leaves picked and stems finely chopped
  • 800 g diced tinned tomatoes (2 x 400g tins)
  • 100 ml red wine
  • 1 zucchini/s (large) diced
  • 425 g can cannellini beans -drained and well rinsed
  • 600 ml chicken broth or stock
  • 50 g spaghetti -broken into pieces (put it in a plastic bag and break it up by hand or by bashing with a rolling pin)
  • 100 g silver beet or spinach leaves -well washed and chopped (or kale even)

Instructions

  • Start by cutting up all of your vegetables.
  • In a large pot or saucepan, heat a little butter or olive oil and over a low heat cook the onion, garlic, bacon, carrots, celery and basil stems. You are not frying, rather sweating the vegetables and bacon with the lid ajar for around 15-20 minutes until they are starting to soften (but not brown).
  • Now add the tomatoes and red wine and simmer for about a further 5 minutes.
  • Next, add the cannellini beans, zucchini, spaghetti and stock.
  • Turn up the heat to a moderate temperature and simmer until the spaghetti is cooked.
  • Add the silver beet or spinach or kale leaves and mix to wilt.
  • Season with sea salt and black pepper to taste.

Serve

  • Serve with basil leaves, a drizzle of extra virgin olive oil and parmesan cheese.

Make-ahead

  • Re-heat in a pot over a low heat until just hot.

Store

  • Store in an airtight container in the fridge or freezer.

Notes

Vegetarian and vegan

Use vegetable stock, and don't add the bacon. You may like to increase the amount of beans. For vegan don't serve with parmesan.

Gluten and grain-free

Use gluten free pasta or quinoa or just omit the pasta all together.

Dairy-free

Just don't add the cheese.

Legume-free

Simply omit the beans.

Onion-free

Replace them with a bulb of fennel, finely diced. It's so delicious this way too.

Garlic-free

Replace the garlic with a pinch of chilli flakes. 

Your kids don't like vegetables?

Blend it all up in a food processor.  It will still be delicious and what they don't know won't hurt them!  I have even served this to my kids and when they have baulked at (usually the zucchini), I take it away and quickly blend it and they are then happy to eat it because it tastes so good.  You can alway omit any of the offenders too.
 

This is a favourite winter warmer in our household - more a meal than a starter.  Love to receive your thoughts and comments too (if you could also rate this recipe I'd be extra appreciative). 

Chocolate Breakfast Smoothie (that will really get you up and on the go)

August 13, 2013 | Breakfast, After School Snacks, Drinks & Smoothies

This Chocolate Breakfast Smoothie is a high fibre, protein rich, sustaining start to the day. It takes minutes to make so there is no reason at all to buy the heavily processed, nutritionally void varieties of breakfast drinks I have written about here.

If the convenience of a boxed drink is necessary, why not serve it in a sipper cup with a stainless steel straw. Same same but actually good for you!

Health benefits

This gluten-free smoothie is not just a treat but also super nourishing. Avocado is a fibre rich source of potassium and healthy monounsaturated fat (amongst many other things). It’s anti-inflammatory and supports heart, brain, and eye health. The nuts and seeds contribute more fibre, protein, and good fats. The raw cacao powder (or unsweetened cocoa powder) is a source of health-giving antioxidants. The natural yogurt is important for digestive health and a good quality cow’s milk contributes calcium, protein and many important fat-soluble vitamins and minerals. For more about the health benefits and best choices in yoghurt click here.

Ingredients in this healthy chocolate smoothie recipe

This chocolate breakfast shake is made with simple, wholesome ingredients like avocado (which gives it a creamy texture), cacao, milk of your choice (dairy or a plant based milk like almond milk), natural yogurt (or Greek yogurt), LSA, and a natural sweetener such as maple syrup or rice malt syrup. You can easily tweak it to suit your taste or dietary needs, making it incredibly versatile.

How to make this healthy Chocolate Smoothie

Just throw all the ingredients into a high speed blender and blitz until smooth and creamy! If you prefer it extra cold, toss in a handful of ice cubes or serve it over ice. It’s a no-fuss recipe that you can have ready in minutes.

Serving suggestions and how to store

Serve this smoothie chilled, either over ice or blended with ice for an extra refreshing touch. It’s thick enough to turn into a smoothie bowl too (simply top with home made granola or nuts and seeds). Leftovers can be poured into ice-block moulds or little cups and frozen for a healthy ice cream.

Vary this to suit your dietary needs

This healthy breakfast smoothie is easily adaptable! For a dairy-free or vegan version, swap the milk for your favourite plant-based milk, and use coconut yogurt. Want to add more fibre? Blend in some oats, quinoa, or chia seeds. You can also switch up the flavours by adding fruit like frozen bananas or berries instead of or with the cacao. Or add in some extra nutrition in the form of vegetables – cauliflower or a handful of spinach or kale would hide well. Check out the variations below the main recipe for tips on how to adapt it to your specific dietary needs.

Healthy chocolate breakfast smoothie with avocado, cacao, yogurt, and maple syrup—high in protein and fiber for a nourishing start.
Print Recipe
4.60 from 15 votes

Chocolate Breakfast Smoothie (that will really get you up and on the go)

This Chocolate Breakfast Smoothie is a quick and delicious way to kick-start your day. Loaded with healthy fats from avocado, natural sweetness from maple syrup or rice malt syrup, and a rich chocolatey hit from cacao, it's the perfect balance of indulgence and nourishment. Plus, it's so simple to whip up—just blend and go!
Prep Time5 minutes mins
Total Time5 minutes mins
Course: Drinks
Servings: 2

Ingredients

  • 30 g cacao powder unsweetened Dutch process or raw (2 tbsp)
  • ½ avocado/s -flesh scooped out
  • 250 ml milk (of choice) (1 cup)
  • 60 g natural, Greek or coconut yoghurt (¼ cup)
  • 2 tbsp LSA (or almond or hazelnut meal)
  • 60 g rice malt syrup or maple syrup -more or less to taste (3 tbsp)

Instructions

  • Simply place all of the ingredients in a powerful blender and blend until smooth and creamy.
  • Serve over ice (or blend trhough with ice if you prefer). Can't be more simple than that!

Store

  • Leftovers can be frozen into little cups or ice-block moulds for a snack another day.

Notes

Low-fructose

Sweeten with rice malt syrup.

Nut -free

Replace the ground nuts with ground flax (linseed).

Dairy-free and vegan

Replace the milk with a sugar-free nut milk, rice milk, coconut milk or coconut water. Replace the yoghurt with coconut yoghurt.

Boost the protein

Stir through your favourite protein powder. I love using this collagen protein—it’s flavourless, so it works beautifully across all kinds of recipes without altering the taste.

Increase the fibre

Add 2 tablespoons of oatmeal, rolled quinoa or soaked chia seeds (for gluten free).

Different flavour

Replace the cacao with the flavour you want. Add frozen banana, strawberry, blueberries...the limit is your imagination.

Add veggies

Raw cauliflower or baby spinach would work well in this smoothie.


Is this a winner in your home?  Let me know by posting a comment.

  • <
  • Page 1
  • Interim pages omitted …
  • Page 21
  • Page 22
  • Page 23
  • Page 24
  • >

Primary Sidebar

Join the community

Social Media

Join over 140,000 followers

Nourish Your Inbox

Nourish Your Inbox!

Christmas Meal Planning Ebook

Sign up today for your FREE:
• Chocolate Ebook
• Subscribers Only Special Offers
• Practical Health & Nutrition Tips
• New Whole Food Recipes

WN App

Join the Family

Join the Family

Join The Family

The Well Nourished Family Membership is your complete solution to your families health and wellbeing. With 1200+ whole food recipes and SO MUCH MORE. Join for a limited time for over 80% OFF!

JOIN & SAVE 80%

Upgrade Your Membership – Recipe Only

Health Programs & Courses – Public

Health Programs & Courses

Health Programs & Courses

Whether you’re looking for effortless meal creation, lunchbox inspiration or strategies to raise adventurous eaters, our expert-led resources will guide you every step of the way.

Find Out More

Programs and Courses – FAM only

Affiliate promo – public

Become an Affiliate

Looking to partner with a respected, Australian-run health and wellness brand to expand your reach and your income?

Find out More

Featured Lunchbox Ebook – Public

From the Shop

See More

Footer

Logos

Well Nourished HomepageWell Nourished

As featured on

Footer-social

Connect with us

  • About Well Nourished
  • Sitemap
  • Contact
  • Privacy Policy
  • Website Terms of Use
  • Affiliates

© Well Nourished 2026

A Firstnature site

Not feeling quite yourself?
If you're dealing with skin flares, gut issues, fatigue or joint pain, this five-minute quiz will help you understand what's actually driving it.
TAKE QUIZ

Rate This Recipe

Your vote:


A rating is required
A name is required
An email is required