
• Skip to primary navigation
  • Skip to main content
  • Skip to primary sidebar
  • Skip to footer

Well Nourished HomepageWell Nourished

Simple recipes, whole foods, inspired health

  • Family Members
    • Recipe Filter
    • Quick Access Shopping List
    • Membership Tutorials
    • How to be Well Nourished
    • About Well Nourished
    • Where to Shop and what to Buy
    • FAQ
  • Family Members
    • Meal Plans
      • G’s Spring Meal Plan
      • G’s Autumn Meal Plan
      • My Weekly Planner
      • Quick Access Shopping List
      • Ingredient Alert
      • Prep Ahead Plans
      • Hosting Event Plans
      • Wellness & Health Plans
    • Recipe Filter
    • Courses & Community
    • Tips for family’s
      • Getting Kids On-board
      • Planning for Picky Eaters
      • New to Meal Planning
      • Meal Planning Tips & Tricks
    • Nourishing Resources
    • Members Offers
    • What’s New This Week
    • Events
    • Membership Tutorials
    • About Well Nourished
    • FAQ
  • Recipes
    • Meals
      • 30 Minute Meals
      • Budget Friendly
      • Chicken & Turkey
      • Fish & Seafood
      • Freezable Meals
      • Make-ahead Meals
      • Meat
      • Pasta and Noodles
      • Pork recipes
      • Slow Cooked
      • Vegetarian
    • Sweet Recipes
      • Baked Sweets
      • Desserts
      • Ice-blocks
      • No-bake Sweets
    • Breakfast
    • Healthy Lunchbox
    • After School Snacks
    • Savoury Snacks
    • Sides & Salads
      • Salads
      • Side Dishes
    • Soups
    • Drinks & Smoothies
    • Dips
    • Holidays & Entertaining
    • Sauces & Dressings
    • Sourdough Baking
    • Fermenting
    • Staples
    • Members only
    • Members only
  • Shop
    • Membership and Programs
    • Ebooks
    • Free Stuff
  • Affiliates
  • About
    • About Well Nourished
    • Testimonials
    • Join the Family
    • FAQ
  • Resources
    • Find a Practitioner
    • Find whole food
      • ACT
      • NSW
      • NT
      • SA
      • QLD
      • TAS
      • VIC
      • WA
    • Products and Services I Value
    • Whole foods pantry list
    • Ingredients Glossary
  • Wellness Hub
    • Inflammation
    • Perimenopause & Menopause
    • Healthy Kids
      • Healthy Baby
      • Healthy Toddler
      • Healthy Child
      • Immune support for kids
      • Digestion & Food Allergies
      • Healthy Lunchboxes
    • Budgeting & Planning
    • Digestion & Intolerance
    • Immune Health
    • Food as Medicine
    • Foods to Avoid
    • Healthy Habits
    • Sugar
    • Carbs, Protein, Fats
      • Carbohydrates
      • Fats
      • Protein
    • Healthy Food Choices
    • Healthy Home
    • Stress & Mood Disorders
    • Healthy Mind
    • Maternal health
    • Health Challenges
  • Login
    • Well Nourished Family
    • Courses & Community
    • Affiliate Login
  • My account

cake

Easy, Healthy Cake Recipe (with lots of flavour variations)

January 12, 2015 | After School Snacks, Baked Sweets

During school holidays, I tend to bake a few more nut based recipes. This is an easy, healthy cake recipe that I just keep coming back to – one because it is so delicious and two because it is so versatile (vanilla one day, citrus or chocolate the next). I’m so excited to share this one because I know it is going to become a firm Well Nourished recipe favourite.

I often make two cakes and layer with a cream cheese frosting, chocolate ganache or cream and chia berry jam for a special, delicious birthday cake.

Health benefits

This is one sustaining, protein and fibre rich gluten-free and dairy-free cake. Almonds are a rich source of monounsaturated fats, many fat-soluble vitamins and a plethora of minerals. They are a very concentrated source of many health giving Phyto (plant) chemicals and are also a great protein source along with the eggs.

Ingredients

This cake uses simple ingredients like almond meal, large eggs, and your choice of natural sweeteners. It’s gluten-free and refined sugar-free, with options to use rice malt syrup, honey, or maple syrup, depending on your preference.

How to make this easy healthy cake

Start by mixing almond meal, sweetener, and egg yolks, rising agents and vanilla extract in a food processor, electric mixer or medium bowl then fold in whisked egg whites to keep the cake light and fluffy. Pour the batter into a well prepared cake pan. After baking at 180°C/350°F for 20-25 minutes, let it cool before serving. For a shortcut, you can skip separating the eggs, but it will make the cake denser.

Serving suggestions and how to store

Serve this cake with double cream, natural Greek yoghurt, or a dairy-free option like coconut yoghurt. It’s perfect for a light dessert or an afternoon treat. Like all cakes it’s best enjoyed fresh but you can store it in an airtight container in the fridge, or freezer.

Vary this easy healthy cake to suit your needs

For a low-fructose version, opt for rice malt syrup as your sweetener. Add lemon zest or orange zest for a citrus cake, or brush the top with syrup for a tea cake or syrup cake variation. You can also make it a chocolate cake by adding raw cacao, or swap the almond meal for hazelnut meal if you need an almond-free option.

Take a look at the variations (below the main recipe) for suggestions to alter the recipe to suit many specific dietary requirements.

For more delicious, healthy and easy to make wholefood treats, click HERE.

Basic healthy cake
Print Recipe
4.88 from 32 votes

Easy, Healthy Cake Recipe (with lots of flavour variations)

This easy, healthy cake recipe is your go-to for a light and fluffy dessert that’s naturally gluten-free and refined sugar-free. Whether you’re serving it up as a tea cake or topping it with syrup, this cake is versatile enough for any occasion and can be easily adapted to suit different dietary needs.
Prep Time15 minutes mins
Cook Time25 minutes mins
Total Time40 minutes mins
Course: Dessert, Snack
Servings: 6

Ingredients

  • 170 g almond meal (1¾ cup loosely packed) 
  • 170 g rice malt syrup, honey or maple syrup (½ cup)
  • 4 egg/s (large) at room temperature and carefully separated
  • ½ tsp bicarbonate of soda
  • ½ tsp sea salt
  • 1 tsp vanilla -powder, extract or essence
  • ½ tsp cream of tartar
Metric - US Customary

Instructions

  • Preheat your oven to 180°C/350°F (fan-forced). Grease a 23cm springform round cake tin well.  Shake a little almond meal over the base and sides too to if you like to make it really non-stick.
  • In a food processor mix the almond meal, sweetener of choice, egg yolks, bicarbonate of soda, sea salt, and vanilla until well combined. If using a Thermomix blend 30 seconds, speed 4. Set aside in a large mixing bowl.
  • In a clean and a completely dry food processor or bowl, whisk your egg whites. You are wanting to form strong peaks (like for a meringue).  I generally do this by whisking it until it becomes foamy. If using a Thermomix butterfly inserted, 20 seconds, speed 3.  
  • Then add the cream of tartar and whisk or beat until peaks form. If using a Thermomix butterfly inserted, 1½ minutes approx., speed 4.  Stop beating as soon as strong white peaks form.
  • Gently fold half of the egg white into the almond batter. Fold in the remaining egg white and pop in the oven for 20-25 minutes or until cooked in the middle.
  • Remove the outer ring from the tin and allow to cool before removing the base.

Tip

  • Personally, I'm generally a throw it all in kind of baker. But by separating the egg white, you will achieve a much lighter cake. So I believe it is worth a little extra effort to beat the egg white.  If you do have an egg white disaster or can't be bothered, you will just have a heavier, but still delicious cake.

Serve

  • With double cream or sour cream
  • With full-fat natural or unsweetened Greek yoghurt
  • For dairy free, serve with coconut yoghurt or cashew nut cream

Store

  • Store in an airtight container in the fridge or freezer.
Notes

Low-fructose

Choose rice malt syrup as your sweetener.

Citrus cake

Add the zest of 2-3 oranges, lemons or lime to infuse that flavour into the cake.  Once the cake is cooked, mix ¼ cup of juice with ¼ cup of sweetener over a low heat until combined.  Pierce the top of the cake with a skewer a few times and drizzle over the syrup.

Tea cake

Brush the top of the warm cake with melted butter or coconut oil and top with a spice/sugar mix (equal parts of mixed spice and coconut sugar)

Syrup cake

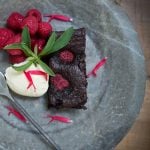
Warm the sweetener of your choice and brush over the cake whilst still warm.  Feel free to get creative and infuse it with and herbs or spices you like.  I often heat the syrup with a few leaves of lemon balm or lemon myrtle from my garden and serve topped with berries and syrup (as pictured).

Chocolate cake

Add a tablespoon of raw cacao to the almond meal batter.

Almond-free

Replace the almonds with hazelnut meal.


As I test other flavour combos I will add to the variations above.  Do you like this cake? Be sure to let me know by posting a comment below. I love hearing from you!

Berry Nice Brownies (sweet potato brownie)

February 6, 2014 | Healthy Lunchbox, Baked Sweets, Desserts

These gluten and grain free brownies aka ‘Berry Nice Brownies’, are made with sweet potatoes, and are a deliciously fudgy treat with a secret healthy twist. Packed with natural sweetness from sweet potatoes and optional bursts of berries, they’re the perfect delicious indulgence that your family will love—especially when served warm with cream and fresh berries. They are SO easy to make and being nut-free they are perfect for school lunchbox treats too. They just taste so good, check out the comments below, I’m not the only one who loves this recipe.

Most sweet potato brownies require cooked sweet potato puree – but this recipe uses grated raw sweet potato which eliminates the more time consuming step of cooking the sweet potato and pureeing it, making these a whole lot quicker to make than many sweet potato brownie recipes!

Health benefits

Using sweet potato as the base, these brownies provide a wholesome protein and fibre rich alternative to traditional recipes. Sweet potatoes are nutrient-dense and naturally sweet, making them a great way to reduce refined sugars while still enjoying a moist, chocolatey treat. This easy to make brownie is full of nutrition including about 2.5 grams protein per serve.

Ingredients in these gluten and grain-free brownies

You’ll need raw grated sweet potato, butter or coconut oil, rice malt syrup or honey, eggs, vanilla, cocoa powder, coconut flour, and a handful of fresh or frozen raspberries (or cherries) to top it off. These ingredients come together to create a brownie that’s rich, moist, and full of flavour. 

How to make this healthy brownie recipe

In a large mixing bowl mix the grated sweet potato with melted butter, sweetener, eggs, and pure vanilla extract until smooth. Then, fold in the cacao, baking powder, and coconut flour. Pour the batter into a baking pan (tin) lined with baking paper (parchment paper), top with berries, and bake at 180℃ for 25 minutes. Let the brownies cool before slicing—they firm up and have a beautiful moist texture once chilled. If you own a Thermomix, we’ve also included Thermomix instructions for this recipe.

Serving suggestions and how to store

These paleo gluten and grain-free brownies are best enjoyed at room temperature or slightly warmed with a dollop of cream or coconut cream and fresh berries. Store them in the fridge for up to a week, or freeze them for later when you need a quick, satisfying snack or school lunchbox treat.

Vary these gluten and grain-free brownies to suit your dietary needs

For a low-fructose option, swap the sweetener for rice malt syrup. To make it dairy-free, use coconut or macadamia nut oil instead of butter. If you prefer a coconut-free version, replace the coconut flour with spelt flour. You can also experiment with other grated veggies like beetroot, carrot, or zucchini for a fun twist! Or add in half a cup of dark chocolate chips for a double choc chip brownie! For a sweet salty twist, add a pinch of sea salt.

Take a look at the variations (below the main recipe) for suggestions to alter the recipe to suit your specific dietary requirements.


For more delicious, healthy and easy to make wholefood treats, click HERE.

 
Berry Nice Sweet Potato Brownies - These gluten and grain free brownies are a delicious, decadent treat with fructose, nut and dairy free versions too. Includes Thermomix method too.
Print Recipe
4.84 from 31 votes

Berry Nice Brownies

These Berry Nice Brownies are one of the most popular recipes on this website. They just tick every box, delicious, easy to make plus they contain a serve of veggies!
Prep Time10 minutes mins
Cook Time25 minutes mins
Total Time35 minutes mins
Course: Dessert, Snack
Servings: 12 slices

Ingredients

  • 200 g sweet potato/s (approx 2 cups) raw, peeled, grated & extra moisture squeezed from it
  • 125 g butter or coconut oil (½ cup) melted
  • 170 g rice malt syrup, honey or maple syrup (½ cup)
  • 2 egg/s (large sized)
  • 2 tsp vanilla -powder, extract or essence
  • 30-60 g cacao powder (¼-½ cup) unsweetened Dutch process or raw (the more you use, the richer the brownie)
  • 2 tsp baking powder
  • 1 tsp bicarbonate of soda
  • 2 tbsp coconut flour
  • 50 g raspberries (½ cup approx.) fresh or frozen or pitted cherries are lovely too (estimate about one berry per slice)

Instructions

  • Preheat your oven to 180℃/350°C (fan forced).
  • In a large bowl, blender or processor, mix together the sweet potato, butter or oil, sweetener, eggs and vanilla until combined.
  • Add the cacao, bicarbonate of soda and baking powder and combine.
  • Finally, stir in the coconut flour. Coconut flour absorbs a lot of liquid so you should only need the two tablespoons. Your batter should be the consistency of a very thick, airy (cake like) batter. Let it sit for a minute and if it still seems a little wet, add more coconut flour teaspoon by teaspoon.
  • Line a small slice tin (approx. 17 x 27cm in size) with baking paper.
  • Pour the batter into the tin and top with the raspberries or cherries (optional).
  • Bake for 25 minutes or until the centre is firm to touch or a skewer inserted comes out clean.  Cool completely before slicing. It will firm up once chilled.
  • Enjoy at room temperature or warm with double cream or coconut cream and fresh berries.

Thermomix Method

  • Preheat your oven to 180℃.
  • Grate your sweet potato, 5 seconds, speed 5. Place in a lined or fine sieve and press to remove the moisture (roughly)
  • Melt your butter or oil (if required) 1 minute, temp 90, speed 3.
  • Add back the sweet potato, sweetener, eggs, vanilla, and mix to combine 10 seconds, speed 4.
  • Add the cacao, bicarb and baking powder and mix 5 seconds, speed 3.
  • Add the coconut flour and mix 5 seconds, speed 3. Coconut flour absorbs a lot of liquid so you should only need the two tablespoons. Your batter should be the consistency of a thick, airy (cake like) batter. Let it sit for a minute and if it still seems a little wet, add more coconut flour teaspoon by teaspoon.
  • Continue from point 6 above.

Store

  • Store in the fridge in an airtight container or you can also freeze them.

Notes

Low-fructose

Sweeten with rice malt syrup.

Dairy-free

Use macadamia nut oil or coconut oil rather than butter.

Coconut-free

Replace the coconut flour with double the amount of spelt flour.

Another vegetable

I've also substituted the sweet potato with grated beetroot, carrot, zucchini or pumpkin - all equally delicious.

No berries

My son has recently decided he doesn't like fruit cooked into anything (kids!!) so these are now no longer 'berry nice' and simply 'very' nice brownies! Feel free to leave the berries off if you'd rather. 
 
 "OMG OMG OMG....just stumbled across your recipe in Haven magazine last night for "Berry Nice Brownies"....made them tonight and they were a HUGE hit for my hubby's birthday - kids and husband LOVED it ! Yum !!! So pleased I found your site !!"
Mish's Thermie Gold Coast


These are a favourite in our household, how about yours? Love to hear your feedback in the comments below (if you could rate this recipe that would be fabulous too).

Carrot Cake Slice

August 20, 2013 | Healthy Lunchbox, Baked Sweets

This healthy Carrot Cake Slice recipe is a wholesome, nut-free treat that’s perfect for lunchboxes or an afternoon snack. Packed with grated carrot, mixed seeds, and just the right amount of sweetness, it’s a delicious way to sneak in some extra nutrition while still satisfying your sweet tooth. Guaranteed to delight even fussy little (and big) people.

Health benefits

This healthy carrot cake recipe is so nourishing and tastes so good. Carrots are full of beta-carotene, which is great for immune health, while the mixed seeds add a boost of fibre, healthy fats, and important minerals like zinc. Plus, using wholemeal spelt flour provides extra fibre and nutrients, making this slice a nutritious alternative to traditional carrot cake.  The orange zest is a great immune booster too.

Ingredients

The star of the show is, of course, the carrot, paired with currants or sultanas for natural sweetness. Wholemeal spelt flour and mixed seeds add texture and a healthy twist, while spices like cinnamon, nutmeg or ground ginger give it a warm, comforting flavour. This recipe keeps it simple with pantry staples, but it makes the best carrot cake.

How to make this Carrot Cake Slice

It’s as easy as mixing your grated carrot, dried fruit, and dry ingredients in one bowl, while beating your eggs, butter, and orange zest in another. Combine everything, pour the batter into a slice tin (lined with parchment paper), and bake until firm and golden. You’ll have a deliciously moist slice in no time. We’ve also included a Thermomix method if you use one.

Time saving tip

I use a lot of ground seeds in my baking. One, because my lunchbox treats need to be nut free and secondly because seeds are very nutritious. For example, pepitas are a rich source of zinc, a mineral that often assists fussy eaters. So instead of supplementing to improve their desire and palate for food, include pepitas where you can. My kids aren’t a fan of their flavour so I grind them. If you plan to use them this way, you can grind a small batch of one or a mixture of seeds to keep in the fridge in an airtight glass container ( a jar is good).

Carrot Cake Slice has gone ‘green’ (or flecked green)

You may have noticed that your seed containing cakes or cookies turn or fleck ‘green’. I can explain…Sunflower seeds contain chlorogenic acid which reacts with the baking powder and bicarb when it’s heated and turns various shades of green when cooled.

To reduce the ‘shrek-look’ you can reduce the baking powder or bicarb (by about a third) or add 2 tsp lemon juice or vinegar to the wet ingredients. But remember – even if they do turn green, they are completely safe to eat. You might even like to use this as a way to turn cakes green on purpose?

Serving suggestions and how to store

Enjoy this refined sugar free carrot cake slice plain or top it with a simple buttercream icing (or cream cheese frosting) and top with shredded coconut for an extra treat. It’s also lovely served with a dollop of Greek yogurt for dessert. Store any leftovers in an airtight container in the fridge for a few days, or freeze them for later. It’s a great make-ahead option for busy mornings or lunchbox fillers. I generally pack from frozen and let it thaw in the lunchbox (but I live in a very warm climate). 

Vary this Carrot Cake Slice to suit your needs

For a dairy-free version, swap the butter for macadamia oil or coconut oil. If you need a gluten-free carrot cake, replace the spelt with a mix of rice and buckwheat flour, or go grain-free with almond meal (or almond flour).  For carrot cake cupcakes, pour the batter into a lined muffin tin.

Take a look at the variations (below the main recipe) for suggestions to alter the recipe to suit your specific dietary requirements.


For more delicious, healthy and easy to make wholefood treats, click HERE.

Healthy carrot cake slice with shredded carrots, nuts, and warm spices—a moist, wholesome treat.
Print Recipe
4.88 from 31 votes

Carrot Cake Slice

This delicious Carrot Cake Slice is easy to make and with a serve of vegetables, is a great edition to the kids lunchbox. 
Prep Time10 minutes mins
Cook Time25 minutes mins
Total Time35 minutes mins
Course: Snack
Servings: 8

Ingredients

  • 1 carrot/s -large (about 140g) grated
  • 70 g currants (½ cup) or sultanas or raisins
  • 115 g wholemeal spelt flour (1 cup)
  • 70 g mixed seeds (½ cup) ground. I grind sunflower, sesame, linseeds and pumpkin seeds but any combo will work. Can also use a nut meal, but no longer nut-free.
  • 60 g coconut sugar or rapadura (¼ cup)
  • 1 tsp bicarbonate of soda (please measure carefully)
  • 1 tsp baking powder
  • 1-2 tsp ground spices (whatever you like eg; cinnamon, nutmeg, cardamom, ginger, mixed spice)
  • 120 g butter (½ cup) melted (or macadamia oil)
  • 3 egg/s
  • 1 orange/s - zest (take care not to include the white pith which can be bitter)

Instructions

  • Preheat your oven to 150℃/300°F (fan forced). Line a small 20 x 30cm tin with greaseproof paper.
  • Grate the carrots.
  • In a mixing bowl mix the carrot, dried fruit, and all dry ingredients.
  • In a small bowl or jug beat the eggs, butter or oil and zest together.
  • Add to the dry ingredients and mix until just combined.
  • Pour into the tin and bake for 20 - 25 minutes or until firm to touch in the middle.

Thermomix method

  • Grind your seeds, 30 sec, speed 8. Set aside. If you are grinding your own gluten or grain-free flour do this now also.
  • Weigh and grate your chopped carrot, 5 seconds, speed 5. Set aside.
  • Melt the butter, 1 minute, 80 degrees, speed 4.
  • Add the eggs and zest and mix 30 seconds, speed 5.
  • Add the carrot and dried fruit and mix, 30 seconds, reverse speed 3.
  • Add the flour, seeds, sugar, spices, bicarb and baking soda. Mix 5-10 seconds until just combined (scraping the sides), speed 4. Don't over-mix as it will become tough.

Ice it

  • You can add any icing - I love a simple buttercream with 70 g butter (at room temperature, 20 ml lemon juice (no more or it may split) 3 tbsp rice malt syrup or honey plus 3 tbsp tapioca flour (or arrowroot).

Store

  • In an airtight container or it can be frozen in an airtight container or bag.

Notes

Make it nutty

If you want to add half a cup of walnut halves or pecans to this cake, feel free though obviously it wouldn't be nut-free or suitable for school lunches.

Dairy-free

Replace the butter with macadamia oil, though now not nut free.

Gluten-free

Replace the spelt with half rice, half buckwheat flour (or another GF flour).

Grain-free

Replace the spelt flour with 100 gram (1 cup) almond meal (now not nut-free).

Don't want to grind the seeds

Replace with almond or hazelnut meal or LSA, though now not nut free.

Low-fructose

Replace the rapadura with 80 -100gram brown rice syrup. Replace the dried fruit with coconut.

Chocolate version

Omit the dried fruit and zest and add 30 gram of cacao powder at stage 6 of the method.

After more healthy lunchbox inspiration?

My best selling ebook The Well Nourished Lunchbox has you covered and is choc-a-block full of healthy lunchbox inspiration - and not just sweet but heaps of savoury crackers, sandwich-free lunch recipes and so much more. In fact, it's 150 pages of goodness!
Click HERE to find out more about this fabulous ebook (and read the many, many reviews).


Do you like this recipe? Let me know, or post a question in the comments below or rate the recipe.

Vanilla Bean Cupcakes

May 27, 2013 | Healthy Lunchbox, Baked Sweets

These grain-free, gluten-free, nut-free and sugar-free Vanilla Bean Cupcakes are a classic favourite in our house. They are SO easy to make and with their light, fluffy texture and delicate vanilla flavour, they’re perfect for birthdays, special occasions, or simply a sweet treat to brighten your day. I often bake these with my kids—they love helping mix the ingredients and, of course, enjoying the delicious results.

Healthier Vanilla Bean Cupcakes

While cupcakes are typically considered a treat, this vanilla cupcake recipe is made with a few healthier twists. Cannellini beans, a key ingredient, are a great source of fibre and protein and are naturally gluten-free, making them a great option for those with dietary restrictions. Free-range or organic eggs add more quality protein and essential nutrients, while coconut flour offers a gluten-free alternative rich in fibre and healthy fats. The use of rice malt syrup, honey, or maple syrup instead of refined sugars provides a more natural sweetness with a lower glycemic index, helping to stabilise blood sugar levels.

Light moist texture

These Vanilla Bean Cupcakes stand out for their light and fluffy texture. Unlike many gluten-free muffins that can be dense and heavy, these cupcakes achieve a soft, airy crumb thanks to the precise combination of ingredients.

Step-by-Step Instructions

Making these Vanilla Bean Cupcakes is straightforward. Start by creaming the butter and sugar until light and fluffy in a medium mixing bowl (you may need to scrape the sides of the bowl). Then, add the eggs one at a time, mixing well after each addition. Incorporate the vanilla extract or vanilla bean paste and then gradually add the dry ingredients to the wet ingredients. Pour the batter into cupcake liners in a cupcake pan and bake until golden brown. Allow them to cool before frosting. We have also included a Thermomix method too.

Great to make a day ahead

I usually like baked goodies straight out of the oven, but these are actually best eaten the next day, especially if you think you can taste the beans or egg. This makes them perfect for birthdays or celebrations because they are even more delicious the next day.

Customising your vanilla bean cupcakes

Feel free to get creative with these easy vanilla cupcakes. You can add mix-ins like chocolate chips or fresh berries to the batter for a fun twist. For a decorative touch, frost with your favourite icing or decorate with edible flowers. You can also experiment with different flavours (check out the variations below the recipe for some ideas).

Make one big cake

This recipe also makes a fabulous ‘big’ vanilla cake too. Perfect for birthday parties (it’s been my kids cake every year since they were little). One batch makes one cake. I generally make a double batch and bake two cakes and layer with cream or ganache in between.

Personal experience with vanilla bean cupcakes

These cupcakes have become a family favourite, especially for birthday celebrations and special events. Baking them together is a cherished tradition in our home, and they always receive rave reviews from friends and family. I love how versatile they are—whether dressed up with fancy frosting or enjoyed plain, they’re always a hit.

Serving suggestions and how to store

Top these cupcakes with your favourite icing (lots of suggestions below the recipe), whether it’s a rich vanilla buttercream or a light dusting of icing sugar. They store best in the fridge in an airtight container for up to 3 days. Or store in the freezer in an airtight container for a few months. These are so great for meal prep or packing fast nut-free school lunches.

Vary this to suit your dietary needs (and taste)

Check out the variations below the main recipe for tips on how to adapt it to your specific dietary needs. For a low-fructose option, use rice malt syrup, and for a coconut-free version, swap the coconut flour for almond meal. You can also go dairy-free by using ghee or coconut oil instead of butter. Mix up the flavours by adding lemon, lime, or orange zest, fresh blueberries, or even a square of dark chocolate in the centre for a fun twist!

For a delicious, easy to make vegan vanilla cupcake – use THIS recipe.

Or for more delicious, healthy and easy to make wholefood treats, click HERE.


Vanilla bean cupcakes with a light, fluffy texture and natural vanilla flavor—perfect for any occasion.
Print Recipe
4.92 from 23 votes

Vanilla bean cupcakes

One of my most popular recipes, these Vanilla bean cupcakes are just delicious and you'd never guess they are made with beans. 
Prep Time10 minutes mins
Cook Time20 minutes mins
Total Time30 minutes mins
Course: Snack
Servings: 8 cupcakes

Ingredients

  • 425 g can cannellini beans -drained and rinsed well
  • 5 egg/s -large (or 6 small eggs, see note below)
  • 1 tbsp vanilla -powder, extract or essence
  • 50 g butter -softened at room temperature
  • 85 g rice malt syrup, honey or maple syrup (¼ cup)
  • 40 g coconut flour please weigh this, as it really needs to be exact
  • ¼  tsp sea salt
  • ½ tsp bicarbonate of soda
  • 1 tsp baking powder (gluten free)

Instructions

  • Preheat the oven to 180℃/350°F(fan forced).
  • In a powerful blender or food processor, puree the rinsed beans, eggs, and vanilla until very smooth and set aside.
  • Without rinsing your food processor, mix together the butter and honey or brown rice syrup until very well combined.
  • Add back the pureed bean/egg mix and mix until well combined.
  • Now add the coconut flour, sea salt, bicarbonate of soda and baking powder.  Mix until combined and spoon into paper-lined cupcake moulds immediately. The batter does have a slightly thick but airy consistency that is unusual if you've never worked with coconut flour before.
  • Bake for 20 minutes for large and 15 minutes for mini cupcakes, or until lightly brown on top and springy to touch (like a regular cake).
  • Cool and top with your preferred icing (recommendations below).

Thermomix Method

  • Preheat the oven to 180℃.
  • Mix the beans, eggs, vanilla, butter and sweetener for 1 minute, speed 7.
  • Add the coconut flour, sea salt, bicarbonate of soda and baking powder and mix 10 seconds, speed 4.
  • As per above method.

Note

  • Don't scrimp on the eggs or let the batter sit for too long. Not enough eggs and delaying getting it in the oven will result in a much heavier batter and cake.
  • I usually like baked goodies straight out of the oven, but these are actually best eaten the next day, especially if you think you can taste the beans or egg. 

Store

  • They are best stored in the fridge and can also be frozen in an airtight container or snap-lock bag.

Notes

Low-fructose

Choose rice malt syrup as your sweetener (optional pinch of stevia if you like also).

Coconut-free

Substitute the coconut flour for 100 grams of almond meal (though now obviously not nut free). I have also substituted for 40 grams of wholemeal spelt flour with success (no longer gluten-free if you substitute with spelt).

Dairy-free

Substitute the butter with ghee or coconut oil.

Lemon or lime cupcakes

Add the zest of one large lemon or lime to the egg/bean mix.

Orange cupcakes

Add the zest of one large orange to the egg/bean mix.

Blueberry cupcakes

Add ¼ cup of fresh or defrosted blueberries, mixed through the batter very gently at the very end.

Chocolate chip

Add a ¼ cup of dark chocolate chips (I love the Green and Blacks 85% cacao chocolate). As I'm a bit of a stooge when it comes to my kids eating chocolate, I often just push a square of chocolate into the middle or place on top of the cupcake (this also saves me the effort of icing)!

Icing suggestions

Remember to make sure the cupcakes are completely cold before icing.

Fructose-free vanilla icing (gluten free too)

50grams of butter, softened at room temperature
A pinch of pure stevia powder
1 tablespoon brown rice syrup
1 tablespoon vanilla bean powder
Beat together until light and fluffy.

Cream cheese icing

50 grams cream cheese or quark
20 grams butter, softened at room temperature
1 tablespoon brown rice syrup
1 teaspoon vanilla
Beat together until light and fluffy.

Cashew nut cream (dairy and gluten free)

½ cup raw cashew nuts
¼ cup water
1 teaspoon vanilla
1 tablespoon brown rice syrup or maple syrup (optional)
Soak the cashews in water for 3-4 hours. Strain and then process with the rest of the ingredients until smooth. You can add more or less water to the nuts to achieve the desired consistency. If you aren't organised enough to soak the cashews, then boil them gently for 5 minutes, then process.

Vanilla cream

Carton cream whipped until light and fluffy
1 teaspoon vanilla
Beat ingredients together and place on top of the cupcake. You can also slice the top of the cake off, top with cream and replace the cake top with a slice of strawberry (like a butterfly cake).
 

  • <
  • Page 1
  • Page 2

Primary Sidebar

Join the community

Social Media

Join over 140,000 followers

Nourish Your Inbox

Nourish Your Inbox!

Christmas Meal Planning Ebook

Sign up today for your FREE:
• Chocolate Ebook
• Subscribers Only Special Offers
• Practical Health & Nutrition Tips
• New Whole Food Recipes

WN App

Join the Family

Join the Family

Join The Family

The Well Nourished Family Membership is your complete solution to your families health and wellbeing. With 1200+ whole food recipes and SO MUCH MORE. Join for a limited time for over 80% OFF!

JOIN & SAVE 80%

Upgrade Your Membership – Recipe Only

Health Programs & Courses – Public

Health Programs & Courses

Health Programs & Courses

Whether you’re looking for effortless meal creation, lunchbox inspiration or strategies to raise adventurous eaters, our expert-led resources will guide you every step of the way.

Find Out More

Programs and Courses – FAM only

Affiliate promo – public

Become an Affiliate

Looking to partner with a respected, Australian-run health and wellness brand to expand your reach and your income?

Find out More

Featured Lunchbox Ebook – Public

From the Shop

See More

Footer

Logos

Well Nourished HomepageWell Nourished

As featured on

Footer-social

Connect with us

  • About Well Nourished
  • Sitemap
  • Contact
  • Privacy Policy
  • Website Terms of Use
  • Affiliates

© Well Nourished 2026

A Firstnature site

Not feeling quite yourself?
If you're dealing with skin flares, gut issues, fatigue or joint pain, this five-minute quiz will help you understand what's actually driving it.
TAKE QUIZ

Rate This Recipe

Your vote:


A rating is required
A name is required
An email is required