• Skip to primary navigation
  • Skip to main content
  • Skip to primary sidebar
  • Skip to footer

Well Nourished HomepageWell Nourished

Simple recipes, whole foods, inspired health

  • Family Members
    • Recipe Filter
    • Quick Access Shopping List
    • Membership Tutorials
    • How to be Well Nourished
    • About Well Nourished
    • Where to Shop and what to Buy
    • FAQ
  • Family Members
    • Meal Plans
      • G’s Spring Meal Plan
      • G’s Autumn Meal Plan
      • My Weekly Planner
      • Quick Access Shopping List
      • Ingredient Alert
      • Prep Ahead Plans
      • Hosting Event Plans
      • Wellness & Health Plans
    • Recipe Filter
    • Courses & Community
    • Tips for family’s
      • Getting Kids On-board
      • Planning for Picky Eaters
      • New to Meal Planning
      • Meal Planning Tips & Tricks
    • Nourishing Resources
    • Members Offers
    • What’s New This Week
    • Events
    • Membership Tutorials
    • About Well Nourished
    • FAQ
  • Recipes
    • Meals
      • 30 Minute Meals
      • Budget Friendly
      • Chicken & Turkey
      • Fish & Seafood
      • Freezable Meals
      • Make-ahead Meals
      • Meat
      • Pasta and Noodles
      • Pork recipes
      • Slow Cooked
      • Vegetarian
    • Sweet Recipes
      • Baked Sweets
      • Desserts
      • Ice-blocks
      • No-bake Sweets
    • Breakfast
    • Healthy Lunchbox
    • After School Snacks
    • Savoury Snacks
    • Sides & Salads
      • Salads
      • Side Dishes
    • Soups
    • Drinks & Smoothies
    • Dips
    • Holidays & Entertaining
    • Sauces & Dressings
    • Sourdough Baking
    • Fermenting
    • Staples
    • Members only
    • Members only
  • Shop
    • Membership and Programs
    • Ebooks
    • Free Stuff
  • Affiliates
  • About
    • About Well Nourished
    • Testimonials
    • Join the Family
    • FAQ
  • Resources
    • Find a Practitioner
    • Find whole food
      • ACT
      • NSW
      • NT
      • SA
      • QLD
      • TAS
      • VIC
      • WA
    • Products and Services I Value
    • Whole foods pantry list
    • Ingredients Glossary
  • Wellness Hub
    • Inflammation
    • Perimenopause & Menopause
    • Healthy Kids
      • Healthy Baby
      • Healthy Toddler
      • Healthy Child
      • Immune support for kids
      • Digestion & Food Allergies
      • Healthy Lunchboxes
    • Budgeting & Planning
    • Digestion & Intolerance
    • Immune Health
    • Food as Medicine
    • Foods to Avoid
    • Healthy Habits
    • Sugar
    • Carbs, Protein, Fats
      • Carbohydrates
      • Fats
      • Protein
    • Healthy Food Choices
    • Healthy Home
    • Stress & Mood Disorders
    • Healthy Mind
    • Maternal health
    • Health Challenges
  • Login
    • Well Nourished Family
    • Courses & Community
    • Affiliate Login
  • My account

picnic

Savoury Veggie Crackers

February 7, 2018 | Healthy Lunchbox, Savoury Snacks

My kids are big veggie lovers now, but this hasn’t always been the case. One of the tricks that really helped along the way was creating fun, nourishing snacks like these Savoury Veggie Crackers. I’ve written extensively about raising real food loving kids HERE – it’s a topic I’m super passionate about. I also have a whole chapter in my ebook The Well Nourished Lunchbox dedicated to delicious ways to include vegetables in your child’s diet (as well as over 50 sensational recipes, including loads of savoury cracker options). Click HERE to find out more.

One thing I know for sure, is the more vegetables your kids eat, the more they will enjoy and be open to eating them. So when my kids were little and reluctant to eat a wide variety of veggies, I used to hide them in everything I cooked, including sweet and savoury baking (as well as presenting them in their whole form throughout the day and with every meal). You can read my thoughts on the benefits and pitfalls of ‘hiding’ veggies for picky eaters HERE.

I first made this cracker when my kids were teething (as a rusk of sorts). So I thought I’d re-invent it as a cracker my kids will enjoy now – and it’s safe to say they do! I love adding extra veggies anywhere I can and this  cracker is really quick and easy to make. I hope you and yours enjoy it too.

Health benefits

Spinach adds a wealth of vitamins and minerals, including iron, calcium, and vitamins A and C. Wholemeal spelt flour provides fibre and complex carbohydrates, while optional sesame seeds and nutritional yeast add extra protein, healthy fats, and B vitamins. These crackers are a wholesome alternative to store-bought varieties, which often contain refined ingredients, vegetable oils and additives.

Ingredients

These vegan crackers feature a base of wholemeal spelt flour combined with pureed spinach, olive oil, and sea salt for a nutritious and delicious dough. Optional ingredients like garlic granules or garlic powder, sesame seeds and nutritional yeast enhance both flavour and nutritional value.

How to make these Savoury Veggie Crackers

To make these crispy crackers, start by blending the spinach and water in a food processor until smooth. Mix in olive oil, salt, sugar, baking powder, and any optional ingredients like sesame seeds or garlic powder. Gradually add the flour, adjusting as necessary until the dough reaches a play-dough-like consistency. Roll the dough out thinly with a rolling pin between sheets of parchment paper, cut into squares with a sharp knife (or a pizza cutter), and bake until crispy.

Serving suggestions and how to store

These dairy-free crackers are a great addition to a snack platter or paired with your favourite dip. Store them in an airtight container for up to a week, or freeze them and pop them into lunchboxes straight from the freezer for an easy snack.

Vary Savoury Veggie Crackers to suit your dietary needs

For a gluten-free or grain-free version, substitute the spelt flour with a gluten-free or paleo flour. These variations may need additional baking time to crisp up properly. If you’re in the mood for something fun and colourful, try replacing the spinach with beetroot for pink crackers. To make this recipe garlic and sesame-free, simply omit those ingredients.

Take a look at the variations (below the main recipe) for suggestions to alter the recipe to suit any specific dietary requirements.


For more delicious, easy to make healthy savoury snack recipes, click HERE.
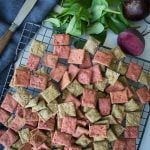
Savoury veggie crackers - These Savoury Veggie Crackers are a delicious, very easy to make and a great way to include a little veggies. They are wheat, dairy, nut and egg-free and have a gluten-free option too.
Print Recipe
4.91 from 10 votes

Veggie Crackers

These Savoury Veggie Crackers are a healthy and tasty snack option, perfect for lunchboxes or as a crispy, savoury bite with dips or spreads. Made with spinach (or beetroot) for a vibrant colour and a boost of nutrients, these crackers are packed with flavour and can easily be adapted to suit different dietary needs.
Prep Time10 minutes mins
Cook Time25 minutes mins
Total Time35 minutes mins
Course: Snack
Servings: 50 crackers
Author: Georgia Harding

Ingredients

  • 60 ml water (¼ cup)
  • 50 g baby spinach (2 large handfuls)
  • 1 tbsp extra virgin olive oil -extra virgin
  • 2 tsp sea salt
  • 1 tsp coconut sugar or rapadura
  • 1 tsp baking powder
  • 2 tbsp sesame seeds -optional
  • 1 tbsp nutritional yeast -optional
  • 1 tsp garlic granules -or powder, optional (I've also used a clove of garlic processed with the spinach too)
  • 200 g wholemeal spelt flour (1¾ cups approx.) see below for GF

Instructions

  • Pre heat the oven to 180℃/350℉.
  • In a high speed blender mix the water and spinach, scraping the sides until pureed. Thermomix 1 minute, speed 5 (you will need to scrape the sides quite a few times).
  • Add the olive oil, sea salt, sugar, baking powder (and any optional ingredients) and mix together until combined. Thermomix 20 seconds, speed 4.
  • Add the flour and mix until a dough the consistency of play-doh forms (so it holds together but doesn't stick to your hands).
  • IMPORTANT - All whole flours are slightly different in the rate they absorb water. This is the reason white (highly refined flours) are used in processed foods because they bring consistent results. So you may need to adjust the amount of flour (or water) slightly to achieve the right consistency as described above (especially with the GF variation below). 
  • Form into a rough disc, place between two sheets of baking paper (or silicone sheets). I use 'If you Care' brand of baking paper, it's very non stick and can even be reused (it's that good).
  • Roll until VERY thin (1-2mm). If they aren't thin enough they won't crisp up so keep rolling until the dough stops expanding. Remove the top piece of parchment and cut the dough with a pizza cutter or plastic ruler (my new way to get the squares nice and even). 
  • Lift this carefully onto a baking tray. 
  • Bake for 20-25 minutes. I find the outside rows cook quicker than the inside squares so I often take it from the oven at 20-25 minutes, remove the outer rows and return the middle crackers which are still not crisp enough to the oven for 5 minutes or until they are dry and crunchy.

Store

  • In an airtight container. They can also be frozen and packed into the lunchbox (from frozen). 

Notes

Gluten or grain-free

I've recipe tested these crackers with both gluten-free and paleo flours (both are also nut-free). I found these needed extra time in the oven to crisp up. 

Beetroot (pink crackers)

Replace the spinach with 50g of raw beetroot (about half a small beetroot), peeled and diced. This makes for little pink crackers. 

Garlic and sesame-free

Simply omit from the recipe.


I'd love to hear how you enjoyed these - post your feedback in the comments below. 

Moroccan Lamb Burgers with a Mint Feta Dressing

January 22, 2015 | Budget Friendly, Make-ahead Meals, Red Meat, Freezable Meals

These Moroccan lamb burgers with a mint feta dressing bring bold flavours to your table with a delicious blend of spices. Perfect for a casual BBQ or an easy weeknight meal, they’re packed with flavour and can be customised to suit your dietary needs. You can also use this mince mix to make little meatballs to include in the school lunch.

Us Aussies love a burger on a BBQ. So I thought I’d share a recipe that’s easy enough for the kids to get involved and make, and one the whole family will love ahead of this long weekend.

Health benefits

Lamb is a great source of protein, iron, and healthy fats, while the spices provide anti-inflammatory benefits. The fresh mint and yogurt in the dressing add a light, tangy contrast, and you can easily make this recipe dairy-free if needed, keeping it healthy without compromising on taste.

Ingredients

This recipe is loaded with aromatic spices like cumin, coriander, and smoked paprika, along with zesty lemon to brighten the flavours. The mint feta dressing offers a refreshing twist, and there are easy swaps if you’re avoiding dairy.

How to make Moroccan Lamb Burgers

Mix the lamb mince with garlic, spices, and lemon zest to form patties, then cook them on the BBQ or in a pan. Blend together feta, yogurt, and mint for the dressing, adding harissa for extra heat if desired. Serve the burgers on buns or lettuce cups with a generous dollop of mint feta dressing.

Serving suggestions and how to store

Serve these Moroccan lamb burgers in a sourdough bun with salad or go grain-free by using lettuce cups or grilled mushrooms instead. Store leftover patties and dressing separately in airtight containers in the fridge, or freeze the patties for a quick future meal.

Vary Moroccan Lamb Burgers to suit

For a dairy-free option, substitute the feta and yogurt with mayonnaise. You can also skip the garlic and replace it with a pinch of chilli flakes if you prefer. This recipe is easy to adjust, so it fits a variety of dietary preferences without losing its vibrant flavours.

Take a look at the variations (below the main recipe) for suggestions to alter the recipe to suit your specific dietary requirements.

These gluten & grain-free Moroccan Lamb Burgers are so easy to make, can be pre-made & are great cooked on the BBQ. Great for school lunches too.
Print Recipe
5 from 1 vote

Moroccan Lamb Burgers with a Mint Feta Dressing

My Moroccan Lamb Burgers with a Mint Feta Dressing is a tasty, easy to make burger. Perfect for a fast lunch or dinner. 
Prep Time15 minutes mins
Cook Time15 minutes mins
Total Time30 minutes mins
Course: Main Course
Servings: 6

Ingredients

Burger ingredients:

  • 500 g lamb mince
  • 1 clove/s garlic -crushed
  • 1 tsp ground cumin
  • 1 tsp ground coriander
  • 1 tsp garam masala
  • 1 tsp smoked paprika
  • 1 lemon/s -zest finely grated
  • Sea salt and freshly ground black pepper -to taste

Mint feta dressing ingredients:

  • 100 g feta cheese -crumbled
  • 2 tbsp natural, Greek or coconut yoghurt
  • ¼ bunch/s fresh mint leaves -finely chopped
  • ½-1 tsp harissa paste (optional)

Serve

  • 6 burger buns
  • Salad (to serve)

Instructions

For the burger patties:

  • In a large mixing bowl or food processor, simply mix all of the burger ingredients together until they are well combined (TMX reverse, speed 2-3, using the spatula to push down).
  • Form into burger patties and cook immediately or refrigerate to cook later, either  on the BBQ or in a frypan.

For the Mint and Feta dressing:

  • Blend the feta, yoghurt, and mint together until well combined (TMX - chop mint 5 sec, speed 6. Add the rest of the ingredients and blend 5 sec, speed 3-4)
  • Swirl through the harissa (optional).

Serve

  • the lamb patty on a sourdough roll with salad and the mint and feta dressing
  • or for gluten and grain free, serve in a lettuce cup or between two grilled field mushrooms

Make-ahead

  • Re-heat in a low oven until just hot.

Store

  • Store burger patties and dressing in separate airtight containers in the fridge.
  • Can also be frozen either the raw patties or cooked. Fully de-frost before cooking/ re-heating.

Notes

Dairy-free

Substitute the feta and yoghurt with homemade or whole-egg mayonnaise.

Garlic-free

Replace the garlic with a pinch of chilli flakes.


As always, I welcome your feed back and questions.


Sticky Drumsticks (with a Simple Tahini Yoghurt Dipping Sauce)

July 16, 2014 | Budget Friendly, Make-ahead Meals, Chicken, Healthy Lunchbox

Today, I have for you, a delicious sticky drumsticks recipe – perfect for picnics, a meal, and leftovers are great for school lunches too. They’re budget friendly (even organic drumsticks are quite affordable), super quick to make and something I’m sure the whole family will love.

Health benefits

Most stores bought marinades are a combination of unhealthy ingredients such as sugar, vegetable oils, additives, and preservatives. This homemade marinade demonstrates that healthy doesn’t necessarily mean hours in the kitchen. The marinade is gluten-free, dairy-free and has a fructose-free option. The chicken is obviously a great source of protein and the yoghurt full of gut loving probiotics.

Ingredients

You only need a few simple ingredients like clove garlic, tamari, and lemon zest & juice to whip up this tasty marinade, while the tahini yogurt sauce is made from whisking together full-fat natural yoghurt (or plain greek yogurt), tahini, and a pinch of spices. With these pantry staples, you’ll have a delicious dish that’s easy to prepare and sure to impress.

Instructions for making Sticky Drumsticks with yogurt tahini sauce

Making these sticky drumsticks is super easy. Mix up the marinade, pour it over the drumsticks in a roasting dish, and bake them in the oven for about 40 minutes. While they’re cooking, quickly whip up the tahini yoghurt dipping sauce and you’re ready to serve a delicious meal.

Serving suggestions and how to store

Serve these sticky drumsticks with the dipping sauce on the side for a satisfying finger food dish. They’re great with a simple salad, some roast veggies or pita chips. Leftovers can be stored in an airtight container in the fridge for up to three days, and you can reheat them in a low oven or enjoy them cold.

Vary this sticky drumsticks recipe to suit

To make this dish dairy-free, swap out the yoghurt for coconut yoghurt in the dipping sauce. If you’re avoiding soy, use coconut aminos instead of tamari. For a sesame-free version, replace the tahini with almond butter, and if you’re garlic-free, just use extra cumin and a pinch of chilli flakes for added flavour.

Take a look at the variations (below the main recipe) for suggestions to alter the recipe to suit many specific dietary requirements.


This sticky drumsticks recipe is delicious, budget friendly & super quick to make. The family will love them especially with the creamy sauce
Print Recipe
5 from 4 votes

Sticky Drumsticks (with a simple tahini yoghurt dipping sauce)

These sticky drumsticks are the perfect mix of sweet, savoury, and just a little tangy, making them a family favourite for dinner or a casual BBQ. Paired with a creamy tahini yoghurt dipping sauce, this easy-to-make dish is a guaranteed hit that’s both healthy and delicious. Whether served hot or cold, it’s a versatile recipe you’ll want to keep on repeat.
Prep Time5 minutes mins
Cook Time40 minutes mins
Total Time45 minutes mins
Course: Main Course
Servings: 12 drumsticks

Ingredients

  • 12 chicken drumsticks (approx.)

Marinade

  • 1 clove/s garlic -crushed
  • 60 ml tamari (¼ cup)
  • 85 g rice malt syrup or honey (¼ cup)
  • 1 lemon/s -zest and juice

Simple tahini yoghurt dipping sauce

  • 250 g natural, Greek or coconut yoghurt (1 cup)
  • 2 tbsp hulled tahini 
  • ¼ tsp sea salt - or to taste
  • ½ tsp ground cumin
  • ½ tsp ground cinnamon
Metric - US Customary

Instructions

  • Preheat the oven to 180°C/350°F (fan-forced).
  • In a small bowl or jug mix all the marinade ingredients together.
  • Place the drumsticks in a small roasting dish in a single layer.
  • Pour the marinade over the top to toss and coat the chicken evenly and place in the oven for about 40 minutes or until the chicken is cooked through. If they are not brown enough, you can always place them under the grill for a few minutes at the end of the cooking process.
  • While they are baking make the dipping sauce. Mix all of the ingredients until well combined and serve with the drumsticks.

BBQ tip

  • If you wanted to BBQ these you could. Just score the meat of each of the drumsticks three times, to allow the marinated to penetrate and to help them to cook through without burning.

Serve

  • Serve with a napkin or wrap foil around the 'handles' .
    Enjoy hot or cold with the tahini yogurt dipping sauce (recipe below).

Make-ahead

  • Re-heat covered in a low oven until just hot.

Store

  • Store leftovers in an airtight container in the fridge.

Notes

Fructose-friendly

Choose rice malt as your sweetener.

Dairy-free

Choose coconut yoghurt for the dipping sauce.

Sesame-free

Replace the tahini with almond butter.

Garlic-free

Replace the garlic with a teaspoon of cumin and a pinch of chilli flakes.

Soy-free

Replace the tamari with liquid or coconut aminos.

After more healthy lunchbox inspiration?

My best selling ebook The Well Nourished Lunchbox has you covered and is choc-a-block full of healthy lunchbox inspiration - and not just sweet but heaps of savoury crackers, sandwich-free lunch recipes and so much more. In fact, it's 150 pages of goodness!
Click HERE to find out more about this fabulous ebook (and read the many, many reviews).

Healthy Roast Chicken Marinade – Take-away Style

April 30, 2014 | Chicken, Healthy Lunchbox

If you love the flavours of take-away roast chicken but want a healthier version, this simple healthy roast chicken marinade is your go-to. It’s quick to prepare and turns any roast chicken into a juicy, delicious meal that’s perfect for a Sunday roast or weeknight dinner. Plus, with a few basic ingredients, you can easily recreate that irresistible “take-away” taste at home.

This healthy roast chicken marinade recipe is so simple you will never buy a pre-cooked, take away chicken again. Gluten-free, sugar-free, additive and vegetable oil free, you will not be disappointed – it’s perfection on a plate!

A budget and time friendly organic meal, lunch, and healing broth…

I pay less than $20 for a large whole organic chicken. With it, I make a roast chook for dinner most Sunday nights and I have plenty of leftover meat for healthy school lunches during the week. For a very large family, you might like to roast two chickens at once. I then use the carcass and all of the leftover bones to make a super healing, flu busting, gut healing, pain reducing chicken broth – waste not want not! Broth is perfect for soups, casseroles, curries and all your cooking needs. Get your ‘too easy’ bone broth recipe here.

Health benefits

By using quality ingredients like protein rich free-range chicken, macadamia nut oil or butter, and real spices, this roast chicken is not only delicious but also packed with healthy fats, essential vitamins, and minerals. Opting for homemade marinades means avoiding unhealthy additives, preservatives and large amounts of sodium often found in store-bought versions.

Ingredients

This recipe calls for a handful of pantry staples like butter (or macadamia oil), honey, smoked paprika, thyme, sea salt, and black pepper. These simple ingredients combine to create a rich, smoky flavour that makes this roast chicken unforgettable.

How to make this Healthy Roast Chicken

Making this whole roasted chicken couldn’t be easier! Mix your marinade ingredients, baste your chicken, and roast it in a roasting pan the oven. Baste halfway through to ensure every bite is full of flavour, and cook until golden and juicy. It’s that simple – minimal prep, maximum taste. If you happen to have a rotisserie in your oven or BBQ, this is the perfect baste for you.

Serving suggestions and how to store

Serve this roast chicken with your favourite root veggies (potato, sweet potato, parsnip, carrots etc)– roast them in the same pan for easy cleanup. While the chicken is baking, I often prepare steamed greens (like beans or broccoli) or a delicious side salad. I also love to drizzle the pan juices over the meat.

Store any leftovers in an airtight container in the fridge, and reheat gently in the oven. It’s great for meal prep, too as cold meat can be repurposed into another meal or added to sandwiches, rolls or wraps for lunch. Or use it to make a delicious Chicken Salad or soup.

Vary this healthy roast chicken marinade to suit

To make this chicken recipe nut-free, simply swap the macadamia nut oil for melted butter (or olive oil). For a fructose-free version, use rice malt syrup as your sweetener. If you’re looking for a different cooking method, try slow cooking it for an even more tender result – perfect for busy days!

Take a look at the variations (below the main recipe) for suggestions to alter the recipe to suit many specific dietary requirements.


This healthy roast chicken marinade recipe is so simple you will never buy a pre cooked, take away chicken again. It's the best!
Print Recipe
5 from 12 votes

Healthy Roast Chicken Marinade - Take away style

This is my take on a healthy 'takeaway' BBQ chicken - this marinade recipe is so simple and delicious you will never need to buy a pre-cooked, take away chicken again.  
Prep Time10 minutes mins
Total Time10 minutes mins
Course: Main Course
Servings: 4

Ingredients

  • 1 whole chicken (preferably free-range or organic)

Marinade ingredients (for one large chicken)

  • 50 g butter or macadamia nut oil (¼ cup)
  • 1 tbsp rice malt syrup or honey
  • 1 tsp smoked paprika
  • 1 tsp dried thyme
  • 2 tsp sea salt - or to taste
  • ground black pepper - to taste

Instructions

  • In a small bowl, mix the ingredients together until well combined.
  • Baste your chicken all over with half of the mix.
  • Place your chicken breast side up in a preheated oven or on a rotisserie if you have one.
  • After 30 minutes of cooking, remove from the oven and baste again with the remaining marinade.
  • Return to the oven and roast until the chicken is cooked to perfection.
  • The time this takes will vary depending on the size of your chicken, but work off 20-30 minutes per 500gram at 180℃/350°F. I use a meat thermometer to check my chicken is cooked to perfection.
  • Once cooked, rest the chicken for 5-10 minutes uncovered, then carve and enjoy!

Also…

  • Add lots of vegetables and also slices of lemon to your roasting dish too.  You may also like to stuff your chook? I personally keep it quick and simple and wedge lemon pieces and any herbs I can rummage from my herb garden.

Slow cooked…

  • Toni messaged me on Facebook to say she had slow cooked this with a 10/10 husband and kids rated result! She cooked it for 8 hours on low, basting it with the marinade every 2-3 hours with great success. A great option if you like to slow cook!

Serve

  • Serve with roasted vegetables, steamed greens (like broccoli or beans) or even Cauliflower Cheese.
  • Or a delicious salad.

Store

  • Store in an airtight container in the fridge or freeze the chicken for up to three months.
  • Re-heat in a low oven (covered) until just hot.

Notes

Nut-free

Replace the macadamia nut oil with melted butter.

Fructose-free

Choose the rice malt syrup as your sweetener.
 

Do you like a roast or BBQ style chook?  Do you normally buy it or cook your own?

 
 "We made this a few weeks ago and you're not wrong - it really does taste like {better than} BBQ chook!" Emma

Turkey Lemon Feta Mini Meatballs, Baby Burgers or Sausage Rolls

January 14, 2014 | Budget Friendly, Make-ahead Meals, Chicken, Freezable Meals, Healthy Lunchbox, After School Snacks, Savoury Snacks

These Turkey Lemon Feta Mini Meatballs, Baby Burgers or Sausage Rolls are the ultimate versatile dish for any occasion. Whether you’re packing a healthy lunchbox, hosting a party, or simply looking for a quick family dinner, this recipe has you covered with three tasty options in one. I often make these for my kids parties – they go down really well with kids and adults alike.

These are a high-protein meal or snack and a really tasty way to ‘hide’ extra nourishment in the form of vegetables. They can be pre-prepared, frozen and leftovers are fabulous for school lunch boxes too.

Health benefits

Packed with protein rich turkey, fibre packed veggies, and the tangy flavour of lemon and feta, this recipe is a nutritious alternative to traditional meatballs or sausage rolls. By using quality ingredients, you’re ensuring a meal that’s not only delicious but also full of natural goodness.

Ingredients

The recipe features turkey mince, fresh garlic, red onion, and a mix of finely grated carrot and zucchini for added moisture and nutrition. Mint or parsley, lemon zest, and crumbled feta add a burst of fresh flavour, while fresh breadcrumbs help bind everything together. Simple seasonings like salt and pepper tie it all together.

How to make these turkey meatballs, hamburgers or sausage rolls

Start by mixing all the ingredients in a large bowl or food processor until well combined. Choose your preferred option—whether mini meatballs, baby burgers, or sausage rolls—and follow the specific cooking instructions for each. Bake, grill, or roll as needed, and you’ve got a versatile dish ready to serve.

Serving suggestions and how to store

Serve the mini meatballs with pasta, in wraps, or with vegetable sticks for a kid-friendly lunchbox option. The baby burgers are perfect for parties or a casual weekend lunch, while the sausage rolls make an excellent snack or picnic food. Store leftovers in an airtight container in the fridge or freezer, and simply reheat when needed.

Vary turkey lemon feta sausage rolls, meatballs or burgers to suit your needs

For a gluten-free version, use gluten-free breadcrumbs and pastry. Dairy-free? Omit the feta or replace it with cashew nuts or nutritional yeast. If you’re avoiding eggs, leave them out, though the patties may be a bit softer. You can also swap turkey mince for chicken mince or pork mince, depending on your preference.

If you’re tired of searching the internet for lunchbox inspo, look no further than my best selling ebook ‘The Well Nourished Lunchbox.’ It’s all the inspiration you’ll ever need to pack a delicious, whole foods lunchbox, quickly and easily!


For more healthy sausage roll recipes, click HERE.

Turkey meatballs, burgers, sausage rolls
Print Recipe
4.80 from 20 votes

Turkey, lemon and feta mini meatballs, baby burgers or sausage rolls

This delicious Turkey, lemon and feta combination can be made into meatballs, sausage rolls or hamburgers. Both adults and kids love this recipe - its my go to for parties and celebrations. 
Prep Time15 minutes mins
Cook Time30 minutes mins
Total Time45 minutes mins
Course: Main Course
Servings: 4

Ingredients

  • 500 g turkey mince (you can substitute chicken mince)
  • 1 clove/s garlic -finely chopped or crushed
  • 1 red onion/s (small) peeled and finely diced
  • 2 tbsp fresh mint leaves (finely diced) or parsley leaves
  • 1 carrot/s -finely grated
  • 1 zucchini/s -finely grated
  • 1 egg/s -lightly beaten
  • 1 lemon/s -zest
  • 30 g fresh breadcrumbs (¼ cup) see below for gluten-free
  • 100 g feta cheese -crumbled or cubed (see below for dairy free)
  • Sea salt and freshly ground black pepper

Instructions

  • In a large mixing bowl or food processor, simply mix all of the ingredients together until they are combined well.
  • Then choose your preferred dish  from the options below.
  • Sometimes, I'll use half of the mix for sausage rolls and the other half, is made into meatballs for the next day's lunch boxes.

Thermomix Method

  • If you need to, make your breadcrumbs from a frozen slice of bread, 10 seconds, speed 6. Set aside.
  • Add your garlic, onion (halved), mint or parsley, carrot and zucchini (chunks) and chop, 10 seconds, speed 5.
  • Add the mince, breadcrumbs, egg, lemon zest, feta and seasoning and combine on reverse, 20-30 seconds, speed 3 (you may need to scrape the sides to help it along).

Mini-meatballs

  • Preheat your oven to 180℃/350°F (fan-forced).
  • With damp hands, roll small balls and place on a baking tray lined with baking paper.
  • Bake for 20-30 minutes or until cooked through and browning on top. Serve warm or cold.
  • I love these for the kids lunch box; either with a salad or vegetable sticks or as a wrap or fresh spring roll filler.
  • Alternatively, you could add a lovely tomato puree and serve over pasta - spaghetti and meatballs!

Baby Burgers

  • With damp hands, roll small balls and place on a baking tray lined with baking paper, then flatten with the back of a fork.
  • Place on a preheated BBQ or grill pan to cook.
  • Serve in little dinner rolls with the salad and sauce of your choice. They can be held together by running a toothpick through the centre if need be.
  • For a grain-free option, serve in lettuce cups, san chou bow style.
  • These make a delicious, healthy party food or a fast weekend lunch.

Sausage rolls

  • Preheat your oven to 180℃/350°F (fan-forced).
  • Beat one egg in a cup with a tablespoon of milk.
  • Take a sheet of all-butter puff or short crust pastry and cut it in half (or better still make your own pastry). Careme brand have a fabulous wholemeal spelt puff pastry that is my personal favourite. 
  • Place the mince mixture along the centre of each half. Brush one edge of the pastry with the egg wash and fold the pastry over the mince.
  • Place on a baking tray (seam side down). Top with a little more egg wash and sprinkle over sesame seeds.
  • Cut into approximately 5cm long rolls and bake for 20 minutes or until the pastry is golden brown. Serve warm.
  • Perfect party food or for a picnic or weekend lunch.

Tip

  • For green phobic kids, peel the zucchini and omit the parsley/mint (or just process it very finely so it can't be detected).

Make-ahead

  • Allow to defrost fully before re-heating/ cooking. Re-heat in a low oven until just hot.

Store

  • Store in an airtight container in the fridge or freezer. All options can be frozen either raw or cooked.

Notes

Gluten-free

Use gluten-free breadcrumbs, rice crumbs or quinoa flakes to bind. Use a gluten-free pastry for the sausage rolls and gluten free buns or lettuce cups for the baby burgers.

Dairy-free

Omit the feta or replace with chopped cashew nuts and/or a tablespoon of nutritional yeast.

Egg-free

Omit the egg altogether (they just aren't as firm).

Sesame-free

Omit the sesame seeds in the sausage rolls (you can sprinkle with poppy seeds instead)

Onion and garlic-free

Replace the onion and garlic with finely diced fennel (from half a small bulb) and a pinch of chilli flakes.

Chicken or pork

Also delicious with chicken or pork mince.
 

Like these? Why not post a comment below or rate this recipe.


Turkey lemon feta meatballs

Almonds – The Ultimate Snack (and three recipes)

December 5, 2013 | After School Snacks, Savoury Snacks

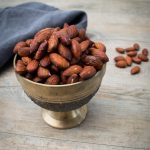
Roasted almonds are a quick, healthy, and delicious snack, but with these three flavour options—Tamari, Indian Spiced, and Sweet Spiced—you can easily switch things up. Whether you’re in the mood for something savoury, spicy, or a little sweet, this recipe has you covered.

Coming into the festive season, I thought I’d share some simple and delicious ways to prepare almonds for a healthy snack. These are just so easy to make and you can store them for long periods of time in airtight containers or jars (in the fridge or freezer is best). Double or triple the recipe to make in bulk. These are so much more delicious than anything you can buy.

They are also lovely tossed through salads (or the sweet almonds can be added to desserts).

Health benefits

Almonds are a delicious and highly nutritious food and you’ll see them feature in many of my recipes. The health benefits of protein and fibre rich almonds are many. Several studies have concluded that including almonds in your diet is protective against heart disease and diabetes. Recent research has found that including a handful of almonds in the diet of the participants, reduced hunger and did not contribute to weight gain. In fact, quite the opposite. Many studies suggest that those who include nuts in their diet regularly are less likely to gain weight.

But not all almonds are created equal, so when buying them, try to buy only raw and unsalted varieties (then flavour/ roast them yourself). The almonds in many of the ‘snack’ mixes are often roasted in vegetable oil or at very high temperatures (which is damaging to the fats in the nut) – that is they are quite processed.

Ingredients

For this recipe, you’ll need raw almonds and a few simple pantry staples like tamari, coconut oil, spices, and a sweetener of your choice. Each variation—Tamari, Indian Spiced, and Sweet Spiced—brings its own unique flavour twist to toasted almonds. And they all taste incredible!

How to make these toasted almonds (three ways)

Preheat your oven to 150°C and spread the almonds in a single layer on a baking tray. For the Tamari Almonds, toast the almonds for 5 minutes, drizzle with tamari, and roast for another 15-20 minutes. For Indian Spiced Almonds, mix coconut oil with spices, coat the almonds, and roast for 20 minutes. For Sweet Spiced Almonds, coat with coconut oil, sweetener, and spices, and roast for 20-30 minutes until crunchy.

Serving suggestions and how to store

Enjoy these roasted almonds as a snack on their own, or toss them into salads, grain bowls, or trail mix. Store them in an airtight container (a glass jar works well) in the pantry, fridge, or freezer to keep them fresh and crunchy.

Vary this to suit your dietary needs

For a soy-free option, replace tamari with coconut aminos and sea salt. If you’re avoiding coconut, swap the coconut oil for macadamia nut oil or olive oil. To keep it fructose-friendly, use rice malt syrup as the sweetener. And remember, you can apply these flavour mixes to any nut or seed you like – walnuts, hazelnuts, pecans and more! Take a look at the variations (below the main recipe) for suggestions to alter the recipe to suit your specific dietary requirements.

Roasted almonds
Print Recipe
5 from 2 votes

Roasted Almonds - three ways

Almonds are a great go-to snack for anyone looking for a nutrient-dense option. Roasting them with different spices and flavours not only adds variety but makes them even more enjoyable as a satisfying snack. Here are three moorish flavour combinations, feel free to increase the quantities as needed. 
Prep Time5 minutes mins
Cook Time20 minutes mins
Total Time25 minutes mins
Course: Snack
Servings: 1 cup

Ingredients

  • 150 g raw almonds (1 cup)

Tamari Almonds

  • 2 tbsp tamari (enough to just cover the nuts, not soak them)

Indian Spiced Almonds

  • 1 tbsp coconut oil (melted if solid)
  • ½ tsp garam masala
  • ½ tsp ground cumin
  • 1 pinch sea salt
  • 1 pinch cayenne pepper -optional for a bit of heat

Sweet Spiced Almonds

  • 1 tbsp coconut oil (melted if solid) or macadamia nut oil
  • 2 tbsp rice malt syrup, honey or maple syrup
  • ½ tsp ground cinnamon
  • ½ tsp mixed spice

Instructions

Tamari Roasted Almonds

  • Place raw almonds on a tray lined with baking paper (in a single layer).
  • Roast in a preheated oven (150℃ fan-forced)) for about 5 minutes.
  • Remove from the oven and drizzle with the tamari (enough to just cover the nuts, not soak them).
  • Return to the oven for another 15-20 minutes or until the almonds are crunchy and the tamari has formed a crunchy, salty coating.

Indian Spiced Almonds

  • Place almonds on a tray lined with baking paper. (in a single layer).
  • Mix together coconut oil (melted if solid), garam masala, cumin powder and a good pinch of sea salt and mix through the almonds until well coated.
  • For a bit of spice, add a pinch of cayenne pepper or chilli flakes too.
  • Roast in a preheated oven (150℃) for about 20 minutes or until the almonds are crunchy.

Sweet Spiced Almonds

  • Place raw almonds on a tray lined with baking paper (in a single layer).
  • Mix together coconut oil (melted if solid) or macadamia nut oil,  rice malt syrup (fructose free), honey or maple syrup, cinnamon and mixed spice.
  • Stir through the almonds until they are well coated.
  • Roast in a preheated oven (150℃) for about 20-30 minutes or until the almonds are crunchy.
  • As they cool the coating will harden to form a crunchy coating. Warning - these are very moreish!

Store

  • In an airtight container or jar in a cool pantry or the fridge or freezer.

Notes

Soy-free

Choose coconut aminos and sea salt to replace the tamari.

Coconut-free

Choose macadamia nut or olive oil instead of coconut oil.

Fructose-friendly

Choose rice malt syrup as your sweetener.

Any nut or seed will do

These mixes can be applied to any nut or seed.


Love to hear what you think of these flavour combinations?  Post a comment below.


Middle Eastern Potato Salad

August 27, 2013 | Salads


This Middle Eastern Potato Salad is a hearty twist on a classic, packed with smoky chorizo, creamy cannellini beans, and fragrant spices. It’s the perfect side dish for your next barbecue or a light, delicious meal on its own. The dressing is rich and creamy with a hint of spice, bringing everything together in a delicious bowl of goodness. You can pre-make it even a day before, so it is perfect for a picnic or entertaining. In fact, I think the flavour improves with time!

Health benefits

This Middle Eastern Potato Salad isn’t just packed with flavour; it’s also a source of resistant starch, thanks to the cooled potatoes. When potatoes are cooked and then cooled, their starch changes into a type of fibre known as resistant starch. This can support gut health by feeding beneficial bacteria and may also help with blood sugar control. The fresh herbs, like parsley, are rich in antioxidants and nutrients that support overall health, adding both flavour and a nutritious boost to this dish. So, you’re not just enjoying a delicious salad but giving your body some great benefits too!

Ingredients

To make this gluten-free potato salad, you’ll need a mix of waxy potatoes, chorizo, cannellini beans, red onion, fresh parsley, a good quality whole egg mayonnaise, and a few spices for the dressing. Don’t forget to toast some pumpkin seeds for a crunchy topping!

How to make this homemade potato salad recipe

Start by cooking the potatoes in a large pot until just fork tender and allow to cool fully. Then mix with crispy chorizo, beans, and fresh herbs. Whip up the dressing with mayo, spices, and a splash of sherry vinegar, then gently toss everything together for a well-balanced, delicious dish.

Serving suggestions and how to store

Serve this salad at room temperature as a side or main dish. It’s great with grilled meats of any kind. We even love it as a side on Christmas day! Store leftovers in an airtight container in the fridge for up to 3 days. It’s can be eaten fresh, but the flavours actually get better after a day.

Vary this to suit your dietary needs

To make it vegetarian, swap the chorizo for smoked paprika, sun-dried tomatoes and extra beans. Roasted sweet potato makes a great alternative to regular potatoes, and if you’re not a fan of onion, sliced radish works well too. Check out the variations below the main recipe for tips on how to adapt it to your specific dietary needs.


For lots more sides and salad inspo, take a look at my hugely popular ebook ËœWell Nourished Sides and Salads’– where vegetables become the hero of the dish! It’s great value at just $9.95, click HERE to take a look.

Middle Eastern potato salad with herbs, spices, and a tangy dressing—a delicious, healthy twist on classic potato salad.
Print Recipe
4.84 from 12 votes

Middle Eastern Potato Salad

This is my absolute favourite Potato Salad, it is so much more flavoursome than its standard version. Once you try it, you'll never make another.
Prep Time20 minutes mins
Cook Time20 minutes mins
Total Time40 minutes mins
Servings: 4

Ingredients

  • 1 kg potato/s -Kipfler, Desiree or dutch creams hold together well for a salad, diced into roughly 2cm pieces (peeled or unpeeled is a matter of personal preference)
  • 1 chorizo sausage -sliced
  • 425 g can cannellini beans -drained and rinsed (or cook your own)
  • 1 red onion/s -halved and thinly sliced
  • 1 bunch/s fresh parsley leaves -leaves roughly picked
  • 30 g pumpkin seeds (¼ cup) toasted to serve, optional

Dressing

  • 200 g whole egg mayonnaise -homemade is my preference (or a good quality creamy whole-egg mayonnaise, just not low-fat which contains shocking amounts of sugar)
  • 1 tbsp reserved chorizo fat (optional)
  • ½ tsp sweet paprika
  • 1 tsp ground coriander
  • 1 tsp ground cumin
  • ¼ - ½ tsp chilli flakes -depending on how much spice you like
  • 1 tsp sherry vinegar -this can be hard to find, but adds an amazing depth of flavour
  • Sea salt and freshly ground black pepper -to taste

Instructions

  • Firstly boil or steam your potatoes until they are just cooked through but not overcooked. The only way to get this right is to keep checking. When a knife or fork can pass through the potato without resistance, take them from the heat, drain in a colander and rinse with cold water.
  • Sit in the colander until they have drained well. Once drained, place the potato in a large salad bowl and allow to cool fully.
  • In a small fry pan, cook the chorizo on both sides until crispy.
  • Set aside and reserve about a tablespoon of the fat from the pan. Cool, then cut the chorizo rounds in half.
  • Add to the potato along with the cannellini beans, red onion, and parsley.

For the dressing

  • Make your own mayonnaise, or take a good quality whole egg mayonnaise and add all of the dressing ingredients in and mix until combined well.
  • Finally, add the mayonnaise dressing to the potato mixture and gently fold through taking care not to break up the potatoes and cannellini beans too much.
  • Place in a large salad bowl or on a platter. Scatter with extra parsley leaves and pumpkin seeds (if desired), cover (refrigerate if necessary).
  • Serve at room temperature when desired.

Store

  • Store in an airtight container in the fridge.

Notes

Vegetarian

Omit the chorizo and add ½ teaspoon smoked paprika and sun-dried tomatoes. Add extra beans if you like.

Onion-free

Replace the onion with 5 sliced radish.

Sweet potato

Replace all or some of the potato with diced sweet potato that has been oven roasted in coconut oil, salt, and pepper.

Chorizo options

Many local butchers make great additive free chorizo sausage. You could also sub with salami or another spicy sausage. 

Gluten-free

Just make sure the chorizo you buy is gluten-free.


I'd love to know how you like this potato salad.  Post a comment below. 


The Easiest, Most Nourishing Choc Chip Cookie Ever

July 17, 2013 | After School Snacks, Baked Sweets

These Healthy Chocolate Chip Cookies are my idea of the perfect treat. They suits most dietary leanings and take minutes to make, which is always a bonus. I think it’s the ultimate and easiest healthy chocolate-chip cookie recipe ever!

Truth be known, baking is not my forte. Mind you neither was photography until I put my mind to it and found I really enjoyed it…and there lies the issue. I LOVE cooking, but because I prefer to freestyle in the kitchen rather than follow a formula, baking and I sometimes don’t see eye to eye. I baked a lot as a child (with my nan), but not much as a young adult so I was a bit out of practice by the time I had kids. Luckily my kids are very forgiving…I think they are just happy for something with a little sweetness, even if it doesn’t look overly appealing!

Anyway, one rainy Queensland summer, I find myself out of eggs and craving a little deliciousness. With a cakey treat ruled out, I fluked these delights. These beauties (which took a few attempts to perfect) are the best and my kids love them for an after-school snack or weekend treat.

The best thing about this grain-free, healthy cookie recipe is that if you do manage to stop at one or two and wait a while, you will find yourself satisfyingly full. These nourishing choc chip cookies are one of my personal favourites to make for my kids lunchboxes. They are a perfect blend of chewy goodness and the texture is just like a store bought one (only better!). The flavours melt together in your mouth and the little bursts of chocolate really give you that feel good, treat feeling.

PS- they can be frozen (which will save you eating them all in one hit).

Health benefits

Are the cookies healthy? Well, firstly almonds are a rich source of protein, essential fats, and fibre. They also contain antioxidants and mood elevating amino acids. The coconut oil, by now, you will know how I love this. You can find out more about its amazing health benefits here. If you add cacao nibs or dark chocolate, prepare for a magnesium boost and an antioxidant hit that rivals green tea. These cookies really do bring together nutritious ingredients like almond meal and cacao nibs, making them a great option for a more mindful treat. 

Ingredients

For these chocolate chip cookies you’ll need almond meal as the base, along with coconut oil, rice malt syrup or honey (or even maple syrup) and a touch of vanilla extract. For that classic choc chip flavour, cacao nibs or dark chocolate chips are the stars of the show. Don’t forget a splash of water to help hold it all together!

How to make Healthy Choc Chip Cookies

The method for these Healthy Chocolate Chip Cookies is so simple where you just fold your dry ingredients into the wet ingredients until fully combined. There is both a traditional method using a large mixing bowl or if you have a Thermomix (or food processor) you can save time and utensils by following along with those instructions. Using baking paper ensures your cookies don’t stick to the sheet pan when cooking and the bake time is so quick, only 15 minutes!

Vary the Healthy Choc Chip Cookies to suit your dietary needs

There are so many variations to suit dietary needs with these healthy chocolate chip cookies. The recipe is already gluten-free as is, but you can also make it dairy-free with the use of cacao nibs and removing the choc chips. As mentioned before, the low fructose option is made by the use of rice malt syrup and cacao nibs. You can replace the coconut oil with macadamia oil for the coconut-free version. It can even be made completely vegan by using rice malt syrup to sweeten and just the cacao nibs! For the almond free version, you simply replace the almond meal with hazelnut meal which will make it into a delicious nutella choc-chip cookie.

Serving suggestions and how to store

These Healthy Choc Chip Cookies are perfect with a cup of tea or as a snack anytime. Store them in an airtight container in the fridge or freezer to keep them fresh—they’ll stay crisp and delicious for days or freeze for up to 3 months.

For more delicious, healthy and easy to make wholefood treats, click HERE.

 
Nourishing chic chip cookies made with wholesome ingredients—easy, healthy, and delicious.
Print Recipe
4.76 from 53 votes

The easiest, most nourishing choc chip cookie ever

These choc chip cookies are the ultimate combination of easy and nourishing! With just a few simple ingredients, you can whip up a batch of cookies that are not only delicious but packed with wholesome goodness. Perfect for a sweet treat any time of day.
Prep Time10 minutes mins
Cook Time15 minutes mins
Total Time25 minutes mins
Course: Snack
Servings: 10 cookies

Ingredients

  • 150 g almond meal (1¼ firmly packed cups)
  • 55 g coconut oil (¼ cup) melted if solid
  • 50-85 g rice malt syrup or honey (¼ cup approx.) taste the batter and alter the sweetness to taste
  • 1 tsp vanilla -powder, extract or essence
  • 2 tbsp cacao nibs -or dark chocolate chips, or both
  • 1 tbsp water (must be added or they go flat)

Instructions

  • Preheat your oven to 150 ℃/300°F (fan-forced). It's preferable to use weight measurements, the recipe will need less adjusting if you do so.
  • In a mixing bowl or food processor, combine all of the ingredients above until just combined.
  • If using a Thermomix, mix 5 seconds, speed 4.
  • Scrape the sides to incorporate the bits around the edge. 
  • **The mixture should be thick and sticky (like in the video below so if it feels very wet, it's important to add more almond meal).
  • Roll tablespoons of the mix in your (wet) hands and place them onto a tray lined with baking paper.
  • Flatten slightly with the back of the fork. The cookies above have cacao nibs through them (I put a little piece of Green and Blacks 85% chocolate on top in this pic too).
  • Bake for 15 minutes or until starting to brown on top. The longer they cook, the crisper they become.
  • Allow to cool fully. They will firm up as they cool.

Store

  • Store in an airtight container in the fridge or freezer.

Notes

Dairy-free

Just use cacao nibs and leave out the choc chips.

Low-fructose

Use the brown rice syrup and cacao nibs.

Coconut-free

Replace the coconut oil with macadamia nut oil.

Vegan

Choose rice malt syrup to sweeten and cacao nibs as choc-chips. 

Almond-free (aka Nutella choc-chip cookie)

Replace the almond meal with hazelnut meal.

Nut-free

This is not the recipe for you. This Spelt Chocolate Chip Cookie is incredible and nut-free. 

For 150 pages of nut-free recipes, take a look at my super popular ebook 'The Well Nourished Lunchbox'. Click HERE to find out more and read the rave reviews.
 

What do you think of this recipe? Please let me know if you've tried it by leaving a comment and rating below.

Get your kids in the kitchen cooking and with these video instructions, even little ones can follow along.

Cheese & Seed Crackers

June 17, 2013 | Healthy Lunchbox, Savoury Snacks

This healthy cheese cracker recipe is  a really delicious, savoury addition to any nourishing lunch box or just to snack on. It’s impossible to buy a savoury cracker with this much nourishment and protein – add a few carrot sticks or other raw veggies and you have a perfectly delicious and nutritious morning or afternoon tea.

Health benefits

So what’s so good about this seed cracker recipe (apart from the taste, they really do have the best cheesy flavour)? The ground seeds pack in protein, loads of zinc, minerals, and healthy fats.  These are so much more nutritious than any packet cracker. Instead of just filling a void with crackers that have little more than empty calories, why not make every mouthful count with these beauties. Children love the cheesy, buttery biscuit, and being nut-free, it makes them a perfect inclusion in the school lunch box. They are also so simple to make. Each cracker has approximately 3.5 grams of protein.

Warning – these are dangerously moreish! I dare you to stop at one.

Ingredients

To make these crackers, you’ll need cheddar cheese, parmesan, butter, mixed seeds (like sunflower seeds, sesame seeds, pumpkin seeds, and flax seeds), wholemeal spelt flour, lemon juice, and garlic. Optional extras include cayenne pepper, rosemary or any other herbs or spices you enjoy.

How to make this healthy cheese cracker recipe

Start by grinding your seeds in a food processor, then grate the cheeses and crush the garlic. Combine all ingredients into a processor or bowl to form a sticky dough. Roll the mixture into a sausage shape with baking paper (parchment paper), chill it for 30 minutes, then slice into discs. Bake at 170℃/340°F on a sheet pan or baking sheet (tray) for 15 minutes or until golden brown, and let them cool completely to crisp up.

Serving suggestions and storage

These homemade cheese crackers are perfect with your favourite dips, cheese platters, or just as they are for a quick snack. Store them in an airtight container for up to a week. You can also freeze them before or after baking to extend their shelf life. You can eat them straight from the freezer which is very dangerous because they are so moorish! Or enjoy at room temperature.

Vary this healthy cheese cracker recipe to suit your dietary needs

For a gluten-free version, swap the spelt flour for buckwheat flour. If you need to omit garlic or sesame seeds, you can easily adjust the recipe by leaving them out or substituting with other seeds (I love with chia seeds).

Tip

I grind up a seed mixture and store them in an airtight container in the fridge. I use them in lots of baking and even just over breakfast so I like to pre-prepare them to save time.

This recipe is one of many savoury cracker recipes in my best selling ebook ‘The Well Nourished Lunchbox‘. Click HERE to read the rave reviews and find out more.


This healthy cheese cracker recipe is the most delicious, nourishing savoury snack. Packed with seeds & nourishing ingredients. Easy to make!
Print Recipe
4.70 from 23 votes

Cheese and Seed Crackers

These Cheese & Seed Crackers are a delicious, savoury snack that’s perfect for pairing with dips or enjoying on their own. They’re super easy to make and packed with the goodness of seeds and cheese, making them a wholesome alternative to store-bought crackers.
Prep Time10 minutes mins
Cook Time15 minutes mins
Total Time25 minutes mins
Course: Snack
Servings: 20 crackers

Ingredients

  • 100 g cheddar cheese
  • 30 g parmesan cheese
  • 70 g butter -chilled and cubed
  • 120 g mixed seeds (1 cup) ground (I use 30g each – sunflower, sesame, pumpkin and flax seeds).  See tip below.
  • 60 g wholemeal spelt flour (½ cup)
  • ½ lemon/s -juice
  • 1 clove/s garlic

Optional extras

  • ½ tsp cayenne pepper -this doesn’t contribute any heat in this cracker though is great for the circulation and digestion, so give it  a try.
  • ¼ tsp dried rosemary - or any other herb you enjoy

Instructions

  • Preheat the oven to 170℃/340°F (fan-forced) and line a large biscuit tray with baking paper.
  • Grind the seeds in a food processor. Thermomix 10-15 seconds, speed 8 (make sure you don't over grind them or they will release oils).
  • Grate the cheeses either by hand or in your food processor and crush the garlic. Thermomix 10 seconds, speed 5.
  • Add all of the ingredients into the processor and mix at a high speed until well combined forming a sticky but firm batter. Thermomix 30 seconds, speed 6.
  • Place the mixture onto a sheet of baking paper and roll into a sausage shape approximately 5cm in diameter (about as wide as a regular rice cracker). Place in the fridge for 30 minutes or more, unwrap and then cut into 5mm discs.  Place on the lined baking tray.
  • Bake for 15 minutes or until they begin to brown. Take care not to overcook as they can become a bit bitter.
  • Cool on the tray (they will harden as they cool) then put in an airtight container for up to a week (if they last that long!)

Store

  • You can freeze these either uncooked and cut and bake as needed or once baked in snap lock bags or airtight containers.

Notes

Gluten and grain-free

Substitute the spelt flour with buckwheat flour.

Garlic-free

Omit the garlic.

Sesame-free

Omit the sesame seeds (just replace with a tolerated seed)

No grinder

Substitute for LSA (but now not nut free)
 

Tip

I grind up quantities of seeds and store them in an airtight container in the fridge. I use them in lots of baking and even just over breakfast so I like to pre-prepare them.
 

So you may have guessed that these are a personal favourite. Let me know what you think? Post a comment or rate this recipe below.


Vanilla Bean Cupcakes

May 27, 2013 | Healthy Lunchbox, Baked Sweets

These grain-free, gluten-free, nut-free and sugar-free Vanilla Bean Cupcakes are a classic favourite in our house. They are SO easy to make and with their light, fluffy texture and delicate vanilla flavour, they’re perfect for birthdays, special occasions, or simply a sweet treat to brighten your day. I often bake these with my kids—they love helping mix the ingredients and, of course, enjoying the delicious results.

Healthier Vanilla Bean Cupcakes

While cupcakes are typically considered a treat, this vanilla cupcake recipe is made with a few healthier twists. Cannellini beans, a key ingredient, are a great source of fibre and protein and are naturally gluten-free, making them a great option for those with dietary restrictions. Free-range or organic eggs add more quality protein and essential nutrients, while coconut flour offers a gluten-free alternative rich in fibre and healthy fats. The use of rice malt syrup, honey, or maple syrup instead of refined sugars provides a more natural sweetness with a lower glycemic index, helping to stabilise blood sugar levels.

Light moist texture

These Vanilla Bean Cupcakes stand out for their light and fluffy texture. Unlike many gluten-free muffins that can be dense and heavy, these cupcakes achieve a soft, airy crumb thanks to the precise combination of ingredients.

Step-by-Step Instructions

Making these Vanilla Bean Cupcakes is straightforward. Start by creaming the butter and sugar until light and fluffy in a medium mixing bowl (you may need to scrape the sides of the bowl). Then, add the eggs one at a time, mixing well after each addition. Incorporate the vanilla extract or vanilla bean paste and then gradually add the dry ingredients to the wet ingredients. Pour the batter into cupcake liners in a cupcake pan and bake until golden brown. Allow them to cool before frosting. We have also included a Thermomix method too.

Great to make a day ahead

I usually like baked goodies straight out of the oven, but these are actually best eaten the next day, especially if you think you can taste the beans or egg. This makes them perfect for birthdays or celebrations because they are even more delicious the next day.

Customising your vanilla bean cupcakes

Feel free to get creative with these easy vanilla cupcakes. You can add mix-ins like chocolate chips or fresh berries to the batter for a fun twist. For a decorative touch, frost with your favourite icing or decorate with edible flowers. You can also experiment with different flavours (check out the variations below the recipe for some ideas).

Make one big cake

This recipe also makes a fabulous ‘big’ vanilla cake too. Perfect for birthday parties (it’s been my kids cake every year since they were little). One batch makes one cake. I generally make a double batch and bake two cakes and layer with cream or ganache in between.

Personal experience with vanilla bean cupcakes

These cupcakes have become a family favourite, especially for birthday celebrations and special events. Baking them together is a cherished tradition in our home, and they always receive rave reviews from friends and family. I love how versatile they are—whether dressed up with fancy frosting or enjoyed plain, they’re always a hit.

Serving suggestions and how to store

Top these cupcakes with your favourite icing (lots of suggestions below the recipe), whether it’s a rich vanilla buttercream or a light dusting of icing sugar. They store best in the fridge in an airtight container for up to 3 days. Or store in the freezer in an airtight container for a few months. These are so great for meal prep or packing fast nut-free school lunches.

Vary this to suit your dietary needs (and taste)

Check out the variations below the main recipe for tips on how to adapt it to your specific dietary needs. For a low-fructose option, use rice malt syrup, and for a coconut-free version, swap the coconut flour for almond meal. You can also go dairy-free by using ghee or coconut oil instead of butter. Mix up the flavours by adding lemon, lime, or orange zest, fresh blueberries, or even a square of dark chocolate in the centre for a fun twist!

For a delicious, easy to make vegan vanilla cupcake – use THIS recipe.

Or for more delicious, healthy and easy to make wholefood treats, click HERE.


Vanilla bean cupcakes with a light, fluffy texture and natural vanilla flavor—perfect for any occasion.
Print Recipe
4.92 from 23 votes

Vanilla bean cupcakes

One of my most popular recipes, these Vanilla bean cupcakes are just delicious and you'd never guess they are made with beans. 
Prep Time10 minutes mins
Cook Time20 minutes mins
Total Time30 minutes mins
Course: Snack
Servings: 8 cupcakes

Ingredients

  • 425 g can cannellini beans -drained and rinsed well
  • 5 egg/s -large (or 6 small eggs, see note below)
  • 1 tbsp vanilla -powder, extract or essence
  • 50 g butter -softened at room temperature
  • 85 g rice malt syrup, honey or maple syrup (¼ cup)
  • 40 g coconut flour please weigh this, as it really needs to be exact
  • ¼  tsp sea salt
  • ½ tsp bicarbonate of soda
  • 1 tsp baking powder (gluten free)

Instructions

  • Preheat the oven to 180℃/350°F(fan forced).
  • In a powerful blender or food processor, puree the rinsed beans, eggs, and vanilla until very smooth and set aside.
  • Without rinsing your food processor, mix together the butter and honey or brown rice syrup until very well combined.
  • Add back the pureed bean/egg mix and mix until well combined.
  • Now add the coconut flour, sea salt, bicarbonate of soda and baking powder.  Mix until combined and spoon into paper-lined cupcake moulds immediately. The batter does have a slightly thick but airy consistency that is unusual if you've never worked with coconut flour before.
  • Bake for 20 minutes for large and 15 minutes for mini cupcakes, or until lightly brown on top and springy to touch (like a regular cake).
  • Cool and top with your preferred icing (recommendations below).

Thermomix Method

  • Preheat the oven to 180℃.
  • Mix the beans, eggs, vanilla, butter and sweetener for 1 minute, speed 7.
  • Add the coconut flour, sea salt, bicarbonate of soda and baking powder and mix 10 seconds, speed 4.
  • As per above method.

Note

  • Don't scrimp on the eggs or let the batter sit for too long. Not enough eggs and delaying getting it in the oven will result in a much heavier batter and cake.
  • I usually like baked goodies straight out of the oven, but these are actually best eaten the next day, especially if you think you can taste the beans or egg. 

Store

  • They are best stored in the fridge and can also be frozen in an airtight container or snap-lock bag.

Notes

Low-fructose

Choose rice malt syrup as your sweetener (optional pinch of stevia if you like also).

Coconut-free

Substitute the coconut flour for 100 grams of almond meal (though now obviously not nut free). I have also substituted for 40 grams of wholemeal spelt flour with success (no longer gluten-free if you substitute with spelt).

Dairy-free

Substitute the butter with ghee or coconut oil.

Lemon or lime cupcakes

Add the zest of one large lemon or lime to the egg/bean mix.

Orange cupcakes

Add the zest of one large orange to the egg/bean mix.

Blueberry cupcakes

Add ¼ cup of fresh or defrosted blueberries, mixed through the batter very gently at the very end.

Chocolate chip

Add a ¼ cup of dark chocolate chips (I love the Green and Blacks 85% cacao chocolate). As I'm a bit of a stooge when it comes to my kids eating chocolate, I often just push a square of chocolate into the middle or place on top of the cupcake (this also saves me the effort of icing)!

Icing suggestions

Remember to make sure the cupcakes are completely cold before icing.

Fructose-free vanilla icing (gluten free too)

50grams of butter, softened at room temperature
A pinch of pure stevia powder
1 tablespoon brown rice syrup
1 tablespoon vanilla bean powder
Beat together until light and fluffy.

Cream cheese icing

50 grams cream cheese or quark
20 grams butter, softened at room temperature
1 tablespoon brown rice syrup
1 teaspoon vanilla
Beat together until light and fluffy.

Cashew nut cream (dairy and gluten free)

½ cup raw cashew nuts
¼ cup water
1 teaspoon vanilla
1 tablespoon brown rice syrup or maple syrup (optional)
Soak the cashews in water for 3-4 hours. Strain and then process with the rest of the ingredients until smooth. You can add more or less water to the nuts to achieve the desired consistency. If you aren't organised enough to soak the cashews, then boil them gently for 5 minutes, then process.

Vanilla cream

Carton cream whipped until light and fluffy
1 teaspoon vanilla
Beat ingredients together and place on top of the cupcake. You can also slice the top of the cake off, top with cream and replace the cake top with a slice of strawberry (like a butterfly cake).
 

Primary Sidebar

Join the community

Social Media

Join over 140,000 followers

Nourish Your Inbox

Nourish Your Inbox!

Christmas Meal Planning Ebook

Sign up today for your FREE:
• Chocolate Ebook
• Subscribers Only Special Offers
• Practical Health & Nutrition Tips
• New Whole Food Recipes

WN App

Join the Family

Join the Family

Join The Family

The Well Nourished Family Membership is your complete solution to your families health and wellbeing. With 1200+ whole food recipes and SO MUCH MORE. Join for a limited time for over 80% OFF!

JOIN & SAVE 80%

Upgrade Your Membership – Recipe Only

Health Programs & Courses – Public

Health Programs & Courses

Health Programs & Courses

Whether you’re looking for effortless meal creation, lunchbox inspiration or strategies to raise adventurous eaters, our expert-led resources will guide you every step of the way.

Find Out More

Programs and Courses – FAM only

Affiliate promo – public

Become an Affiliate

Looking to partner with a respected, Australian-run health and wellness brand to expand your reach and your income?

Find out More

Featured Lunchbox Ebook – Public

From the Shop

See More

Footer

Logos

Well Nourished HomepageWell Nourished

As featured on

Footer-social

Connect with us

  • About Well Nourished
  • Sitemap
  • Contact
  • Privacy Policy
  • Website Terms of Use
  • Affiliates

© Well Nourished 2026

A Firstnature site

Not feeling quite yourself?
If you're dealing with skin flares, gut issues, fatigue or joint pain, this five-minute quiz will help you understand what's actually driving it.
TAKE QUIZ

Rate This Recipe

Your vote:


A rating is required
A name is required
An email is required