
Magic Mash is a creamy, comforting blend of sweet potato and regular potatoes, making it the perfect side dish for any meal—from roast dinners to grilled meats. With a hint of garlic, butter, and milk, this mash is as simple as it is delicious, easily becoming a staple in your dinner rotation. Plus, it’s easily…
lowfructose
Lemon Garlic Roast Chicken
This lemon garlic roast chicken is a succulent and delicious dish that’s perfect for any occasion. The garlic and lemon blend beautifully with the tender chicken. This meal is not only easy to prepare, but also full of nourishing ingredients. It’s the perfect go-to recipe when you want something comforting and easy. It’s also healthy…
Leek Capsicum Feta Omelette
This leek capsicum feta omelette is a delicious and nutritious meal perfect for breakfast, brunch, or a light dinner. Quick to prepare, this dish is ideal for busy mornings or when you’re craving a tasty, satisfying meal. I love a tasty omelette and this Leek, Capsicum and Feta Omelette is just that. It’s something I…
Pizza Subs
These Pizza Subs are a really quick and easy to make snack or lunchbox main that my kids absolutely love. I find by adding the toppings to a good quality sourdough, it’s more filling than thin pizza bases for my two big kids. However, you can always use these toppings on pita or flat bread…
Baked Vegetables with Hummus
This Baked Vegetables with Hummus is a colourful variety of roasted vegetables paired with creamy, homemade hummus. Perfect as a light main or side dish, it’s a simple yet nutritious meal that is both satisfying and packed with flavour. This Baked Vegetables with Hummus recipe is a really versatile meal of plant powered, rainbow goodness….
Chocolate Party Cake
My Chocolate Party Cake is an easy to make, gluten-free, allergy friendly cake that is perfect for parties. Don’t let the ingredients fool you – the kids will be none the wiser to this rich, moist, and delicious cake. Best of all, it is actually best eaten the next day so you can happily pre-prepare…
Five Spice Salad Dressing
This five spice salad dressing is a quick and easy way to elevate your salads with a delicious Asian-inspired flavour. It’s lovely over grains (quinoa, rice, couscous), cooked and raw vegetables too. It accompanies either a simple meal or an Asian or Middle Eastern meal. Health benefits Made with apple cider vinegar for gut health,…
Healthy Lamington Parfait
This healthy lamington parfait is a modern twist on a classic Australian dessert. It’s layered with almond cake, raspberry coulis, and a rich chocolate sauce, all topped with creamy whipped cream and toasted coconut. Perfect for entertaining or as a treat, it’s a delicious way to enjoy a wholesome dessert. This deconstructed Healthy Lamington Parfait…
Asian Omelette with a Sprout Salad
I love omelettes and this one is a bit special. My Asian Omelette with a Sprout Salad makes for a sensational, nourishing breakfast, lunch or dinner. My kids absolutely love bean sprouts so any meal containing them, is always going to be a winner. It’s also super easy and quick to make. Health benefits Eggs…
Cauliflower Rice
Cauliflower rice is a great substitute for white rice and a fabulous way to increase the nutrition in a dish. Cauliflower supports liver detoxification pathways as well as the cardiovascular, immune and digestive systems. You can use this yummy side to substitute rice in pretty much any meal at all, either as a side, or…
Healthy Chocolate Coconut Slice
This is such a yummy, old-fashioned style Chocolate Slice – it reminds me a lot of the one my nan always made me, only a little healthier. This Healthy Chocolate Coconut Slice is a lovely chocolatey treat to stock your freezer with, so if you have hungry kids at home looking for a snack or need an easy lunchbox filler, you’ll have this on hand ready to go!
Food memories are the best. As a kid I used to bake with my nan every weekend, we even occasionally ‘invented’ recipes. The ones that worked out, she carefully wrote on a note pad and sticky taped it into her recipe notebook. I still have that notebook, though the tape is browned and dried and the binding has seen better days.
Anyway, enough nostalgia…though I do hope that one of my recipes will perhaps form memories and be carried down in your family.
Health benefits
This healthy chocolate coconut slice is made with wholemeal spelt flour, rolled oats, and desiccated coconut, this slice provides fibre and slow-releasing energy. The cacao powder is rich in antioxidants, while the choice of natural sweeteners like honey or rice malt syrup makes it a healthier alternative to refined sugar treats.
Ingredients
This recipe uses spelt flour, oats, cacao powder, and coconut. Butter or coconut oil adds richness, and the bittersweet chocolate icing made with raw cacao powder (or cocoa powder), rice malt syrup or honey, milk and coconut oil brings a decadent touch that can be adjusted to suit your taste.
How to make this healthy chocolate coconut slice
Melt the butter or coconut oil, stir in the sweetener, and mix with the dry ingredients until combined. Press the mixture into a tin lined with baking paper and bake in a fan-forced oven as instructed below. Chill before adding the rich bittersweet chocolate icing made with cacao powder, rice malt syrup or honey, milk and coconut oil and sprinkle with coconut for a beautiful finish. This can also be made in your food processor and we’ve included the Thermomix method too if you have one.
Serving suggestions and how to store
Enjoy this slice as a mid-morning snack or a healthier dessert option. It’s also perfect for school lunchboxes being nut-free and egg-free. Store in an airtight container in the fridge to keep it fresh for up to a week or freeze it for longer storage. It can be packed or eaten from frozen. Refrigerating before slicing ensures clean, crumb-free cuts.
Vary this healthy chocolate coconut slice to suit
For a gluten-free option, swap spelt flour for your favourite gluten-free flour and replace oats with quinoa flakes. Make it dairy-free or vegan by using coconut oil instead of butter. Choose brown rice syrup for a low-fructose version.
Want more great recipes like this one? SUBSCRIBE NOW
For more delicious, easy to make prep-ahead heathy snack recipes, click HERE.

Chocolate Coconut Slice
This Chocolate Coconut Slice is a delicious, very easy to make, low sugar lunchbox treat or snack. Sure to become a favourite with young and old alike!
Servings: 12
Ingredients
- 150 g butter or coconut oil
- 85 g rice malt syrup, honey or maple syrup (¼ cup approx.)
- 30 g cacao powder - unsweetened Dutch process or raw
- 120 g wholemeal spelt flour (1 cup)
- 90 g rolled oats (1 cup)
- 100 g desiccated coconut (1 cup)
Bittersweet Chocolate Icing (see note below)
- 30 g cacao powder - unsweetened Dutch process or raw (¼ cup)
- 2 tbsp coconut oil
- 2 tbsp rice malt syrup or honey
- 1 tbsp milk (of choice)
- 10 g desiccated coconut (2 tbsp)
Instructions
- Preheat your oven to 180°C/350°F (fan-forced).
- In a large pot over medium heat, melt your butter (or coconut oil). If using a Thermomix 90, 1 minute, speed 3.
- Turn off the heat and add the sweetener, mixing to combine. If using a Thermomix 30 seconds, temp 90, speed 4.
- Add all of the other ingredients and mix well until combined. If using a Thermomix reverse speed, 30 seconds.
- Press firmly into a lined tin (approx. 17 x 27cm) and bake for 10-12 minutes. Take care not to overcook this as it can dry out. If your oven runs hot, reduce the temperature to 160°C.
- Once cooled, pop it into the fridge to chill for 30 minutes or more.
Bittersweet Chocolate Icing
- Make the icing by beating all of the ingredients together in a small bowl until smooth and creamy. If using a Thermomix butterfly, 1 minute, speed 3.
- Spread over the chilled slice and sprinkle over a little extra desiccated (or shredded) coconut.
- Chill for 10 more minutes in the freezer, remove from the tin and carefully slice into squares by pressing straight down with a large sharp knife.
Store
- Store in the fridge or freeze in an airtight container.
Note
- The icing above is very rich (for dark chocolate lovers only). You can leave it off, top it with melted chocolate or a chocolate butter cream. This recipe works really well as a super healthy ganache too.
- Refrigerating before slicing makes it much easier to cut without crumbling.
Notes
Gluten-free
Substitute the spelt with your favourite gluten-free flour and the oats can be replaced by quinoa flakes.Dairy-free or vegan
Replace the butter with coconut oil (this will produce a tougher/ crisper slice).Low-fructose
Use brown rice syrup as your sweetener.I'd love to hear how you like this slice. Post a comment below or rate this recipe.
Breakfast Salsa
This Breakfast Salsa is a simple, healthy start to the day. It can also be prepared the night before for a super fast, easy brekkie. My perfect breakfast always includes protein, good fats and carbohydrates in the form of vegetables and nuts. I find this kind of meal sets me up for a productive and…
Avocado Dressing
This creamy avocado dressing is a delicious and versatile addition to salads, grain bowls, or roasted vegetables. Made with fresh ingredients like ginger, garlic, and lemon, it’s packed with flavour that will elevate any even the simplest salad or veggie side, while packing a nutritional punch! Health benefits Avocado is rich in healthy monounsaturated fats,…
Healthy Bircher Muesli
This Healthy Bircher Muesli is a nourishing and versatile breakfast option, perfect for busy mornings. Made with rolled oats, hazelnut meal, and a combination of milk and yoghurt, it’s rich in fibre, healthy fats, and protein to keep you feeling full and energised throughout the day. Best of all, it can be customised to suit…
Nourishing Beef Nachos
These Nourishing Beef Nachos are so delicious, easy and complete with loads of healthy ingredients. If you love a chilli con carne, then you are going to love this recipe. Loaded with beef, black beans, and melted cheese over crispy corn chips, topped with a fresh salad, they’re the perfect meal for a family night…
Pork Belly with Nectarine Slaw
This crisp Pork Belly with Nectarine Slaw is a mouth watering meal that’s really very simple to make. I was always a bit scared of cooking roast pork…the pressure of ensuring a nice crisp crackle was too much;) But once I tried it, I realised it was actually so easy. I love the pork combined…
Mexican Tomato Salsa
This delicious Mexican Tomato Salsa recipe is a fabulous, easy to make staple. With its Mexican flavours, it’s lovely served on tortilla chips or as a side to any Mexican fare. When friends drop in Often when friends drop by or I have to get something prepped quickly, I’ll make this Mexican Salsa and Guacamole for a…
Lemony Smoked Salmon Spinach Caper Quiche
This Lemony Smoked Salmon Spinach Caper Quiche is a perfect summer meal because it can be pre-made and is just as delicious cold, as it is it hot. It’s a great recipe for brunch or to take on a picnic or to a bring-a-plate event. I think this is a flavour match made in heaven…
Charred Broccolini Salad
This Charred Broccolini Salad is such a delicious dish, featuring charred broccolini, crispy haloumi, and toasted pine nuts. It’s tossed with watercress (or any green you like) and a tangy preserved lemon dressing, creating a perfect balance of smoky, salty, and zesty flavours. Ideal for a light lunch or as a side for grilled meats.
Health benefits
Broccolini is rich in fibre, vitamins C and K, and antioxidants that support immune function and bone health. Haloumi provides protein and calcium, while pine nuts add healthy fats. The watercress brings additional vitamins and minerals, including vitamin A and folate, and the preserved lemon in the dressing boosts vitamin C intake, enhancing the immune-supporting properties of this dish.
Ingredients
This recipe calls for broccolini, haloumi, and watercress, paired with toasted pine nuts and preserved lemon. The dressing combines honey, Dijon mustard, turmeric, lemon juice, and extra virgin olive oil, adding layers of flavour to the salad.
How to make Broccolini Haloumi Salad
To make this Broccolini Haloumi Salad, start by heating your BBQ grill or griddle pan over a high heat. Toss the bunch broccolini (including the stems) and haloumi in olive oil, then grill them until the broccolini is lightly charred and the haloumi is golden. Toast the pine nuts until brown, and finely slice the skin of the preserved lemon. For the dressing, combine all ingredients in a small bowl or jar, and shake to mix. Assemble the salad by placing watercress in a bowl, adding the grilled broccolini, haloumi, pine nuts, preserved lemon. Drizzle over the dressing and toss it well.
Serving suggestions and how to store
Serve this salad immediately for best flavour and texture, while the broccolini and haloumi are warm. It’s an excellent side for grilled meats or as a stand-alone light dish. Leftovers can be stored in the fridge for up to 2 days, but the haloumi may lose its crispness upon reheating.
Vary this Charred Broccolini Salad to suit your dietary needs
For a dairy-free or vegan version, omit the haloumi and replace it with cashew nut cheese or tofu. If you’re following a nut-free diet, substitute the pine nuts with toasted sunflower seeds. If you can’t find preserved lemon, replace it with the zest of one lemon and a pinch of sea salt. Though preserved lemon adds a unique flavour, this alternative will still provide a fresh citrusy note. If you can’t access broccolini you can sub it with broccoli florets.
Take a look at the variations (below the main recipe) for suggestions to alter the recipe to suit your specific dietary requirements (vegan/ nut free).
For more delicious, easy to make healthy salad recipes, click HERE.

Charred Broccolini Salad
I love to char grill broccolini on the BBQ, I think it really brings out the flavour. Combined with the saltiness of the haloumi and the citrus salad dressing, this Charred Broccolini Salad makes for a delicious and very nourishing meal or side.
Servings: 2
Ingredients
- 1 bunch/s broccolini
- 100 g haloumi
- 30 ml extra virgin olive oil -extra virgin (2 tbsp)
- ¼ cup/s pinenuts -toasted
- 60 g watercress (you could also use rocket or baby spinach if you prefer)
- 1 preserved lemon
Dressing
- 1 tsp honey
- 1 tsp dijon mustard
- ¼ tsp ground turmeric
- ½ lemon/s -juice and zest
- 60 ml extra virgin olive oil -extra virgin (¼ cup)
Instructions
- Heat your BBQ grill or griddle pan.
- Toss the broccolini and haloumi in the olive oil and grill until the broccolini begins to just char and the haloumi is golden brown.
- Toast the pine nuts until just brown.
- Remove the flesh from the preserved lemon and finely slice the skin.
Dressing
- Make the dressing by combining all of the ingredients together in a small bowl or shake in a re-cycled jar.
Serve
- Place the watercress in a salad bowl. Add the rest of the ingredients, toss through the dressing and enjoy immediately.
Notes
Dairy free
Omit the haloumi and replace with cashew nut cheese.Vegan
Omit the haloumi and replace with cashew nut cheese or tofu. Substitute the honey with rice malt or maple syrup.Nut-free
Replace the pine nuts with toasted sunflower seeds.No preserved lemon
Preserved lemon is available in most supermarkets or gourmet shops. If you can't source it, then replace it with the zest of one lemon and a good pinch of sea salt. But if you can find it, it's so well worth it. You'll keep adding it to salads because it adds such a fabulous flavour.I'd love to hear how you like this recipe. Post a comment and rate this recipe below.
Black Forest Tart
This delicious Black Forest Tart is quick and easy to make, and a decadent chocolate dessert. I think cherries and chocolate are a flavour match in heaven! Who’s with me? I have strong memories of the flavours of Black Forest. I grew up in Perth and as a teenager, every Thursday night my parents and…
Rolled Turkey with Quinoa Cranberry Stuffing
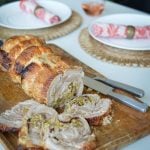
This rolled turkey with quinoa cranberry stuffing recipe is a festive showstopper that’s as delicious as it is nutritious. Perfect for any holiday meal, it combines tender turkey with a lovely, gluten-free quinoa stuffing made with fresh herbs, pistachios, and dried cranberries. The stuffing adds a beautiful balance of savoury and sweet, and the turkey is cooked to perfection, ensuring a juicy and delicious meal for your family and friends.
Now before you click away thinking there is no way you can be bothered rolling meat…here’s the thing, you don’t have to. I’ve made a rolled turkey of sorts every Christmas, because I find it easier to cook than a whole bird. So I just make the stuffing and I’ve always found the butcher I buy my turkey from, really accommodating in boning and rolling it for me.
This super simple Rolled Turkey with Quinoa Cranberry Stuffing will wow any crowd! I can’t wait to hear how you love it.
Health benefits
This dish offers a wonderful array of health benefits. Quinoa, a gluten-free grain, is packed with protein, fibre, and essential minerals like magnesium and iron. The addition of fresh herbs and vegetables, like parsley, sage, and celery, provides a boost of antioxidants and vitamins. Pistachios are a great source of healthy fats, fibre, and protein, making this stuffing not only tasty but also healthy. Plus, using organic or free-range turkey ensures you’re enjoying a lean protein option.
Ingredients
The ingredients for this recipe include butter, red onion, celery, garlic, chicken broth or stock, quinoa, fresh sage, parsley, pistachio nuts, dried cranberries, almond meal, free-range eggs, and a whole organic turkey. For the gravy, you’ll need red wine, chicken stock, cornflour, and water. You can customise the stuffing with variations like swapping nuts or omitting garlic or onions for dietary preferences.
How to make this Rolled Turkey Quinoa Stuffing
To make this healthy turkey roulade, start by preparing the stuffing: sauté the onion and celery in butter, then combine with cooked quinoa, herbs, pistachios, and cranberries. After cooling, mix in the egg and refrigerate until ready. For the turkey, season the bird, stuff it with the quinoa mixture, and roast with vegetables and water to keep it moist. After 1.5 hours, uncover and increase the heat to brown the skin. While the turkey rests, make a simple gravy from the pan juices. The turkey is done when juices run clear and the skin is crispy.
Serving suggestions and how to store
Serve this delicious rolled turkey with quinoa cranberry stuffing alongside roasted vegetables or a fresh salad for a balanced, festive meal. The gravy can be poured over the turkey or served on the side for added richness. Leftovers can be stored in the fridge for up to 3 days and make for a tasty next-day lunch or dinner. If you want to store it longer, freeze the turkey and stuffing separately for up to 3 months.
Vary this Rolled Turkey Quinoa Stuffing to suit your dietary needs
You can easily modify this recipe to suit various dietary needs. For an egg-free version, simply omit the egg in the stuffing—while it may not bind as well, the dish will still be delicious. If you’re avoiding onions, try using fennel instead for a milder flavour. For a garlic-free option, just leave out the garlic. If you’re following a fructose-friendly diet, skip the cranberries, and for a nut-free version, swap pistachios for toasted pumpkin seeds or omit them altogether.
Take a look at the variations (below the main recipe) for suggestions to alter the recipe to suit many specific dietary requirements.
For more delicious, yet healthy festive recipes, click HERE.
Rolled Turkey with Quinoa Cranberry Stuffing
This Rolled Turkey with Quinoa Cranberry Stuffing is the ultimate special occasion meal... truely fit for a crowd.
Servings: 12
Ingredients
Stuffing
- 60 g butter
- 1 red onion/s - finely chopped
- 4 stick/s celery - finely chopped
- 3 clove/s garlic - minced
- 250 ml chicken broth or stock (1 cup)
- 170 g quinoa (1 cup)
- ¼ cup/s fresh sage leaves - finely chopped
- 3 tbsp flat leaf parsley - finely chopped
- 80 g pistachio nuts - toasted (⅔ cup)
- 60 g dried cranberries (½ cup)
- 4 tbsp almond meal (or more to thicken the stuffing)
- 1 tsp sea salt - or to taste
- 1 egg/s
- ground black pepper - to taste
Turkey
- 7 kg free-range or organic turkey - whole (approx.)**
- 2 tbsp extra virgin olive oil - extra virgin
- Sea salt and freshly ground black pepper - to taste
- 500 ml water
- 2 stick/s celery - diced
- 2 carrot/s - diced
- 1 red onion/s - diced
- 4 clove/s garlic - diced
Gravy
- 60 ml red wine (¼ cup)
- 60 ml chicken broth or stock - optional, only if needed (¼ cup)
- 2 tsp cornflour (optional, only if you feel you'd like a thicker gravy)
- 1 tbsp water - to form a slurry with the cornflour
Instructions
Stuffing
- In a medium sized pot, melt the butter and sweat the onion and celery (with the lid on) until its softened (but not browned). Set aside in a mixing bowl.
- Rinse the quinoa in a fine sieve really well for at least 1 minute (this removes the bitter saponins from the quinoa). Cook the quinoa by placing it into a pot with 2 cups of water.
- Bring the mixture to a boil over medium-high heat, then decrease the heat a bit to maintain a gentle simmer. Cook uncovered until the quinoa has absorbed all of the water, about 10 to 12 minutes.
- Remove the pot from heat, cover, and let the quinoa steam for 5 minutes. This step gives the quinoa time to pop open and the little white spiral to appear. After 5 minutes, remove the lid and fluff the quinoa with a fork. Allow to cool.
- Now mix all the stuffing ingredients together. Taste and adjust the seasoning before adding the egg and mixing through. Keep airtight in the fridge until ready to add to the turkey (I make this a day ahead).
- I personally take the stuffing to my butcher to de-bone the turkey and roll it for me. If you want to tackle this yourself, there are heaps of YouTube tutorials on boning and rolling a whole turkey.
- Once the turkey is boned, it will weigh approx. 4 kg. Work off around 30 mins per kg.
- Pre-heat oven to 200°C / 400°F (fan-forced).
Turkey
- Place the turkey on a large baking tray. Pat the skin dry and drizzle with olive oil and then season well.
- Pour the water into the base of the roasting dish and add the celery, carrots, onion and garlic.
- Cover the turkey with baking paper and then tightly wrap the baking dish in foil (so it retains the moisture).
- Cook for 1.5 hours then remove the foil and baking paper and increase the heat to 220°C / 425°F. Cook for another 20 minutes to brown the skin. ***
- The turkey is cooked when the juices run clear when pierced. I also use a meat thermometer to ensure it is cooked.
Gravy
- Set the turkey aside on the chopping board (loosley cover with foil) while you make a gravy using the pan juices. Pour all of the juices and vegetables into a small pan. Bring to the boil and add the red wine.
- Let it simmer rapidly to reduce and thicken. You may like to add more stock to the pan to increase the amount of gravy you make.
- You can strain it or puree it with the vegges in it (or just enjoy it chunky). Taste and season to taste.
- If you feel you'd like a thicker gravy, mix the optional cornflour with the tablespoon of water to form a slurry, and mix in with the gravy, stirring until it thickens.
Turkey Size & Cooking Times
- ** When deciding on the size of the turkey you buy, work off about 250 g per person (remembering the boned turkey will weigh a lot less than the whole - my 7kg turkey became just over 4kg). I must say I like to over-cater and like having leftovers for Boxing Day. This recipe would definiately stretch to 16 people.
- ***The cook time will vary a little depending on how thick it is rolled so check the meat frequently ( in 2-3 different parts of the roll). If it's not cooked, add 10 minutes at a time. If you think it's cooked, but the skins not brown, pop under a grill watching it carefully for a few minutes to brown it.
- I always ask the butcher for the bones and carcass which makes the most delicious bone broth.
Notes
Egg-free
Omit the egg. It won't bind quite as well, but it will still be delicious.Onion-free
Replace the onion with a small bulb of fennel.Garlic-free
Simply omit the garlic.Fructose friendly
Just omit the cranberries.Nut-free
Replace the pistachios with toasted pumpkin seeds or just leave them out.I'd love to hear how you love this recipe. Post a comment below if you make it or if you have any questions!
Beef Fillet with Garlic Tahini Sauce
With the festive season sneaking up quicker than I’d like (seriously, where has this year gone??), I thought I’d share one of our go-to recipes when feeding a crowd… Beef Fillet with Garlic Tahini Sauce. We tend to make it as it’s quick and easy and you can rest it for as long as you like so it’s pretty forgiving. We have even rested it for several hours and had it just warm and it was divine.
In case you’ve not heard, in just two weeks I’m launching the Well Nourished Family membership. I’m bursting with excitement and I really can’t wait to share all of the delicious details. It’s been a long time coming… over a year of working with a fabulous team, to develop the technology to make meal planning and eating well a whole lot easier and very well nourished.
I’ve been flat out creating exclusive, members only recipes and developing everything you need to feed you and your tribe ‘well’. The ‘Well Nourished Family’ not only includes customisable and done-for-you weekly meal plans, but event plans too. I’ve got you sorted for Kids Parties, Christmas Day feasting, and entertaining friends and family with absolute ease. Plus shopping lists, kitchen storage and waste reducing tips and much, much more.
Click to find out more HERE.
But in the meantime, I hope you love this supremely tender cut of beef fillet with garlic tahini sauce as much as my meat loving family does.
Health benefits
Beef fillet is a rich source of protein, iron, and essential vitamins like B12. The garlic tahini sauce adds healthy fats and calcium from the yoghurt and tahini, making this a nutrient-dense dish.
Ingredients
The beef fillet is seasoned simply with olive oil, salt, and pepper to highlight its natural deliciousness. The sauce is a mixture of yoghurt, tahini paste, and garlic cloves.
How to make this gluten-free beef recipe
Begin by seasoning and searing the beef fillet in a hot oven proof pan or skillet until caramelised on all sides. Finish it in the oven to cook to your preferred liking, using a meat thermometer for precision (I like this medium rare). Rest the beef before slicing to lock in the juices. Mix the garlic tahini sauce ingredients and serve alongside the beef for a perfect pairing.
Serving suggestions and how to store
Serve this dish warm with your favourite sides, such as roasted vegetables, a fresh salad, or creamy mashed potatoes. Leftovers are versatile—use them in sandwiches, wraps, pita or salads. Store in an airtight container in the fridge for up to three days.
Vary this to suit your dietary needs
For a dairy-free version, replace the yoghurt with coconut yoghurt or cashew cream. If sesame-free, swap the tahini for horseradish cream. For garlic-free, use ground cumin and a pinch of cayenne in the sauce instead.

Beef Fillet with Garlic Tahini Sauce
Servings: 8
Ingredients
- 1.2 kg Scotch Fillet - or rib eye
- 2 tbsp extra virgin olive oil - extra virgin
- 1 tsp sea salt - or to taste
- ground black pepper - to taste
Sauce
- 1 clove/s garlic - minced
- 1 tbsp hulled tahini
- 250 g natural or Greek yoghurt (1 cup)
Instructions
- Pre-heat the oven to 150°C / 300°F (fan-forced).
- Rub the fillet in the olive oil so it is well coated. Then season with the sea salt and pepper.
- Heat a cast iron or oven proof pan over a moderately high heat and sear the beef on all sides so it is dark brown and caramelised on all edges. Use tongs to turn it.
- Then, simply place in the oven to roast (uncovered) for about an hour or until almost cooked to your liking.
- I have a meat thermometer which I think is invaluable for getting this perfect. I cook this to med-rare, then wrap it tightly in foil to rest for about 30 minutes or more. This is really important and makes it super moist.
- To make the tahini sauce, mix all the ingredients together in a serving bowl.
Serve
- When ready to serve, slice the beef and then pour over the pan juices and juices from the foil wrapping.
- Enjoy immediately with the tahini sauce and your favourite sides and salads.
- My family also love this with various mustards.
Store
- In an airtight container in the fridge.
- Left overs are great to make a roast beef sandwich, roll, wrap or salad.
Notes
Dairy-free
Replace the yoghurt with coconut yogurt or cashew cream.Sesame-free
Omit the tahini and replace with horseradish cream.Garlic-free
Omit the garlic and replace it with 1 tsp of ground cumin and a pinch or cayenne.I'd love to hear how you enjoy this. Post a comment below and don't forget to rate the recipe too. Cheers!
steaks
Coconut Caramel Slice
This new healthy Coconut Caramel Slice recipe is sure to become a firm favourite. It makes a decent sized batch so my kids are always happy to have this treat in the freezer. The nut-free version is perfect for school lunches packed from frozen. I’ve designed it to suit many dietary intolerances and it’s sweet,…
Healthy Okonomiyaki (Savoury Pancake)
I remember the first time I tried Okonomiyaki in a Japanese restaurant, I thought it was totally delicious. So of course, I set about making a Healthy Okonomiyaki and it very quickly became a firm family favourite.
I love that it’s so versatile based on the addition of extra ingredients so that each time we eat it, it’s a little different. I often add all of the toppings to the table and my kids create their own adventure. I personally go for the works because I think it’s the best flavour combo!
Health benefits
This dish is rich in carbohydrates and fibre from the cabbage and wholemeal spelt flour, supporting digestive health. The eggs and broth provide protein, while the nori and pickled ginger offer additional minerals and probiotics, promoting gut health. Using extra virgin olive oil to cook it in adds healthy fats, making this a balanced meal. Instead of the traditional oyster sauce used on Okonomiyaki (which is high in sodium and sugar) I’ve made a healthier sauce with tamari (gluten-free soy sauce) and rice malt syrup.
Ingredients
The batter is made from broth, eggs, Worcestershire sauce, and wholemeal spelt flour, giving the pancake a savoury base. Finely shredded cabbage and spring onions are mixed in for crunch, texture and flavour. You can top the pancake with crispy bacon, toasted nori (or you could use bonito flakes too), pickled ginger, fresh coriander (cilantro), and drizzle it with a homemade sauce made from rice malt syrup and tamari.
How to make Healthy Okonomiyaki
Start by whisking together the broth, eggs, and Worcestershire sauce in a large bowl, then add the spelt flour and sea salt to form a batter. Mix in the cabbage and spring onions. Heat a little olive oil in a fry pan, then cook the pancake mixture in two batches, flipping when the edges golden brown. Serve with your choice of toppings, like crispy bacon, pickled ginger, and a drizzle of the sauce.
Serving suggestions and how to store
Top with your choice of ingredients, such as crispy bacon (or you could sub with pork belly), nori (seaweed), pickled ginger, and garnish with fresh coriander. This pancake is best enjoyed fresh, but you can store any leftovers in an airtight container in the fridge for up to 2 days. Reheat in a pan before serving.
Vary this to suit your dietary needs
For a gluten-free version, swap the spelt flour for a mix of rice and buckwheat flour or your favourite gluten-free blend. Vegetarian? Simply leave out the bacon and use vegetable broth. If you’re avoiding soy, use coconut aminos instead of tamari, and for an onion-free option, replace the spring onions with fennel. You can also make this egg-free by using a besan batter as a substitute.
Add-ons and extra options
- Add fermented veggies like sauerkraut or kimchi for a probiotic boost.
- For a heartier meal, serve with stir-fried vegetables or seafood on top of the pancake.
- You can also switch up the mayonnaise by trying a drizzle of cashew cream instead of traditional kewpie mayonnaise.
Take a look at the variations (below the main recipe) for suggestions to alter the recipe to suit your specific dietary requirements including gluten-free, vegetarian and more.
Healthy Okonomiyaki (Savoury Pancake)
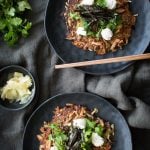
This Healthy Okonomiyaki is a savoury Japanese-inspired pancake made with wholesome ingredients like cabbage, wholemeal spelt flour, and broth. It’s a simple and nutritious dish that’s packed with flavour, and you can easily customise it with your favourite toppings and variations.
Servings: 2
Ingredients
- 125 ml stock or broth - vegetable or chicken (½ cup)
- 3 egg/s
- 1 tbsp Worcestershire sauce
- 75 g wholemeal spelt or gluten-free flour (⅔ cup)
- ¼ tsp sea salt - or to taste
- ½ small white cabbage - finely shredded (about 2 cups)
- 4 spring onion/s - white part thinly sliced
- 15 ml extra virgin olive oil - extra virgin (1 tbsp)
Sauce
- 1 tbsp rice malt syrup
- 1 tsp tamari
To serve
- 2 rasher/s bacon - thinly sliced
- 1 sheet/s toasted nori (sushi paper) - shredded
- 4 tbsp pickled ginger - this is my most favourite add on (can sub with kim chi too)
- 4 tbsp whole egg mayonnaise - cashew cream
- ½ bunch/s fresh coriander leaves - torn
Instructions
- Make the sauce by mixing the rice malt and tamari together.
- If including the bacon, then cook this in a crêpe or small fry-pan until it's crispy and set aside.
- In a mixing bowl, whisk together the broth, eggs and worcestershire.
- Then whisk in the flour and sea salt to form a batter.
- Mix through the cabbage and spring onion which should be coated by the batter. If not, add more cabbage, it shouldn't have to much residual batter in the bowl.
- Add a little olive oil to cover the base of the crêpe or small fry-pan (used to cook the bacon) and heat over a medium heat. Add half the cabbage batter and spread out to form a thick pancake.
- Cook for a few minutes until the edges have browned, flip and cook the other side.
- Repeat with the other half of the batter.
- Serve topped with some, or all of the extras and a drizzle of the sauce.