
There are many ways to enjoy the many cuts of lamb. This guide ‘Lamb – simple ways to enjoy it’ lists the most common cuts of lamb and the best way to cook them. Lamb is a protein my family would eat about once a week. Simply prepared with a lovely side or salad is one…
meal
Chicken – simple ways to enjoy it
There are many ways to enjoy the many cuts of chicken. This guide ‘Chicken – simple ways to enjoy it’ lists the most common cuts of chicken and the best way to cook them. Chicken is one of my favourite proteins. My family would eat it 2-3 times per week. Simply prepared chicken and a lovely…
Beef – Simple ways to enjoy it
There are many ways to enjoy the many cuts of beef. This guide ‘Beef – Simple ways to enjoy it’ lists the most common cuts of beef and the best way to cook them. The cut of meat you choose will have a unique amount of fat, tenderness and flavour depending on what part of the…
Garlic Mushroom Omelette Wrap
This simple, delicious Garlic Mushroom Omelette Wrap recipe is SUPER special. You see it’s the first of ten recipes I’ll be sharing with JamieOliver.com for Jamie’s Food Revolution campaign starting this Friday 20th May 2016.
A few months back I was one of ten lucky people, chosen worldwide to put my spin on ten of Jamie’s recipes that will save your life. The first is a Cheese Omelette and this is my spin… a Garlic Mushroom Omelette Wrap. It is a delicious, nutrient dense ‘anytime meal’ that my whole family adores and I hope you love it too!
Health benefits
Mushrooms are a wonderful source of antioxidants, fibre, vitamin D and a powerful immune boosting food. The garlic offers more immune support as does the protein from the cheese and egg. Spinach and thyme add a fresh touch along with extra vitamins and minerals. This is one healthy combo!
Ingredients
This wrap uses simple ingredients: butter or oil, mushrooms, garlic, fresh thyme, baby spinach, eggs, and cheddar cheese. A dash of sherry vinegar or a substitute adds a subtle tang.
How to make a Garlic Mushroom Omelette Wrap
This recipe serves 1 person, so multiply the ingredients to feed as many as you need. In a hot pan, melt butter or oil and sauté garlic, mushrooms, and thyme until golden. Add vinegar and spinach to wilt, then set aside. Beat the eggs, season, and pour them into the pan to form a thin omelette. Sprinkle with cheese, add the mushroom mix, and fold the omelette into a egg wrap.
Serving suggestions and how to store
Serve this wrap fresh from the pan or wrap it in foil for an easy, on-the-go meal. Leftovers can be stored in the fridge and gently reheated in a pan or microwave.
Vary this to suit your dietary needs
For a dairy-free option, skip the cheese, or use a dairy-free alternative. Swap cheddar with your favourite cheese, like feta, for a different flavour. To keep it gluten-free, ensure your vinegar is gluten-free.
Take a look at the variations (below the main recipe) for suggestions to alter the recipe to suit many specific dietary requirements.
For more delicious, quick easy and healthy breakfast recipes, click HERE.

Garlic Mushroom Omelette Wrap
My Garlic Mushroom Omelette Wrap is a delicious, nutrient dense dish that my whole family adores. It's great for brekkie or for a fast lunch or dinner.
Servings: 1
Ingredients
- 20 g butter, ghee or olive oil
- 150 g mushrooms -any combination, I like Swiss Brown, shiitake and oyster, sliced or torn
- 1 clove/s garlic -finely chopped
- ½ tsp fresh thyme leaves
- ½ tsp sherry vinegar -can substitute red wine vinegar with a pinch of sweetener dissolved into it
- 10 g baby spinach (approx. 1 handful/s)
- 2 egg/s
- 10 g cheddar cheese
Instructions
- Heat a large non-stick or cast iron pan over a medium-high heat and add the butter, ghee or olive oil.
- Once it has melted add the garlic, mushrooms, thyme and a good pinch of sea salt and black pepper. Stir well so that the mushrooms are coated in the butter.
- Cook for 3-4 minutes stirring occasionally, until the mushrooms soften and brown.
- Add the vinegar and spinach and stir for 30 seconds to just wilt the spinach. Set aside.
- Crack the eggs into a mixing bowl, season with a pinch of sea salt and black pepper, then beat well with a fork until fully combined.
- Add a little more butter to the hot pan, then carefully pour in the eggs.
- Tilt the pan so that the egg thinly coats the base of the pan.
- Grate the cheese onto a board and sprinkle over the egg.
- Now add the mushrooms to the centre of the omelette wrap and fold in the edges to form a parcel.
Notes
Dairy-free
Just leave out the cheese. You can also swap the cheddar with goat or cows feta or any other cheese you like really.Gluten-free
Ensure the vinegar you use is gluten-free.Tips
You can wrap this in foil for a meal on the go. To make a thicker, more sturdy wrap, double the eggs.Let us know how you enjoy this delicious recipe. Post a comment and rate this recipe below!
Kids in the Kitchen
Encouraging kids to cook is so important! Loads of kids love following my kids on Youtube. Here’s a video recipe of my Mushroom Omelette wrap.
Simple Ceviche
I like to keep things as simple as possible in the kitchen, but always without compromising taste and nourishment. Ceviche was a dish I became very familiar with when travelling the coastal parts of South America many moons ago. I fell in love with it then and my simple ceviche has become a firm favourite with my family since (this is one of a very few ways my fish fussy daughter will eat fish).
I generally make it for special occasions, but it’s so simple, I often ask myself why I don’t make it more often. I think this is a fabulous seafood starter for a hot Christmas day. Anything that doesn’t involve having the oven on any longer than need-be right?
Health benefits
Ceviche is not just a delicious raw fish dish; it’s also packed with health benefits! The fish provides high-quality protein and omega-3 fatty acids, which are great for heart health. Lime juice is loaded with vitamin C, and the addition of fresh herbs adds antioxidants and anti-inflammatory properties. Paired with avocado, which is full of healthy fats, this dish supports a balanced and nutritious diet.
Ingredients
For this ceviche, you’ll need firm white fish fillets like snapper, mahi-mahi kingfish, fresh lime juice, and coconut water to create a refreshing marinade. Add finely sliced spring onions, fresh coriander (cilantro), mint, and red chilli for a burst of flavour. Don’t forget the salsa, made with diced avocado, red capsicum, and lime juice, which adds a creamy and colourful touch!
How to make simple ceviche
Start by tossing your fish cubes in a bowl with half cup lime juice, coconut water, and all the herbs and chilli in a large bowl. Cover the bowl and let it chill in the fridge for about four hours, allowing the fish to marinate until it turns opaque. Once ready, serve the ceviche garnished with micro herbs and enjoy it with the avocado salsa and some crispy corn chips for a delightful crunch!
Serving suggestions and how to store
This easy ceviche recipe is best served chilled and enjoyed fresh. Pair it with good-quality corn chips (tortilla chips) or tostadas for a delicious appetiser or snack. If you have leftovers, store them in an airtight container in the fridge for up to a day, but keep in mind that the fish may become more “cooked” in the lime juice over time, so it’s best to eat it soon after preparation.
Vary this simple ceviche to suit your needs
Feel free to customise this ceviche to suit your taste! If you prefer a milder flavour, you can omit the chilli. For a twist, add diced mango or pineapple for a sweet touch. For onion-free, omit the spring onion. You can also use lemon juice to cure the fresh fish but I prefer lime juice personally.
Take a look at the variations below for all the details as well as suggestions to alter the recipe to suit your specific dietary requirements.
For more healthy, easy, delicious recipe click HERE.

Simple Ceviche
This Simple Ceviche is a refreshing dish that perfectly captures the vibrant flavours of summer! With tender pieces of fish “cooked” in zesty lime juice and complemented by the sweetness of coconut water, this ceviche is both light and satisfying. It's ideal for warm days, backyard gatherings, or a quick and healthy meal that feels a bit fancy without much effort.
Servings: 4
Ingredients
Ceviche
- 800 g firm white fish fillets - pin boned and cut into 1cm cubes (I like snapper or kingfish)
- 120 ml fresh lime juice (juice of approx. 3-4 limes)
- 370 ml coconut water (1½ cups)
- 4 spring onion/s - white part finely sliced
- 2 tbsp fresh coriander leaves - finely diced
- 2 tbsp fresh mint leaves - finely diced
- 1 small red chilli/s - seeds removed and finely sliced
- Sea salt and freshly ground black pepper - to taste
Salsa
- 1 avocado/s - diced
- 1 red capsicum/s - finely diced
- 1 tbsp fresh coriander leaves - finely chopped
- ½ lime/s - juice and zest
Instructions
- Toss the fish, lime juice, coconut water, spring onions, herbs and chilli in a small bowl.
- Cover and chill in the fridge for 4 hours (the lime juice will 'cook' the fish - you will see it go opaque).
- Garnish with herbs or micro herbs.
Serve
- Serve with good quality corn chips or tortilla chips and avocado salsa.
Notes
Onion-free
Simply omit the spring onion.I'd love to hear how you like this delicious dish. Post a comment below.
Middle Eastern Beef Brisket
This Middle Eastern beef brisket is a flavour-packed dish that transforms a budget friendly cut of meat into a tender, aromatic feast. It is really quick to prepare, but does require a lot of time to cook, so plan ahead for this meal.
The basic recipe will leave you with a ‘pulled’ style of meat which you can serve with salad, in a burger, wrap or tortilla, or on a bed of creamy mashed potato. The tahini sauce adds a lovely earthy-citrus hit to balance the richness of the meat. I hope you enjoy this really versatile and very satisfying meal.
Health benefits
Beef brisket is rich in protein and essential nutrients like iron and zinc, which are vital for overall health. The combination of spices not only adds depth of flavour but also provides antioxidant benefits, while tahini adds healthy fats and calcium, making this dish both nutritious and satisfying.
Ingredients
To make this Middle Eastern beef brisket, you’ll need a blend of spices (smoked paprika, cumin, coriander, cinnamon, cardamom, and cloves), a 1 kg beef brisket, chicken stock or bone broth, onion, garlic cloves, and a simple tahini sauce made with hulled tahini, lemon juice, and water.
How to make Middle Eastern Beef Brisket
Preheat your oven to 150°C (300°F) and mix the spices, salt, and pepper in a small bowl. Rub the brisket with the spice blend and place it in a Dutch oven or casserole dish. Add sliced onions, garlic, and pour in the stock until it almost covers the meat. Cover tightly and slow cook for about 4 hours, turning the brisket halfway through. Finish by uncovering and increasing the heat to caramelise the meat for about 20-30 minutes, then drizzle with homemade tahini sauce before serving.
Serving suggestions and how to store
Serve this brisket buffet-style or on a platter, allowing everyone to create their own meals in lettuce cups, tortillas, or over grains (like couscous or rice). Store leftovers in an airtight container in the fridge for up to 3 days, or freeze shredded meat for future meals. Reheat gently in the oven or on the stove with a splash of broth.
Vary Middle Eastern Beef Brisket to suit your dietary needs
This pulled beef recipe is gluten-free, dairy-free, nut-free and grain-free. For those with specific dietary needs, you can easily modify this recipe: omit the onion for fennel, replace garlic with chilli flakes for a kick, or substitute tahini with almond butter for a sesame-free option. Additionally, feel free to adjust the spices according to your flavour preferences!
Take a look at the variations (below the main recipe) for suggestions to alter the recipe to suit many specific dietary requirements.
For more delicious, easy to make slow cooked meals click HERE.
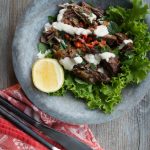
Middle Eastern Beef Brisket
This Middle Eastern Beef Brisket features on my dinner table very regularly. I love it because I can simply prepare it and then let it slow cook in my oven so dinner is done when I'm late home from after school activities.
Servings: 4
Ingredients
- 2 tsp smoked paprika
- 2 tsp ground cumin
- 1 tsp ground coriander
- 1 tsp ground cinnamon
- 1 tsp ground cardamom
- ¼ tsp ground cloves
- Sea salt and freshly ground black pepper - to taste
- 1 kg beef brisket (approx.)
- 370 ml chicken broth or stock (1½ cups) or water
- 1 onion/s - halved and sliced
- 2 clove/s garlic - sliced
Tahini Sauce
- 3 tbsp hulled tahini
- 1 lemon/s (small) juice
- ¼ tsp ground cumin
- Pinch sea salt
- water - to thin sauce
Instructions
- Preheat your oven to 150°C/300°F (fan-forced).
- In a small bowl mix together the spices, salt and pepper.
- Rub the beef with about 1½ tablespoons of the spice blend to coat it and place in a medium sized Dutch oven, casserole dish (with a lid) or roasting pan. Place the remaining spice mix in a small jar for your next brisket.
- Add the garlic, onion and pour over the stock (it should cover or almost cover the meat).
- Cover with a lid or foil wrapped tightly to seal.
- Cook for about 2 hours, turn the meat and cook for another 2 hours (approx. total 4 hours cook time). Remove from the oven and rest with the lid on for 30 minutes.
- It is cooked perfectly when the meat easily pulls apart. If you have a larger or particularly tough cut it may need a slightly longer cook time
- If there is lots of excess liquid int he pot, remove the lid or foil and turn the oven up to 200°C. Pull the meat apart and cook for approximately 20 minutes to caramelise and thicken the sauce (only if required).
- To make your tahini sauce, combine all of the tahini sauce ingredients together. Add the water tablespoon by tablespoon until you have a slightly runny sauce that can be drizzled over the meat.
Slow Cooker
- This can certainly cooked in a slow cooker. However, as the speed and temperature varies between the many brands of slow cookers, base the amount of liquid you add and the cook time on a similar style of recipe in the guide book for your specific slow cooker. The general rule of thumb is to halve the liquid and double the cook time, but understanding your own slow cooker is the best guide.
Serve this buffet style so you can build your own meal. Here are some ways we eat this...
- In a lettuce cup with julienne vegetables
- In a burger, wrap or tortilla with lots of salad/grated veggies
- On a creamy mashed potato or cauliflower puree with steamed green vegetables
- Over rice, quinoa or cous cous.
- Or any way you like really
Make-ahead
- Re-heat (covered) in a low oven until just hot or in a pot with a splash of bone broth.
Store
- Store in an airtight container in the fridge.
- Shredded meat can also be frozen.
Grab Bag Formula Method
- If you've done the **Grab Bag Formula Short Course, this is the method to convert this recipe...
- Place the beef brisket, spices, seasoning, stock, onion and garlic into your Grab Bag. Carefully seal your Grab Bag. I close most of the seal then press out as much air as I can then complete the seal. Place the Grab Bag in the freezer.
- To cook, remove the Grab Bag from the freezer, place on a baking tray and thaw in the fridge overnight.
- Tip the contents of the Grab Bag into a large oven proof dish (with a tight fitting lid) or Dutch oven. It may still be a bit frozen; that’s okay.
- Place the lid on the pot, set your oven to 150°C/300°F (fan-forced) and cook for about 2 hours. Turn the meat and cook for another 2-3 hours (total 4-5 hours cook time). It is cooked when the meat easily falls apart when pulled at. Remove the lid and turn the oven up to 200°C. Pull the meat apart and cook for approximately 30 minutes to caramelise and thicken the sauce.
- ** The Grab Bag Formula Short Course is available to purchase for just AU$46 HERE.ORIf you are a full-access Well Nourished Family member, the course is included in your membership and you can access in the members portal - HERE.
Notes
Onion-free
Replace the onion with a small bulb of finely diced fennel.Garlic-free
Replace the garlic with a pinch of chilli flakes.Sesame-free
Replace the tahini with almond butter.This recipe is a firm family favourite. If you like it as much as we do, add a comment or rate this recipe.
Smoked Salmon Pea Broccoli Pasta
We tend not to eat a heap of pasta, but it does make for a really fast meal occasionally. So it’s handy to have a few easy, delicious flavour combos like this lemony, Smoked Salmon Pea Broccoli Pasta recipe to call on.
This recipe came about after I bought some hot smoked salmon from our local farmers market (it’s also available in supermarkets), which I generally keep in the fridge to whip up a salad (like this one).
But it was a beautiful sunny Sunday and we were reminiscing about a long gone (but memorable) holiday in Italy – when the urge for pasta struck. So here it is, a delicious quick and easy to make Italian inspired meal…
Health benefits
This creamy smoked salmon pasta recipe is packed full of nutrition with omega-3 fatty acids and protein from the salmon, fibre from the peas and broccoli, and a touch of healthy fats from butter, it’s both nourishing and satisfying. The addition of sour cream or crème fraîche provides a creamy texture while maintaining a light feel.
Ingredients
The dish comes together with pasta (or zoodles for a grain-free option), hot smoked salmon, peas, broccoli, and a creamy sauce of butter, sour cream, and lemon zest, with a splash of white wine for depth.
What is ‘Hot’ smoked salmon?
Hot smoked salmon is smoked at a higher temperature, cooking the fillets of fish fully, resulting in a firm, flaky texture and a rich, smoky flavour. It’s ready to eat and great in salads or cooked dishes. Cold smoked salmon, on the other hand, is smoked at a lower temperature, which doesn’t cook the fish but cures it instead. This gives it a softer, silky texture and a more delicate, mild smoky flavour. It comes in thin slices where as the hot smoked salmon is sold in fillets. Both are available in major supermarkets.
How to make this smoked salmon pasta
Cook the pasta (or prepare zoodles if using) then drain well. Sauté onion and garlic in butter, add broccoli and peas, then deglaze with wine. Stir in remaining butter, sour cream, and lemon, then fold in the smoked salmon. Gently mix the pasta or zoodles through the sauce and serve immediately.
Serving suggestions and how to store
Serve this Smoked Salmon Pea Broccoli Pasta warm with a leafy salad for a well-rounded meal. It can also be enjoyed cold as a pasta salad, making it great for leftovers. Store any remaining pasta in an airtight container in the fridge.
Vary this Smoked Salmon Pea Broccoli Pasta to suit
For dairy-free, use olive oil and coconut cream instead of butter and sour cream. Use gluten-free pasta for a gluten-free option, or serve with zoodles to make it grain-free. If you’re avoiding onion, swap it for fennel, and if you prefer not to use wine, replace it with stock and a splash of vinegar for a similar flavour profile. I also love this with a couple tablespoons of capers mixed through. Feel free to serve with grated parmesan cheese too.
Take a look at the variations below for all the details as well as suggestions to alter the recipe to suit your specific dietary requirements.
For more delicious, nourishing and easy to make meals click HERE.

Smoked Salmon Pea Broccoli Pasta
This Smoked Salmon Pea Broccoli Pasta is a simple, delicious meal, combining pasta with rich smoked salmon and vibrant green veggies. It’s a perfect dish for a quick weeknight dinner that feels gourmet.
Servings: 4
Ingredients
- 50 g butter
- 1 red onion/s -finely diced
- 1 clove/s garlic -finely chopped or crushed
- 150 g peas (1 cup) frozen or fresh
- 1 broccoli (small head) broken into small florets
- 60 ml dry white wine (¼ cup)
- 2 tbsp sour cream -or creme fraiche (see dairy-free below)
- ½ lemon/s -juice and zest
- 1 fillet/s hot smoked salmon fillet/s
- Sea salt and freshly ground black pepper -to taste
- 300 g pasta -or approx. 3 cups of zoodles
Instructions
- Fill a large pot with water and bring to the boil. Once boiling cook your pasta.
- In a pan, sauté the onion and garlic in 25g of the butter over a low heat until soft and translucent (try no to brown it).
- Add broccoli and stir-fry for a couple of minutes to just start to soften it then add the peas.
- Turn the heat to high and add the wine (it should sizzle and reduce instantly).
- Turn off the heat immediately and add the remaining butter, sour cream, lemon juice and zest and mix to combine. Season to taste.
- Break the salmon into chunks and add to the peas/broccoli sauce.
- When the pasta is al dente, strain (rinse if necessary) and gently fold through the sauce.
- If using zoodles, obviously you don't need to cook them, just toss gently through the sauce to heat.
Serve
- Completely optional, but this is lovely finished with grated parmesan cheese.
- Immediately with a big leafy salad
- You can also allow to cool and eat as a pasta salad (good for leftovers)
Store
- Store in an airtight container in the fridge.
Notes
Dairy-free
Sub the butter for olive oil and the sour cream for coconut cream.Grain-free
Serve on zoodles.Gluten-free
Choose a gluten-free pasta.Onion-free
Replace the onion with a small bulb of finely diced fennel.No wine
Replace the wine with stock or bone broth and a teaspoon of vinegar.Add capers
I love this with a couple tablespoons of capers mixed through.Id love to hear how you like this simple meal. Post a comment or rate this recipe.
Quinoa Stuffed Mushrooms
These Quinoa Stuffed Mushrooms are a delicious, gluten-free and grain-free, vegetarian meal and a real family favourite. Friends have touted this a ‘restaurant quality’ meal, but they couldn’t be simpler to make. Line up flat mushrooms on a baking sheet or dish, stuffing with a flavoursome mix of onion, spinach and feta and topping with crunchy walnuts and chia seeds. Bake in the oven for 20 minutes and you have an impressive result with very little effort.
Health benefits
Mushrooms are a nutritious vegetable and one of the few sources of vitamin D. The garlic and red onion are wonderful immune building, detoxifying vegetables. The quinoa is a complete protein and fibre rich seed. More plant-based fibre and nutrition are provided by the spinach and walnuts. The chia is another excellent source of fibre, protein and essential fatty acids.
Ingredients
The key ingredients in this recipe are of course quinoa and mushrooms! Portobello or field mushrooms are used as a large, flat base and filled with a flavoursome mixture of the stems, onion, spinach, thyme and feta. This is then topped with walnuts which roast in the oven as it is baked, giving an extra flavoursome and crunchy topping. To complete the meal, the stuffed mushrooms are dressed with a zesty garlic and lemon dressing.
How to make Quinoa Stuffed Mushrooms
While your oven is preheating, rinse and cook the quinoa. Rinsing is important to wash off any saponins that can otherwise make the quinoa taste bitter. Drain well then transfer to a saucepan, cover with water and bring to a simmer. When the water has been absorbed, place a lid on the saucepan and turn off the heat. This traps the steam, completing the cooking without risking burning the quinoa. While the quinoa is cooking, you can de-stem the mushrooms and chop the stems finely, dice the onion and chop the spinach and fresh thyme. Once the quinoa is cooked, this can be added to the chopped vegetables as well as the feta cheese. Stir together well then press firmly onto the mushrooms on the baking sheet or dish lined with parchment paper. Top with the chopped walnuts and chia if you like, then bake. While baking, prepare the dressing if you are including this. I love the flavours of the dressing to add a bit of fresh zesty lemon to the dish.
Vary Quinoa Stuffed Mushrooms to suit
This recipe lends itself to many variations! I’ve included nut-free for school lunches, dairy-free, vegan and garlic-free. If you’re out of quinoa, that’s okay too! Rice or buckwheat also work for this stuffing. For green-avoiding people, there’s an easy substitute for the fresh spinach and if mushrooms really aren’t your thing, you can even swap them to make stuffed tomatoes or capsicums. The instructions are easy to follow with these variations so have a good look to suit your needs.
Serving suggestions and how to store
Serve your quinoa stuffed mushrooms warm with a sprinkle of fresh rocket and a drizzle of zesty dressing. If you have leftovers, they store beautifully in an airtight container in the fridge—just reheat them in a low oven until they’re warmed through.
More delicious, easy to make vegetarian meals HERE.
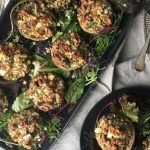
Quinoa Stuffed Mushrooms
One of my favourite meatless Monday meals, these Quinoa Stuffed Mushrooms are really tasty and quite simple to make. Plant powered nourishment!
Servings: 4
Ingredients
For the stuffed mushrooms:
- 135 g quinoa (¾ cups)
- 8 large portobello or field mushrooms -stalks removed and set aside
- ½ red onion/s (small) finely diced
- 30 g baby spinach - or kale leaves, finely chopped (approx. handful)
- 1 tbsp fresh thyme leaves -picked off the stalks (or 1 teaspoon of dried)
- 100 g feta cheese -or goats curd, crumbled
- 60 g walnuts (½ cup) roughly chopped
- 1 tbsp chia seeds (optional)
For the dressing (optional):
- 1 clove/s garlic -unpeeled (roasted with the mushrooms)
- 1 lemon/s -(small) zest and 2 tablespoons of juice
- 60 ml extra virgin olive oil -extra virgin (4 tbsp)
Instructions
- Preheat your oven to 180º C/350°F (fan-forced).
- Rinse the quinoa in a fine sieve really well for at least 1 minute (this removes the bitter saponins from the quinoa). If you have time to soak the quinoa in water with a splash of apple cider vinegar (for up to 12 hours) this will improve its digestibility. Cook the quinoa by placing it into a pot with 1½ cups of water.
- Bring the mixture to a boil over medium-high heat, then decrease the heat a bit to maintain a gentle simmer. Cook uncovered until the quinoa has absorbed all of the water, about 10 to 12 minutes.
- Remove the pot from heat, cover, and let the quinoa steam for 5 minutes. This step gives the quinoa time to pop open and the little white spiral to appear. After 5 minutes, remove the lid and fluff the quinoa with a fork.
- Chop the mushrooms stalks up and combine in a bowl with the quinoa, onion, spinach or kale and thyme leaves.
- Now mix through the feta or goats curd. Taste and season with sea salt and freshly ground black pepper.
- Spoon onto the mushrooms, pressing it into place and then top with the walnuts and sprinkle with the chia seeds.
- Place them in a baking tray with the whole clove of garlic and roast for 20 minutes.
- For the dressing mix together the zest, lemon juice and olive oil, and once cooked, squeeze out the soft centre of the roasted garlic and mix into the dressing.
Serve
- With rocket and a drizzle of dressing.
Make-ahead
- Re-heat in a low oven until just hot.
Store
- Store in an airtight container in the fridge.
Notes
Nut-free
Leftovers are great for school lunches. To make them nut-free substitute the walnuts with sunflower seeds or just omit altogether.Dairy-free and vegan
Replace the feta or goat cheese with a thick cashew nut cream. Recipe here.Garlic-free
Omit the garlic in the dressing.No quinoa
No worries, you can replace it with brown rice or buckwheat.Kids hate green
Replace the spinach with grated carrot.Don't do mushrooms?
Then you may not have read this far - but, you could substitute with half a tomato or capsicum with the centre scooped out.Hope you like this recipe? I love to receive your feedback, write a comment below to show your support!
Vegetarian Shepherd’s Pie
This vegetarian shepherd’s pie is a hearty dish that’s perfect for family dinners or meal prepping. It’s packed with lentils, veggies, and delicious herbs, giving you a satisfying and nutritious plant-based meal. Plus, it’s easy to make and offers a variety of topping options for a crispy, golden finish.
I was a vegetarian for a good chunk of my life. This was a staple meal for me back then and still features regularly now, 20+ years on. It is a cost effective, easy to prepare vegetarian meal and one of my go-to meals when time and supplies are low. It’s comfort food at its best!
Health benefits
Loaded with fibre-rich lentils, a rainbow of veggies, and immune-boosting garlic and rosemary, this vegetarian shepherd’s pie is a nutritious powerhouse. The lentils provide plant-based protein, and the mix of veggies ensures you’re getting plenty of vitamins and minerals, all while being gut-friendly and easy to digest.
Ingredients
This vegetarian shepherd’s pie recipe uses common pantry staples like onion, garlic cloves, carrots, zucchini, celery, mushrooms, lentils, diced tomatoes and vegetable broth or stock. The rosemary, smoked paprika and Worcestershire sauce add a warm, earthy flavour that ties everything together, while the potato topping gives it that classic shepherd’s pie texture.
How to make Vegetarian Shepherd’s Pie
Sauté your onion and garlic, then add the veggies, lentils, tomatoes, and seasonings. Stir and let it all simmer until the flavours meld together, then thicken the mixture with a simple cornflour slurry. Pour the lentil mixture into a baking dish (or casserole dish), top with diced potatoes (or mashed potato if you prefer), and bake until the potatoes are fork tender and golden. Easy and delicious! If you own a Thermomix, we’ve also included Thermomix instructions for this recipe.
Serving suggestions and how to store
Serve this gluten-free vegetarian shepherd’s pie with a fresh, leafy green salad on the side for extra crunch and nutrients. Leftovers store well in the fridge in an airtight container, and it will also freeze beautifully for easy weeknight freezer meals down the line.
Vary this vegetarian shepherd’s pie to suit
You can switch up the topping with mashed potato topping or sweet potato or cauliflower mash for a twist, or make it dairy-free (vegan shepherd’s pie) by omitting the cheese. If you want a bit more protein, bacon pairs wonderfully with the lentils. You can even sneak in more veggies by grating them, which is a great trick for fussy eaters!
Take a look at the variations below for all the details as well as suggestions to alter the recipe to suit your specific dietary requirements.

Vegetarian Shepherd's Pie
A delicious, warming vegetarian dish, this Vegetarian Shepherd's Pie is one of my all time favourite meatless Monday meals.
Servings: 4
Ingredients
- 1 onion/s (large) finely diced
- 2 clove/s garlic -finely diced
- 2 carrot/s -diced
- 1 zucchini/s -diced
- 2 stick/s celery -sliced
- 130 g mushrooms (approx. 1 cup) diced
- 2 cup/s cooked brown lentils (or 2 cans, drained and rinsed)
- 425 g diced tinned tomatoes
- 250 ml vegetable stock (1 cup)
- 1 tbsp fresh rosemary leaves -roughly chopped
- ½ tsp smoked paprika
- 1 tbsp Worcestershire sauce
- Sea salt and freshly ground black pepper
- 2 tbsp hot water
- 1 tbsp cornflour
- 5-6 potato/s -peeled and diced into 1-2cm cubes
- 20 g parmesan cheese -grated (optional) (¼ cup)
- 30 g sunflower and/or pumpkin seeds (optional)
Instructions
- Preheat your oven to 200°C/395°F.
- In a medium sized pot, sauté your onion and garlic in a little oil for a few minutes until opaque.
- Add the carrots, zucchini, celery, mushrooms, lentils, tomatoes, stock, rosemary, smoked paprika, Worcestershire sauce and seasoning.
- Bring to a simmer for 10-15 minutes.
- Meanwhile, mix the water and cornflour until combined and add to the pot to thicken for a few more minutes.
- Pour into an oven proof dish and top with the diced potato (and optional cheese and seeds). Stud with any extra rosemary sprigs if you like.
- Bake for 20-30 minutes or until the potato is golden and cooked through.
Thermomix method
- Preheat your oven to 200℃.
- Chop your onions and garlic, 3 seconds, speed 5. Scrape down the sides and cook 5 minutes, temp 100, speed 1 in a little olive oil.
- Add the carrots, zucchini, celery, and process 10 seconds, speed 4.
- Now add the sliced mushrooms (I don't like to process them, but you can if you prefer), lentils, tomatoes, stock, rosemary, paprika and seasoning. Cook 10 minutes, temp 100, reverse speed 1.
- Add the cornflour/water mixture and cook 5 minutes, temp 100, reverse speed 1. Pour into an oven proof dish and top with the diced potato (and optional cheese and seeds). Stud with any extra rosemary sprigs if you like.
- Bake for 20-30 minutes or until the potato is golden and cooked through.
- Note - you can top with traditional mashed potato if you like. I'm a lazy, time-poor cook and always looking for shortcuts in the kitchen (and ways to reduce washing up)! This is one saves time and washing, but I don't think alters the taste too much - in fact, I love the crispy baked spuds on top.
Make-ahead
- Re-heat in a low oven until just hot.
Serve
- With a leafy green salad.
Store
- Store in an airtight container in the fridge.
- Can also be frozen.
Cook the Lentils
- To cook the lentils, soak in water and a tablespoon of natural yoghurt or apple cider vinegar to produce easily digestible legumes. Soaked lentils can then be cooked by simmering for 15 minutes or until tender but not sloppy. Un-soaked lentils should be rinsed and cooked for 30-45 minutes. 1 cup of raw lentils yields approximately 2 cups cooked.
Notes
Different pie top
You can also top the pie with sweet potato, cauliflower pieces or cauliflower mash.Dairy-free and vegan
Omit the cheese.Onion-free
Replace the onion with a small bulb of fennel, finely diced.Garlic-free
Replace the garlic with a teaspoon of cumin powder and a pinch of chilli flakes.Gut repair
If you aren’t vegetarian and looking to include bone broth in your diet, substitute the vegetable stock with bone broth.Add bacon
I think brown lentils and bacon is a match made in heaven. So if you please, add 4 rashers of nitrate free bacon with the onion.Fussy eater tip
Grate the vegetables so they sit behind the lentil/tomatoes.Like this recipe? Let me know what you think, it really helps me to shape the content I produce here at Well Nourished. Post a comment or question below, thanks.
Asian Noodle Soup (supercharged gluten and grain free version)
This Asian Noodle Soup is dairy-free, gluten-free and grain-free and one of the most nutritious and nourishing meals about. When the weather is hot and humid as it is at this time of year, I often crave a simple soup. Not a heavy chunky or blended soup but an Asian style spicy broth.
As I like to make everything I feed my family as nourishing and tasty as possible, I’m always looking for new and interesting ways to do so. So here it is and as always, with lots of versions to suit your taste and dietary requirements.
Health benefits
Starting with bone broth, the most nourishing ‘super food’ and digestive tonic of all. For all you need to know about bone broth and how to make it click here. Next is one of my favourite ingredients – rehydrating and mineral rich coconut water! For why it is so very nutritious, click here. A good dose of protein (about 35-40 grams per serve) and stacks of vegetables…what more could you ask for from a meal?
Ingredients
The mix of fresh ginger, garlic, fish sauce, and kaffir lime leaves adds incredible depth to the broth. Whether you use zucchini noodles or opt for rice noodles, this recipe is super versatile. You can adjust the noodles and vegetables to suit your preferences or dietary requirements. I love this made with bok choy or baby spinach, shiitake mushrooms, broccoli and snow peas or beans)
How to make this
Start by simmering your chicken in a delicious broth of chicken stock, ginger, garlic, red onion, and kaffir lime leaf. Once cooked, shred the chicken and set it aside. Add your vegetables, noodles, and coconut water to the broth, bringing everything to a simmer before seasoning with lime juice, fish sauce, and chilli to taste. Divide the broth, chicken, and veggies between bowls and garnish with fresh herbs for a refreshing finish.
Serving suggestions and how to store
Serve this soup steaming hot with fresh chilli and a generous handful of Vietnamese mint, Thai basil or coriander (cilantro). If you have any leftovers, store them in an airtight container in the fridge or freezer for a quick and easy meal later. It’s perfect for meal prep!
Vary this to suit your dietary needs
For a gluten-free version, opt for gluten-free noodles, or go grain-free with zoodles or konjac noodles. Vegetarians can swap the chicken for tofu or egg, and vegans can add extra mushrooms and tempeh, using a vegetable broth and sea salt in place of fish sauce.
Take a look at the variations (below the main recipe) for suggestions to alter the recipe to suit your specific dietary requirements.

Asian Noodle Soup - (supercharged gluten and grain free version)
This Asian noodle soup is the perfect comfort dish when you're craving something nourishing and delicious. Loaded with fresh veggies, tender chicken, and the unique balance of coconut water and lime, it’s a simple and wholesome meal that’s perfect for any time of year. Plus, you can easily tweak the ingredients to suit your dietary needs.
Servings: 4
Ingredients
- 400 ml chicken broth or stock -or chicken stock
- 330 ml coconut water
- 1 tbsp ginger root -peeled and finely grated
- 2 clove/s garlic -peeled and finely sliced
- 1 red onion/s -peeled, halved and finely sliced
- 1 tbsp fish sauce
- 1 kaffir lime leaf (optional but recommended)
- 500 g chicken thigh or breast
- 2-3 cup/s vegetables (I've used sliced carrot, broccoli florets, shitake mushrooms, snow peas)
- 200 g noodles (of your choice) (I used a mix of zucchini noodles and a small pack of konjac noodles which are grain free and very much like a rice noodle, available in the health section of the supermarket or health food shops). You could also use rice noodles which are available in the Asian section of the supermarket.
- 1 lime/s -juice
- 1 red chilli/s -or chilli flakes, to taste
- ¼ bunch/s fresh Vietnamese mint leaves -or regular mint, coriander leaves and Thai basil are delicious (but optional)
Instructions
- In a medium size pot, add the broth, ginger, garlic, red onion, kaffir lime leaf and fish sauce and bring to a slow simmer.
- Drop in your chicken and simmer until the chicken is cooked through. Remove the chicken to a plate and shred or slice. Set aside.
- Now add your vegetables and simmer for a few minutes until they are just starting to soften. If you are using zucchini noodles, add these now too.
- Add the coconut water and lime juice and bring back up to a simmer and take off the heat immediately.
- Taste it and make sure it has a nice balance of sweetness (from the coconut water), saltiness from the fish sauce and sour from the lime juice. Adjust any of the flavours if needed.
- In a deep bowl place your rinsed and drained konjac noodles (or softened rice noodles). Pour over the broth and divide your vegetables and chicken (returning any juices from cutting) between the bowls.
- Garnish with chilli and fresh Asian herbs.
Tip
- You can also make this using left over cooked chicken. If you do this you can skip the second stage of the method.
Make ahead
- Re-heat in a pot over a low heat until just hot.
Store
- Store in an airtight container in the fridge or freezer.
Notes
Gluten-free
Choose a gluten-free noodle.Grain-free
Choose a grain-free noodle like zoodles.Coconut-free
Replace the coconut water with more broth.Vegetarian
You can substitute the chicken with egg (I'd make a thin omelette and add that sliced) and replace the fish sauce with a good pinch of sea salt. Use a vegetable broth to replace the chicken broth.Vegan
Add extra mushrooms and tempeh and replace the fish sauce with a good pinch of sea salt. Use a vegetable broth to replace the chicken broth.Onion and garlic-free
Replace the onion and garlic with an extra 2 cm piece of ginger.Like this recipe or have a question? Post in the comments below.
Quinoa Patties
These Quinoa Patties are a fantastic way to enjoy a nutritious and delicious meal that’s packed with flavour and goodness. Perfect as a snack, lunchbox treat, or a light dinner, these patties are versatile and easy to whip up, making them a hit with both kids and adults. Plus, they’re a great way to sneak in some veggies!
Health benefits
Quinoa is a superfood I just love. It is a complete protein, providing all nine essential amino acids, while leafy greens contribute vitamins and minerals that support overall health. The addition of garlic and parmesan cheese not only enhances flavour but also adds beneficial nutrients. The eggs combined with the quinoa make this a wonderful, protein-rich vegetarian meal with approximately 18 grams of protein per serve.
Ingredients
For these yummy quinoa patties, you’ll need quinoa, parmesan cheese, garlic, spring onions, leafy greens (like kale or spinach or even fresh chives), fresh breadcrumbs, eggs, and seasoning with sea salt and black pepper.
How to make Quinoa Patties
Start by washing the quinoa well to remove any bitterness, then cook it in a saucepan according to these instructions and let it cool. In a food processor, blend the cheese, cloves garlic, and spring onions, then process the bread to make bread crumbs (if making them). Next, mix in the eggs and chopped greens, combining everything together in a medium bowl. Shape the mixture into patties and cook them in a fry pan or skillet in either coconut oil, olive oil or butter until golden brown on both sides.
Serving suggestions and how to store
These quinoa cakes are delicious served with avocado salsa, guacamole, or your favourite dips like pesto or hummus. They can be enjoyed warm or cold, making them perfect for lunchboxes or meal prep. Store any leftovers in an airtight container in the fridge for up to a week, or freeze them (with baking or parchment paper separating them) for a quick meal option later.
Vary this to suit your dietary needs
To make these patties gluten-free, simply use gluten-free bread or rolled quinoa. For a dairy-free version, omit the cheese and consider adding nutritional yeast and a good pinch of sea salt for flavour. If you’re not a fan of leafy greens, feel free to substitute them with grated carrot or sweet potato for a different twist.
Take a look at the variations (below the main recipe) for suggestions to alter the recipe to suit your specific dietary requirements.

Quinoa Patties
These quinoa patties are delicious hot or cold, as a side dish or as the main event. They are just so versatile, nourishing and delicious.
Servings: 4
Ingredients
- 180 g quinoa (1 cup) washed very well
- 45 g parmesan cheese (½ cup) grated
- 2 clove/s garlic -peeled and crushed
- 1 bunch/s spring onion/s -white part finely diced
- 30 g leafy greens -like kale, spinach, basil or another herb (1 cup approx.)
- 60 g fresh breadcrumbs (1 cup) or gluten-free breadcrumbs
- 4 egg/s
- Sea salt and freshly ground black pepper - to taste
Instructions
- After washing your quinoa very well in a fine sieve to remove the bitter saponins, cook your quinoa in a saucepan (instructions here). If you have time to soak the quinoa in water with a splash of apple cider vinegar (for up to 12 hours) this will improve its digestibility. Once cooked set aside to cool.
- In a food processor or powerful blender, grate your cheese and chop your garlic and spring onion. Set aside in a large mixing bowl.
- Now process your bread (works well from frozen) to a crumb. Add to the cheese mix.
- Without rinsing your bowl, process you eggs and greens until the greens are a chopped up as necessary. I like them a little in tact, but for veggie phobic kids, you may like to process them to a liquid.
- Now mix all the ingredients together until well combined and season well.
- In a large frypan, add a good couple of tablespoons of coconut oil or butter (or a mix of both).
- Heat over a moderate heat and drop a good heaped tablespoon of the quinoa mixture into the oil. This recipe should make approx. 15-16 patties.
- Press down a little with the back of a spatula.
- Cook until the edges start to brown. Carefully turn and brown the other side.
- Eat immediately or allow to cool and store in the fridge.
Thermomix method
- Soak the quinoa overnight, drain and rinse. If no time to soak, rinse several times, rubbing it so the bitter saponins are washed away. Cook in the basket with 700ml of water, Varoma temp, speed 4, 12minutes if soaked, 15minutes if just rinsed or until the little white tail on the seed appears.
- Set aside to cool and dry your TMX bowl.
- Process you cheese, garlic, and onion, 10 seconds, speed 4. Set aside.
- Make your breadcrumbs by processing frozen bread (broken into pieces), 10 seconds, speed 6. Set aside.
- Chop the leafy greens, 5 sec, speed 4. Add the eggs and process 5 seconds speed 4.
- Add back the cooked quinoa, breadcrumbs and cheese/onion mix. Season and mix on reverse, 10 seconds, speed 3 (you may need to scrape the sides).
- In a large frypan, add a couple of tablespoons of coconut oil or butter (or a mix of both).
- Heat over a moderate heat and drop a good heaped tablespoon of the quinoa mixture into the oil.
- Press down a little with the back of a spatula.
- Cook until the edges start to brown. Carefully turn and brown the other side.
- Eat immediately or allow to cool and store in the fridge.
Serve
- With a squeeze of lemon juice
- With avocado tomato salsa (pictured) or guacamole
- With pesto or hummus
- With salad
- With grilled meat or fish and salad for a larger meal
Make-ahead
- They can be eaten cold or re-heated in the oven or a sandwich press.
Store
- Store in an airtight container in the fridge.
- Can also be frozen.
- My kids love these in their school lunchbox.
Notes
Gluten-free
Use gluten free bread or rolled quinoa.Dairy-free
Just omit the cheese (you can add in ¼ cup nutritional yeast for more flavour).No greens
You can substitute the greens with grated carrot or sweet potato.Love to hear your thoughts on these delicious patties. You can comment or rate this recipe below.
Homemade Hamburger (and why you need to avoid the rest)
This healthy hamburger recipe is quick, easy, and a family favourite. I usually make my own patties because homemade burgers are a genuinely healthy meal, but only when you skip the takeout. The best part? These come together faster than ordering and picking up takeaway!
After seeing an intact McDonalds hamburger that was five years old and completely free of mould or any kind of decay, I can confirm the longevity of the McDonalds burger is no urban myth. I would never touch a fast food or frozen burger of any kind!
Even Jamie Oliver has been on the fast food giants back recently. In a graphic youtube video, he describes that when producing hamburger mince, “basically, we’re taking a product that would be sold in the cheapest ways for dogs” and after being washed with ammonium hydroxide (which is what forms the bulk of your household disinfectants) ‘is being given to human beings.’ Jamie goes on to ask “why would any sensible human being put meat filled with ammonia in the mouths of their children?”
So I regularly make up healthy homemade hamburgers in batches and freeze them to throw on the BBQ when the need arises. They are truly delicious, healthy and very simple to make.
Health benefits
Homemade hamburgers give you complete control over what goes into your meal, allowing you to use fresh, nutrient-rich ingredients. The inclusion of vegetables like carrots and zucchini not only boosts the flavour but also adds fibre and essential vitamins, making these burgers a more balanced option compared to typical fast food versions. There is nothing that you can buy that compares to these burger patties nutritionally!
Ingredients in this healthy burger recipe
This burger recipe calls for a blend of beef mince, fresh breadcrumbs, herbs like basil or parsley, and a mix of veggies, including red onion, carrots and zucchini, to create a juicy and delicious patty. Simple seasonings like garlic, mustard, oregano, sea salt and black pepper bring everything together, giving you a burger that’s both satisfying and nutritious.
How to make this healthy hamburger recipe
To make healthy burgers, start by preparing your fresh breadcrumbs, grating the vegetables and finely chopping the herbs. Place them into a mixing bowl. Mix everything together with the beef mince, egg, and seasonings until you can form firm patties. Cook them over a medium-high heat on the BBQ grill or in a skillet or pan until they’re perfectly done. Customise your burger with your favourite toppings, sauce and enjoy the homemade goodness!
Serving suggestions and how to store
Serve these homemade burger patties with your favourite accompaniments like your favourite salad, grated carrot, slices of cheddar cheese, avocado, tomato, fresh greens, and grilled onions. Go the extra mile by adding crispy bacon, fried egg, pickles or grilled pineapple. I also recommend to toast the buns on the BBQ for added flavour and texture. Leftover burgers can be stored in an airtight container in the fridge. You can also freeze the burgers either before or after cooking, making them perfect to prep ahead.
Vary this healthy hamburger recipe to suit your dietary needs
Make these burgers gluten-free by using gluten-free breadcrumbs or quinoa flakes. For a grain-free option, try binding the patties with nut meal and wrap in a lettuce cup. If you need an egg-free version, simply omit the egg; the patties might be a bit softer but will still taste great. You can even sub the ground beef for another ground meat like minced / ground turkey or chicken. For a fabulous Veggie burger take a look at THIS RECIPE.
Check out the variations below the main recipe for tips on how to adapt it to your specific dietary needs.
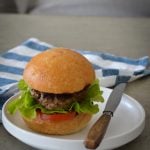
Homemade Hamburger
Looking for a healthier alternative to store-bought hamburgers? This Healthy Homemade Hamburger recipe is packed with fresh veggies, herbs, and quality beef, making it a nutritious and delicious choice. Say goodbye to unnecessary additives and preservatives, and hello to a burger that's as wholesome as it is tasty. These are perfect for picky eaters who love burgers!
Servings: 6
Ingredients
- 500 g beef mince (approx.)
- 25 g fresh bread crumbs (½ cup)
- 1 red onion/s -quartered & grated
- 1 clove/s garlic -crushed
- 2 tbsp fresh basil or parsley -leaves picked
- 1 carrot/s (small) quartered & grated
- 1 zucchini/s (small) quartered & grated
- 1 tbsp dried oregano
- 1 tbsp dijon mustard
- 1 egg/s
- Sea salt and freshly ground black pepper
- 6 burger buns (to serve)
- Salad (to serve)
Instructions
- If you want to make these burgers the good old fashioned way, then just throw all the ingredients into a bowl and mix with your hands, squeezing the mixture until it comes together.
- I personally find it easier and quicker to make them in a food processor or Thermomix.
- Start with processing your bread to make fresh crumbs and set aside. If using a Thermomix 30 seconds, speed 8.
- Now process the onion, garlic, fresh herbs and vegetables and process until finely chopped. If using a Thermomix 10 seconds, speed 5.
- Add back the breadcrumbs plus the mince, egg, oregano, dijon and seasoning and combine on reverse. If using a Thermomix 30 seconds reverse speed 4 (you may need to scrape the sides a few times).
- If the mixture feels very wet, add more breadcrumbs until you are able to form firm patties. This is important for them to hold together.
- Form you patties into the sizes you want (I do some big for adults, some small for the kids), throw on a preheated BBQ or in a pan over a high heat.
- It's important to make sure the bottom is well cooked before flipping them so they hold together. Also don't try to move them about until the bottom half is very well cooked.
Serve
- I always put all of my accompaniments in little bowls on the table and my kids build their own. Personally, I love grated carrot, grated cheese, lettuce or some type of greens, sprouts, grilled onions, grated fresh beetroot, pieces of fresh pineapple for a Hawaiian touch.
Tip
- I also love to chargrill the cut side of my burger buns to crisp them up and add some char flavour.
- I also melt the cheese on the burger patty too (by closing the BBQ hood for the last few minutes).
Store
- Store in an airtight container in the fridge.
- Can also be frozen either the raw patties or cooked. Fully de-frost before cooking/ re-heating.
Notes
Gluten-free
Use gluten-free breadcrumbs or quinoa flakes or chickpea flour to bind.Grain-free
Use quinoa flakes or nut meal to bind them and serve in a lettuce cup with salad, San Choy Bow style.Egg-free
You can certainly leave the egg out, the patty just won't be as firm (but it will still taste great).Double-up
Double the batch to load the freezer with your own fast food.Leftovers?
Great for tomorrow's lunch box. Sometimes I make four patties and roll the rest of the hamburger mince into meatballs.Hope it has inspired you to get in the kitchen or find another fast food alternative. Any comments or question, please leave them below.
Fish Tortillas, buffet style.
These Healthy Fish Tortillas are a fresh, light, and easy dinner option that’s perfect for busy weeknights. Packed with seasoned white fish, guacamole, and plenty of fresh veggies, it’s a fun, build-your-own meal that the whole family can enjoy!
Buffet style of eating is also a great way to get kids involved and interested in food. For more about this way of eating, click here.
Health benefits
The fish speaks for itself – a quality protein and omega 3 fatty acid source. The avocados also add more good fats, fibre, and minerals. The lime juice and zest are a vitamin C rich immune booster. Lots of salads on the side for fibre, antioxidants, and a host of health giving nutrients.
Ingredients
For this fish tortillas recipe you’ll need firm white fish like snapper, mahi mahi or cod, spices like smoked paprika and thyme, fresh coriander (cilantro), and basic ingredients for guacamole, including avocado, lime, and plain yogurt (or Greek yogurt). For sides, use fresh veggies like cabbage, tomato, cucumber and lettuce—perfect for making each tortilla your own!
How to make healthy fish tortillas
Start by prepping your guacamole and sides. Then, toss the fish in olive oil and spices, and cook it in a hot pan with onions until it’s done. Serve the fish with guacamole and a variety of fresh veggies, all laid out for a fun, DIY tortilla meal.
Serving suggestions and how to store
Let everyone build their own fish tortillas using lettuce cups or additive-free corn tortillas or flour tortillas. Serve with fresh lime wedges. Store any leftovers in airtight containers in the fridge and reheat the fish in a pan or oven. The guacamole is best eaten fresh but can be stored for a day in the fridge with a bit of lime juice to prevent browning.
Vary this to suit your dietary needs
For dairy-free, skip the yogurt in the guacamole or use coconut yoghurt instead. Use gluten-free tortillas if needed, and feel free to adjust the veggies and toppings to suit your family’s preferences!

Fish Tortillas, buffet style.
These Healthy Fish Tortillas are a quick and easy dinner. With spiced fish, creamy guacamole, and a variety of toppings, they’re not only delicious but also packed with nutritious ingredients to keep everyone happy and satisfied.
Servings: 4
Ingredients
For the fish
- 500 g firm white fish -I like snapper, mahi mahi or cod, 2cm dice
- 1 tbsp extra virgin olive oil -extra virgin
- 1 tbsp smoked paprika (or you can use pure Mexican spice mix, my spice blend recipe here))
- 1 tsp dried thyme
- Sea salt and freshly ground black pepper -to taste
- 1 red onion/s (large) sliced
- ½ bunch/s fresh coriander leaves -finely chopped (serve on the side if this is a deal breaker for fussy kids)
Guacamole
- 1 avocado/s (large)
- 1 lime/s -juice (zest optional)
- 1 clove/s garlic -crushed
- 3 tbsp natural, Greek or coconut yoghurt
- Sea salt and freshly ground black pepper -to taste
Serve
- 1 lime - quartered
- Salad (to serve)
Instructions
- Firstly prepare your sides (below) so they are ready to serve.
Guacamole
- Process or mash the avocados with a fork. Add the remaining ingredients and mix well to combine. Place in a serving bowl.
Fish
- Toss the fish in a small splash of oil followed by the spices, thyme, sea salt and pepper.
- Over a moderate heat, add a little more oil to a large fry pan and cook the red onion for 2 minutes or until it starts to soften. Add the fish and turn each piece or stir gently until it is cooked through. It should only take 4-5 minutes max.
- Turn off the heat, stir through the coriander and place in a serving bowl.
- Serve with guacamole and your choice of sides.
Options for sides to serve:
- Choose at least three of the following sides. I always serve them all in separate bowls so everyone can build their own tortilla (kids love this):
- Serve in a lettuce cup tortilla (cos and iceberg lettuce works well)
- If using store bought tortillas, make sure they are additive-free and without vegetable oil (the only ingredient should be corn and perhaps sea salt)
- 2 tomatoes, diced (you can add a little diced red onion to make a salsa if you like)
- 1 small cucumber, diced
- Lettuce leaves, shredded (dress with lime juice)
- Shredded cabbage slaw
- Sprouts, of your choice (dress with lime juice)
- 1 capsicum, diced
- 2 large carrots, grated (dress with lime juice)
- This is also really lovely with diced fresh mango if in season
- 1 fresh chilli, finely chopped or dried chilli flakes
Notes
Dairy-free
Omit the yogurt from the guacamole or replace with coconut yoghurt.Nut-free
Choose olive oil to cook the fish in.Gluten-free
If using store bought tortillas, ensure they are gluten-free.What's your favourite Mexican meal? Let me know by commenting below.
Roast Vegetables, Three Ways (that even the kids will like)
This Roast Vegetables, Three Ways recipe is a versatile and easy way to transform simple veggies into delicious meals the whole family will enjoy – even the kids! Whether you want a hearty side dish, a rich pasta sauce, or a nourishing soup, these roasted veggies have you covered. With just a few simple ingredients, you can create multiple dishes with minimal effort. It’s a wonderful and delicious way for hiding vegetables in meals.
Health benefits of hiding vegetables in meals
This recipe is perfect for parents to help with hiding vegetables in meals (for picky eaters). Packed with a variety of colourful vegetables, this recipe provides a wholesome way to enjoy seasonal produce. Roasting brings out their natural sweetness, and it’s an easy way to incorporate more fibre rich, plant-based foods into your meals.
What you need to make Roast Vegetables, Three Ways
This recipe uses a variety of everyday vegetables like sweet potatoes, carrots, zucchini, and capsicum (bell peppers), combined with herbs, garlic, and a sprinkle of pumpkin seeds for crunch. For a richer flavour, add tomatoes to the mix if you’re making pasta sauce or soup. Optional extras like fennel or eggplant can switch things up.
How to make the base for these three recipes
Simply toss your chopped vegetables in olive oil, ghee, or butter, season with oregano, salt, and pepper, then spread them in a single layer onto a baking tray or baking sheet. Roast at 180℃/350℉ for 40-60 minutes, until tender. For the pasta sauce or soup versions, blend the roasted veggies, and you’re ready to go!
Serving suggestions and how to store
These roasted vegetables can be served as a side with any protein, or turned into a creamy soup or pasta sauce by blending them. Leftovers can be turned into a hearty salad with leafy greens, feta, or grains like quinoa. Store leftovers in an airtight container in the fridge, or freeze the soup and sauce versions for later.
Vary this to suit your dietary needs
For a vegan version, use olive oil and skip the cheese or meat additions. If you’re legume-free, simply avoid the beans in the soup or pasta sauce variations. Feel free to adapt the veggies based on what you have on hand!
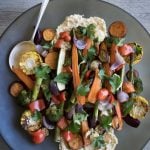
Baked vegetables, three ways (that even the kids will like)
One simple tray of roasted vegetables can become three different meals. Here's how...
Ingredients
- 1 large sweet potato/s -skin on and cubed (can sub pumpkin)
- 3 carrot/s -unpeeled and sliced
- 100 g mushrooms -Swiss brown or button, whole or quarter field
- 1 zucchini/s -sliced or cubed
- 1 red capsicum/s -roughly sliced
- 2 red onion/s -peeled and quartered
- 4 clove/s garlic -whole and unpeeled
- 3 tbsp butter, ghee or olive oil -melted
- 60 g pumpkin seeds (½ cup)
- 2 tbsp dried oregano
- Sea salt and freshly ground black pepper -to taste
If making this into a pasta sauce or soup also include:
- 6 vine ripened tomatoe/s -halved and placed cut side up on the roasting tray ( depending on the size of your tray, they may need to sit on top of the vegetables) or 2 punets of cherry tomatoes, whole. The vegetables sit very well behind the tomato flavour. However if your kids can still detect vegetables, then next time, remember to increase the amount of tomatoes and reduce the quantity of vegetables. For very vegetable fussy kids, do this to begin with.
Optional extras:
- 1 bulb fennel -quartered
- 1 eggplant/s -small
Instructions
- Preheat your oven to 180℃/350°F (fan-forced).
- Take a large baking or roasting tray. Throw in all of your cut up vegetables, oregano, salt and pepper and ghee (or butter or olive oil) and toss to coat them all well.
- Place you tomatoes, cut side up on top (sprinkle with a little extra oregano, salt and pepper). Scatter over the pepitas.
- Place in the oven for about 40 - 60 minutes or until the vegetables are cooked through.
- Drizzle with a little extra virgin olive oil, adjust the seasoning and serve as a side with any type of protein.
Soup
- Squeeze the flesh from the garlic skin.
- Throw all of the contents of the baking dish into a blender or food processor (or Thermomix), with a glug of EV olive oil, season well and blend on a high speed until pureed.
- Add in some fresh basil or parsley to for extra goodness and flavour.
- To add protein, include a can of brown lentils or canellini beans (drained and rinsed). These can be either stirred through or pureed too.
- Add a little water or stock to achieve the desired consistency. I love a thick soup, so I would use only a little stock.
Pasta sauce
- Squeeze the flesh from the garlic skin.
- Throw all of the contents of the baking dish in a blender or food processor (or Thermomix), with a glug of EV olive oil, season well and blend on a high speed until pureed.
- Add in some fresh basil or parsley too for extra goodness and flavour.
- You could even add a spoon or two of your favourite pesto to the mix (or on top as I have pictured below).
- To add protein, include a can of brown lentils or canellini beans (drained and rinsed). These can be either stirred through for texture or pureed to. You could also add a can of tuna, some diced bacon or chorizo sausage if you like.
- Serve over pasta with grated cheese. I often mix this sauce through macaroni or tube pasta to coat it, add a little feta or goats cheese to if you like and top it with grated cheese. Bake in the oven for 10 minutes.
- My favourite type of pasta is a gluten-free rice and quinoa pasta.
Salad
- Let the vegetables cool down.
- Toss salad leaves in a dressing of one part red wine vinegar to two parts extra virgin olive oil, seasoned well.
- Add the cooled vegetables, gently toss and serve.
- This is lovely with crumbled feta or goats cheese mixed through.
- Add some legumes, tuna, cooked meat, brown rice or quinoa to make a real meal of it.
Store
- Store in an airtight container in the fridge.
- The soup and sauce versions can be frozen.
Notes
Vegan and vegetarian
Obviously avoid any of the meat/ cheese additions (stick with legumes for protein). For vegan choose olive oil.Legume-free
Avoid the suggestions for beans/ pulses.There you have it. One dish, loads of healthy meals. Cook without boundaries. Enjoy and I'd love to receive your comments!
Lamb, Bacon and Lentil Pot
This Lamb, Bacon, and Lentil Stew is a hearty, delicious dish perfect for cozy family dinners. With tender lamb shanks, smoky bacon, and a mix of veggies, it’s a delicious, no-fuss, one pot meal that practically cooks itself – ideal for busy nights when you want something comforting and nutritious.
This gluten free, healthy lamb shank recipe is so simple to make, it’s sure to become a family favourite. You don’t really need a whole shank per person here, especially if they are large. I’m all for spending extra money on quality meat, buying less of it (so it’s still affordable) and bulking it out with other good stuff. You know I’m all for variety too, so including the lentils for extra protein is a winner.
You can either throw it in the slow cooker or cook in the oven at a low temperature (like below). The meat just melts in your mouth and the flavour of the lamb with bacon and rosemary is a match made in heaven.
Health benefits
This Lamb Bacon Lentil stew combines protein-rich lamb and lentils with a variety of vegetables, making it a well-rounded meal. The slow-cooked ingredients provide a rich flavour and satisfying texture, perfect for nourishing the whole family. The gut healing chicken broth I’ve raved about here, and by slow cooking the shanks this way, even more, immune boosting, nutritious goodies are added. The onion, garlic, vegetables and rosemary give further immune support too. This lamb shank recipe is a great option for those who don’t tolerate tomatoes but are after a hearty stew.
This recipe has about 38-42 grams of protein per serve.
Ingredients
To make this dish, you’ll need lamb shanks, bacon, brown lentils, carrots, celery, mushrooms, onions, garlic, rosemary, red wine, and chicken stock. Optional extras include zucchini, eggplant, or parsnips for added variety.
How to make Lamb, Bacon and Lentil Stew
Start by browning the lamb shanks in a large ovenproof dish, then add all the remaining ingredients. Season everything well, ensuring the lamb shanks are submerged in liquid. Cover with a lid and cook in a 160℃/320℉ oven for about 3 hours. The slow cooking ensures tender lamb that falls off the bone.
Serving suggestions and how to store
Serve this lamb bacon lentil stew with mashed potatoes to soak up the rich juices plus steamed veggies or a fresh salad. Store any leftovers in an airtight container in the fridge for up to 3 days, or freeze for up to 3 months. Reheat in a low oven until warm.
Vary this to suit your dietary needs
For a vegetarian version, swap the lamb and bacon for extra lentils, mushrooms, and smoked paprika for a smoky flavour. If you’re avoiding legumes, leave out the lentils and add more vegetables like parsnips or sweet potatoes.

Lamb, Bacon and Lentil Stew
This Lamb, Bacon, and Lentil Pot is the ultimate comfort dish, packed with tender lamb shanks, smoky bacon, and hearty lentils. It's a one-pot wonder that's easy to prepare and perfect for those days when you want a wholesome, nourishing meal with minimal effort.
Servings: 4
Ingredients
- 2 onion/s -peeled and sliced
- 2 clove/s garlic -sliced
- 400 g can brown lentils -drained and rinsed or 1 cup cooked brown lentils
- 3 carrot/s -sliced roughly
- 4 rasher/s bacon -diced roughly
- 100 g mushrooms -Swiss brown or button, sliced (1 cup)
- 3 stick/s celery -sliced roughly
- 2 tbsp fresh rosemary leaves -chopped (or 1 tablespoon of dried)
- Sea salt and freshly ground black pepper
- 60 ml red wine (¼ cup)
- 250 ml chicken broth or stock (1 cup)
- 4 lamb shanks -small, or two large ones (depending upon your appetite)
Optional extras
- 1 zucchini/s - or eggplant or parsnip, diced
Instructions
- Preheat your oven to 160℃/320℉ (fan-forced).
- In a large oven proof dish (I like my cast iron pot), place the lamb shanks and brown quickly on the stove top (in a little olive oil or ghee) over a medium high heat. This is not essential and I have to confess, I'm a bit lazy and tend to take the just throw it all in approach.
- Next, add all of the ingredients, season and stir to combine. Make sure the lamb shanks are toward the bottom of the dish and covered with the liquid and other ingredients.
- Place the lid on the pot and cook for 3 hours. I aim for 3 hours, as the longer it cooks the more tender the lamb. I tend to put it in the oven before school pick up and it's ready in time for dinner. It's very forgiving so can easily cook for longer. *
- Sprinkle with finely chopped parsley (good way to hide this very nutritious green) and serve alone or with one of the following...
Slow Cooker
- This can certainly cooked in a slow cooker. However, as the speed and temperature varies between the many brands of slow cookers, base the amount of liquid you add and the cook time on a similar style of recipe in the guide book for your specific slow cooker. The general rule of thumb is to halve the liquid and double the cook time, but understanding your own slow cooker is the best guide.
Serving suggestions
- Steamed and buttered vegetables.
- Mashed potato, sweet potato or pumpkin (soaks up the delicious juices).
- Pureed or mashed cauliflower.
- Green beans, steamed and dressed with lemon juice, zest and EV olive oil.
- A simple bowl of greens or a salad.
Make-ahead
- Re-heat in a low oven until just hot.
Store
- Airtight in the fridge and can also be frozen (remove the bone to freeze).
Grab Bag Formula Method
- If you've done the **Grab Bag Formula Short Course, this is the method to convert this recipe...
- Place all of the ingredients (other than those for serving) into the Grab Bag.
- Carefully seal your Grab Bag. I close most of the seal then press out as much air as I can then complete the seal. Place the Grab Bag in the freezer.
- To cook, remove the Grab Bag from the freezer, place on a baking tray and thaw in the fridge overnight.
- Tip the contents of the Grab Bag into a large oven proof dish (with a tight fitting lid) or Dutch oven. It may still be a bit frozen; that’s okay. Place the lid on the pot, set your oven to 160°C/320°F (fan-forced) and cook for 3½-4 hours. The thicker the lamb shanks the longer it will need to cook.
- ** The Grab Bag Formula Short Course is available to purchase for just AU$46 HERE.ORIf you are a full-access Well Nourished Family member, the course is included in your membership and you can access in the members portal - HERE.
Notes
Vegetarian is Possible
Double the lentils, use vegetable stock, add 300g mushrooms and add a tablespoon of smoked paprika (to add a smoky flavour like bacon). You could also add tempeh if you'd like and cook for only 1 hour.Legume-free
Leave out the lentils and add in extra veggies. I love adding parsnip and sweet potatoes but you can add whatever you like really.Onion-free
Replace the onion with a small bulb of diced fennel.Garlic-free
Replace the garlic with a good pinch of chilli flakes.Green boost
Stir in a bunch of kale (leaves trimmed and diced) at the very end of cooking (last 5 mins).Wine-free
Replace the red wine with more stock or broth and a tsp of balsamic vinegar.Let me know what your think. I love receiving your comments.
Healthy Bolognese (with a few twists)
While it may seem like reinventing the wheel, I’m excited to share this classic family favourite with a healthy twist. This Healthy Bolognese recipe is incredibly versatile and can be adapted to be vegetarian, gluten-free, or grain-free. It’s perfect for dinner or even breakfast, making it a multi-meal marvel. This simple recipe allows you to make every mouthful count nutritionally and ensures your efforts are rewarded with happy, healthy children.
Why homemade bolognese is a better choice
If you’ve fallen into the habit of using store-bought sauces for your mince, this recipe is for YOU! Making your own bolognese sauce takes only a few minutes and offers a superior taste and nutritional value. Unlike sterile supermarket sauces, which are often loaded with sugar and additives, this homemade version is fresh, delicious and packed with nutrients.
Boosting nutritional value with hidden vegetables
This Bolognese is a fantastic opportunity to add in a variety of healthy vegetables. By grating, finely chopping, or using a food processor, you can incorporate veggies that “disappear” into the sauce, making it perfect for fussy eaters who are averse to vegetables. This ensures that even the pickiest eaters get a nutrition boost without compromising on flavour.
Experimenting with different proteins
To keep things interesting and add variety, try using different types of protein in your Bolognese. Chicken or turkey mince are excellent alternatives to traditional beef or pork and offer their own unique flavours. This variation not only keeps meals exciting but also contributes to a balanced diet. Made with beef mince, this meal has about 35 grams of protein per serve.
The health benefits of herbs and tomatoes
The herbs used in this recipe support a healthy digestive system, adding both flavour and health benefits. Tomatoes are rich in lycopene, a powerful antioxidant that provides protection against various health issues. Incorporating these ingredients into your Bolognese not only enhances taste but also boosts its nutritional profile.
Personal experience with healthy bolognese
This Healthy Bolognese has become a staple in our family meal plan. It’s a hit with the kids, and I love knowing that I’m adding a nutritious, homemade sauce to their pasta. I often experiment with different vegetables and proteins to keep things fresh and exciting. It’s a versatile recipe that adapts well to various dietary needs and preferences. We love it topped with grated cheddar or parmesan cheese.
Why this recipe works
This Healthy Bolognese recipe offers a balance of taste and nutrition. Its versatility allows it to cater to different dietary requirements, while the homemade sauce ensures a healthier alternative to store-bought options. By adding vegetables and varying proteins, you create a meal that is both satisfying and beneficial for your family’s health.
Serving suggestions and how to store
Serve your Healthy Bolognese with pasta and a simple green salad for a complete meal. Bolognese is a great dish to pre-prepare and it also freezes really well. I often freeze leftovers in little glass pyrex containers. If time is an issue, double this recipe and freeze in ready to go batches. Just reheat over low heat and enjoy again!
Vary this to suit your dietary needs
Check out the variations below the main recipe for tips on how to adapt it to your specific dietary needs. For a gluten-free meal, opt for rice or quinoa pasta. If you’re following a grain-free or paleo diet, zucchini ribbons or baked potatoes make a great base. Vegetarians can swap the mince for lentils and mushrooms, and if you’re looking to stretch the dish, adding lentils is a great way to do so! Or take a look at this Mushroom Walnut Bolognese and this incredible, not at all fishy Fish Bolognese.

Healthy Bolognese (with a few twists)
My healthy Spaghetti Bolognese is such a versatile meal - check out my many variations for loads of inspiration for this family favourite.
Servings: 4
Ingredients
- 1 tbsp extra virgin olive oil - extra virgin
- 2 onion/s - diced
- 2 clove/s garlic - finely chopped or crushed
- 500 g beef mince - or turkey or chicken mince (see below for vegetarian)
- 2 bay leaf/s
- 1 tsp dried rosemary - or 2 tablespoons of fresh
- 1 tbsp dried oregano
- 1 carrot/s - grated
- 1 zucchini/s - grated
- 1 stick/s celery - finely chopped
- 75 g mushrooms -sliced (or processed if mushroom fussy) (1 cup)
- 700 g tomato passata (puree) - or you can use 5-6 vine ripened tomatoes, diced on a plate to keep the juice
- Sea salt and freshly ground black pepper - to taste
- 1 bunch/s fresh basil leaves - roughly chopped (to serve)
- 300 g pasta - of your choice (I love rice, quinoa spaghetti)
Optional extras
- 1 tbsp tomato paste - for a richer tomato flavour if using fresh tomatoes
Serve
- Salad (to serve)
Instructions
- In a large pan or a pot with a lid, sauté onions and garlic in a tablespoon of olive oil over a low to medium heat, for a couple of minutes until they start to soften, but not brown.
- Add the mince (or lentils) and bay leaves, dried rosemary and oregano and cook until it just starts to brown (about 5 minutes) then add the vegetables, tomatoes (and tomato paste if using). Season to taste.
- Place the lid ajar the pan. Simmer until the sauce starts to thicken, minimum 30 minutes. The longer you can let it simmer, the richer the sauce will become.
- Turn off the heat and stir in the basil. Serve with al dente spaghetti (or one of the variations below).
Thermomix
- Chop the carrot, zucchini and celery 10 sec, speed 4. Set aside.
- Now place the garlic in the bowl. Chop 5 sec, speed 6.
- Add the onion and chop 5 seconds, speed 4.
- Add the olive oil and saute 2 mins, 100, speed 1.
- Add the mince, bay leaves, dried rosemary and oregano and cook 5 mins, 100, reverse speed 1.
- Add the vegetables, mushrooms and tomato passata and cook 20-30 mins, 100, reverse speed 1 (with the cap in place so it doesn't spit over your bench). Season to taste.
- Once cooked stir in the basil. Serve with al dente spaghetti (or one of the variations below).
Serve
- I like to serve this with a simple green salad.
Make-ahead
- Re-heat in a pot over a low heat until just hot.
Store
- Store in an airtight container in the fridge.
- Can also be frozen.