
This healthy Gingerbread Loaf with Caramel Drizzle is a low-sugar, wholegrain version of the classic, making it a perfect treat for any occasion. The recipe is versatile, offering options to cater to different dietary preferences. If you love ginger, you’ll love this loaf and whilst it’s sweet, it’s not sickly sweet. Health benefits This loaf…
vegan
Charred Broccolini Salad
This Charred Broccolini Salad is such a delicious dish, featuring charred broccolini, crispy haloumi, and toasted pine nuts. It’s tossed with watercress (or any green you like) and a tangy preserved lemon dressing, creating a perfect balance of smoky, salty, and zesty flavours. Ideal for a light lunch or as a side for grilled meats.
Health benefits
Broccolini is rich in fibre, vitamins C and K, and antioxidants that support immune function and bone health. Haloumi provides protein and calcium, while pine nuts add healthy fats. The watercress brings additional vitamins and minerals, including vitamin A and folate, and the preserved lemon in the dressing boosts vitamin C intake, enhancing the immune-supporting properties of this dish.
Ingredients
This recipe calls for broccolini, haloumi, and watercress, paired with toasted pine nuts and preserved lemon. The dressing combines honey, Dijon mustard, turmeric, lemon juice, and extra virgin olive oil, adding layers of flavour to the salad.
How to make Broccolini Haloumi Salad
To make this Broccolini Haloumi Salad, start by heating your BBQ grill or griddle pan over a high heat. Toss the bunch broccolini (including the stems) and haloumi in olive oil, then grill them until the broccolini is lightly charred and the haloumi is golden. Toast the pine nuts until brown, and finely slice the skin of the preserved lemon. For the dressing, combine all ingredients in a small bowl or jar, and shake to mix. Assemble the salad by placing watercress in a bowl, adding the grilled broccolini, haloumi, pine nuts, preserved lemon. Drizzle over the dressing and toss it well.
Serving suggestions and how to store
Serve this salad immediately for best flavour and texture, while the broccolini and haloumi are warm. It’s an excellent side for grilled meats or as a stand-alone light dish. Leftovers can be stored in the fridge for up to 2 days, but the haloumi may lose its crispness upon reheating.
Vary this Charred Broccolini Salad to suit your dietary needs
For a dairy-free or vegan version, omit the haloumi and replace it with cashew nut cheese or tofu. If you’re following a nut-free diet, substitute the pine nuts with toasted sunflower seeds. If you can’t find preserved lemon, replace it with the zest of one lemon and a pinch of sea salt. Though preserved lemon adds a unique flavour, this alternative will still provide a fresh citrusy note. If you can’t access broccolini you can sub it with broccoli florets.
Take a look at the variations (below the main recipe) for suggestions to alter the recipe to suit your specific dietary requirements (vegan/ nut free).
For more delicious, easy to make healthy salad recipes, click HERE.

Charred Broccolini Salad
I love to char grill broccolini on the BBQ, I think it really brings out the flavour. Combined with the saltiness of the haloumi and the citrus salad dressing, this Charred Broccolini Salad makes for a delicious and very nourishing meal or side.
Servings: 2
Ingredients
- 1 bunch/s broccolini
- 100 g haloumi
- 30 ml extra virgin olive oil -extra virgin (2 tbsp)
- ¼ cup/s pinenuts -toasted
- 60 g watercress (you could also use rocket or baby spinach if you prefer)
- 1 preserved lemon
Dressing
- 1 tsp honey
- 1 tsp dijon mustard
- ¼ tsp ground turmeric
- ½ lemon/s -juice and zest
- 60 ml extra virgin olive oil -extra virgin (¼ cup)
Instructions
- Heat your BBQ grill or griddle pan.
- Toss the broccolini and haloumi in the olive oil and grill until the broccolini begins to just char and the haloumi is golden brown.
- Toast the pine nuts until just brown.
- Remove the flesh from the preserved lemon and finely slice the skin.
Dressing
- Make the dressing by combining all of the ingredients together in a small bowl or shake in a re-cycled jar.
Serve
- Place the watercress in a salad bowl. Add the rest of the ingredients, toss through the dressing and enjoy immediately.
Notes
Dairy free
Omit the haloumi and replace with cashew nut cheese.Vegan
Omit the haloumi and replace with cashew nut cheese or tofu. Substitute the honey with rice malt or maple syrup.Nut-free
Replace the pine nuts with toasted sunflower seeds.No preserved lemon
Preserved lemon is available in most supermarkets or gourmet shops. If you can't source it, then replace it with the zest of one lemon and a good pinch of sea salt. But if you can find it, it's so well worth it. You'll keep adding it to salads because it adds such a fabulous flavour.I'd love to hear how you like this recipe. Post a comment and rate this recipe below.
Mango Whip with Salted Macadamia Caramel
My sons most favourite fruit is mango…just as well we live in Queensland, and we have inherited an old mango tree in our small backyard too. My daughter is not so much a fan, unless it’s made into something like this Mango Whip with Salted Macadamia Caramel. Then she’s happy to eat it. One of…
Coconut Caramel Slice
This new healthy Coconut Caramel Slice recipe is sure to become a firm favourite. It makes a decent sized batch so my kids are always happy to have this treat in the freezer. The nut-free version is perfect for school lunches packed from frozen. I’ve designed it to suit many dietary intolerances and it’s sweet,…
Apple Crumble Cake
This wholesome Apple Crumble Cake combines the warmth of cinnamon, the sweetness of apples, and the nutty crunch of almonds in the crumble topping.
We’re right on the cusp of shifting from winter to new season summer produce. Every year, I find it’s about now that the once crisp, bursting with flavour apples I’ve been buying are just not tasting so great. Some just don’t have the flavour, others are floury and not enjoyable to eat. But I never throw them, I just re-invent them like I’ve done here with this Apple Crumble Cake.
Truth is, once cooked and combined with other flavours they are quite delicious. If the apples are particularly floury, I’ll often mix them with a stronger flavoured fruit like rhubarb or berries of some kind and they are transformed. So like so many of my recipes, this soft buttery cake is a great base for experimenting with fruits and flavours.
For more apple recipes, take a look at this Apple Pie recipe or pears, check out this Pear, Yoghurt, Ginger Cake.
Health Benefits
This Apple Crumble Cake recipe is not only a delicious treat but is also healthier than many apple cakes. Made with wholemeal spelt flour, it provides more fibre, vitamins, and minerals compared to refined flours, supporting digestive health and helping to stabilise blood sugar levels. The apples add natural sweetness and are rich in antioxidants and dietary fibre. Coconut sugar or rapadura, used as a sweetener, is less processed and has a lower glycemic index than refined sugars, making it a better choice for sustained energy. Additionally, the flaked almonds offer healthy fats, protein, and vitamin E, contributing to health and overall vitality.
Ingredients in this Apple Crumble Cake
The ingredients in this Apple Crumb Cake are thoughtfully chosen to create a balance of taste, texture and nutrition.
- Wholemeal spelt flour – Higher in fibre and nutrients compared to refined wheat flour.
- Melted Butter – Adds richness and moisture to the crumble and cake.
- Coconut sugar or rapadura – Natural, unrefined sweeteners with a lower glycemic index.
- Natural yoghurt (or plain greek yogurt) – Provides a tangy flavour, creamy texture, and beneficial probiotics.
- Rice malt syrup or honey – Natural sweeteners, offering a healthier alternative to refined sugars.
- Fresh Granny Smith apples – Tart, fibre-rich, and full of antioxidants (you can also use other apples like gala apples or pink lady apples but I think Granny Smith taste best).
- Ground cinnamon – Adds warmth and spice to the cake.
- Flaked almonds – Introduce a satisfying crunch and healthy fats.
How to make this easy Apple Cake
To make this Apple Crumble Cake, start by preheating your oven and lining a slice tin with baking paper. Begin with the crumble by mixing the butter, sweetener, spelt flour, and cinnamon in a food processor or by hand until a heavy crumb forms. Fold in the flaked almonds and set the mixture aside. For the cake, mix the melted butter with yoghurt, sweetener, and egg until creamy and well combined. Add the cinnamon, baking powder, bicarbonate of soda, and sea salt, mixing thoroughly. Gently fold in the flour until just combined. Pour the cake batter into the prepared baking dish, spread the diced apple evenly over the top, and finish by sprinkling the streusel topping, pressing it down slightly. Bake for 35-40 minutes, or until a skewer inserted into the middle comes out clean.
This Apple Crumble Cake recipe also includes a Thermomix method.
Vary this Apple Cake to suit your dietary needs
Check out the variations below the main recipe for tips on how to adapt this Apple Cake to your specific dietary needs. Includes dairy-free, gluten-free, egg-free and nut-free. You could also make this cake into muffins. Simply divide the batter into muffin cases and top with the apple and crumb topping. Also reduce the cook time to 20-25 minutes.
Serving suggestions and how to store it
For a delicious treat, serve this Apple Crumble Cake warm with a dollop of cream, crème fraîche (sour cream), natural yoghurt or plain Greek yoghurt. Or for dessert, you could top it with a scoop of vanilla ice cream.
To store, allow the cake to cool to room temperature and then to chill fully in the fridge, which helps achieve clean, crumb-free slices. Once chilled, slice the cake and snap freeze the pieces on a tray before transferring them to an airtight container for longer storage. Alternatively, separate slices with baking paper and freeze airtight. This method ensures the cake stays fresh and easy to enjoy whenever you like.

Apple Crumble Cake
This healthy, wheat-free Apple Crumble Cake is easy to make and delicious with variations for gluten-free, nut-free, egg-free (vegan) and frutose friendly.
Servings: 8 serves
Ingredients
Crumble
- 70 g butter - diced and room temp
- 3 tbsp coconut sugar or rapadura
- 115 g wholemeal spelt flour (1 cup)
- ½ tsp ground cinnamon
- 20 g flaked almonds (¼ cup)
Cake
- 70 g butter - melted
- 165 g natural, Greek or coconut yoghurt
- 115 g rice malt syrup or honey (⅓ cup)
- 1 egg/s
- 1 tsp ground cinnamon
- 1½ tsp baking powder
- ¼ tsp bicarbonate of soda
- ¼ tsp sea salt
- 200 g wholemeal spelt flour (approx. 1¾ cups)
- 3 apple/s (Granny Smiths if you are buying especially) peeled and 1cm dice
Instructions
- Preheat your oven to 170°C/340°F (fan forced). Line a slice tin with baking paper. My slice tin is approx. 17cm x 27cm.
Start with the crumble.
- In a food processor or by hand, combine the butter, sweetener, spelt and cinnamon until a heavy crumb forms.
- Then fold in the flaked almonds and set aside.
Now make the cake.
- In a food processor or with an electric mixer, mix the butter with the yoghurt, sweetener and egg until creamy and well combined.
- Add the cinnamon, baking powder, bicarb and sea salt. Mix together.
- Fold in the flour until just combined.
- Place the cake batter into the tin. Spread the apple over it and top with the crumble. Press down a little.
- Cook for 35-40 minutes or until a skewer inserted into he middle comes out clean.
Thermomix
- Mix the crumble 1 minute, speed 5. Then fold in the flaked almonds, 5 seconds, reverse speed 4. Set aside.
- Without washing the bowl, melt the butter, 1 min, temp 90, speed 3.
- Add the yoghurt, sweetener and egg and mix 30 seocnds, speed 4 until creamy and well combined.
- Add the cinnamon, baking powder, bicarb and sea salt. Mix 5 seconds, speed 3.
- Fold in the flour until just combined. Use the flour symbol for 3-4 turns.
- Place the cake batter into the tin. Spread the apple over it and top with the crumble. Press down a little.
- Cook for 35-40 minutes or until a skewer inserted into the middle comes out clean.
Serve
- Warm with cream, creme fraiche or yoghurt.
Store
- Chill fully in the fridge (this will help you to get nice crumb free slices), slice and snap freeze on a tray before storing in an airtight container.
Notes
Gluten-free
Sub with a good quality gluten-free flour. Or approx. 2/3 almond meal with 1/3 buckwheat flour.Dairy-free
Substitute the butter with macadamia nut oil and the yoghurt with coconut yoghurt.Egg-free
Substitute the egg with a chia egg.Nut-free
Omit the flaked almonds, it will still be lovely. Or swap for sunflower seeds.Vegan
Chose the dairy-free and egg-free versions and rice malt as your sweetener.Fructose friendly
Choose rice malt as your sweetener (in the crumble and cake). Top with a low-fructose berries instead of apple.Add a twist
Add berries or rhubarb to the apple or swap apples for pears.I really can't wait to hear how you love this cake. Post a comment below and feel free to rate the recipe too. It helps it to reach and be enjoyed by others.
Healthy Salted Caramel Popcorn
One of the quickest and easiest snacks to make your kids, this Healthy Salted Caramel Popcorn is a little bit dangerous! I literally struggle to stop eating it, it’s so moorish. Store bought or microwave popcorn is generally loaded with dangerous vegetable oils and franken-ingredients, let alone truck loads of sugar. My Salted Caramel Popcorn…
Raw Vegetable Salad
This seriously versatile Raw Vegetable Salad is one of my kids favourite ways to eat their vegetables. If using a food processor it takes just minutes to make and it’s sure to become a firm favourite. Feel free to play with different combinations of veggies and nuts or seeds. I often make this when I…
Healthy Pea and Ham Soup
This is my take on a Dutch style Healthy Pea and Ham soup. I can’t always source good quality ham hocks (or have leftover ham bones outside of Christmas ham season) so I’ve improvised to replicate the flavour combo of smoked meat and legumes that I grew up with, but using a pork chop and bacon instead of the hock.
The result is this tasty, hearty soup that’s more a complete meal than a starter. Whilst it has a long cooking time, it really is a no-fuss, set and forget type meal that my whole family loves. It’s also a very budget friendly meal which is always a bonus.
Health benefits
Split peas are a fantastic source of plant-based protein and dietary fibre, helping to support digestion and keep you full for longer. The addition of lean pork and bacon provides extra protein, while veggies like garlic cloves, sweet potato, carrot, and spinach or kale bring essential vitamins and antioxidants to the dish.
Ingredients
This recipe is built around split peas and a combination of pork chops and bacon for a rich, smoky flavour. The soup is bulked up with celery, carrot, potatoes, and leafy greens for added texture and nutrients.
How to make this Healthy Pea and Ham soup
To make this split pea soup, start by soaking the split peas overnight to soften them. Once ready, simmer the peas with pork, bacon and aromatic veggies like garlic, onion, and celery for 30 minutes. Add the diced carrots, potato, and sweet potato and continue cooking until the peas break down into a creamy base. Break apart the pork from the bone (it should fall away simply). Finally, stir in some spinach or kale and let it wilt before serving. If you want to make a very smooth soup you can also blend with an immersion blender.
Serving suggestions and how to store
Ladle the soup into a bowl and serve with a crusty slice of sourdough bread for dipping. Leftovers can be stored in an airtight container in the refrigerator for up to 5 days or frozen for longer. Reheat on the stove over low heat until warm.
Vary this Healthy Pea and Ham soup to suit
This delicious soup is already gluten-free and dairy-free. For a vegan version, omit the pork and bacon and replace them with smoked paprika for flavour. You can also swap the water for vegetable stock or chicken broth to enrich the taste. To make it onion and garlic-free, use diced fennel and add a pinch of cayenne pepper for a bit of heat. Feel free to add extra veggies like cauliflower and broccoli for more variety.
Take a look at the variations (below the main recipe) for suggestions to alter the recipe to suit your specific dietary requirements (including vegan, vegetarian, onion and garlic-free options).
For more delicious, easy to make healthy soup recipes, click HERE.
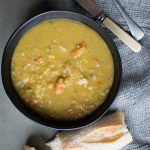
Healthy Pea and Ham Soup
This Healthy Pea and Ham Soup is a nourishing and hearty dish, perfect for chilly days. Made with split peas, pork, and an array of veggies, it’s packed with protein, fibre, and essential nutrients. The simplicity of ingredients combined with the depth of flavour makes it a comforting and satisfying meal.
Servings: 4
Ingredients
- 200 g dried green split peas (1 cup)
- 1 pork chop -fat trimmed
- 3 rasher/s bacon
- 1 red onion/s (large) diced
- 2 clove/s garlic -diced
- 2 stick/s celery -finely diced
- 1.5 ltr water
- Sea salt and freshly ground black pepper - to taste
- 1 carrot/s (large) finely diced
- 1 potato/s (large) peeled and finely diced
- 1 sweet potato/s (medium) peeled and finely diced
- 30 g baby spinach -or kale (optional) (aapprox. 1 handful)
Instructions
- Soak the split peas overnight in enough water to allow for them to expand. Strain and rinse them very well (in a sieve under running water).
- Place the split peas, pork chops, bacon, onion, garlic, celery and water into a pot and bring to the boil. Reduce the heat to a simmer, cover and cook for 30 mins. Any scum that appears just skim it from the top.
- Then add carrot, potato and sweet potato and simmer slowly with the lid on for another hour or until the split peas are mushy and the soup has thickened.
- Remove the pork from the bone (it should just fall away). Break any solid bits up and mix through the soup.
- Sir through the leafy greens (if including) and allow them to wilt.
Serve
- Serve with crusty sourdough bread.
Make-ahead
- Re-heat in a pot over a low heat until just hot.
Store
- In an airtight container in the fridge or freezer
Slow Cooker
- This can certainly cooked in a slow cooker. However, as the time and amount of liquid varies between brands of slow cookers, base both on thick soup like recipes in the guide book for your specific slow cooker.
Grab Bag Formula Method
- If you've done the **Grab Bag Formula Short Course, this is the method to convert this recipe...
- Rinse the green split peas really well in a sieve.
- Place the split peas, pork chop, bacon, onion, garlic, celery, water, carrot, potato and sweet potato into the Grab Bag.
- Carefully seal your Grab Bag. I close most of the seal then press out as much air as I can then complete the seal. Place the Grab Bag in the freezer.
- To cook, remove the Grab Bag from the freezer, place on a baking tray and thaw in the fridge overnight.
- Tip the contents of the Grab Bag into a large oven proof dish (with a tight fitting lid) or Dutch oven. It may still be a bit frozen; that’s okay.
- Place the lid on the pot, set your oven to 150°C/300°F (fan-forced) and cook for 3 hours.
- Remove the pork from the bone (it should just fall away). Break any solid bits up and mix through the soup. I mash with a potato masher to break it all apart, but if you want a smooth soup, feel free to puree it.
- Sir through the leafy greens (if including) and allow them to wilt. Season to taste.
- ** The Grab Bag Formula Short Course is available to purchase for just AU$46 HERE.ORIf you are a full-access Well Nourished Family member, the course is included in your membership and you can access in the members portal - HERE.
Notes
Onion and garlic-free
Substitute with a small bulb of fennel, diced finely and a pinch of cayenne.Vegan
Omit the bacon and pork and add a tablespoon of smoked paprika and increase the salt to 1 tablespoon. You could also replace the water with vegetable stock if you like.Add more veggies
Feel free to add in extra vegetables if you like. I sometimes add cauliflower and broccoli for the last 5 minutes of cooking.I'd love to hear how you and your family enjoy this recipe. Leave a comment below or rate this recipe.
Breakfast Fruit Pizza
I’m always being asked to come up with breakfast recipes to help convince kids to move away from the processed cereal aisle, to a more nourishing start to the day. This Breakfast Fruit Pizza may be your answer. It jams a lot of protein, good fats and fibre into each slice and is easy to make ahead for a breakfast on-the-go.
Protein deficiency
In my experience, insufficient dietary protein is surprisingly common. The one thing that a swing towards processed foods has done, is dramatically reduce the amount of protein many kids (and adults) consume. You see most processed, convenience foods are generally a combination of fat and carbohydrate (breads, breakfast cereals, crackers, muesli bars, pasta and noodles). Anything with a shelf life is generally protein deficient.
Although it’s rare to see frank protein deficiency, subclinical signs are increasingly common. These include:
- poor immune responses (getting sick frequently or difficulty recovering from illness)
- poor appetite or very picky (or more of a snacker, craving simple carbohydrates)
- poor concentration and trouble learning
- moodiness and mood swings
- poor sleep patterns
- muscular weakness, aches and pains
- poor growth and development (failure to thrive)
- skin problems
- delayed wound healing
The importance of protein
Protein is essential to form antibodies to protect your body from foreign invaders, such as disease causing bacteria and viruses. So ensuring you and your family are eating adequate amounts of protein is really important, especially at this time of the year when our immune systems need to be at their best.
In addition to supporting immune function, protein is used to make digestive enzymes, to repair the digestive tract, to grow skin, hair, and nails, make blood cells, form strong bones, to build muscle, to make hormones, to stabilise our blood sugar (so we have lots of energy and good focus)….as well as many more critical functions.
We cannot store protein, so it’s safe to say, that in order to replace, rebuild and repair, we need to consume protein very regularly.
Breakfast is a meal where protein is most critical, but is often lacking the most. No matter the claims, it’s a stretch to find anything in the supermarket isles that’s nutritionally adequate for breakfast. Not only that, but most exceed the World Health Organisations recommended daily intake of sugar in one foul swoop.
Personally, we eat a cooked breakfast a few days a week, but I also love to mix it up with other nourishing brekkies as I don’t always have time for cooking. The best thing about this Breakfast Fruit Pizza is you can make it ahead and keep it in the fridge or freezer until you are ready to enjoy it. My family also loves it as a snack for arvo tea.
The vast world of protein powders
I really wanted this breakfast pizza to have a protein rich base, so you’ll see I’ve boosted it with my favourite, wholefoods protein powder.
Navigating the many types of protein powders available is tricky business. Many brands are derived from feed-lot, grain-fed cows (also often fed GMO’s), highly processed soy proteins and contain franken-sugars, fructose, maltodextrin starches (aggravate blood sugars and the GIT), additives and more yuk ingredients.
Most also contain absolutely no plant fibre, good fats or micronutrients (vitamins and mineral) so nutritionally they are incomplete and not at all reflective of a well rounded, whole food meal. Thankfully, there are a select few which offer balanced nutrition and do what we need them to do – provide a sustaining, nutritious supplement, and here’s the clincher, that actually tastes good. It’s just got to taste good right?
What to look for when choosing protein powders
When choosing a wholefood-based protein powder, there are several key factors to consider to ensure you’re getting a good-quality and effective product:
Ingredients: Look for a protein powder that is derived from wholefood sources, such as pea protein, brown rice protein (preferably non GMO, sprouted and fermented), hemp protein, or a blend of these. If you’re okay with dairy, choose a Whey based protein powder, ensure it is grass-fed and/or organic. Avoid products with additives, artificial flavours, excess sugar or artificial sweeteners.
Nutritional Profile: Assess the nutritional content beyond just protein. Look at the levels of essential amino acids, vitamins, and minerals present in the powder. A good wholefood-based protein powder will offer a range of nutrients beyond just protein.
Allergen Information: Consider any allergies or dietary restrictions. Wholefood-based protein powders are often suitable for those with common allergies (e.g., dairy, soy, gluten), but always check the label for potential allergens.
Taste and Texture: Personal preference matters too. Choose a protein powder that tastes good to you and mixes well with your favourite fruits and fluid (I love making smoothies with coconut water and yoghurt) or add protein powder to recipes like pancakes, overnight oats or chia puddings. Some wholefood-based powders can have a grainier texture, which may be a consideration.
By considering these factors, you can select a wholefood-based protein powder that aligns with your dietary preferences, nutritional needs, and taste preferences, ensuring you get the most out of your protein supplement.
GoodnessMe have a fabulous selection of clean protein powders, you can take a look HERE.
Health benefits
The almond meal and nuts provide healthy fats and protein, which help keep you full longer. Protein powder adds an extra boost of muscle-supporting nutrients, while the fruit adds natural sweetness and antioxidants. The cinnamon yoghurt topping provides a delicious way to add gut-friendly probiotics to your morning meal.
Ingredients
For the base, you’ll need pecans or walnuts, almond meal, wholefood protein powder, arrowroot flour, coconut flour, an egg, and your choice of sweetener (rice malt syrup, honey, or maple syrup). For the cinnamon yoghurt topping, use full-fat natural yoghurt (or coconut yoghurt) and ground cinnamon, with sweetener to taste. Top with your favourite fruit.
How to make this brekkie pizza
Preheat your oven. Mix the dry ingredients in a large bowl, then whisk the egg, sweetener, and vanilla extract in a jug. Combine both and form a dough, adding coconut flour if needed. Roll the dough into a thin base between two sheets of baking paper, then bake for 15 minutes. Let the base cool, then spread the cinnamon yoghurt over it and top with fresh fruit (I love raspberries, blueberries, strawberries and blackberries).
Serving suggestions and how to store
Serve your breakfast fruit pizza immediately after assembling, or store the base in the fridge or freezer. To serve later, just top with yoghurt and fruit when ready to eat. This makes for a perfect grab-and-go breakfast!
Vary this to suit your dietary needs
For a chocolate version, use chocolate-flavored protein powder and add cacao to the base. For a fructose-friendly option, choose rice malt syrup and top with berries and kiwi fruit. You can also make this egg-free by using a flax or chia egg, and to make it vegan, use a plant-based protein powder and coconut yoghurt.

Breakfast Fruit Pizza
This Breakfast Fruit Pizza jams a lot of nourishment into each slice and is easy to make ahead for a breakfast on-the-go.
Servings: 4
Ingredients
- 50 g pecan or walnuts (½ cup) roughly chopped
- 125 g almond meal (1¼ cup)
- 40 g wholefood protein powder - or extra nut meal or ground seeds
- 2 tbsp true arrowroot flour
- 1 tbsp coconut flour
- 1 egg/s
- 2 tbsp rice malt syrup, honey or maple syrup
- 1 tsp vanilla
Cinnamon yoghurt
- 250 g natural, Greek or coconut yoghurt (1 cup)
- ½ tsp ground cinnamon
- 1 tbsp rice malt syrup, honey or maple syrup (optional)
Fruit
- 1 cup/s fruit of choice
Instructions
- Pre-heat the oven to 180°C/350°F (fan-forced).
- In a large bowl, mix together the nuts, almond meal, protein powder, arrowroot and coconut flour.
- In a jug whisk the egg, sweetener and vanilla. Add to the dry and mix until a dough forms.
- If it's too wet, add coconut flour teaspoon at a time to form a slightly sticky dough.
- Place onto a piece of baking paper and flatten into a oval/ rough rectangle. Place another piece of baking paper on top and roll until a thin, flat base is formed.
- Peel off the top layer and place onto a baking tray. Bake for 15 minutes.
- Allow to cool completley and keep in the fridge until ready to serve.
- Make the cinnamon yoghurt by mixing the cinnamon, sweetener and yoghurt together.
- Assemble by smearing the cinnamon yoghurt over the base and topping with the fruit. To get a nice crumb-free slice, cut chilled, on a chopping board with a large sharp knife.
Thermomix
- Start by chopping yor pecans or walnuts. Pulse (turbo button) 1-2 times to roughly chop.
- Add the almond meal, protein powder, arrowroot and coconut flour. Mix 30 seconds, speed 5.
- Add the egg, sweetener and vanilla and mix 10 seconds, reverse speed 5.
- If it's too wet, add coconut flour teaspoon at a time to form a slightly sticky dough. Mix 5 seconds, reverse speed 5.
- Place onto a piece of baking paper and flatten into a oval/ rectangle. Place another piece of baking paper on top and roll until a thin, flat base is formed.
- Peel off the top layer and place onto a baking tray. Bake for 15 minutes.
- Allow to cool completely and keep in the fridge until ready to serve.
- Make the cinnamon yoghurt by mixing the cinnamon, sweetener and yoghurt together.
- Assemble by smearing the cinnamon yoghurt over the base and topping with the fruit. To get a nice even slice, cut once chilled, on a chopping board with a large sharp knife.
Store
- You can store the base either whole or sliced in the fridge or freezer. Then simply top with yoghurt and fruit and enjoy for breakfast.
Notes
Chocolate Pizza
Use the chocolate flavoured protein powder plus a tablespoon of cacao in the base.Fructose friendly
Choose rice malt syrup as your sweetener and top with berries and kiwi fruit (or any tolerated fruit).Egg-free
Sub the egg with a flax of chia egg.Vegan
Use a flax or chia egg, a vegan protein powder, rice malt or maple syrup and top with coconut yoghurt.I hope you and your family love this simple, delicious and sustaining breakfast.
Crispy Roast Potatoes
Once you’ve eaten perfectly Crispy Roast Potatoes you’ll accept nothing less….and this simple recipe will guarantee the perfect spud every-single-time. I’ve found little things like heating the fat makes a real difference to the outcome, so this is a recipe that whilst simple, will only yield a crunch if you follow the recipe closely. Crispy…
Orange Almond Coconut Granola
I’ve always had batches of my Nourishing Toasted Muesli in the pantry for days when we don’t have time to cook eggs or prepare another breakfast. But lately my kids have been fussing over it and that’s always a sign that it’s time for me to change things up a bit…and this sensational Orange Almond Coconut Granola was born!
With oranges in season, I thought I’d inject some seasonal flavours into breakfast. It’s funny, because when I first made this a few months back, my kids were actually hesitant to try it. But when they did, they admitted that they really loved it and it’s become a firm favourite.
My son has it dry or with coconut yoghurt and orange segments (he’s just not a fan of dairy). The rest of us love it with milk, natural yoghurt and orange. It’s also great as part of a smoothie bowl as a snack!
Click for other Granola recipes or Muesli recipes.
Health benefits
This low sugar granola is packed with more nutrition than anything in the supermarket and has a super quick prep time. The rolled oats are a fibre packed, mineral rich wholegrain. In herbal medicine oats are a nerve restorative so great for supporting the nervous system function and digestion also. Almonds add in more fibre, protein and good fats as well as a range of essential micronutrients including antioxidants.
Ingredients
This granola is made with oats, almonds, shredded coconut, macadamia nut oil, fresh orange zest and juice, rice malt syrup or maple syrup (or even honey), and a hint of vanilla extract, giving it a rich and nutty flavour with a citrusy zing.
How to make Orange Almond Granola
Start by pulsing half of the oats and all of the almonds until coarsely chopped. Mix with the remaining oats and coconut on a baking tray (baking sheet) and spread in a thin, even layer. In a large bowl or blender combine the macadamia oil (or coconut oil), orange juice and zest, syrup, and vanilla. Then pour over the oat mixture and mix well. Bake in the preheated oven stirring occasionally, until golden and crisp. Let the granola cool fully (it firms up as it cools).
Serving suggestions and how to store
Serve with fresh fruit – I love orange segments and strawberries, plus your favourite milk, and unsweetened yogurt. It’s great for breakfast or as a snack. Store in an airtight container in a cool pantry for up to a month.
Vary this to suit your dietary needs
More breakfast inspo
Find an awesome range of brekkie inspo in my ebook ‘Rise and Shine a Well Nourished Breakfast‘ – designed with mad mornings in mind, it will ensure your brekkie is as good as it gets. Click HERE to shop.
Remember to take a look at the variations (below the main recipe) for suggestions to alter the recipe to suit your specific dietary requirements (gluten-free, nut-free, fructose friendly).
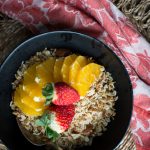
Orange, Almond, Coconut Granola
This orange almond coconut granola brings a refreshing citrus twist to your breakfast routine. With the natural sweetness of orange and the crunch of almonds, this homemade granola is a nutritious way to start your day, packed with fibre and healthy fats.
Servings: 28 serves
Ingredients
- 800 g rolled oats (8 cups)
- 280 g raw almonds (2 cups)
- 200 g shredded coconut (2 cups)
- 120 ml macadamia nut oil (½ cup)
- 2 orange/s - zest and juice
- 170 g rice malt syrup or maple syrup (½ cup)
- 2 tsp vanilla - essence or paste
Instructions
- Pre-heat your oven to 160°C / 320°F (fan-forced).
- In a food processor add 360g (4 cups) of the rolled oats and all of the almonds. Pulse until the almonds are chopped up (but not milled to a meal, you want chunks). If using a Thermomix, turbo (pulse) function and check through the lid (about 5 quick pulses).
- Place this and the rest of the oats and coconut into a large baking tray. It should form a thin layer (approx. 1-2cm deep) so use two baking trays if necessary.
- Mix the macadamia oil, orange juice and orange zest, rice malt or maple syrup and vanilla together in a jug (or your food processor). If using a Thermomix 30 seconds, speed 4.
- Pour over the dry mix and give it a good stir so that all the dry ingredients are coated.
- Bake for 15 minutes. Stir well and bake another 15 mins. Repeat if necessary until the mixture is crisp and dry.
- Stir again and allow to cool completely.
Store
- In an airtight container in a cool pantry for up to a month.
Serve
- With orange segments (and fresh strawberries), your favourite milk and unsweetened yoghurt.
Notes
Nut-free
Replace the almonds with sunflower seeds and the macadamia nut oil with coconut oil.Gluten/grain-free
Replace the rolled oats with a gluten and grain-free rolled seed like rolled (flaked) quinoa or millet.Coconut-free
Replace the coconut with slivered or flaked almonds.Fructose friendly
Choose rice malt as your sweetener (you can also reduce the orange juice if you need to).Cardamon infused
Add a tablespoon of ground cardamon if it's flavour you enjoy (I personally love it).Add cranberries or goji
This is lovely with dried cranberries or goji berries too.I'm fairly certain this is going to become a very popular brekkie and I'd love to hear how you like it. Post a comment below and let me know. I'd love to hear from you.
Sweet and Sour Chicken Adobo
This Sweet and Sour Chicken Adobo is my take on a traditional Filipino dish, ‘Chicken Adobo.’ But with a bit of a Chinese twist. The balance between sweet and sour is a delicate one, but if achieved it makes for an unforgettable meal. This is a meal I often make when my kids are snotty….
Watermelon Pizza
Party food does not get a whole lot easier than this Watermelon Pizza! I probably don’t need to even write up a recipe for this as the image says it all, but I will in case you need a few extra ideas. This Watermelon Pizza is such a versatile recipe. In this photo, I’ve just…
Mint Yoghurt
This Mint Yoghurt is a really versatile dip or sauce that pairs well with lamb (grilled, BBQ’d or roasted) and also Indian dishes. When my kids were little and I was teaching them to enjoy curries and spicy foods, I’d always had this Mint Yoghurt on the table, so they could add it to cool…
Buckwheat Broccolini Bowl
This Buckwheat Broccolini Bowl is easy to make and super delicious. Plus, it’s easy to modify for various dietary preferences, making it a great addition to your meal rotation. If you haven’t tried cooking with buckwheat this is a great place to start. It’s inexpensive, very versatile, and super nourishing. I recently sent my mum…
Chorizo Baked Sweet Potato
This Chorizo Baked Sweet Potato is a tasty tray-bake meal that’s super simple to make. Sometimes, we’ll go out for lunch (or have lunch at friends), and come dinner time, we aren’t overly hungry. I find this dish perfect for those nights when you feel like a light meal, but can’t be bothered with loads…
Roast Potatoes with Garlic Miso
These Roast Potatoes with Garlic Miso are a really simple yet delicious way to enjoy potatoes. It’s also lovely made with sweet potatoes (or a combination). I think flavour wise, the garlic miso sauce is the perfect accompaniment to the crispy roasted potatoes. I love to make this dish as a mid-week side and it’s…
Raspberry Chocolate Mousse Cups
These Raspberry Chocolate Mousse Cups have long been one of my party go-to’s. One because my kids feel like they’ve hit the jackpot with them and two, because even kids used to processed treats think these are the bomb. It’s also good for intolerance aware parties being egg, nut, gluten, dairy, and grain-free. Don’t be…
Brekkie Burger
This Brekkie Burger is an easy, nourishing breakfast that’s quick to assemble on busy mornings and full of flavour. With crispy bacon, fried eggs, and a mix of fresh ingredients like kimchi, avocado, and spinach, this burger is a satisfying start to your day. You can easily customise it to suit dietary needs, making it…
Superfood Quinoa Pilau
This Superfood Quinoa Pilau is a wholesome, nourishing dish packed with nutrient-dense ingredients. With a perfect balance of flavors from quinoa, sweet potato, kale, and goji berries, this pilau can be enjoyed on its own or as a delicious side dish. It’s versatile and customisable, making it ideal for any meal.
By now you all know I love to put a healthy spin on classic recipes and make them as nourishing as possible (without any compromise on taste). This delicious Superfood Quinoa Pilau recipe is my twist on the classic, which is traditionally made with rice.
The ‘superfood’ tag is generally used to describe foods that are particularly high in essential nutrients, phytonutrients and antioxidants. They are especially immune supportive and provide a wide range of essential vitamins and minerals to your body.
This recipe is super given that it’s a combination of particularly nutrient dense superfood ingredients. I hope you love it.
Superfood health benefits
Quinoa (pronounced ‘kin-wah’) is a complete plant based protein which has an extraordinary nutrient profile.
Kale is a fibre rich, nutritional powerhouse. It’s a great source of antioxidant vitamins A and C, as well as protective isothiocyanates and indoles (phytonutrients).
Goji Berries are an immune supportive, anti-oxidant rich, very nutrient dense food. They are my number one choice when it comes to dried fruit.
Turmeric is a powerful anti-inflammatory herb. In a word where inflammation underpins so many disease, turmeric is an important part of a healthy diet.
For more practical info on ‘superfoods’ and how to include them in your diet, click HERE.
Ingredients
This pilau uses quinoa, sweet potato, kale, and pumpkin seeds, with cinnamon, cardamom, turmeric, black pepper, and topped with goji berries.
How to make this superfood pilau
Start by rinsing or soaking quinoa to remove bitterness, then cook it with onion, sea salt, cinnamon, and cardamom. While the quinoa cooks, roast diced sweet potato with cinnamon and olive oil, then add kale and pumpkin seeds for the last few minutes to crisp them. After the quinoa has cooked, fluff it and mix in the turmeric and black pepper. Combine it with the roasted veggies, and top with goji berries just before serving.
Serving suggestions and how to store
This dish can be served on its own or with grilled, baked, or BBQ’d protein like fish, chicken, or tofu. Store leftovers in an airtight container in the fridge. For make-ahead prep, keep the roasted kale and pumpkin seeds separate until serving to preserve their crunch.
Vary this to suit your dietary needs
To make this recipe vegan or vegetarian, use vegetable stock or water to cook the quinoa. For a quicker version, use leftover cooked quinoa and skip some of the preparation steps. You can also add more vegetables or swap them out based on what you have on hand—this dish is easily customisable to suit your preferences.

Superfood Quinoa Pilau
This Superfood Quinoa Pilau is a nutrient dense meal or side dish. It contains a fabulous variety of superfoods to support and truely nourish your body.
Servings: 4
Ingredients
- 170 g quinoa (1 cup)
- 1 red onion/s -finely diced
- 500 ml water (2 cups) or bone broth
- 1½ tsp sea salt - or to taste
- 1 cinnamon quill
- 4 cardamom pods -bruised
- 1 sweet potato/s -diced
- 2 tbsp extra virgin olive oil -extra virgin
- ½ tsp ground cinnamon
- 1 bunch/s kale -leaves torn off stems
- 30 g pumpkin seeds (¼ cup)
- 30 g goji berries
- ½ tsp ground turmeric
- ground black pepper
Instructions
- Preheat your oven to 180°C/350°F (fan-forced).
- Rinse the quinoa really well in a fine sieve or ideally soak it for 1-12 hours to remove the bitter tasting saponins.
- Finely dice the red onion and put into a pot with the quinoa and 2 cups of water or broth. Add ½ teaspoon of sea salt, cinnamon quill and cardamon pods. Bring to the boil then reduce to a simmer for 20 minutes or until the water is all absorbed.
- Whilst that is simmering, line a large oven tray with baking paper.
- Dice the sweet potato into 2 cm pieces and place at one end of the tray leaving room for the kale and pumpkin seeds which you'll add later.
- Drizzle with half tablespoon of the olive oil, toss and sprinkle with ½ teaspoon of the sea salt and the cinnamon. Bake for 20 minutes.
- Now wash the kale leaves well and tear the soft leaves from the woody stem. Place them into your serving/ salad bowl and add the remaining one and half tablespoons of olive oil and ½ teaspoon of the sea salt. Massage the oil into the leaves.
- After the sweet potato has cooked for 12 minutes, add half of the kale leaves, in a single layer. I choose the thicker outer leaves to roast and reserve the younger, more tender leaves for the salad.
- Also add the pumpkin seeds to the tray. Cook along side the sweet potato for the remaining 8 minutes to crisp the kale leaves and toast the pumpkin seeds.
- By now your quinoa will be close to being cooked. Stir it and make sure it has absorbed the water or broth. Remove the pot from heat, cover, and let the quinoa steam for 5 minutes. This step gives the quinoa time to pop open and the little white spiral to appear. Fluff with a fork and allow to cool a little. Add the turmeric and black pepper and mix well.
- You can serve this dish either warm or cold. If serving cold allow the quinoa to cool completely.
- Remove the cinnamon quill and add the quinoa to the salad or serving bowl.
- Mix in the roasted sweet potato, pumpkin seeds and top with the crisp kale (add the pumpkin seeds and crispy kale right before serving or they lose their crunch).
- Sprinkle over the goji berries and enjoy.
Serve
- As is or with a simple piece of grilled, baked or BBQ'd protein like fish, chicken, red meat or a vegetarian protein.
Make-ahead
- Just keep the kale chips and pumpkin seeds aside until serving.
Store
- Store in an airtight container in the fridge.
Notes
Vegetarian and vegan
Choose water or vegetable stock to cook the quinoa.Onion-free
Replace the onion with finely diced fennel.Cheats version
Use leftover cooked quinoa. Fry the red onion in a little olive oil to soften it. Then add the pre-cooked quinoa, half teaspoon ground cardamon, half teaspoon ground cinnamon (these replace the quill and pods) and one teaspoon sea salt. Toss together and continue from step 5 in the method.Add more/different vegetables
Yes, you can absolutely add in extra or different vegetables. It's a very versatile dish.grains lemon chicken broth mushroom
Simple Guacamole
This simple and healthy guacamole recipe is creamy and full of fresh flavour. Made with ripe avocado, a splash of lime, and a pinch of sea salt, it’s perfect as a dip, spread, or to add a delicious twist to any dish. Plus, it’s versatile enough to suit a variety of dietary preferences. It’s funny,…
Anzac Brownie Slice
This Anzac Brownie Slice is next level good! With lots of Anzac inspired recipes to suit those with dietary intolerance already on the Well Nourished website… there is some seriously tough competition when it comes to designing Anzac inspired recipes.
This Anzac Brownie Slice is a delicious fusion of two classic treats—the hearty, oat-packed texture of Anzac biscuits and the rich, fudgy goodness of brownies. With layers of nutty, sweet, and chocolatey flavours, this slice is sure to be a crowd-pleaser. It’s also highly versatile, with options for gluten-free, dairy-free, and nut-free variations.
My very first recipe from six years ago, my epically popular Healthy Anzac biscuits has been a long time crowd pleaser and is a great nut-free treat. A personal favourite, my Chocolate Macadamia Anzacs are a mouthwatering flavour combo. Then there’s Anzac Creams and ice-blocks...something for everyone.
I have a sneaking suspicion this Anzac Brownie Slice will be another popular recipe to celebrate this important day. Have a great Anzac day. Lest we forget!
Take a look at the variations (below the main recipe) for suggestions to alter the recipe to suit many specific dietary requirements.
For more delicious, festive healthy sweet recipes, click HERE.

Anzac Brownie Slice
This Anzac Brownie Slice is a delicious fusion of two classic treats—the hearty, oat-packed texture of Anzac biscuits and the rich, fudgy goodness of brownies. It's also highly versatile, with options for gluten-free, dairy-free, and nut-free variations.
Servings: 12
Ingredients
Anzac
- 150 g butter or coconut oil -melted
- 115 g rice malt syrup, honey or maple syrup (⅓ cup)
- ¾ tsp bicarbonate of soda
- 180 g nut meal -or wholemeal spelt flour (1½ cups)
- 75 g desiccated coconut (¾ cup)
- 180 g rolled oats (2 cups)
Brownie
- 30 g cacao powder -unsweetened Dutch process or raw (¼ cup)
- 250 g nut butter (1 cup)
- 170 g rice malt syrup, honey or maple syrup (½ cup)
- 40 g nut meal -or wholemeal spelt flour (⅓ cup)
- 1 tsp bicarbonate of soda
- Pinch sea salt
Drizzle
- 100 g dark chocolate -broken into pieces (optional)
Instructions
- Pre-heat your oven to 180°C/350°F (fan-forced). Line a small (approx. 17 x 20cm) slice tin with baking or parchment paper.
- In a medium sized pot, heat the butter or coconut oil over a low heat to melt. Add the sweetener of your choice and mix until combined.
- Mix in the bicarbonate of soda.
- Add the rest of the ingredients and mix well to combine.
Brownie
- In a food processor mix all the ingredients together. You could do it by hand too. Just soften the nut butter enough so it can be mixed with the other ingredients.
- It forms a sticky dough (not a pourable cake batter).
Drizzle (optional)
- Start this once the slice is cooled completely.
- Place the chocolate in a bowl. Sit it over a pot of boiling hot water and stir until the chocolate melts.
Assemble
- Press half the Anzac mixture firmly into the base of the tin (with wet hands or a wet large spoon). Set the other half aside.
- Top with the brownie mixture and press this across to cover the biscuit base (wet hands work well again).
- Finish by pressing the rest of the Anzac mixture on top.
- Place into the oven for 20-30 minutes or until golden brown on top. The longer you cook it, the crisper the slice becomes.
- Allow to cool, refrigerate and then drizzle over the melted chocolate.
- Cut into portions right out of the fridge (you'll get nice neat slices if cut when chilled).
Thermomix
- Pre-heat your oven to 180℃. Line a small (approx. 20 x 30cm) slice tin with baking or parchment paper.
- Melt the butter, temp 90, 1 minute, speed 4 or until melted.
- Add the sweetener and bicarb and mix temp 90, 30 seconds, speed 3.
- Add the rest of the ingredients. Mix 30 seconds, flour symbol until it forms a sticky dough. You may need to scrape the sides to incorporate all the flour.
- Set the Anzac dough aside.
- Without rinsing the bowl, add the brownie ingredients and mix speed 4, 30 seconds or until combined into a sticky dough.
- Assemble as above.
Store
- Store in an airtight container (if it was warm weather, I'd keep it in the fridge)and it can definitely be frozen too.
Notes
Adjust the sweetness
I personally make this with rice malt syrup and I think it's perfectly sweet enough. If using honey or maple syrup, you may choose to slightly reduce the amount (unless you have a sweet tooth).Gluten-free
Choose nut meal or a gluten-free flour. Replace the oats with rolled (flaked) quinoa.Dairy-free and vegan
Choose coconut oil instead of butter. This will make a tougher/ crisper slice (as the coconut oil shrinks and firms up a lot when cooled).Fructose friendly
Choose rice malt as your sweetener.Nut-free
Choose the spelt or a nut-free gluten-free flour and replace the nut butter in the brownie with sunflower seed butter.Coconut-free
Choose butter as your fat and replace the desiccated coconut with more nut meal or flour.Leftover Easter Eggs
If there is such a thing as leftover Easter eggs in your house, you could melt them for the drizzle (if you dare).I hope you love this Anzac inspired brownie slice. Let me know if you have any questions or if you try the recipe, post a comment and rate the recipe!
Tomato Salsa
This delicious Tomato Salsa recipe is a fabulous, easy to make staple that is a great addition to any table. With vine-ripened tomatoes, red onion, and basil, it’s a simple yet flavorful recipe perfect for dipping, topping, or serving as a side dish. With its Italian flavours, is lovely served on a crostini or even…
Maple Macadamia Chocolate Bark
This maple macadamia chocolate bark is a decadent treat that combines roasted macadamia nuts with homemade chocolate. Sweetened with maple syrup and finished with a sprinkle of sea salt, this bark is perfect for a little self-care treat.
I don’t have a great memory, especially for dates and numbers in general. But for food, I’m always on point. I remember flavour combinations, textures and food with friends. One memory I carry is of maple roast macadamia nuts dipped in dark chocolate from a winery on the Mornington Peninsula, many moons ago. Because I don’t have the patience or time to individually coat each nut, this Maple Macadamia Chocolate Bark was born in my effort to recreate this delicious treat. For those of you that know me well, you know I love a shortcut!
This will be on my table this Easter. My kids adore it and it at least satisfies them enough so they don’t overdo the eggs left by the Easter bunny.
Wishing you all a wonderful upcoming Easter break creating lots of your own food memories! Georgia x
Health benefits
Macadamia nuts are a fantastic source of healthy fats, vitamin E and a range of B vitamins and essential minerals. Cacao is packed with antioxidants, which help fight inflammation and support health. It’s also rich in magnesium, promoting relaxation and muscle function, and contains mood-boosting compounds like serotonin and endorphins.
Ingredients
The star of this gluten-free recipe is roasted macadamia nuts, caramelised in maple syrup, vanilla extract, and macadamia nut oil. The homemade, dairy-free chocolate is made from cacao butter, cacao powder, maple syrup and a sprinkle of sea salt.
How to make this maple macadamia dark chocolate bark
Start by roasting macadamia nuts until golden, then toss them in a mixture of maple syrup, macadamia nut oil, and vanilla, baking again until caramelised. To make the chocolate, melt cacao butter in a double boiler, then stir in cacao powder, maple syrup, and a pinch of sea salt. Layer the nuts evenly, pour the chocolate over them, and freeze until set. Once hardened, break into pieces.
Serving suggestions and how to store
Enjoy this bark as an afternoon pick-me-up or a dessert. It pairs beautifully with a cup of coffee or herbal tea. Store in an airtight container in the fridge or freezer to keep it fresh and prevent melting.
Vary this maple macadamia chocolate bark to suit your needs
For a nut-free option, replace macadamia nuts with roasted sunflower or pumpkin seeds, and swap macadamia nut oil for coconut oil. To make it fructose-friendly, use rice malt syrup instead of maple syrup. For a quick version, melt your favourite dark or milk chocolate and pour it over the roasted macadamias instead of making the chocolate from scratch.
For more delicious, healthy and easy to make sweet treats, click HERE.
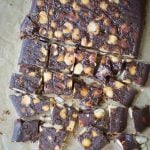
Maple Macadamia Chocolate
This Maple Macadamia Chocolate Bark is an easy to make, decadent chocolate treat, minus the guilt. Dairy, gluten, grain-free and vegan.
Servings: 12
Ingredients
- 300 g macadamia nuts (2 cups)
- 2 tbsp maple syrup
- 1 tsp macadamia nut oil
- ½ tsp vanilla -powder, extract or essence
Chocolate
- 200 g cacao butter -chopped or grated
- 30 g cacao powder (¼ cup) unsweetened Dutch process or raw
- 2-4 tbsp maple syrup -to suit your taste
- Good pinch sea salt
Instructions
- Pre-heat your oven to 150℃/ 300℉.
- Place the macadamia nuts on a tray lined with baking paper so they are in a single layer.
- Roast for 10-15 minutes or until they are golden brown.
- In a small bowl combine the maple syrup, oil and vanilla. Toss it through the macadamia nuts and return them to the oven for another 10 minutes until the syrup caramelises.
- Remove from the oven and allow to cool completely while you make the chocolate.
Chocolate
- Place a bowl over boiling water (or use a double broiler).
- Melt the cacao butter by mixing it over the steam (take care not to let any water into the cacao).
- Mix in the syrup and cacao.
- Loosen the macadamia nuts from the baking paper and arrange in an even layer.
- Sprinkle over the sea salt then mix the chocolate well and pour it over the macadamia nuts.
- Place in the freezer immediately to set.
- Once set, cut into rough pieces. I like this rustic rather than in perfect squares.
- Keep refrigerated as it's not very heat stable.
Thermomix
- As above but you can make the chocolate in the Thermomix.
- Add the roughly chopped cacao butter.
- Grate speed 8, 5 seconds.
- Heat 37 degrees, speed 2 until it is melted.
- Add the syrup and cacao and mix 15 seconds, speed 4.
- Pour over the maple roasted macadamia immediately.
Store
- Store in an airtight container in the fridge or freezer.