
This Smoky Grilled Corn with Manchego, Lime and Chilli is such a delicious combination of flavours. I think it’s a real step up on basic buttered corn and it’s quick, easy to make, and sure to impress your family and friends. Corn is a staple in many cultures and it’s certainly one food that definitely…
vegan
Peppermint Choc-chip Iceblocks
These Peppermint Choc-chip Iceblocks are currently my sons favourite snack and I’m not complaining. They take literally minutes to make and don’t require the oven which in QLD summer, is a godsend. Plus, all that goodness disguised in this tasty iceblock, what more could you want from an icy treat?
I freeze these in my Onyx stainless steel iceblock moulds. I also freeze them in little containers so the kids can pack them in their lunchbox. By morning tea they are soft enough to scoop out and eat easily.
Health benefits
These iceblocks are packed with nourishing ingredients like avocado, which provides healthy fats, and spinach, which adds a boost of vitamins and minerals. Coconut milk contributes a creamy texture while offering healthy fats. The optional cacao nibs provide antioxidants, and the peppermint adds a refreshing flavour that can aid digestion. It’s a guilt-free treat that’s both delicious and nourishing.
Ingredients
To make these healthy iceblocks, you’ll need canned coconut milk, baby spinach, avocado, and a sweetener of your choice such as rice malt syrup, honey, or maple syrup. You will also need peppermint oil or peppermint essence, and cacao nibs or dark chocolate chips.
How to make these peppermint choc-chip iceblocks
Start by placing the coconut milk, spinach, avocado, sweetener, and peppermint oil into a high-speed blender or food processor. Blend until smooth and creamy. Taste the mixture to check that the mint flavour and sweetness are to your liking. The flavour intensifies once frozen, so don’t worry if it tastes a little milder before freezing. Once you’re happy with the taste, fold in the cacao nibs or chocolate chips. Pour the mixture into iceblock moulds, insert the pop stick and freeze until firm. To release the iceblocks, run the mould under warm water, then enjoy!
Serving suggestions and how to store
These gluten-free ice blocks are perfect for a cooling snack on a hot day, or packed in lunchboxes for a refreshing treat. You can freeze them in reusable pouches or small cups for an easy, grab-and-go option. Store in the freezer until ready to serve.
Vary this peppermint choc-chip iceblocks to suit your needs
For a fructose-friendly version, use rice malt syrup as your sweetener. If you’re looking for a coconut-free option, substitute the coconut milk with cow’s milk or a nut milk of your choice. These iceblocks are versatile, and you can adjust the ingredients to suit your family’s preferences.
For more delicious, healthy and easy to make wholefood treats, click HERE

Peppermint Choc-chip Iceblocks
These Peppermint Choc-chip Ice-blocks are quick and oh so easy to make and crammed with so much nourishment. And super delicious to boot!
Servings: 6
Ingredients
- 400 ml canned coconut milk (I used Ayam brand)
- 1 handful/s baby spinach
- 1 avocado/s -medium sized
- 115-170 g rice malt syrup, honey or maple syrup (⅓-½ cup)
- 15-20 drop/s food grade peppermint oil or peppermint essence - to taste
- 40 g cacao nibs (⅓ cup) or dark chocolate chips if you'd prefer
Instructions
- Place the coconut milk, baby spinach, avocado, sweetener and peppermint oil in a high speed blender or food processor and blend until creamy.
- Taste the mixture to check the mint flavour and sweetness is right for you. I do find the flavour intensifies and is much more delicious when the mixture is frozen.
- Fold in the cacao nibs or choc-chips and then pour into mould and freeze until firm.
- Remove from the moulds and enjoy. I find running the mould under water helps to release the ice-blocks.
Notes
Fructose Friendly
Choose rice malt as your sweetener.Coconut-free
Replace the coconut milk with cows milk or a nut milk.School lunchbox
You can always freeze this into re-usable pouches or little cups and pack from frozen for a icy morning tea. For heaps more lunchbox inspo (150 pages to be exact), take a look at my best selling ebook The Well Nourished Lunchbox.I hope you and your kids love this recipe as much as we do. Post a comment below and let me know.
Mediterranean Chicken Bake
This is one of my ultimate time saving meals that also doubles as a great lunchbox main. My Mediterranean Chicken Bake is prep to plate in 30 minutes and I strongly recommend you make a double batch for a few days of quick and simple lunches.
Last week we added to our family an adorable puppy – Bonnie. My teen also started at a new school so I now have two kids at two different schools. So between chasing after this tiny creature who feels like a cross between a new born (minus a nappy) and a toddler, and spending more time each day driving my kids about, meals like this one that require minimal effort have been my saviour. Plus, the kids are loving it in their lunchbox in my grain-free wraps (recipe in the Well Nourished Lunchbox ebook).
Health benefits
Chicken thighs are packed with protein and essential nutrients, while the sweet potato adds a healthy dose of fibre and antioxidants like beta-carotene. The red capsicum offers a boost of vitamin C, and the olive oil provides healthy fats.
Ingredients
You’ll need boneless skinless chicken thighs, red capsicums (bell peppers), sweet potato, red onion, olive oil, dried oregano, smoked paprika, and lemon zest. For the lemony mayo, mix whole egg mayonnaise, garlic, lemon juice, honey, and seasoning. These simple ingredients come together for a flavour-packed bake.
How to make Mediterranean Chicken Bake
Preheat your oven to 180℃/350℉ and prepare a baking dish or sheet pan. Slice the chicken, sweet potato, capsicum, and onion, then toss them with a couple tablespoon of olive oil, oregano, smoked paprika, lemon zest, and seasoning. Spread everything in a single layer on the tray and bake for 20-25 minutes until the chicken is cooked through. Mix the mayo ingredients together and serve with the chicken bake.
Serving suggestions and how to store
Serve this Mediterranean Chicken Bake in lettuce cups, tortillas, or wraps for a lighter meal, or over rice, quinoa, or couscous for something more filling. Leftovers are great in a salad or wrap for school lunches (or mum or dad lunches). Store in an airtight container in the fridge and enjoy cold or reheat in a low oven.
Vary this Mediterranean Chicken Bake to suit your needs
For an onion-free version, swap out the red onion for baby fennel. If you’re avoiding garlic, try using cumin and cayenne instead. For a fructose-friendly option, use rice malt syrup in place of honey. Vegetarians can substitute the chicken with mushrooms and nuts, while vegans can also use cashew cream instead of mayo. Also feel free to add in other vegetables (zucchini or cauliflower would be nice) or ingredients (kalamata olives or feta cheese would work well too). You can sub the thigh with chicken breast, just watch it closely as it is a lot less forgiving and can over cook (unlike thigh meat).
Save time and sanity packing school lunches
Do you spend a heap of time searching the internet for recipes which you lovingly cook, only to find your kids fuss and don’t enjoy what you’ve made?
The ‘Well Nourished Lunchbox’ ebook is here to help…and it’s SO much more than just another recipe book!
As Natasha wrote on facebook…
‘I feel like I am always looking for new recipes and ideas and I spend an inordinate amount of time doing so. I just said to my husband that this ebook is the only lunchbox resource I will need for the rest of my kids’ school lives!’
Take a look at the variations (below the main recipe) for suggestions to alter the recipe to suit any specific dietary requirements (including making this dish vegetarian or vegan).

Mediterranean Chicken Bake (with lemony mayonnaise)
This Mediterranean Chicken Bake is a one-tray wonder, full of vibrant colours and bold flavours. With chicken thighs, sweet potato, capsicum and a hint of smoky paprika, it's a delicious, wholesome meal perfect for weeknights. Serve it with a refreshing lemony mayo for an extra zing.
Servings: 4
Ingredients
- 500 g chicken thighs
- 2 red capsicum/s (large)
- 1 sweet potato/s (kumara)
- 1 red onion/s
- 2 tbsp extra virgin olive oil -extra virgin
- 1 tsp dried oregano
- 1 tsp smoked paprika
- 1 lemon/s -zest
- Sea salt and freshly ground black pepper -to taste
Lemony mayo
- 115 g whole egg mayonnaise (½ cup)
- 1 clove/s garlic -minced
- ½ lemon/s – juice
- 1 tsp honey
- Sea salt and freshly ground black pepper -to taste
Instructions
- Pre-heat the oven to 180℃/350℉ (fan-forced).
- Finely slice the chicken, capsicums, sweet potato and red onion. Place on a large baking tray and drizzle over the olive oil. Add the oregano, smoked paprika, lemon zest, sea salt and pepper.
- Toss together until the chicken and vegetables are evenly coated and arrange in a single layer on the tray.
- Place the tray into the oven and bake for 20-25 mins until browned and the chicken is cooked through.
- Now make the lemony mayo by mixing all of the ingredients together in a small bowl.
Serve
- For a light meal, serve in a lettuce cup, tortilla or wrap with the lemony mayo and leafy greens
- Or tossed through mixed greens (dressed with olive oil and lemon juice) for a delicious salad. I also like to add in olives and cherry tomatoes.
- For a bulked up meal, it’s lovely over rice, quinoa or cous cous.
- Leftovers are fabulous in a wrap or as a salad for lunch.
Make-ahead
- Re-heat in a low oven until just hot.
Store
- Store in an airtight container in the fridge.
Notes
Onion-free
Replace the red onion with baby fennel.Garlic-free
Replace the garlic with a pinch of cumin and cayenne.Fructose friendly
Replace the honey with rice malt syrup.Egg-free
Replace the mayo with natural yoghurt or Cashew Nut Cream.Vegetarian
Replace the chicken with 300g of brown or field mushrooms. Plus 1 cup of cashew nuts or almonds (throw on the tray for the last 10 minutes of baking).Vegan
See vegetarian variation. Replace the honey with rice malt syrup and and the mayo with cashew cream.I hope you and your family love this recipe. Help me to reach more people with simple, nourishing whole foods. Leave a comment, rate this recipe or share it on socials.
Popcorn Caramel Chews
I’m seriously becoming more time poor as each year passes. My kids are busy with both before and after school activities pretty much every day of the week. So the amount of time I have to spend in the kitchen is way less than when they were little and we were home a lot more. So it’s recipes like these Popcorn Caramel Chews that take literally 5 minutes to make, which are a saviour when life gets crazy.
The caramel base is the easiest caramel you’ll ever make (no heating required). The best part is they hold up much better than most no-bake treats when out of the fridge.
These are also a great treat for kids resistant to whole foods. You can serve them as is, but I’d encourage you to take the opportunity to add in some extra nourishment (suggestions to tailor the recipe to your needs and taste below). My kids think this is the best thing I’ve ever made, so I can’t wait to hear how your kids like them.
These are also super popular at parties… I reckon they’d give Honey Joys a run for their money.
All the lunchbox inspo you’ll ever need
If you’re also a busy mum or dad lacking inspiration to pack a healthy, yet delicious lunch box that your kids actually enjoy eating, then the ‘Well Nourished Lunchbox’ ebook is here to help…and it’s so much more than just another recipe book!
“This book has been the answer to the weekday dilemma of what to put in the lunchbox that is not only healthy but taste good and gets eaten !!! We all LOVE it.” Suzanne
Find out more or SHOP HERE.
Health benefits
Coconut butter is a great source of healthy fats, while the popcorn adds fibre and lightness to the treat. The optional chia seeds provide omega-3 fatty acids, and goji berries are rich in antioxidants. Sunflower or pumpkin seeds add protein and crunch, and the flaked almonds bring additional healthy fats and vitamins.
Ingredients
To make these caramel corn chews, you’ll need coconut butter, rice malt syrup (or your preferred sweetener), vanilla, and a pinch of sea salt. For the popcorn, you can use plain or salted varieties of popped popcorn. Optional extra ingredients include chia seeds, goji berries, sunflower or pumpkin seeds, and flaked almonds. If you want a fun and festive touch, top them with freeze-dried raspberry fruit sprinkles.
How to make these caramel popcorn caramel chews
To make the caramel sauce, start by softening the coconut butter by standing the jar in hot water until it becomes easy to mix. Then, combine it with your choice of sweetener and vanilla in a bowl. Mix until smooth and creamy. Add the popcorn and any optional extras, folding them through the caramel mixture. If the caramel is too thick, warm the bowl in hot water for a few minutes to soften it. Once mixed, divide the mixture between mini patty cases, adding extra toppings if desired. Freeze for 30 minutes or so to set.
Serving suggestions and how to store
These caramel chews are perfect for an on-the-go snack, packed in lunchboxes with an ice-brick to keep them cool. You can also serve them at parties or gatherings, with freeze-dried raspberry sprinkles for a festive touch. Store the chews in an airtight container in the freezer. They can be eaten directly from the freezer, or thawed slightly for a softer texture.
Vary this popcorn caramel chews to suit your needs
If you prefer a slice rather than individual chews, simply double the recipe and press the mixture into a lined baking tray. For a corn-free version, use flaked almonds in place of popcorn. If you’re looking for a nut-free option, you can use other seeds, or stick with the base recipe. For a fructose-friendly version, choose rice malt syrup as your sweetener. To make it vegan, use rice malt or maple syrup instead of honey.
For more delicious, healthy and easy to make wholefood sweet treats, click HERE.

Popcorn Caramel Chews
These Popcorn Caramel Chews take just minutes to make and are a delicious, no-bake treat. They are great for the lunch box or for kids parties and celebrations.
Servings: 18 small serves
Ingredients
- ½ cup/s coconut butter
- 170 g rice malt syrup, honey or maple syrup (½ cup)
- ½ tsp vanilla -powder, extract or essence
- Pinch sea salt (optional)
- 3 cup/s popcorn - plain or salted (or pop your own, approx.⅛ cup uncooked)
Your choice of extra nourishment (all optional)
- 1 tbsp chia seeds
- 30 g goji berries (¼ cup)
- 30 g sunflower seeds (¼ cup) or pumpkin or sesame seeds (raw, toasted or dehydrated)
- 30 g flaked almonds (¼ cup) or slivered or chopped nuts (raw, toasted or dehydrated)
- Top with freeze dried raspberry fruit sprinkles for a party
* the nuts and seeds you can add in whole or grind them.
Instructions
- Start by softening the coconut butter by standing the jar in hot water.
- Once it's soft enough to be mixed with a spoon easily, add it to a bowl with your choice of sweetener and the vanilla.
- Mix with a metal spoon until combined and creamy.
- Add the popcorn (and any extras) and fold it thorough the caramel. If it's cold and the caramel is too thick to work through the popcorn, stand the mixing bowl in hot water for a few minutes.
- Divide between 18 mini patty cases. You can top with extras if you like also.
- Put in the freezer for 30 minutes or so to set.
Store
- Airtight in the freezer. They can be eaten from frozen or packed into a lunchbox with an ice-brick. The caramel will soften a little but it holds up a lot better than coconut oil based raw treats.
Notes
Make a slice
To make a slice, double this recipe and press the mixture into a lined baking tray. You'll need to really push down the mix so it's firmly packed. Pop in the freezer to set and then cut into squares.Corn-free
Make them with flaked almonds instead.Nut-free
Choose one of the nut-free options above or use the base recipe.Fructose friendly
Choose rice malt syrup as your sweetener.Vegan
Choose rice malt or maple syrup as your sweetener. *Coconut butter is NOT the same as coconut oil or cacao butter and it's NOT the cream off the canned coconut milk/cream. Though it is sometimes also called 'coconut cream' or 'creamed coconut'. Many health food stores and some supermarkets stock it also.large bowl inbox new recipes pour
Peanut Butter Dessert Hummus
This Peanut Butter Dessert ‘Hummus’ is a quick, delicious and nutritious snack – my kids think it tastes like a peanut butter cookie dough! Plus, it’s easy to prepare and versatile for different dietary needs.
We’re just back from holiday and the kids are back into the swing of having friends over and intensive early morning nippers training for my son. So they need snacks, regular snacks and it’s way too humid for me to put the oven on. Enter this Peanut Butter Dessert ‘Hummus’…
It’s one of over a 1,000 awesome recipes in this years brilliant Healthy Meal Planning Bundle – thanks so much to Cheapskate Cooks for the recipe inspo! To be honest, I wasn’t so sure they’d like it. But surprise me as they do, they absolutely love it (they say it tastes like a cookie dough) and I’m thrilled because it is one of the easiest things I’ve ever made.
Health benefits
Cannellini beans or chickpeas provide a rich source of plant-based protein and fibre, making this dessert filling and satisfying. Peanut butter offers healthy fats and protein, while the optional chocolate chips or cacao nibs add a little indulgence without too much added sugar. With the choice of milk or coconut water, you can control the creaminess, keeping it light and refreshing.
Ingredients
This recipe combines pantry staples like canned beans, peanut butter, rice malt syrup (or honey/maple syrup), and vanilla for a naturally sweet treat. A pinch of sea salt enhances the flavours, and optional chocolate chips or cacao nibs bring a chocolaty richness to the mix. You can dip it with fruit, crackers, or even veggies like carrot sticks.
How to make this peanut butter dip
To prepare, simply place the drained and rinsed beans, sweetener, vanilla, sea salt, and peanut butter into a food processor and blend until smooth. Add milk or coconut water in small amounts to reach your desired consistency. For extra flavour, fold in the chocolate chips or cacao nibs at the end. If you’re using a Thermomix, process the beans first, then add the rest of the ingredients, blending until smooth and adjusting the consistency.
Serving suggestions and how to store
Serve the hummus with dippers like strawberries, apple slices, or stone fruits. For something savory, try it with crackers, or for a kid-friendly option, serve with carrot sticks. This dessert hummus can be stored in an airtight container in the fridge, where it will keep fresh for several days.
Vary this to suit your dietary needs
If you’re allergic to peanuts, you can easily substitute the peanut butter with another nut butter, like cashew or almond butter. For a nut-free version, use sun butter or your preferred seed butter. If you’re vegan or dairy-free, be sure to use dairy-free chocolate or cacao nibs, and opt for maple syrup or rice malt syrup as your sweetener. For those following a fructose-friendly diet, rice malt syrup and cacao nibs are excellent choices. If you love chocolate, add a tablespoon or two of cocoa powder to the mix for an extra chocolatey twist. You can also adjust the sweetness by adding more sweetener to taste.
For more delicious, healthy and easy to make sweet treats, click HERE.
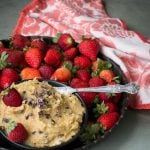
Peanut Butter Dessert Hummus
A quick, delicious and nutritious snack - my kids think it tastes like a peanut butter cookie dough!
Servings: 8
Ingredients
- 400 g can cannellini beans -or chick peas, drained and rinsed
- 85 g rice malt syrup, honey or maple syrup (¼ cup)
- 1 tsp vanilla powder, extract or essence
- Pinch sea salt
- 190 g peanut butter (¾ cup)
- 2-4 tbsp milk (of choice) - or coconut water
- 30 g chocolate chips (¼ cup) or cacao nibs, to taste (optional)
Dippers
- Fruit - strawberries, slice apple or stone fruit
- Crackers (plain sweet or savoury)
- My kids even love this with carrot sticks and I'm not arguing!
Instructions
- Combine all ingredients except milk and chocolate chips in a food processor and puree until very smooth (2-3 minutes, depending on how powerful your machine is). Thin with milk or coconut water if necessary to reach desired consistency.
- Stir in chocolate chips and eat with a spoon (mmmmm...), or serve with a 'dipper'.
Thermomix
- Add the white beans/ chick peas to the bowl and process for 5 seconds, speed 5.
- Add the sweetener, vanilla, sea salt, peanut butter and blend 30 seconds, speed 5 (scraping down the sides every 10 seconds).
- Add the milk or coconut water and blend 5 seconds at a time until you have the consistency you're after.
- Mix through the choc chips or cacao nibs, reverse 10 seconds speed 5. Serve as above.
Store
- Store in an airtight container in the fridge.
Notes
Peanut-free
Substitute peanut butter for another nut butter, like cashew or almond.Nut-free
Use sun butter or desired substitute.Vegan and dairy-free
If you’re dairy-free, choose a dairy-free chocolate or cacao nibs. For vegan choose rice malt or maple syrup as your sweetener.Fructose friendly
Choose rice malt syrup as your sweetener and cacao nibs.Chocoholic
Add a few tablespoons of cocoa powder to the mix, then blend in thoroughly.Make it sweeter
The original recipe (via Cheapskate Cooks) has ⅓ cup of sweetener, but I find the ¼ enough. For sweet tooth, it would be best to add more though.One Pan Chicken Fajitas
These One Pan Chicken Fajitas are a quick, healthy, and flavour-packed meal that’s perfect for busy weeknights. With minimal prep, one baking tray, and customisable toppings, they’re sure to become a family favourite.
This week’s recipe, One Pan Chicken Fajitas, is one of many fabulous recipes in this years incredible Healthy Meal Planning bundle (along with 28 of my own recipes). I made it for my family during the holidays and they just loved it so I thought I’d better share it. Thanks to Heather from Passion For Savings for agreeing to let me feature it. It’s super quick and easy to make, with just one pan to wash (always a bonus) and it’s really, really tasty. It can also be easily customised to suit your tastes and food goals.
Health benefits
Chicken is a great source of lean protein, while the capsicums and onions provide a boost of vitamins and antioxidants. The homemade fajita seasoning adds a smoky flavour without the additives found in store-bought mixes.
Ingredients
This healthy Mexican recipe uses boneless chicken breasts or thighs, capsicums, and red onion. To make the fajita seasoning, mix Mexican chilli powder, smoked paprika, onion and garlic powder, cayenne powder and ground cumin. Extra virgin olive oil brings everything together for a simple, satisfying bake that’s loaded with flavour.
How to make sheet pan chicken fajitas
Preheat your oven and start preparing the fajita seasoning by mixing all the spices together. Slice the chicken, capsicums, and onion into thin strips, then arrange them on a baking tray. Drizzle with olive oil and sprinkle over the seasoning blend. Toss everything well to coat evenly, then bake in the oven for 25 to 30 minutes, stirring halfway through to ensure even cooking.
Serving suggestions and how to store
Serve the One Pan Chicken Fajitas in lettuce wraps topped with cheddar, coriander, radish, and lime wedges. For added creaminess, pair them with guacamole, diced avocado or even sour cream. Leftovers can be stored in an airtight container in the refrigerator and reheated gently in a low oven until warmed through.
Vary this One Pan Chicken Fajitas to suit your needs
If you need an onion and garlic-free version, simply omit these ingredients as the other spices will still provide plenty of flavour. To make this dish vegetarian or vegan, replace the chicken with mushrooms and reduce the cooking time to 20 minutes. For extra protein, toss black beans in the reserved spice mix and add them to the tray during the final five minutes of cooking. For a low-carb option, serve the fajitas with cauliflower rice or in lettuce wraps. Add Mexican Salsa for a special twist or even Guacamole.

One Pan Chicken Fajitas
These One Pan Chicken Fajitas are a delicious, quick, easy and healthy dish to add to your meal plan. It's fast family food at it's best.
Servings: 4
Ingredients
- 500 g boneless, skinless chicken breasts (I've also used thigh meat)
- 2 red capsicum/s
- 1 red onion/s -peeled
- 2 tbsp extra virgin olive oil -extra virgin
Fajita seasoning
- 2 tsp Mexican spice mix (my spice blend recipe here)
- 1 tsp sea salt
- 1 tsp smoked paprika
- ½ tsp onion powder
- ½ tsp garlic powder
- ¼ tsp cayenne pepper
- ½ tsp ground cumin
Instructions
- Pre-heat your oven to 350°F/180°C (fan-forced).
- Prepare fajita seasoning by mixing all of the spices together. Set aside
- Cut the chicken, onion and bell peppers into thin strips and place on a sheet pan or baking dish.
- Drizzle with olive oil.
- Sprinkle with homemade fajita seasoning.
- Toss with tongs or spatula to get everything evenly coated.
- Bake for about 25-30 minutes (stir halfway through).
Serve
- Serve in lettuce wraps with cheese and your favourite toppings!
- I've served it here with cheddar, coriander (cilantro) leaves, radish and fresh lime juice. But you can tailor this to suit your families needs and tastes.
- I love it with Guacomole or diced avocado too.
Make-ahead
- Re-heat in a low oven until just hot.
Store
- Store in an airtight container in the fridge.
Notes
Onion and garlic-free
You can omit them all, the other spices add loads of flavour.Vegetarian and vegan
Replace the chicken with 300g of brown or field mushrooms and reduce the cooking time to 20 minutes. Reserve 1 tsp of spice mix and toss through 1 drained and rinsed can of black beans. Add these to the baking tray 5 minutes before the vegetables are ready to warm them.I'd love to hear how you enjoy this simple, delicious meal. Let me know by posting a comment below.
Carrot Cake Baked Oatmeal
I’m sure many of you are thinking about forming (or re-forming) healthy habits about now, so, I thought this the best time to share this little gem of a recipe – my Carrot Cake Baked Oatmeal (with Cinnamon Yoghurt).
The festive season is one time in the year I stray from my usual clean eating. I’m eating out more often, the change in routine with my kids being on school holidays also throws me, plus, loads of celebrations and gatherings. So I loosen the reigns, relax and enjoy the festivities. These periods of overindulgence are a great reminder why I’m committed to eating well. I get to the point where my energy starts to wane and I just don’t feel right, so I accept that the parties over and re-establish the habits that keep me happy, healthy and energised.
Breakfast is the one meal that ensures I have loads of energy to cook up a storm and eat well throughout the day (and exercise too). With a wholesome brekkie, I go into the day with the mental clarity and energy to make better food choices – it just sets me up for success, not only in the food department, but my work productivity is way better too.
Health benefits
The oats are a fibre packed, mineral rich wholegrain. In herbal medicine oats are a nerve restorative so great for supporting the nervous system function and digestion also. The eggs and milk provide protein for a sustained release of energy. The apple, carrot and spices provides more plant based nutrition and fibre. The yoghurt also supports gut health. What more could you want from brekkie?
More breakfast inspo
Find an awesome range of brekkie inspo in my ebook ‘Rise and Shine a Well Nourished Breakfast‘ – designed with mad morning’s in mind, it will ensure your brekkie is as good as it gets.
Ingredients
The base of this baked oatmeal recipe includes rolled oats, grated apple and carrot, currants, cinnamon and vanilla extract. A choice of sweeteners, milk, and optional nuts or seeds make this dish adaptable for various tastes and dietary needs.
How to make this carrot cake baked oatmeal
To make this carrot cake baked oats, mix the oats, grated apple, carrot, and currants in a baking dish. Blend or whisk milk, eggs, sweetener, melted butter, cinnamon, and vanilla, then pour over the oat mixture. Top with sugar and optional nuts or seeds, then bake until set. Serve with cinnamon yoghurt, Greek yogurt or enjoy cold as leftovers.
Serving suggestions and how to store
Serve warm with spiced yoghurt for breakfast or enjoy chilled as a snack. Or serve with maple syrup for dessert if you like. Leftovers can be stored in an airtight container in the fridge for up to a week or frozen for longer storage. Reheat as needed.
Vary this carrot cake baked oatmeal to suit your needs
For a dairy-free option, use coconut milk (or almond milk or any non-dairy milk) and coconut yoghurt. Replace oats with quinoa flakes for a gluten-free version or omit the dried fruit and use rice malt syrup for a fructose-friendly dish. Nut-free and vegan adaptations are also included, ensuring this recipe fits your lifestyle. You can also adjust the sweetness to your taste.

Carrot Cake Baked Oatmeal with Cinnamon yoghurt
This Carrot Cake Baked Oatmeal with Cinnamon yoghurt is a delicious, super nourishing and easy to make breakfast that the whole family will love. Best of all it includes a serve of fruit and vegetables and it will set you up for an energised and productive day.
Servings: 6
Ingredients
- 180 g rolled oats (2 cups)
- 1 apple/s -grated
- 2 carrot/s -grated
- 35 g currants (¼ cup)
- 500 ml milk (of choice) (2 cups)
- 2 egg/s (these need to be large approx. 80g eggs otherwise use 3 eggs or it won't set quickly)
- 85 g rice malt syrup, honey or maple syrup (¼ cup) optional
- 40 g butter, ghee or coconut oil (3 tablespoons) melted
- 1 tbsp ground cinnamon
- 1 tsp vanilla -powder, extract or essence
- 5 g coconut sugar or rapadura (1 tsp)
- 35 g pumpkin seeds, walnuts or pecan nuts (¼ cup) optional
Cinnamon Yoghurt
- 250 g natural, Greek or coconut yoghurt (1 cup)
- 1 tsp ground cinnamon
- 1 tsp vanilla -essence
Instructions
- Preheat your oven to 180ºC /350ºF (fan-forced). Grease or line a 20 x 20 (approx.) casserole or baking dish.
- Place the oats, grated apple, grated carrot and currants/raisins into your baking dish and mix to roughly combine.
- In a blender, food processor or jug/bowl, mix/whisk the milk, eggs, sweetener, melted butter, cinnamon and vanilla until well combined.
- Pour over the oats/ carrot mix and top with the sugar (and optional pumpkin seeds, walnuts or pecan nuts).
- Place in the oven for around 25-30 minutes or until it is set (just firm in the middle).
- Whilst it’s cooking, make the spiced yoghurt by combining all of the ingredients together in a small mixing bowl.
- When the oatmeal is cooked, enjoy immediately (with the spiced yoghurt) or cool and slice into portions to store.
Thermomix instructions
- Preheat your oven to 180ºC /350ºF. Grease or line a 20 x 20 (approx.) casserole or baking dish.
- Grate the carrots, 5 seconds, speed 4. Add to the dish. Now grate the apple, 3 seconds, speed 4.
- Add the oats, currants/raisins into your baking dish and mix to roughly combine.
- Without rinsing the Thermomix bowl, melt the butter, 1 min, 90, speed 4. Add the milk, eggs, sweetener, cinnamon and vanilla. Mix 30 seconds, speed 5 until well combined.
- Pour over the oats/ carrot mix and top with the sugar (and optional pumpkin seeds, walnuts or pecan nuts).
- Place in the oven for around 25-30 minutes or until it is set (just firm in the middle).
- Rinse the Thermo bowl. Add the spiced yoghurt ingredients and blend, 20 seconds, speed 3.
- When the oatmeal is cooked, enjoy immediately (with the spiced yoghurt) or cool and slice into portions to store.
Store
- Store in an airtight container in the fridge or freezer.
Notes
Recipe notes
You can certainly vary the kinds of fruit you use, for example substituting the apple with pear. You can also slice seasonal fruit and place on top to bake.Dairy-free
Choose coconut milk as your sweetener and replace the butter with coconut oil. Replace the yoghurt with coconut yoghurt.Gluten-free
Replace the oats with rolled quinoa flakes.Fructose friendly
Omit the dried fruit and choose rice malt syrup as your sweetener.Nut-free
Omit the nuts or choose the pumpkin seeds.Vegan and egg-free
Use the dairy-free options and replace the eggs with chia or flax eggs.Make ahead
You can make this ahead and simply bake in the morning. Left-overs can be enjoyed cold or re-heated.I'd love to hear how you love this recipe. Does a good breakfast set you up for a productive, focussed, healthy day?
meal prep microwave large mixing bowl calories total time flavor stir frost
Gluten Dairy and Egg-free Pastry
This gluten-free, dairy-free and egg-free pastry is a versatile recipe perfect for anyone with dietary restrictions or looking for a healthier pastry alternative. With a combination of almond meal and arrowroot flour, it’s naturally gluten-free and can be used for both sweet and savoury dishes.
A word about store bought pastry
I largely avoid all wheat but my one exception is a very occasional splurge on puff pastry (because I’m nowhere near patient enough to make my own). The only brand I buy though is Careme All Butter Puff Pastry – it contains just butter and flour (they also have a wholemeal spelt puff available now). You see, the majority of store-bought pastry is a dumping ground for dangerous additives, vegetable oils, sugar and trans-fats.
Before you think every now and again won’t hurt – did you now that trans-fats accumulate in your cells and that their effect on your body is cumulative. Because there is no immediate visible effect of consuming trans fats the warning signs are missed until the damage is done years later. Don’t let you (and especially your children’s) body become bogged down with this toxic oil. Make your own pastry (or buy an all butter brand)!
For other pastry options check out:
Health benefits
This pastry is nutrient-dense thanks to almond meal, which is rich in healthy fats, protein, and vitamin E. Chia seeds add fibre and omega-3 fatty acids, supporting gut health and reducing inflammation. Using coconut sugar or rapadura for sweet versions offers a lower glycaemic index alternative to refined sugar.
Ingredients
The key ingredients in this pastry recipe include almond meal (almond flour), arrowroot flour (or tapioca starch), and chia seeds. Xanthan gum is optional but helps improve the binding. Coconut sugar or rapadura adds natural sweetness (if you’re making a sweet pastry), while bicarbonate of soda and pinch of salt ensures lightness.
How to make this gluten, egg and dairy-free pastry dough
Start by mixing chia seeds, xanthan gum (if using), and hot water until a gel forms. Combine the dry ingredients in a food processor or bowl, then fold in the chia gel and mix until the dough comes together. Adjust the cold water gradually to achieve the right consistency. Wrap the dough in parchment paper, chill it in the fridge, and roll it out when ready to use. Bake at the bottom of the oven for approximately 10 minutes.
Serving suggestions and how to store
This pastry is ideal for gluten-free pie crust, tarts, or quiches, offering a delicious and sturdy base for your favourite fillings. Store it wrapped in parchment paper in an airtight container in the fridge for up to a week or freeze for longer storage. Thaw before rolling (see tips below for this) and baking.
Vary this to suit your dietary needs
For a nut-free version, experiment with sunflower seed flour or cassava flour as a substitute for almond meal. For a sweeter taste, increase the coconut sugar slightly. Adjust the consistency with water to suit the flour’s absorbency, ensuring the dough is workable without being sticky.

Gluten, grain, dairy and egg free pastry (also vegan)
Servings: 1 large pie base
Ingredients
- 2 tsp chia seeds - ground is best, but can be unground
- ¼ tsp xanthan gum (optional but does help to bind it more strongly)
- 70 ml hot water
- 200 g almond meal
- 70 g true arrowroot flour (starch)
- 45 g coconut sugar or rapadura - only for sweet pastry (3 tbsp)
- ½ tsp bicarbonate of soda
- ¼ tsp sea salt
Instructions
- In a small bowl, place the chia, xanthan and hot water and mix until well combined. Rest until a gel is formed (approx. 10 minutes).
- In a food processor or bowl mix the almond meal, arrowroot, sugar, bicarb and salt until very well combined. If using a Thermomix 5 seconds, speed 4.
- Add the chia gel and process until the dough comes together. If using a Thermomix 10 seconds, speed 6.
- Add extra water if necessary, teaspoon by teaspoon until it is the proper consistency (see the note about consistency below).
- Roll into a ball (or portion into balls) and wrap in parchment (baking) paper. This pastry can be used immediately or rest in the fridge until needed. See the note below for tips on rolling.
- This pastry may not brown the same way wheat pastry will - avoid overcooking it as it will toughen with prolonged cooking. Brushing it with a sugar glaze before or after cooking will help colour the pastry. Cook time is approx. 10 minutes.
Store
- Store in an airtight container in the fridge or freezer.
Notes
A note about pastry consistency
As all whole flours are slightly different in their consistency/texture, you will need to judge how much water is needed yourself for all types of pastry. The consistency you are after is that the dough should easily come together in a firm, slightly sticky ball (but not stick to your hands or the bowl). If your kitchen is hot (during summer) you will need to work quickly to assemble.A note about rolling pastry
Personally, I find the cleanest and most fool proof way to roll pastry is to roll it between two pieces of parchment or baking paper. Remove the top piece of paper and invert the pastry into the pan before peeling off the bottom layer.Baking note
Always bake pastry items like pies and quiche on the bottom shelf of the oven (makes for a crisper pastry).instruction apple pie pumpkin pie flour mixture vegan butter plastic wrap rolling pin
Choc-Orange Biscuits
There are certain flavour combinations that just work. Dark chocolate paired with orange is certainly one of them! So I present to you, in time for the festive season, my Choc-orange Biscuits.
Baking gifts is good for your health
Christmas is a great time to get your bake on and give the gift of deliciousness by baking something lovely for friends and family! I recently read a news article where psychologists explained the benefits of baking for others. They said that baking for others is an ‘altruistic act and a proactive form of creative expression’ (both of which are psychologically advantageous). Baking’s also a great way to practice mindfulness (due to the attention it requires).
For me, baking is absolutely therapeutic and definitely forces me into mindfulness (more so than meal cooking which doesn’t require the same degree of concentration). It triggers memories of the love my nan had for me as a child, the deliciousness we shared when she baked for me. I hope I can trigger those same memories in my own children one day.
As much as cooking is something I’m obviously passionate about, baking is something I have largely struggled to do well. I think I’m perhaps a little too creative and my free-flowing approach to cooking (combined with a deficit in the patience department) means quite a few fails. Though with each fail I learn a lot about the science behind the bake and I have come a long way as a baker in the past five years or so.
I think it’s why my recipes are well received by many, because they are created by a non-natural baker so they are simple and perfect for those of us challenged in this department. Also, because I have to do my own washing up, I make the instructions simple and the amount of bowls required minimal ha ha!
Health benefits
Made with wholemeal spelt flour, these biscuits provide more fibre and nutrients than those made with refined flours. The orange zest offers a vitamin C boost, while dark chocolate adds antioxidants. By making your own biscuits, you avoid the unnecessary additives and excess sugars often found in store-bought options.
What you need to make these choc-orange biscuits
This healthy cookie recipe uses simple ingredients like butter or coconut oil, orange zest, vanilla extract, spelt flour, and dark chocolate for the coating. You can adjust the sweeteners to your liking and easily swap out ingredients to accommodate dietary preferences, making it versatile for everyone.
How to make
These chocolate orange cookies are as simple as mixing the wet ingredients with the dry ingredients. Begin by mixing the melted fat, sweetener, orange zest, juice, vanilla, and sea salt in a bowl. Add the bicarb and spelt flour to form a cookie dough, then chill it before slicing into biscuits. Bake until golden and, once cooled, dip each biscuit into a melted chocolate mixture for an extra indulgent finish. If you own a Thermomix, we’ve also included Thermomix instructions for this recipe.
Serving suggestions and how to store
These biscuits (or cookies if you are American) are perfect as a snack with a cuppa, or as a sweet treat after a meal. Store them in an airtight container in the fridge or freeze them for later, so you always have a tasty treat on hand.
Vary the choc-orange biscuits to suit your needs
These are perfect for those of you who have egg allergies. For gluten-free, replace the spelt flour with a mix of almond meal, buckwheat, and arrowroot. To make them dairy-free or vegan, simply use dairy-free chocolate. For nut-free, choose coconut oil or butter, and if you’re avoiding fructose, opt for rice malt syrup as your sweetener.
Remember to take a look at the variations (below the main recipe). Here, you’ll find suggestions to alter the recipe to suit your dietary goals.
For more delicious, easy to make, healthy sweet recipe, click HERE.

Choc-orange Biscuits
These choc-orange biscuits are a delicious blend of zesty orange and rich dark chocolate, perfect for anyone craving a classic flavor combination. With a crunchy texture and a luxurious chocolate coating, they make an ideal snack or sweet treat.
Servings: 20
Ingredients
- 50 g butter or coconut oil (¼ cup) melted
- 85 g rice malt syrup, honey or maple syrup (¼ cup)
- 1 orange/s -zest finely grated plus 3 tbsp juice
- 1 tsp vanilla -powder, extract or essence
- Pinch sea salt
- ¼ tsp bicarbonate of soda
- 215 g wholemeal spelt flour (1¾ cups)
Chocolate coating
- 100 g dark chocolate -broken into squares
- 1 tbsp coconut oil
Instructions
- Place the fat, sweetener, zest, orange juice, vanilla and sea salt into a large bowl and beat until well combined. Thermomix melt the butter or coconut oil 1 min, 90, speed 3 then add the sweetener, zest, juice, vanilla and salt and mix 1 min, speed 4.
- Add the bicarbonate of soda and mix well. Thermomix 5 seconds, speed 4.
- Add the spelt flour and mix until combined. Thermomix, lock lid, 30 seconds knead (flour symbol). Scrape the sides of the bowl to incorporate the flour.
- The dough should be firm and hold together without sticking to your hands (like play dough). If it is too wet (sticky) add a little more flour. If too dry, add a tablespoon of juice or water.
- Place the dough onto a piece of baking paper and roll it into a log (approx. 5cm in diameter).
- Place in the fridge for 1-2 hours then slice into 5mm biscuits (in winter you will only need 30 mins in the fridge).
- Preheat the oven to 180℃/350℉ (fan forced) before slicing the dough.
- Place slightly apart on a lined baking tray (they spread ever so slightly) and bake for 10 minutes.
- Allow to cool fully on the tray (they firm as they cool).
Chocolate coating
- Bring a small pot of water to the boil and then turn off the heat. Place a small ceramic, glass or metal bowl over the hot water. Add the chocolate and coconut oil and stir until it is melted.
- I use a small bowl so that the melted chocolate is deep (which makes it easier to get a good half of the biscuit coated).
- Work with your tray of biscuits right next to the melted chocolate. Dunk half the biscuit into the melted chocolate and place back on the tray. Pop in the fridge to set the chocolate.
Time saving tip
- If you can't be bothered with the chocolate coating, press a chocolate button into each biscuit before baking.
Store
- Store in an airtight container in the fridge or freezer.
Notes
Gluten-free
Swap the spelt flour with 130g (1¼ cup) of almond meal plus 95g (¾ cup) buckwheat flour plus 2 tablespoons arrowroot. This dough is firm but sticky so wet your hands to shape it into the log.Dairy-free and vegan
Use a dairy-free chocolate.Fructose-friendly
Choose rice malt syrup as your sweetener and 98% dark chocolate.Nut-free
Choose the coconut oil (or even melted butter) for your fat.Coconut-free
Replace the coconut oil with macadamia oil or melted butter and omit from the chocolate coating.I hope you love this recipe as much as my family does. Remember to post any feedback or questions below, enjoy!
Mango Coconut Lime Ice Blocks (with a sneaky side of cauliflower)
These mango coconut lime ice blocks are a refreshing and healthy treat, perfect for hot days. With a tropical twist of mango, creamy coconut, and lime, they’re easy to make, naturally sweetened, and full of nutritious goodness.
It’s definitely that time of year to break out my stainless steel Onyx popsicle moulds and whip up a batch of ice-blocks. These Mango, Coconut and Lime Ice Blocks are not only a healthy snack or treat, they are so very convenient. They take just minutes to make and they are a nutritious grab and go snack. My son often helps himself to an ice-block on his way to nippers training, either at 5am (which I encourage because otherwise he has a smoothie which wakes the entire house up) or before his arvo sessions.
Health benefits
Mangoes are a fabulous source of fibre, protective micro-nutrients and anti-oxidants. A pilot study found that eating mango was effective in improving constipation and good gut bacteria. Like its other cruciferous cousins, cauliflower is a rich source of many micronutrients (vitamins and minerals, especially folate and Vitamin C) and bursting with fibre. It also contains glucosinolates (sulphur containing plant chemicals) many of which have been researched for their promising anti-cancer properties and ability to support liver detoxification. Turmeric is a powerful anti-inflammatory and immune supportive herb.
Ingredients
Made with ripe mangoes, lime zest and juice, creamy coconut milk, turmeric, raw cauliflower and a touch of vanilla, these ice blocks are naturally sweet. Using your choice of sweetener, you can also adjust the sweetness to your preference.
How to make mango coconut lime ice blocks
To make these mango ice blocks, blend all the ingredients until smooth and creamy, adjusting the sweetness to your preference depending on how ripe the mangoes are. Pour the mixture into ice block molds and freeze for several hours until solid.
Serving suggestions and how to store
These ice blocks are best enjoyed straight from the freezer on a hot day. Store them in the molds or wrap them individually in parchment paper for easy grab-and-go snacks.
Vary this these mango coconut lime ice blocks to suit your needs
For a coconut-free version, replace the coconut milk with your favorite nut milk or full-fat cow’s milk. To keep it vegan, choose rice malt or maple syrup as the sweetener. If mangoes aren’t in season, swap them for fresh strawberries. For an added protein boost, blend in a scoop of clean wholefood protein powder to make these ice blocks even more nourishing.
For more delicious, easy to make healthy sweet recipes, click HERE.

Mango, Lime and Coconut Ice Blocks
Complete with a small serve of cauliflower, these creamy Mango, Lime and Coconut ice-blocks are as nourishing as they are delicious.
Servings: 6 ice blocks
Ingredients
- 2 mango/s -flesh
- 1 lime/s -juice and zest
- 125 ml canned coconut milk (½ cup) preferably full-fat (I used Ayam brand)
- ½ cup/s cauliflower -raw florets, roughly chopped
- ¼ tsp ground turmeric
- 1 tsp vanilla -powder, extract or essence
- 1-2 tbsp rice malt syrup, honey or maple syrup -optional
Instructions
- Place all of your ingredients into a high speed blender and process until smooth and creamy.
- Taste and adjust the sweetener to suit (keep in mind it will taste better frozen). The amount of sweetener you need will depends upon how ripe the mangos are (mangos become sweeter the riper they are). I like a slight tang from the lime.
- Pour into ice block moulds and freeze until solid (several hours).
Notes
Coconut-free
Replace the coconut milk with a nut milk or full-fat cows milk.Vegan
Chose rice malt or maple syrup as your sweetener.It's not mango season
Replace the mango with 2 cups of fresh strawberries.Add Protein
I often add a scoop of a wholefood Protein powder. GoodnessMe have a fabulous selection of clean protein powders, you can take a look HERE.I'd love to hear how you and your family enjoy these ice blocks. Write me a comment below.
lime juice
Vegan Rice Paper Rolls
These Vegan Rice Paper Rolls are light, refreshing, and packed with colourful veggies and herbs. They are paired with a creamy peanut dipping sauce for an irresistible combination. Perfect for a light lunch, snack, or party appetiser, these rolls are also a fun way to add variety to your meals.
With the warmer weather ahead of us, I thought it time to spring into summer with a fresh, delicious meal or snack. My family LOVES fresh rice paper rolls. We fill them with all kinds of things (including leftovers), but this is our go-to often. I think fresh herbs are really what makes rice paper rolls delicious – they add so much flavour so I never make them without some kind of herb inside.
I am so grateful for my little herb wall garden it helps to ensure I always have fresh, organic, in-season herbs and greens to flavour my meals and pack a healing, health supporting punch. I especially love that it’s not costing me a small fortune for a puny little bunch of nutritionally sub-standard, generally hydroponically grown herbs.
Health benefits
Rice paper rolls are naturally gluten-free, and this vegan version is packed with fibre from the fresh vegetables, healthy fats from avocado, and probiotics from the sauerkraut or kimchi. The dipping sauce contains peanut butter for plant-based protein and healthy fats, making these rolls both satisfying and nourishing.
Ingredients
These vegan summer rolls are filled with vermicelli rice noodles, crunchy capsicum, creamy avocado, fresh herbs like mint and coriander (cilantro), and fermented sauerkraut or kimchi for a tangy twist. The peanut sauce is a simple mix of peanut butter, tamari, rice wine vinegar, and rice malt syrup, which gives it a delicious balance of salty, sweet, and tangy flavours.
How to make Vegan Rice Paper Rolls
To make these fresh spring rolls, start by soaking the vermicelli noodles and preparing your vegetables. Lay softened rice paper wrap on a damp surface, place the filling ingredients in the centre, and roll tightly. Mix the dipping sauce ingredients in a bowl, adjusting the consistency with water as needed. Serve immediately for the freshest taste.
Serving suggestions and how to store
Serve these rice paper rolls with the peanut dipping sauce on the side. To store, keep the rolls in an airtight container lined with baking paper and covered with a damp cloth, but they are best enjoyed fresh. Store the dipping sauce in the fridge in a sealed container for up to a week.
Vary these Vegan Rice Paper Rolls to suit your needs
For a nut-free version, replace peanut butter with tahini. If you’re soy-free, swap tamari with coconut aminos. You can also leave out the sesame seeds if needed. For more filling options, you can explore different vegetables (like cucumber, carrot, red cabbage, bean sprouts), tofu, or even leftover meats if not following a vegan diet.
Remember to take a look at the variations (below the main recipe). Here, you’ll find suggestions to alter the recipe to suit your dietary goals.

Vegan Rice Paper Rolls
I always add fermented vegetables to fresh rice paper rolls. They add a lovely tang to the filling and a whole lot of gut supporting goodness too. The dipping sauce in this recipe is so delicious and so much healthier than anything store bought.
Servings: 2
Ingredients
- 6 pieces rice paper (spring roll paper) I love the Spiral Organics Rice paper
- 100 g vermicelli rice noodles (approx.)
- 6 tsp sauerkraut or kim chi
- ½ red capsicum/s -sliced into 6 strips
- ½ avocado/s -sliced into 6 strips
- 6 lettuce leaves -small ones rolled up (or halve large ones)
- 6 sprigs fresh mint leaves (or Vietnamese mint)
- 6 sprigs fresh coriander or basil (regular or Thai basil)
- 1 tbsp black sesame seeds to garnish (optional)
Dipping sauce
- 3 tbsp peanut butter
- 1 tbsp tamari
- 1 tbsp rice malt syrup
- 1 tbsp rice wine vinegar
- 1 tbsp water
- Pinch chill flakes -to taste
Instructions
- Start by putting the noodles into a bowl and covering with boiling water whilst you prepare the other ingredients.
- To make the dipping sauce, combine all of the ingredients together in a small bowl. If the sauce is too thick, you can always add a little more water, teaspoon by teaspoon.
- Prepare your vegetables on one plate so you can work quickly to assemble each roll. Drain the noodles once they have softened into a bowl.
- Wet a chopping board so it is damp. Take a sheet of rice paper and run it under luke warm water so both sides are wet. Lay it flat on the chopping board (it will continue to soften as it sits).
- Place the ingredients horizontally, across the middle of the rice paper. 1 tsp of the sauerkraut or kim chi, a slice of capsicum and avocado. A piece of rolled lettuce, a sprig of mint and coriander in each, followed by about ¼ cup noodles.
- Fold the top half of the rice paper down, then fold the sides in and roll towards you tucking the ingredients in to form a neat roll.
- You can also sprinkle with black sesame seeds to serve. Enjoy immediately with the dipping sauce.
Store
- Store the sauce in an airtight container in the fridge.
- The rice paper rolls can be stored in an airtight container lined with baking paper and covered with a wet cloth. The paper does go a bit sticky with storage so they are best enjoyed fresh.
Notes
Add meat
If you’re not vegan, feel free to add in seafood or chicken or any leftover meat really.Nut-free
Replace the peanut butter with tahini.Soy-free
Replace the tamari with coconut or liquid aminos.Sesame-free
Leave the black sesame seeds off.More rice paper roll filling ideas
Click here for lots more filling inspo.I'd love to hear how you enjoy this fresh, light meal or snack. Post a comment below or rate this recipe.
Strawberry Shortcake Protein Smoothie
This strawberry shortcake protein smoothie has been an absolute lifesaver lately. You see my 10 year old son is growing at a rate of knots. He has size 10 adult mens feet (we call him ‘the hobbit’ lol) and he’s a big, athletic kid. He’s mad for sport and at the moment, he is training sometimes twice a day (athletics and nippers season is in full swing for him). So feeding him nutritionally balanced meals and snacks is especially important for his day to day wellness and his ability to train often and hard.
When I’m creating a meal, I primarily focus on the macronutrients – the balance I’m after is a complete source of protein, plant based carbohydrate (vegetables, fruit, whole grains) and good fats. I believe if they are coming from a variety of whole foods sources, the micronutrients take care of themselves.
Dietary variety really is key to good nutrition as it increases the range of micro-nutrients derived from food, therefore protecting against deficiencies developing. Carbohydrate I find pretty easy to include in meals and snacks, but ensuring a good variety of quality protein and fats, I find a little trickier.
Why is protein SO important?
We all need protein to build new cells and repair tissue. It is especially critical for kids, pregnant women, athletes, those suffering chronic illness or injury, those with dietary restrictions and the elderly. Protein is used extensively by everybody, everyday. Protein is used to make digestive enzymes, to repair the digestive tract, to make antibodies to fight infection, to grow skin, hair, nails, to make blood cells, for strong bones, to build muscle, to make hormones, to stabilise our blood sugar….I could go on forever really.
We cannot store protein, so it’s safe to say, that in order to replace, rebuild and repair, we need to consume protein very regularly.
Protein deficiency is common
In my experience, insufficient dietary protein is surprisingly common, especially amongst fussy kids, pregnant women, athletes, those with food intolerance and the elderly. The one thing that a swing towards processed foods has done, is dramatically reduced the amount of protein many people consume. You see most processed, convenience foods are generally a combination of fat and carbohydrate (breads, breakfast cereals, crackers, muesli bars, pasta and noodles). Anything with a shelf life is generally protein deficient.
It’s a bit of a vicious circle because people who are lacking protein also often reject eating it, craving high energy foods like refined, simple carbohydrate. They may also have also have a poor appetite for ‘meals’ and often just want to snack throughout the day. Poor variety is also another issue, where they may eat protein, but only from one source e.g.; dairy is common. To make matters worse, I’ve also found those deficient in protein are often also deficient in a number of key micronutrients (vitamins and mineral) found in good amounts in, you guessed it, protein rich foods. These micronutrients not only support their health, but help to build a robust appetite for other good foods (like veggies).
Protein supplementation
As you know, I’m a huge advocate of persisting to teach kids to love eating a good variety of whole foods – first and foremost. If you have a picky eater The Raising Well Nourished Kids Podcast is worth a listen to support you to support your young people in developing healthy eating habits and positive relationships with and through food. You can listen on Apple Podcasts, Spotify, YouTube or your favourite podcast App!
However, just as medicine is required occasionally for illness, supplementation is often critical in restoring the appetite and desire for whole foods, especially in picky eaters. Protein supplementation is also often required for people who suffer chronic illness, are athletes or suffering with food intolerance which restricts their protein intake (egg, nut, dairy allergies for example).
It is also very helpful for those mornings that go pear-shaped and a sustaining brekkie is required quickly. As much as I’d like to serve a nutritionally balanced, high protein brekkie each and every morning, some days time is just stretched (like when my kids have a 5am swim squad and we are up at 4.30am) and a protein powder supplement is invaluable.
The vast world of protein powders
Navigating the many types of protein powders available is tricky business. Many brands are derived from feed-lot, grain-fed cows (also often fed GMO’s), highly processed soy proteins and contain franken-sugars, fructose, maltodextrin starches (aggravate blood sugars and the GIT), additives and more yuk ingredients.
Most also contain absolutely no plant fibre, good fats or micronutrients (vitamins and mineral) so nutritionally they are incomplete and not at all reflective of a well rounded, whole food meal. Thankfully, there are a select few which offer balanced nutrition and do what we need them to do – provide a sustaining, nutritious supplement, and here’s the clincher, that actually tastes good. It’s just got to taste good right?
What to look for when choosing protein powders
When choosing a wholefood-based protein powder, there are several key factors to consider to ensure you’re getting a good-quality and effective product:
Ingredients: Look for a protein powder that is derived from wholefood sources, such as 100% grass-fed collagen, pea protein, brown rice protein (preferably non GMO, sprouted and fermented), hemp protein, or a blend of these. If you’re okay with dairy, choose a Whey based protein powder, ensure it is grass-fed and/or organic. Avoid products with additives, artificial flavours, excess sugar or artificial sweeteners.
Nutritional Profile: Assess the nutritional content beyond just protein. Look at the levels of essential amino acids, vitamins, and minerals present in the powder. A good wholefood-based protein powder will offer a range of nutrients beyond just protein.
Allergen Information: Consider any allergies or dietary restrictions. Wholefood-based protein powders are often suitable for those with common allergies (e.g., dairy, soy, gluten), but always check the label for potential allergens.
Taste and Texture: Personal preference matters too. Choose a protein powder that tastes good to you and mixes well with your favourite fruits and fluid (I love making smoothies with coconut water and yoghurt) or add protein powder to recipes like pancakes, overnight oats or chia puddings. Some wholefood-based powders can have a grainier texture, which may be a consideration.
By considering these factors, you can select a wholefood-based protein powder that aligns with your dietary preferences, nutritional needs, and taste preferences, ensuring you get the most out of your protein supplement.
I personally love using this collagen protein—it’s flavourless, so it works beautifully across all kinds of recipes without altering the taste.
Health benefits of this strawberry shortcake protein smoothie
Packed with antioxidants from strawberries, protein from yoghurt and almonds, and added fibre from raw cauliflower, this strawberry shortcake protein smoothie is a nutritious powerhouse. It provides a boost of energy, supports muscle recovery, and helps maintain a healthy gut.
Ingredients
The combination of strawberries, almonds, creamy yoghurt, and a hint of vanilla creates a naturally sweet smoothie that’s satisfying and nourishing. The shortcake-inspired almonds add a delicious crunch, making every sip a treat.
How to make this strawberry shortcake protein smoothie
Start by toasting almonds coated in maple syrup and protein powder for a crunchy shortcake topping. For the syrup, blend strawberries and maple or rice malt syrup. Then, blend the smoothie ingredients—frozen strawberries, cauliflower, coconut water, yoghurt, vanilla extract and plain or vanilla protein powder—until creamy. Assemble by swirling the strawberry syrup in the glass, pouring in the smoothie, and garnishing with the crunchy shortcake topping.
Serving suggestions and how to store
Serve this smoothie immediately with the crunchy almonds piled on top for the best texture. Leftovers can be frozen into popsicle moulds or small containers for a quick, nutritious snack later.
Vary this strawberry shortcake protein smoothie to suit
For a vegan option, use coconut yoghurt and a plant-based protein powder. If you’re short on time, blend all the ingredients together without worrying about the syrup and layering. Want a nut-free option? Swap almonds for sunflower or pumpkin seeds.
For more delicious, easy to make healthy smoothies, click HERE

Strawberry Shortcake Protein Smoothie
This is a delicious, super simple recipe that we often have for breakfast or for an after school, pre-sport snack (I pop it in a thermos to keep it nice and cold)…
Servings: 2
Ingredients
Shortcake
- 35 g raw almonds (¼ cup)
- 1 tbsp maple syrup
- 1 serve/s wholefood protein powder -vanilla or plain flavour
Syrup
- 4-5 fresh strawberries
- 1-2 tbsp rice malt syrup or maple syrup
Smoothie
- 1½ cup/s frozen strawberries
- 2 floret/s cauliflower -raw and roughly chopped
- 60 ml coconut water (¼ cup)
- 250 g natural, Greek or coconut yoghurt (1 cup)
- 2 serve/s wholefood protein powder -vanilla or plain flavour
- 1 tsp vanilla -powder, extract or essence
- 2 fresh strawberries -sliced into flat edged quarters (for garnish)
Instructions
Shortcake
- On a tray line with baking paper place the almonds and drizzle with the syrup. Toss to coat. Sprinkle over the protein powder and toss to coat the nuts.
- Place under a low grill to toast for 5 minutes (watching carefully so they don't burn).
- You can always do a big batch of the nuts for a fabulous, protein rich snack (store in an airtight jar in the fridge but be careful - they are soooo moorish).
Syrup
- In a high powered blender place the strawberries and the syrup. Blend for 10 seconds to make a syrup and pour into the serving glasses. If using a Thermomix speed 8, 10 seconds.
Smoothie
- Without washing the blender, add the frozen strawberries, cauliflower, coconut water, yoghurt, vanilla and protein powder. Blend well until smooth and creamy. If using a Thermomix speed 9, 30 secs.
- Tilt the serving glass so the syrup coats the sides. Place the cut strawberries on the sides of the glass and carefully pour in the creamy smoothie touching the sides three times to create the streaky finish.
Serve
- With the roughly chopped nuts piled on top.
Store
- Leftovers can be frozen into little cups or ice-block moulds for a fast, healthy snack another day.
Notes
Shortcut
If you aren't bothered about how it looks, just add all of the ingredients for both the syrup and smoothie into the blender at once.Vegan
Choose the vegan protein blend and coconut yoghurt.Make ice-blocks
My kids love this blend frozen into ice-blocks. These are super convenient for a nutritious snack on the go.Enjoy (I know you will :)). Post your comments and any questions in the comments below.
Kimchi Fried Brown Rice
This Kimchi Fried Brown Rice is such a versatile meal that my family loves for dinner, breakfast or as leftovers (cold) in their school lunches…aka fried rice salad. It’s so quick and easy to make and the addition of the kim chi balances out the flavours beautifully.
Sometimes, if I’m cooking brown rice, say for a curry for dinner, I’ll cook extra so I can make this for breakfast the next morning.
Health benefits
Did you know that half of the daily calories for half of the world’s population come from rice? For many of the oldest living people in the world, brown rice is a dietary staple being a low allergenic, high fibre and nutrient rich food. Combined with protein from the eggs and more plant based goodness from the veggies and kim chi, this is one nourishing meal.
Ingredients
The base includes cooked brown rice, kimchi, and a mix of vegetables such as carrots, broccoli, and snow peas, with a delicious sauce made from tamari (soy sauce), sesame oil, and a touch of natural sweetness from coconut sugar or rapadura. Bacon and eggs add protein, but the recipe offers vegetarian and vegan alternatives.
How to make this kimchi fried rice
Start by scrambling the eggs in a wok or pan with a little oil and set them aside. Sauté diced bacon and red onion until the onion softens, then add garlic, ginger, carrots, and broccoli. Stir-fry the mixture briefly before incorporating the cooked rice, sauce, scrambled egg, and snow peas. Continue to stir-fry until the vegetables are tender and everything is well combined. Serve with a generous dollop of kimchi and a sprinkle of spring onions for garnish.
Serving suggestions and how to store
Serve immediately as a main meal or side dish. Leftovers can be stored in an airtight container in the fridge for up to three days or frozen for later. Reheat in a pan or microwave until heated through.
Vary this kimchi fried brown rice to suit your dietary needs
For a vegetarian option, omit the bacon and substitute with tempeh or firm tofu. Egg-free? Use soft tofu as a scramble substitute. To make it vegan, combine both the vegetarian and egg-free variations. If you need to avoid onion and garlic, replace them with fennel and chilli for a different flavour profile. Adjust oils and sweeteners for nut, sesame, or fructose-free preferences. Tailor the recipe with your favourite proteins or vegetables to suit your taste and dietary goals.
For more delicious, easy to make healthy meals, click HERE.

Kimchi Fried Brown Rice
Fried Rice is such a quick and easy meal that my whole family loves. The kimchi adds a really nice acidity and is great for supporting digestive health.
Servings: 4
Ingredients
- 1 tbsp peanut oil or olive oil
- 3 egg/s -beaten
- 2 rasher/s bacon -diced (see vegetarian variation below)
- 1 red onion/s -peeled and finely diced
- 2 clove/s garlic -crushed
- 3 cm ginger root -finely grated
- 2 carrot/s -peeled and diced
- ½ broccoli -cut into small pieces
- 3 cup/s leftover cooked brown rice -which works out approx. 1 cup raw
- 12 snow peas -trimmed and sliced
- 4 tbsp kim chi
- 2 spring onion/s -white part sliced thinly
Sauce (mix these 3 ingredients together)
- 2 tbsp tamari -or coconut aminos
- 1 tbsp sesame oil
- 1 tbsp coconut sugar or rapadura
Instructions
- In a non-stick or cast iron pan or wok, add a splash of oil. Heat over a low to moderate heat and add your eggs, stirring to scramble them. Set aside once firm.
- Add your bacon and red onion to the pan and stir until the onion just starts to soften. Add the garlic, ginger, carrots and broccoli and stir-fry for another 2 mins.
- Next add the rice, sauce, egg and snow peas. Stir-fry for another 5 minutes until the vegetables start to soften.
- Divide between four bowls and top each with a tablespoon of kim chi.
- Garnish with spring onions and enjoy.
Store
- Store in an airtight container in the fridge.
- Can also be frozen.
Notes
Vegetarian
Omit the bacon. You might like to add in slices of tempeh or firm tofu.Egg-free
Replace the eggs with ½ cup soft tofu and scramble this as you do the eggs.Vegan
Combine the vegetarian and egg-free variations.Onion and garlic-free
Replace the onion, garlic and sprinkle onion with a small bulb of fennel, finely diced and a small red chilli.Nut and sesame-free
Replace the peanut oil and sesame oil with macadamia nut oil or ghee.Fructose friendly
Replace the coconut sugar with rice malt or stevia.Tailor made
Change up the protein and/or vegetables to suit your taste or dietary goals.I'd love to hear how you enjoy this delicious, family friendly meal. Let me know, post a comment and rate the recipe below!
gluten-free sodium flavor
Asian Mushroom Stir-fry
One thing I’ve learned in my 40 something years is that life is fluid and sometimes you have to surrender to those times that go a little pear shaped. I like to be organised and efficient in my day to day life but the curve balls (which are just part of life and being a parent) leave me floundering occasionally. This is one of those weeks where I’m on the back foot – and this Asian Mushroom Stir-fry recipe was born.
Last week my hubby was away all week, my daughter had a heap of singing competitions/ auditions. Then on the weekend (where I’d usually regroup) we had our nephew stay which was so lovely. But it left me behind the eight ball ahead of another working week which began with two days watching my son’s district athletic carnival.
Busy times like this really highlight how much organisation is the key to eating well. They also make me really glad I have quick, healthy meals like this Asian Mushroom Stir-fry to turn to.
Without a well stocked fridge / pantry and recipes like this, I’m not sure how I’d have got by this last week. For heaps more 30 minute meal inspo, click HERE. I also often turn to slow cooked meals (with minimal prep time) when I’m pushed for time, click HERE for recipes.
Health benefits
Asian mushrooms are such a wonderful immune supportive food and a great source of Vitamin D too. This simple stir-fry not only tastes delicious, but truly is food as medicine.
Ingredients
This stir-fry features a mix of enoki, oyster, and shiitake mushrooms combined with fresh garlic, carrots, spring onions, and snow peas. The simple sauce, made with tamari (soy sauce), mirin, and sesame oil, ties the dish together and adds extra flavour.
How to make this Asian mushroom stir-fry
Start by whisking together the sauce ingredients in a small bowl. Beat the eggs with a tablespoon of the sauce and cook into an omelette, then set it aside and slice into strips. Heat your pan or wok and stir-fry the mushrooms, garlic, carrots, and spring onions in your choice of cooking fat. If the vegetables start to stick, add a splash of water or stock. Once the mushrooms begin to wilt, stir in the remaining sauce, snow peas, and sliced omelette, cooking until everything is tender-crisp.
Serving suggestions and how to store
Serve the stir-fry as a side dish, or pair it with steamed rice or noodles for a complete meal. Add a sprinkle of chili flakes if you like spice. Store leftovers in an airtight container in the fridge and reheat in a pan or wok with a splash of broth or water.
Vary this Asian mushroom stir-fry to suit your needs
For an egg-free and vegan option, substitute the eggs with tofu or tempeh slices and include cashews for additional protein. Replace tamari with coconut aminos for a soy-free version. If garlic isn’t suitable, use grated ginger instead. To make it onion-free, omit the spring onions and replace them with a small, finely diced chili for extra flavor. For a sesame-free dish, omit the sesame seeds and swap the sesame oil with macadamia nut oil. Lastly, if you’re avoiding coconut, cook the vegetables in butter or ghee instead.

Asian Mushroom Stir-fry
This healthy Asian Mushroom Stir-fry is prep to table in less than 30 minutes so it makes for delicious, nourishing fast family food.
Servings: 4
Ingredients
- 3 egg/s -beaten
- 3 tbsp butter, ghee or coconut oil
- 350 g mushrooms -shiitake, oyster, enoki are my favourites
- 2 clove/s garlic -sliced
- 2 carrot/s -peeled & sliced
- 6-8 spring onion/s -white part, trimmed and cut into 3cm lengths
- 10-12 snow peas -halved
- 1 tbsp black sesame seeds -optional
Sauce
- 60 ml tamari (¼ cup) -or coconut aminos
- 1 tbsp mirin
- 1 tsp sesame oil
Instructions
- Start with making your sauce by combining all of the ingredients together in a small bowl.
- Beat the eggs in a small jug with one tablespoon of the sauce.
- Heat a non-stick or cast iron pan or wok over a moderate heat and add the egg. Cook into a rough omelette and once firm, set aside and slice into strips.
- Now heat the coconut oil or butter in the pan (moderate to high heat) and add the mushrooms, garlic, carrots and spring onions stirring well. If the veggies start to stick, add a little splash of water or stock.
- After a couple of mins, just as the mushrooms start to wilt, add the remaining sauce, snow peas and sliced omelette.
- Cook for a few more minutes stirring often.
Serve
- Sprinkle with the optional sesame seeds and serve as a side dish or with rice or noodles as a main meal.
- You can also serve with chilli flakes if you enjoy a little heat.
Make ahead
- Re-heat by stir-frying in a wok or pan with a splash of broth or water.
Store
- Store in an airtight container in the fridge.
Notes
Egg-free and vegan
Replace the egg with slices of tofu and tempeh and serve with rice or add in cashew nuts to form a complete protein. Choose coconut oil as your frying oil.Soy-free
Choose the coconut or liquid aminos instead of the tamari.Garlic-free
Replace the garlic with a tablespoon grated ginger.Onion-free
Omit the spring onion. Replace with a finely diced small chilli if you like.Sesame-free
Omit the sesame seeds and replace the sesame oil with macadamia nut oil.Coconut-free
Cook the veggies in butter or ghee.Gluten-free
True mirin should be gluten-free (as it's made form fermented rice wine) but please clarify this with the miring you buy.I hope you love this fabulous mid-week meal. Post your comments and questions below.
teaspoon
Red Cabbage Dukkah Slaw (or braise)
This Red Cabbage Dukkah Slaw (or braise) is a recipe I often turn to in the cooler months. I think it is the perfect accompaniment to the heavy stews, slow cooked casseroles and roasts that we often enjoy at this time of the year.
For those of you who have been following me for a while now, you’ll know that I believe that dietary variety is really important for maintaining good health. Eating lots of different foods not only keeps cooking and eating interesting, but it’s also essential to ensure that our nutritional requirements are met and also that our gut microbiome thrives (more on why variety is so important for gut health here).
Red cabbage is in season right now (so nutritionally at it’s peak) and it’s one vegetable that many people struggle knowing how to prepare it into a delicious dish. So in the name of expanding upon the variety of foods you eat in your household, here is a delicious, easy to make recipe that you can enjoy as a fresh slaw (I generally have a raw plant based component to every meal I eat) or you can braise the cabbage and enjoy it as a warm side.
Health benefits
Red cabbage is a powerhouse of micronutrients (vitamins and minerals) and protective antioxidants such as anthocyanins and indoles (studies indicate they are important to protect against various cancers).
The dukkah spices are wonderful warming antioxidants and also have anti inflammatory properties. The nuts and seeds add a little protein and good fats.
For lots more sides and salad inspo, take a look at my hugely popular ebook ˜Well Nourished Sides and Salads’– where vegetables become the hero of the dish! It’s great value at just $9.95, click HERE to take a look.
Ingredients
This dish features finely shredded red cabbage tossed with a zesty dressing made from lime juice, olive oil, and currants. It’s topped with crumbled feta, fresh parsley, and a sprinkle of dukkah to add a flavorful crunch.
How to make this Red Cabbage Dukkah Slaw (or braise)
To prepare this red cabbage slaw, combine currants, lime juice, olive oil, salt, and pepper in a small bowl and let the mixture rest for at least 10 minutes. Toss the shredded red cabbage with the dressing, then finish with crumbled feta, chopped parsley, and dukkah. For the braised version, sauté the shredded cabbage in olive oil over low to medium heat until softened, then mix with the dressing and garnish with the same toppings.
Serving suggestions and how to store
This slaw pairs well with grilled meats, fish, or falafel and can also be enjoyed on its own as a light, flavorful meal. Store any leftovers in an airtight container in the fridge for up to two days. The slaw version is best enjoyed fresh, while the braised version can be reheated and served warm.
Vary this Red Cabbage Dukkah Slaw (or braise) to suit
To make this Red Cabbage Dukkah Slaw (or braise) nut-free, use a nut-free dukkah or toasted sunflower seeds instead. For a fructose-friendly option, simply omit the currants. If you need it to be dairy-free or vegan, skip the feta or replace it with vegan cheese or savory cashew cream. To make it sesame-free, ensure your dukkah mix doesn’t contain sesame seeds by using a suitable store-bought version or preparing your own.
For more delicious, easy to make healthy sides and salad recipes, click HERE

Red Cabbage Dukkah Slaw (or braise)
This Red Cabbage Dukkah Slaw (or braise) is a delicious recipe that you can enjoy as a fresh slaw or you can braise the cabbage & enjoy this as a warm side. It's two recipes in one!
Servings: 4
Ingredients
- 40 g currants - (¼ cup)
- 1 lime/s - juice and zest
- 60 ml extra virgin olive oil - extra virgin (¼ cup)
- ¼ tsp sea salt
- ground black pepper - to taste
- ½ red cabbage - finely shredded
- 40 g feta cheese - goat or cow feta, crumbled (¼ cup)
- ¼ bunch/s fresh parsley leaves - roughly chopped
- 2 tbsp dukkah - (recipe linked below or a good store bought dukkah)
Instructions
Slaw
- Combine the currants, lime, olive oil and seasoning in a small bowl and allow to rest for 10 minutes (or longer).
- Shred the red cabbage and then toss through the dressing.
- Top with the feta, parsley and dukkah.
Braise
- Combine the currants, lime and olive oil in a small bowl with a good pinch of sea salt and allow to rest for 10 minutes (or longer).
- Shred the red cabbage.
- Heat a drizzle of olive oil in a pan over a low to moderate heat. Add the cabbage and wilt it whilst stirring often. Try not to brown it, just heat it gently until it has softened (approx. 10 minutes).
- Toss through the dressing.
- Top with the feta, parsley and dukkah.
- Enjoy warm.
Store
- Store in an airtight container in the fridge.
Notes
My home made dukkah recipe HERE.
Nut-free
Make a nut-free dukkah or replace with toasted sunflower seeds.Fructose friendly
Omit the currants.Dairy-free and vegan
Omit the cheese (you can replace with a vegan cheese or the savoury version of my cashew cream).Sesame-free
Ensure there are no sesame seeds in the dukkah mix (you may need to make your own, recipe here).I hope you add this recipe to your repertoire. If you try it, I'd love for you to post a comment.
Chocolate Maple Macadamia Slice
This healthy Chocolate Maple Macadamia Slice is a delicious and easy treat that perfectly balances crunchy, sweet macadamias with a fudgy chocolate base. Easy to make and packed with wholesome ingredients, it’s perfect for satisfying your sweet tooth naturally.
One of my most favourite spices is cardamon. I love it’s flavour in curries, but also and especially in desserts. I think cardamon and chocolate is a flavour match made in heaven. Combined with the maple roasted macadamia nuts, this Chocolate Slice has become one of my favourite treats. If you’re not a fan of the flavour of cardamon, this is also delicious without…your call!
Health benefits
Cardamon has been used empirically in Ayurvedic medicine for treating mouth ulcers, digestive problems such as nausea, heartburn, bloating and constipation and also to support mood. It’s also a great antioxidant, anti-inflammatory and antibacterial. The almond meal, macadamia nuts and coconut oil are fabulous sources of protein and fat that makes this a supremely satisfying treat.
Ingredients
This slice has a base of almond meal, desiccated or shredded coconut, and cacao, with coconut oil and sweetened with maple syrup. Maple-roasted macadamias add crunch and a caramelised flavour.
How to make this chocolate maple macadamia slice
Begin by toasting the macadamias in the oven with a coating of maple syrup until golden. Allow them to cool while mixing the coconut oil, sweetener, and cardamom in a food processor. Add the almond meal, coconut, and cacao powder to form a glossy mixture. Fold in the cooled, maple-coated macadamias, then press the mixture firmly into a lined slice tin. Freeze for 30 minutes until set, then cut into squares.
Serving suggestions and how to store
Serve chilled straight from the freezer for a firm texture or let it soften slightly for a fudgier bite. Store the slice in an airtight container in the freezer to maintain its texture and freshness.
Vary this Chocolate Maple Macadamia Slice to suit
For a fructose-friendly version, replace the pure maple syrup with rice malt syrup. To make it nut-free, substitute macadamias with pumpkin seeds and almond meal with ground, toasted sunflower seeds. For a vegan option, ensure your sweetener is either rice malt or maple syrup.
For more delicious, easy to make healthy sweet recipes, click HERE.
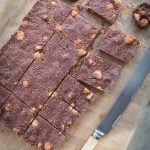
Chocolate, Maple Macadamia Slice
This healthy Chocolate, Maple Macadamia Slice is a delicious and easy sweet treat and is perfect for freezer storage!
Servings: 18 slices
Ingredients
- 130 g macadamia nuts (1 cup)
- 1 tbsp maple syrup
- 100 g coconut oil (½ cup) melted
- 85 g rice malt syrup, honey or maple syrup (¼ cup)
- 1 tsp ground cardamom (optional but recommended)
- 150 g almond meal (1½ cups)
- 25 g desiccated coconut (½ cup) or shredded
- 30 g cacao powder (¼ cup) unsweetened Dutch process or raw
Instructions
- Preheat the oven to 180℃/350℉.
- Place the macadamia nuts on a tray lined with baking paper and toss in the maple syrup.
- Pop into the oven for 6-10 minutes to toast them. They should be golden brown but please take care not to over brown them as they can go a bit bitter.
- Once toasted removed from the oven and allow to cool fully (the maple sets into a nice crust once cooled).
- In a food processor or Thermomix combine the coconut oil, sweetener and cardamon. Mix to combine, Thermomix 5 seconds speed 4.
- Add the almond meal, coconut and cacao and mix to combine. If using a Thermomix 10 seconds, speed 4.
- The mixture should be glossy (slightly oily) and hold together when pinched. If it seems very wet /oily you may need to add a tablespoon more almond meal.
- Fold in the maple roasted macadamia nuts and use the baking paper they were toasted on to line a small slice tin (I used one approx. 18 x 26cm).
- Press the mixture into a slice tin very firmly with wet hands and pop into the freezer for 30 minutes to set.
Store
- Cut into squares and store in an airtight container in the freezer.
Notes
Fructose friendly
Replace the maple syrup with rice malt syrup.Nut-free
Replace the macadamia nuts with pumpkin seeds and the almond meal with ground, toasted sunflower seeds.Vegan
Chose rice malt or maple syrup as your sweetener.I'd love to hear how you like this combination of flavours. Let me know, leave a comment and rate the recipe too.
fridge dark chocolate sprinkle gluten-free blender blend flour stir sea salt
Easy Lamb Harira
Lamb Harira is a hearty, flavour-packed soup-stew that’s especially nourishing during the colder months. With warming herbs and spices, it’s comfort in a bowl, and the best part is how simple it is to prepare. Just 15 minutes of hands-on time in one casserole dish, then let the oven do the work while it slowly braises into something rich and super satisfying. If you prefer, this recipe is also easily adapted for the slow cooker, making it as fuss-free as it is delicious.
Health benefits
This is one nutritionally balanced meal – lots of plant based fibre and available, gut healing protein thanks to the lamb (on the bone) and broth. The addition of the spices further supports the digestive and immune systems, with a boost of liver supporting greens (kale and parsley or coriander) to finish it off.
Ingredients
Key ingredients include lamb shanks, a blend of lentils, kale, and an aromatic mix of cumin, turmeric, cinnamon, and ginger. Tomato passata and chicken stock or bone broth create a rich base for the dish.
How to make this easy lamb harira
Start by pre-heating your oven and combining all the ingredients (except the kale and lemon) in a large ovenproof dish. Add the lamb shanks and cook in a low oven for several hours until the lamb is tender and falling off the bone. Stir in the kale at the end, and let it wilt before serving with a squeeze of lemon and fresh coriander (cilantro) or parsley.
Serving suggestions and how to store
Serve this hearty stew in a big bowl with a wedge of lemon and a sprinkle of fresh herbs. Leftovers can be stored in an airtight container in the fridge or freezer. You may need to add more liquid when reheating, as the lentils will continue to absorb moisture.
Vary this lamb harira to suit your dietary needs
For a vegetarian/vegan version, replace the lamb with mushrooms or chickpeas and use vegetable stock instead of bone broth. To make this onion and garlic-free, substitute with fennel and add extra cumin and chilli powder for flavour. Make it spicy by serving with chilli flakes for an extra kick.
Take a look at the variations (below the main recipe) for suggestions to alter the recipe to suit your specific dietary requirements. There are also instructions to make it vegetarian too!
For more delicious, easy to make, healthy slow cooker recipes, click HERE.

Lamb Harira
This Easy Lamb Harira is a rich and delicious Moroccan-inspired stew. It's a one-pot wonder made with tender lamb shanks, lentils, and a warming blend of spices. This dish is slow-cooked to perfection, making it a hearty and nourishing option for the whole family.
Servings: 6
Ingredients
- 1 onion/s (large) diced
- 4 clove/s garlic -chopped
- 2 carrot/s (large) diced
- 2 stick/s celery -diced
- 1 sweet potato/s -peeled and diced
- 680 g tomato passata (puree)
- 1 tsp ground cumin
- 1 tsp ground turmeric
- 1 tsp ground cinnamon
- ½ tsp ground nutmeg
- ½ tsp ground ginger
- 200 g puy (French) lentils (1 cup)
- 100 g split red lentils (½ cup)
- 1 tsp sea salt - or to taste
- ground black pepper
- 1 ltr chicken broth or stock
- 2 lamb shanks
- 1 bunch/s kale -leaves torn off the stems (stems diced)
- ½ bunch/s fresh coriander leaves -or flat leaf parsley leaves, to serve
- 1 lemon/s -cut into quarters, to serve
Instructions
- Pre-heat the oven to 250℃/480℉ (fan-forced).
- In a large oven proof casserole dish with lid, add all of the ingredients except the shanks and kale (add the stems though).
- Mix well to combine. Add the shanks and submerge them in the liquid.
- Cover the dish (with a lid or foil) and put in the oven, turning the temperature down to 150℃/300℉ immediately.
- Cook for 3-4 hours or until the lamb falls off the bone.
- Remove the dish from the oven, stir in the kale, replace the lid and allow to sit for 5-10 minutes so the kale wilts.
Slow Cooker
- This can certainly cooked in a slow cooker. However, as the speed and temperature varies between the many brands of slow cookers, base the amount of liquid you add and the cook time on a similar style of recipe in the guide book for your specific slow cooker. The general rule of thumb is to halve the liquid and double the cook time, but understanding your own slow cooker is the best guide.
Serve
- With a wedge of lemon and garnished with coriander or parsley.
Make-ahead
- Re-heat in a pot over a low heat until just hot.
Store
- If you are storing or freezing it, strip the meat from the bones of the shanks and discard the bones (or freeze them to re-use to make a bone broth - there will still be some goodness remaining).
- Store in an airtight container in the fridge or freezer.
- You may need to add more liquid (water or stock) when reheating.
Grab Bag Formula Method
- If you've done the **Grab Bag Formula Short Course, this is the method to convert this recipe...
- Place all your prepared ingredients (except the kale, coriander and lemon) into the Grab Bag.
- Carefully seal your Grab Bag. I close most of the seal then press out as much air as I can then complete the seal. Place the Grab Bag in the freezer.
- To cook, remove the Grab Bag from the freezer, place on a baking tray and thaw in the fridge overnight.
- Tip the contents of the Grab Bag into a large oven proof dish (with a tight fitting lid) or Dutch oven. It may still be a bit frozen; that’s okay.
- Place the lid on the pot, set your oven to 150°C/300°F (fan-forced) and cook for 4-5 hours.
- If there is a lot of liquid, remove the lid and cook for a further 20-30 minutes to reduce and thicken the sauce.
- Remove the dish from the oven, stir in the kale, replace the lid and allow to sit for 5-10 minutes so the kale wilts. Taste and adjust the seasoning and spiciness.
- ** The Grab Bag Formula Short Course is available to purchase for just AU$46 HERE.ORIf you are a full-access Well Nourished Family member, the course is included in your membership and you can access in the members portal - HERE.
Notes
Vegetarian and Vegan Harira
Replace the lamb with 250grams (approx. 2 cups) diced mushrooms (or chickpeas) and the bone broth with vegetable stock. Cook for 2-3 hours.Onion and Garlic-free
Replace both with finely diced fennel, a extra teaspoon of cumin and chilli powder to taste.Make it spicy
You can serve this with chilli flakes - we always do.Leftovers
Leftovers are fabulous the next day and this is a great dish to make ahead or freeze (in an airtight container). My kids love it in a thermos for their school lunch.I'd love to hear how you and your family enjoy this delicious, super nourishing meal. Let me know what you think- post a comment below and rate this recipe!
Kale Pesto Penne
Each week I try to rotate the veggies I buy because I really do believe that variety is such a great way to ensure our nutritional needs are met. I also make sure a good part of what I buy is green and leafy. Leafy green vegetables have more nutrients per calorie than any other food, and this Kale Pesto Penne is one of my favourite ways to pack them in. Forget fancy and expensive ‘super’ foods – leafy greens like kale are as nourishing as it gets.
Kale isn’t one of my family’s favourite greens, but that just makes me more determined to find a delicious way for them to enjoy it, and this pasta hits the mark. As it’s in season right now in the southern hemisphere, it’s a great time to try this nourishing meal.
Health benefits
Kale’s high level of nutrients (both vitamins and minerals) coupled with many potent, immune enhancing and anti-inflammatory phyto (plant) chemicals, results in much-needed virus protection at this time of year. I believe consuming greens daily during winter (when they are in season), is a key factor in preventing colds and flu. Nature, as always, provides.
The combination of the quinoa and rice in the pasta along with the almonds forms a complete vegetarian protein too making this a nutritionally balanced, vegetarian meal.
Ingredients
This kale pesto pasta features fresh kale, cloves garlic, parmesan cheese, almonds, basil, lemon, olive oil, and rice quinoa penne pasta, creating a dish that’s both delicious and nutritious.
How to make this kale pesto penne
Start by separating the kale leaves from the stems and chopping the stems finely. Boil the stems until tender and set aside. Cook the penne pasta in a pot of boiling water until al dente. Prepare the pesto by blending garlic, parmesan, toasted almonds, basil, cooked kale stems, lemon zest and juice, and olive oil in a food processor until it forms a coarse paste. Sauté the kale leaves in olive oil and water until just wilted, then toss with the cooked pasta, pesto, and remaining toasted almonds.
Serving suggestions and how to store
Serve this dish warm, garnished with freshly grated parmesan or a sprinkle of crushed almonds for added texture. It pairs beautifully with a side of mixed greens or a tomato salad. Store leftovers in an airtight container in the fridge for up to three days and reheat gently on the stove.
Vary this kale pesto penne to suit your dietary needs
For a nut-free option, substitute the almonds with toasted sunflower seeds. You can also sub the almonds with walnuts or pine nuts if you prefer. To make the dish gluten-free, use your favourite gluten-free penne pasta. For a dairy-free or vegan variation, replace the parmesan with nutritional yeast and sea salt. Enhance the dish with additional vegetables like cherry tomatoes, broccoli, or sautéed mushrooms. If desired, add cooked chicken or tuna for extra protein, though this will make the dish non-vegetarian.
For more delicious, easy to make healthy pasta recipes, click HERE.

Kale Pesto Penne
This dish I developed out of wanting to include the nourishing stems of the kale in a meal. I often save them to add to bone broth but I wanted another option... and so this delicious, nutritious pasta was born.
Servings: 4
Ingredients
- 5 stem/s kale -washed well
- 2 clove/s garlic -peeled
- 50 g parmesan cheese (approx.)
- 140 g raw almonds (1 cup) toasted
- ¼ bunch/s fresh basil leaves
- 1 lemon/s (small) juice and zest
- 60 ml extra virgin olive oil (¼ cup) -extra virgin
- Sea salt and freshly ground black pepper -to taste
- 250 g rice quinoa penne pasta
- 30 ml extra virgin olive oil -(2 tbsp) plus 1 tbsp water (extra)
Instructions
- Start with stripping the leaves off the kale stems, tearing them into small pieces and finely chopping the remaining kale stems.
- Bring 2 cups of water to the boil in a large pot and boil the chopped stems (not the leaves) for 5 minutes (or until they have softened). Strain and set aside.
- Refill the pot with water and bring to the boil. Once boiling, cook your penne until al dente.
- Meanwhile make the pesto.
- In a food processor, chop the garlic. If using a Thermomix 5 sec, speed 7.
- Add the parmesan and process until finely grated. If using a Thermomix 10 sec, speed 7.
- Add half of the almonds and pulse until finely chopped. If using a Thermomix pulse approx. 3 times.
- Add the basil, cooked kale stems, lemon juice and zest, olive oil and pepper and pulse until it forms a course pesto. If using a Thermomix pulse approx. 3-4 times.
- Once the pasta is cooked, strain it and return the pan to a moderate heat. Add the extra 2 tablespoons olive oil and water and then add the kale leaves. Sauté stirring constantly until it is just wilted (but not browned).
- Once they are wilted, return the pasta, pesto, remaining toasted almonds to the pot and stir to combine over a low heat.
- Serve immediately.
Store
- Store in an airtight container in the fridge.
Notes
Nut-free
Substitute the almonds with toasted sunflower seeds.Gluten-free
Choose a gluten-free penne (I love rice and quinoa pasta).Dairy-free and vegan
Replace the parmesan with nutritional yeast and a good teaspoon of sea salt.Add in more veggies
I love to add in other vegetables sometimes too. A handful of cherry tomatoes, broccoli and sautéed mushrooms work really well, as does roasted sweet potato.Add chicken or tuna
To up the protein content of the meal (though no longer vegetarian) add in cooked chicken or a can of tuna.If your looking to convince your kids in the greens department...
Click HERE for loads of tips and recipe ideas.I'd love to hear how you like this simple pasta dish. It's super tasty and so nourishing - you can leave a comment or rate the recipe below.
Creamy Potato Apple Soup
Well, there’s a distinct change in the weather, even here in sunny Queensland, with a little bit of a chill in the air in the evenings and mornings. It’s the perfect time to bring out comforting recipes like this Creamy Potato Apple Soup. Autumn and winter are my favourite seasons here on the Gold Coast – the skies are blue, the days are dry and sunny, and the crisp air is far more comfortable for me than the sticky humidity of summer (now I’m sounding like my mother, ha ha).
Which brings me to this budget friendly, quick and easy to make, nourishing soup. It’s a little winter warmer to mark the change in season as I LOVE me a bowl of soup.
I actually developed this recipe recently to support a great community program by The Fruit Box called The One Box – where fresh produce is purchased directly from local markets and suppliers and distributed to families doing it tough. I worked with a list of the ingredients available in the box and I came up with four recipes (using at least four ingredients available in the box – depending on seasonal availability). The Fruit Box then print my recipes onto beautiful designed recipe cards and distribute with the box. So the families receiving the food boxes not only get a box full of nourishment, but some recipe inspiration to turn the goodies into a delicious, nourishing meal.
So for this recipe, the ingredients I chose from what was available were onion, celery, potato and milk…and this simple soup was born!
Health benefits
Potatoes and sweet potatoes provide a healthy dose of fiber, potassium, and vitamin C, supporting immune function. Apples add natural sweetness along with antioxidants, and the broth or stock contributes protien and essential minerals.
Ingredients
This soup includes basic ingredients like potatoes, sweet potatoes, Granny Smith apples, and celery, simmered in a broth or stock of your choice and finished with a touch of milk for creaminess.
How to make this creamy potato apple soup
In a pan, begin by sautéing onion, cloves garlic, and celery in butter or olive oil until soft and fragrant. Add diced potatoes, sweet potatoes, apples, and chicken broth or stock, then season with salt and pepper. Simmer until the vegetables are tender and falling apart. Let the soup cool slightly before blending with milk to achieve a smooth and creamy texture.
Serving suggestions and how to store
Serve this apple and potato soup warm with a slice of sourdough bread or a sprinkle of fresh herbs for garnish. It pairs wonderfully with a side salad for a complete meal. Store leftovers in an airtight container in the fridge for up to three days or freeze for up to a month. Reheat gently on the stove before serving.
Vary this creamy potato apple soup to suit your needs
For a dairy-free version, use olive oil and a nut-based milk. To make it vegetarian or vegan, choose vegetable stock and follow the dairy-free adjustments. If you’re avoiding onion, substitute it with finely chopped fennel. For a garlic-free variation, replace garlic with a pinch of cumin and cayenne pepper for a subtle, warming spice.

Creamy Potato Apple Soup
This is a delicious blend of carbohydrate by way of the vegetables and apple, coupled with protein from the broth and milk.
Servings: 4
Ingredients
- 30 g butter or olive oil
- 1 large onion/s -peeled and roughly diced
- 2 clove/s garlic -peeled and sliced
- 2 stick/s celery -cut into pieces
- 2 potato/s (medium) (approx. 300g) peeled and diced
- 1 sweet potato/s (small) (approx. 100g) peeled and diced
- 2 Granny Smith apple/s (small) (approx.100g) peeled and diced
- 370 ml chicken broth or stock (1½ cups) or vegetable stock
- Sea salt and freshly ground black pepper -to taste
- 60 ml milk (of choice) (¼ cup)
Instructions
- In a large pot add the butter or oil with the onion, garlic and celery. Sauté over a low to medium heat for 5 minutes or so until the onion starts to soften.
- Add the potatoes, sweet potato, apples and broth or stock. Season with salt and pepper and bring to a high simmer. Cook until the potato is soft and falls apart (when skewered with a knife or fork).
- Allow to cool a little, add the milk and blend with a stick blender or in blender or food processor until smooth and creamy.
Thermomix
- Chop the onion, garlic and celery 5 seconds speed 5.
- Add the butter or olive oil and cook 5 mins, 100, speed 1.
- Add the potatoes, sweet potatoes, apple and broth or stock.
- Cook 15 mins, speed spoon, 100.
- Remove the lid and allow to cool for 15 minutes. Add the milk and blend 30 seconds, speed 5-6 (take care to gradually increase the speed).
Store
- Store in an airtight container in the fridge or freezer.
Make-ahead
- Re-heat in a pot over a low heat until just hot.
Notes
Dairy-free
Choose olive oil and a nut milk.Vegetarian and vegan
Use vegetable stock and for vegan the dairy-free variations.Onion-free
Replace the onion with fennel, finely chopped and sautéed as above.Garlic-free
Replace the garlic with a pinch of cumin and cayenne pepper.I'd love to hear how you enjoyed this soup. You can post a comment below and let me know.
cream cheese boil
Chocolate Macadamia Anzac Biscuits
This year to mark Anzac day, I thought I’d share this ‘Next-level Anzac’ (thanks Nikki Fisher for the name suggestion). They are still packed full of goodness (with variations to suit those with food intolerance). But there’s something about adding macadamias and a chocolate drizzle that feels very indulgent! I present to you my Chocolate Macadamia Anzac Biscuits – three of my favourite flavours jammed into one delicious bikkie.
I’m obliged to post a warning – stopping at one may be tough!
Health benefits
By using wholemeal spelt flour and rolled oats, these biscuits offer more fibre and nutrients than standard versions. The addition of macadamia nuts provides healthy fats, while using rice malt syrup or honey cuts back on processed sugars. Plus, the homemade chocolate drizzle is free from artificial ingredients found in many store-bought toppings.
Ingredients
This recipe uses a combination of wholesome ingredients including oats, spelt flour, macadamias, and dark chocolate. You can swap in almond meal for a gluten-free version or adjust the sweeteners depending on your preferences, making it as versatile as it is delicious.
How to make chocolate macadamia Anzac biscuits
Start by melting the butter and sweetener of choice in a large pot, then add bicarb and mix well. Stir in the dry ingredients, and roll the mixture into balls and flatten slightly. Bake until golden, and while they cool, melt the chocolate and coconut oil to drizzle on top. For a shortcut, you can place a square of chocolate directly on the biscuits before baking. If you own a Thermomix, we’ve also included Thermomix instructions for this recipe.
Serving suggestions and how to store
Serve these biscuits as an afternoon treat or pack them in lunchboxes for a homemade snack. Store in an airtight container, and they freeze well for up to a month, making them perfect for batch baking.
Vary these chocolate macadamia Anzac biscuits to suit your needs
For gluten-free, swap oats for quinoa flakes and spelt for almond meal. To make them dairy-free, use coconut oil instead of butter, and opt for a dairy-free chocolate drizzle. Vegans can stick with rice malt syrup and choose dairy-free chocolate to enjoy this indulgent biscuit.
Take a look at the variations (below the main recipe) for suggestions to alter the recipe to suit many specific dietary requirements.

Chocolate Macadamia Anzac Biscuits
These chocolate macadamia Anzac biscuits are a twist on the classic Aussie favourite, combining the buttery, chewy goodness of traditional Anzacs with crunchy macadamias and a rich dark chocolate drizzle. Perfect with a cuppa or as a sweet treat, these bikkies will be a hit with the whole family.
Servings: 12 biscuits
Ingredients
- 100 g butter
- 85 g rice malt syrup or honey (¼ cup)
- ½ tsp bicarbonate of soda
- 2 tbsp coconut sugar or rapadura (this is optional if you need extra sweetness)
- 120 g wholemeal spelt flour (1 cup approx.) or almond meal
- 50 g desiccated coconut (½ cup approx.)
- 115 g rolled oats (1¼ cup approx.) see gluten-free below
- 60 g macadamia nuts (½ cup) chopped
Chocolate drizzle
- 50 g dark chocolate -broken into pieces
- 1 tbsp coconut oil
Instructions
- Preheat the oven to 180℃/350℉ (fan-forced)and line a large biscuit tray with baking paper.
- In a large pot, gently heat the butter and honey or rice syrup until melted. Remove from the heat. Add the bicarbonate of soda and mix very well.
- Add the rest of the ingredients to the pot, and mix until well combined. The mixture should feel wet and sticky but presses together.
- With wet hands roll the mixture into approximately golf sized balls and place well apart (they do spread) on a large biscuit tray. If the mixture feels a little dry, add a tablespoon of water to bring it together.
- Flatten very slightly with the back of a wet fork and bake until golden (approximately 10-20 minutes).
- The longer they are baked the crispier they become. So if you like a slightly chewy biscuit remove just as they start to brown. For a crunchy biscuit, leave a little longer. I also find the gluten-free version cooks quicker still.
- Whilst they are baking, melt the chocolate by bringing a small pot of water to the boil. Place the chocolate and coconut oil in a bowl and sit over the hot water, mixing until the chocolate is melted.
- If you're feeling lazy, you can break the chocolate on top of the biscuit before cooking (not as pretty, but yum none the less).
- When they are cooked, cool the bikkies on the tray (they will harden as they cool) and then drizzle over the melted chocolate.
Thermomix Method
- Melt the butter and syrup/honey, 1 minute, temp. 90, speed 3.
- Add the bicarb and mix 10 seconds, speed 3.
- Add the remaining ingredients and mix approx. 20 seconds, reverse, interval speed until combined.
- For the chocolate drizzle, you can grate the chocolate (20 sec, speed 5), add the oil and melt 1 min, temp 50, speed 3.
- Roll and bake as per above method.
Store
- These should be stored in an airtight container and they can also be frozen.
Notes
Gluten and grain-free
Replace the oats with quinoa flakes and spelt flour with almond meal. You may have to adjust the amounts so that the mixture is sticky and moist but able to be rolled into balls.Dairy-free
Replace the butter with coconut oil (but they do loose the classic buttery ANZAC flavour). They will also toughen as they cool (which is nice for a crunchy biscuit). Choose a dairy free chocolate or raw chocolate for the drizzle.Coconut-free
Replace the coconut with a heaped tablespoon of almond meal or more spelt.Fructose friendly
Choose rice malt syrup as your sweetener and omit the rapadura/ coconut sugar. Use 90% dark chocolate for the drizzle (or make your own raw chocolate).Vegan
Chose rice malt syrup as your sweetener and the dairy-free variation.Nut-free
This Anzac Biscuit recipe is divine, nourishing and nut-free. Perfect for the school lunchbox too. My ebook The Well Nourished Lunchbox is 100% nut-free and is full of inspo, click HERE to find out more.I'd love to hear what you think of these - they are my families new favourite treat. Post a comment below and better still 'rate' this recipe so more people decide to make it too.
Spiced Carrot Cake Chocolate Truffles
These Spiced Carrot Cake Truffles are the perfect bite-sized treats. Combining the flavours of spiced carrot cake with a chocolate coating, they’re a healthy treat for any occasion. With no baking required, these truffles are super easy to make and so delicious.
This healthy chocolate truffle recipe is one for the Easter Bunny! All of my taste testers (including my two little blondies) are in love with these little balls of deliciousness, so I reckon the big bunny will be impressed too.
My hubby said I should call them healthy Jaffas (kids couldn’t confer as they’ve not tried them, but Jaffas are now on their radar since stories of him getting up to mischief with them at the movies – hhhmm).
They look a bit fancy but they really couldn’t be easier to make (even I found them simple to put together and I hate too much fuss). Like most of my recipes, they are date and dried fruit-free (as well as gluten-free, grain-free and with options for nut and dairy-free). I’ve also included a Thermomix method.
Health benefits
These healthy carrot cake truffles are packed with nourishing ingredients. Carrots provide a natural sweetness along with beta-carotene for healthy skin and eyes. Almond meal and walnuts contribute protein and heart-healthy fats, while dark chocolate offers antioxidants and a hint of sweetness.
Ingredients
This recipe features simple and wholesome ingredients like grated carrots, almond meal, walnuts, vanilla extract and orange zest for the filling. The chocolate coating is made with dark chocolate and coconut oil for a smooth, rich finish.
How to make these carrot cake truffles
Start by grating the carrots finely and combining them with almond meal, sweetener, spices, orange zest, and coconut oil. Fold in the chopped walnuts, roll the mixture into balls, and freeze until firm. Coat the chilled carrot cake balls in melted dark chocolate and let them set in the fridge. Enjoy the truffles as they are, or drizzle extra chocolate on top.
Serving suggestions and how to store
Serve these truffles as a dessert or snack alongside a cup of tea or coffee. They also make a great addition to a Easter or festive dessert platter. You could even insert a pop stick into the carrot cake balls and make them into cake pops too. Store them in the fridge for up to three days or freeze them for a couple of weeks to enjoy later.
Vary these carrot cake truffles to suit your dietary needs
For a dairy-free option, use dairy-free chocolate or make raw chocolate for the coating. To make them nut-free, substitute almond meal with ground sunflower seeds and replace walnuts with whole sunflower seeds. If you’re avoiding coconut, use ghee or butter instead of coconut oil. For a fructose-friendly version, opt for rice malt syrup as the sweetener and for a vegan version ensure your chocolate is vegan (and use rice malt or maple for the sweetener).

Spiced Carrot Cake Chocolate Truffle
These delicious truffles have a beautiful flavour - I think the carrot, cinnamon, orange and chocolate is a divine combination.
Servings: 20 truffles
Ingredients
Raw carrot cake filling
- 150 g carrot/s -peeled and chopped into pieces
- 165 g almond meal (1½ cups)
- 85 g rice malt syrup, honey or maple syrup (¼ cup)
- 1½ tbsp ground cinnamon
- 1 tsp vanilla -powder, extract or essence
- 1 orange/s -zest (just the orange part, no bitter white pith). You can alternatively use one drop of wild orange essential oil (this adds a gorgeous flavour)
- 2 tbsp coconut oil -melted
- 75 g walnuts (¼ cup) chopped
Chocolate coating
- 200 g dark chocolate -70-85% cacao, broken into pieces
- 1 tbsp coconut oil
Instructions
Raw carrot cake filling
- Place the carrot in a food processor and finely grate (if grating by hand you need to use the absolute finest side of the grater). If using a Thermomix 10 seconds, speed 5.
- Add the almond meal, sweetener, cinnamon, vanilla, orange zest (or oil) and coconut oil and mix until well combined. If using a Thermomix 10 seconds, reverse speed 3.
- Fold in the walnuts. If using a Thermomix 5 seconds, reverse speed 2.
- Roll into balls and place on a tray lined with a baking sheet. If the mixture is too wet to roll into balls, either add a little more almond meal or chill in the fridge to firm. It is a moist mixture (not sticky), but should be able to be formed into small balls (approx. 20).
- Place in the freezer for 30 minutes or until firm.
Chocolate coating
- To make the chocolate coating, bring a small amount of water to boil in a small pot, then turn off the heat. Place a bowl over it and add half the chocolate. Stir to melt then add the coconut oil.
- Add the remaining chocolate and stir until completely melted.
Assemble
- Remove the carrot balls from the freezer.
- To assemble the truffles, use two forks to toss the carrot balls in the melted chocolate until coated and place back on the lined tray.
- Once they are all coated, pop the tray into the fridge for 5 minutes to set. If you'd like, you can drizzle any remaining chocolate across the truffles (as pictured).
Store
- In the fridge for up to 3 days or freeze for a couple of weeks.
Notes
Dairy-free
Make raw chocolate to coat or use a dairy-free chocolate.Nut-free
Sub the almond meal with sunflower seeds, toasted and ground to a meal. Sub the walnuts with whole sunflower seeds.Coconut-free
Replace the coconut oil with ghee or butter.Fructose-friendly and vegan
Choose rice malt as your sweetener. Make sure the chocolate is vegan friendly too.I really hope you LOVE these delicious truffles. To help my recipes to reach more people and support me on my mission to inspire a healthier world, please star rate this (or any other recipe) or leave a comment. It will be very much appreciated. G x
instructions nuts tablespoons dip white chocolate flavors
Smashed Potato Vegetable Bake
This smashed potato vegetable bake is a deliciously simple recipe perfect for any occasion. With crispy potatoes, roasted carrots, and prosciutto, this dish is is perfect to serve as a side or main.
I originally developed this Smashed Potato Vegetable Bake recipe for WellBeing’s EatWell Magazine – a simple, flavoursome take on meat and three veg (with more of an emphasis on veggies). Trust me, there’s nothing bland about these carrots, peas and crunchy potatoes.
For some reason when I think of meat and three veg I think back to my days living in Ireland and visiting one of my hubby’s distant aunts who would always serve up meat and three veggies for lunch or dinner when we visited. The veg part was always mashed swede (turnip), mashed potato and carrots or peas. I was a pescatarian back then which used to throw her into such a spin (but I was happy and grateful for the veggies which were always well seasoned and slathered in butter, just the way I like them).
I love to make this one tray side dish when I’m entertaining a crowd, it’s a bit more interesting than simple roast spuds.
Health benefits
Packed with potassium-rich potatoes and vitamin A-loaded carrots, this bake supports healthy digestion and immunity. Peas add a boost of plant-based protein, while olive oil provides healthy fats. With variations for different diets, it’s a nutritious and adaptable choice for any table.
Ingredients
This dish features simple, wholesome ingredients like Kipfler potatoes, carrots, rosemary, garlic, prosciutto, and peas. Optional sour cream or crème fraîche adds a creamy finishing touch, but there are easy substitutions for dietary preferences, like cashew cream for a dairy-free option.
How to make this Smashed Potato Vegetable Bake
Start by boiling the potatoes in a pot until just tender, then drain and crush them slightly on a baking tray with olive oil. Add the carrots, garlic, and rosemary, then season and bake until golden. Add the prosciutto and bake until crispy. Finish by scattering defrosted peas over the top and serving with optional sour cream or crème fraîche.
Serving suggestions and how to store
Serve this dish immediately as a side or main course. It pairs wonderfully with a fresh salad or roasted chicken. To make ahead, reheat in a low oven until warmed through. Leftovers can be stored in an airtight container in the fridge for up to three days.
Vary this Smashed Potato Vegetable Bake suit your dietary needs
For a dairy-free option, replace the cream with coconut yogurt or cashew cream. Make it vegetarian by taking out the prosciutto, or go fully vegan by skipping both the prosciutto and dairy, using cashew cream instead. For a garlic-free version, swap garlic for smoked paprika and a pinch of chilli for a flavourful twist.
For more delicious, easy to make healthy side recipes, click HERE.

Smashed Potato Vegetable Bake
This bake is such delicious side dish with lots of lovely flavours and textures. It's great to serve at a BBQ or when entertaining a crowd. Check out the variations below for vegetarian and vegan.
Servings: 4
Ingredients
- 12 Kipfler potatoes - scrubbed clean (or any small potato that roasts well)
- 4 tbsp extra virgin olive oil - extra virgin (or melted ghee)
- 12 dutch carrots - peeled and trimmed
- 1 tbsp fresh rosemary leaves - chopped
- 4 clove/s garlic - crushed
- 1½ tsp sea salt - or to taste
- ground black pepper -to taste
- 8 slice/s prosciutto
- 150 g peas (1 cup) frozen
- 60 g sour cream (¼ cup) or creme fraiche (optional)
Instructions
- Pre-heat your oven to 200°C/395°F (fan-forced).
- Boil the potatoes until starting to soften (almost cooked through). Depending upon the size of your potatoes, this will take about 10-20 mins.
- Drain the potatoes well.
- Place 2 tbsp of the olive oil into a large baking tray. Add the potatoes and with the back of a fork, partially crush them.
- Scatter over the carrots, rosemary and garlic.
- Drizzle with the remaining olive oil and season with salt and black pepper.
- Bake for 20 minutes then add the prosciutto and cook for a further 15 mins.
- Defrost the peas by sitting them in boiling water. Drain well.
- Once the potatoes and prosciutto are crispy, remove from the oven and scatter over the peas.
Serve
- Serve immediately with the optional creme fraiche or sour cream.
Make-ahead
- Re-heat in a low oven until just hot.
Store
- Store in an airtight container in the fridge.
Notes
Dairy-free
Replace the cream with coconut yoghurt or Cashew Cream.Vegetarian
Simply omit the prosciuttoVegan
Omit the prosciutto and replace the cream with Cashew Cream.Garlic-free
Replace the garlic with ½ teaspoon smoked paprika and a pinch of chilli. For lots more sides and salad inspo, take a look at my hugely popular ebook ‘Well Nourished Sides and Salads’ - where vegetables become the hero of the dish! It’s great value at just $9.95, click HERE to take a look.I'd love to hear how you enjoy this delicious bake - once again please post your feedback or any questions below G x
Mushroom Lentil Lasagne (to die for)
I have SO much thyme in my garden at the moment and even though it is just one of many ingredients in this totally divine Mushroom Lentil Lasagne, it was what ultimately inspired this dish. I’m constantly experimenting on delicious ways to win over my meat loving family and this is our latest vegetarian favourite so I thought I’d better share it.
For about 20 years of my life I was a vegetarian, many of those years I was a student also so legumes, being a cheap, healthy source of protein, were my go to. Various types of vegetarian bolognese type dishes were staples for me back than- the base ingredients were similar, always a legume of some kind + vegetables + tomatoes + various herbs and spices depending upon what I felt like.
So in creating my latest vegetarian lasagne, I returned to my tried and tested formula, balancing the flavours of thyme and vegetables until it was perfect – and now it is, so I hope you love it as much as my family does (even the legume fussy one in our household loves this).
For a legume-free vegetarian lasagne, my Pumpkin Lasagne has been a huge hit with the Well Nourished audience too. They are both the best veggie lasagna recipes.
Health benefits
Lentils are a fantastic source of plant-based protein, fibre, and essential nutrients like iron and folate. Mushrooms add depth of flavour and are rich in antioxidants, while the variety of vegetables provide a wide range of vitamins and minerals. This dish supports a balanced, gut-friendly diet.
Ingredients
Key ingredients include Puy lentils, mushrooms, an array of vegetables (onion, garlic cloves, carrots, celery, zucchini, and spinach), and a rich cheese sauce. For a gluten-free or vegan version, variations are provided below.
How to make this mushroom lentil lasagne
To make this vegetarian lasagne is super simple. To make the lentil sauce, begin by sautéing the onions and garlic in olive oil. Add the finely chopped celery, carrots, and zucchini, followed by mushrooms, lentils, tomato paste, stock, and tomatoes. Simmer for about 30 minutes until the lentils are cooked and the sauce thickens. Stir in the spinach to wilt before setting aside.
For the cheese sauce, melt butter in a pot, then whisk in flour to form a paste. Gradually add milk while stirring, allowing the sauce to thicken. Add grated cheese and season with salt and pepper.
If you own a Thermomix, we’ve also included Thermomix instructions for this recipe.
To assemble, layer the lentil sauce and lasagna noodles (sheets) in a baking dish, topping it all off with cheese sauce and extra grated cheese. Bake for 30–45 minutes at 180℃ until the lasagne is cooked through and golden on top.
Serving suggestions and how to store
Serve with a green salad or steamed vegetables for a complete meal. Leftovers can be portioned and stored in an airtight container in the fridge or freezer. Reheat in the oven until just hot.
Vary this mushroom lentil lasagne to suit
For a gluten and grain-free option, use gluten-free lasagne sheets or layer with thinly sliced eggplant or zucchini. For a vegan cheese sauce, steam and puree cauliflower with nutritional yeast, almond milk, and seasoning to create a dairy-free Béchamel. Top with grated vegan cheese. For an onion and garlic-free variation, replace with sautéed fennel, cumin, and chilli powder for a delicious alternative.
Quicker version
If you’re short on time, the lentil sauce can be simply served as a pasta sauce or made into a pasta bake.
Take a look at the variations (below the main recipe) for suggestions to alter the recipe to suit many specific dietary requirements.
For more delicious, easy to make healthy lasagne recipes, click HERE.

Mushroom and Lentil Lasagne (to die for)
This wholesome Mushroom and Lentil Lasagne is a delicious, vegetarian twist on the classic dish. Packed with vegetables and hearty Puy lentils, it’s a great comfort meal that’s both nutritious and satisfying.
Servings: 4
Ingredients
- 100 g Puy (French) lentils (½ cup approx.)
- 15 ml extra virgin olive oil -extra virgin (1 tbsp)
- 1 onion/s -peeled and halved
- 3 clove/s garlic -peeled and chopped
- 1 stick/s celery -roughly chopped
- 2 carrot/s -roughly chopped
- 1 zucchini/s (medium) roughly chopped
- 2 bay leaf/s -dried
- 1 bunch/s fresh thyme leaves - leaves picked off the stems
- 250 g mushrooms -Swiss brown or portobello
- 3 tbsp tomato paste
- 400 ml vegetable stock (or bone broth if not worried about it no longer being vegetarian)
- 400 g diced tinned tomatoes (or 6 vine ripened roma tomatoes) diced
- Sea salt and freshly ground black pepper -to taste
- 60 g baby spinach -chopped (2 cups)
- 200 g dried lasagne sheets (see below for GF and GrF)
Cheese sauce (see below for a vegan version)
- 115 g cheddar cheese (1 cup) grated
- 30 g butter
- 55 g wholemeal spelt flour (½ cup)
- 500 ml milk (of choice) (2 cups) -see below variations
- Sea salt and freshly ground black pepper -to taste
Instructions
- Pre-heat your oven to 180℃ / 350℉ fan-forced (about 10 minutes before you are ready to bake the lasagne).
- I personally like to soak all legumes overnight in water with a splash of vinegar, so do this with the puy lentils if you like (you don't have to, but I'd recommend it).
- I used my Thermomix to do all the chopping, but you can easily use a regular food processor or grate/ finely dice all the veggies by hand. No need to wash or rinse the food processor in between each step too.
- In a food processor or Thermomix chop your garlic. If using a Thermomix, 5 secs, speed 5 and then add onion 5 secs, speed 4.
- Heat a large pan over a low heat and add the olive oil (or you can use ghee or butter if not vegan). Add the chopped garlic/onion and gently sauté whilst processing the other veggies.
- Now pop the celery, carrots and zucchini into your food processor and pulse to chop - you are looking for a course consistency so be careful not to over process. If using a Thermomix use the turbo button, quick pulses until the right consistency, about 2-3 should do it look through the lid after each pulse. Alternatively grate the carrot and zucchini and finely dice the celery. Add this to the pan with the onion.
- Sauté for a few minutes with the bay leaves and thyme leaves.
- Pulse the mushrooms in the food processor until just chopped. If using a Thermomix pulse 1-2 times.
- Add them to the pan with the Puy lentils, tomato paste, stock and diced tomatoes. Season, stir to combine and allow to simmer with the lid ajar, stirring occasionally, until the sauce thickens and the lentils are cooked. This will take about 30 minutes.
- Once cooked, add the chopped spinach and stir though to wilt it. Taste, adjust the seasoning if you need to (salt brings out the flavour so don't be shy). Remove from the heat and set aside.
Cheese sauce
- Grate the cheese (in the processor and set aside).
- For the Thermomix method, follow the recipe for Béchamel in your basic cookbook.
- In a medium sized pot, melt the butter over a low heat. Remove from the heat and add the flour mixing to combine.
- Return to a medium to high heat and gradually add the milk, approx. half a cup at a time mixing constantly. As it heats it will thicken, this is when you should add another half a cup of milk. Do this until all the milk is added and the sauce is thick.
- Add about a quarter of the cheese, season with sea salt and pepper to taste, and stir well (reserve the rest of the cheese for the top of the lasagne).
Assemble
- To assemble the lasagne, use a medium size baking dish (mine is 25 x 25cm), placing half of the lentil sauce in the base, top with lasagne sheets, then the remaining lentil sauce, another layer of pasta and finish with the cheese sauce and the remaining grated cheese.
- Bake for 30 - 45 minute or until the lasagne is cooked through.
Serve
- With a big green salad or steamed veggies.
Make-ahead
- Re-heat in a low oven until just hot.
Store
- Store in an airtight container in the fridge. I store it in a rectangle shaped oven proof glass pyrex or glass lock container so I can simply remove the lid and reheat in the storage container (saves washing up).
- Can also be frozen.
Notes
Gluten and grain-free
Choose gluten-free lasagne sheets and for grain free layer with thinly sliced eggplant (aubergine) or zucchini (courgette).Vegan (dairy-free) cheese sauce
Steam half a large head of cauliflower, then puree with a tablespoon of nutritional yeast, a generous pinch of sea salt and pepper and a splash of almond milk to achieve a Béchamel consistency (thick sauce). Top with grated vegan cheese.Onion and Garlic-free
Replace both with finely diced fennel sautéed with a pinch of cumin and chilli powder.All in the Thermomix
I personally used my TMX for all the preparation (chopping) and making the cheese sauce but cooked the lentil sauce in the pan as I prefer the consistency the pan produces (plus the volume of the sauce is pushing the bowl limits). But if you did want to cook it all in the TMX, I'd cook on reverse, speed 1, temp 100, 30 minutes (or until the lentils are cooked through) with the lid ajar.Enjoy! I'd love to hear how you and your family enjoyed this tasty dish. Please leave a comment and let me know what you think (star rating extra appreciated as that way this recipe will entice even more people).
Healthy Chocolate Caramel Muesli Bar
I have a sneaking suspicion that this weeks Chocolate Caramel Muesli Bar is going to be popular. I’ve had a few requests for a healthy caramel slice recipe and though it looks nothing like the sugar laden three layer slice, it is a super delicious, nourishing caramel choc treat.
As a kid I spent every weekend at my nan’s house and we cooked and baked together- a lot! Most of my childhood memories are centred around tending to our chickens and ducks, digging for potatoes (my favourite job as the kids in my favourite Enid Blighton book ‘The Faraway Tree’ used to dig for new potatoes) and long sessions of cooking in her old wood-fired stove, always experimenting, always creating ‘new’ recipes and searching for delicious flavour combo’s.
However as an adult, whilst I’ve always loved cooking meals, it wasn’t until I had kids (and they started school) that I baked again. Once my youngest noticed all the biscuits and crackers her friends had in their lunchbox (and wanted the same) I realised the only thing I could do was to get my bake on again. The rest they say, is history!
A healthy-ish treat
I always try to inject as much nutrition as I can into all of my recipes, including sweet treats. I’ve made this Chocolate Caramel Muesli Bar wheat-free and nut-free so it’s good for a school lunchbox snack. The seeds and wholegrains really help to add protein, fibre, good fats and a bit of sustenance to this sweet treat. The cacao adds antioxidants, and using rice malt syrup or honey as a sweetener helps avoid the refined sugars typically found in store-bought bars. My kids feel like they’ve hit the jackpot with this slice – it’s a new favourite.
Ingredients
The base of this sticky muesli bar recipe is made with pantry staples including butter, oats, spelt flour, mixed seeds, and cacao powder. The caramel layer is a simple mix of rice malt syrup (or your preferred sweetener), coconut milk, and a pinch of sea salt for balance. It’s all-natural, with no preservatives or artificial ingredients.
How to make Healthy Chocolate Caramel Muesli Bar
To make these bars, you’ll start by cooking a simple sweet caramel sauce in a small saucepan while mixing the base ingredients. Press most of the oat mixture into a baking pan lined with baking paper (parchment paper), layer with the gooey caramel, then crumble the remaining oat mix on top. Bake until golden, let it cool, and refrigerate to firm up before slicing into bars.
Serving suggestions and how to store
These bars are perfect as a snack and in the school lunchbox. Store them in an airtight container in the fridge, or freeze for longer storage—they’re great to pack in a lunchbox straight from the freezer.
Vary this healthy chocolate caramel muesli bar to suit your needs
For a gluten-free version, simply swap the spelt flour for gluten-free flour and the oats for quinoa flakes. To make it dairy-free, replace the butter with coconut oil. You can even add nuts like hazelnuts or pecans for a nuttier twist, or use regular cream if you’re not avoiding coconut.
Take a look at the variations (below the main recipe) for suggestions to alter the recipe to suit many dietary requirements.
For more delicious, easy to make healthy bars, slices and sweet treats, click HERE.

Chocolate Caramel Muesli Bar
This healthy Chocolate Caramel Muesli Bar is a delicious, wholesome treat that satisfies your sweet tooth. Packed with oats, seeds, and a thin layer of caramel, it’s the perfect snack for school lunches or a snack. Plus, it's super easy to make!
Servings: 18 slices
Ingredients
Base / crumble
- 125 g butter -cubed
- 170 g rice malt syrup, honey or maple syrup (½ cup)
- ½ tsp bicarbonate of soda
- 120 g mixed seeds (1 cup approx.) I used sunflower seeds and pepitas
- 120 g wholemeal spelt flour (1 cup)
- 200 g rolled oats (2 cups) or quinoa flakes (or a mixture)
- 30 g cacao powder (4 tbs approx.) unsweetened Dutch process or raw
Caramel
- 115 g rice malt syrup, honey or maple syrup (⅓ cup)
- 120 ml canned coconut milk (½ cup) preferably full-fat, I use Ayam brand
- 1/8 tsp sea salt
Instructions
- Pre-heat the oven to 180℃ / 350℉ (fan-forced).
- Begin with the caramel.
- In a small saucepan mix the sweetener, coconut milk and sea salt and bring to a bubbling simmer. Simmer rapidly (it looks a bit foamy on top) for about 10 + minutes or until the caramel starts to thicken. Remove from the heat and allow to cool (it will further thicken as it cools).
- Whilst the caramel cooks/cools, make the slice.
- In a small pot melt the butter and sweetener, mixing to combine. Add the bicarb and stir well.
- Place the seeds in a food processor and grind into a meal. Add the flour, oats (or quinoa flakes) and cacao and mix until well combined.
- Add the butter/ sweetener mix and process to combine. The mixture should come together into a coarse dough.
- Line a small tin (27cm x 18cm) with baking paper. Press ⅔ of the mixture into the base of the tin and press down very firmly with wet hands. I like to make sure the outer edges sit a little higher than the middle so I get an even coverage without the caramel making its way down the sides.
- Top with the caramel. It is not a thick layer as a traditional slice would be, rather a randomly gooey, thin layer. More caramel means a lot of sugar which is why I've kept it minimal.
- Crumble the remaining dough over the caramel pressing lightly.
- Bake for approximately 20 minutes or until just golden brown.
- Allow to cool in the pan, refrigerate until firm and then cut into slices (chilling it allows for it to be sliced without crumbling).
Thermomix Method
Caramel
- Heat the sweetener, coconut milk and sea salt, 10-15 minutes, temp varoma, speed 3 (cap ajar or off so the steam can escape) or until it thickens (this can vary a bit). You can set this aside to cool and use the bowls without washing it.
Base
- Grind your seeds and set aside. No need to rinse the bowl.
- Melt the butter and sweetener 1 minute, temp 90, speed 3 or until melted and combined. Add the bicarb and mix 5 seconds speed 3.
- Add the rest of the base ingredients and the butter/sweetener and mix 15 seconds, speed 4. You may need to scrape the sides a few times to fully combine.
- Assemble as above.
Store
- Airtight in the fridge or freezer. You can pack in school lunch boxes from frozen.