• Skip to primary navigation
  • Skip to main content
  • Skip to primary sidebar
  • Skip to footer

Well Nourished HomepageWell Nourished

Simple recipes, whole foods, inspired health

  • Family Members
    • Recipe Filter
    • Quick Access Shopping List
    • Membership Tutorials
    • How to be Well Nourished
    • About Well Nourished
    • Where to Shop and what to Buy
    • FAQ
  • Family Members
    • Meal Plans
      • G’s Spring Meal Plan
      • G’s Autumn Meal Plan
      • My Weekly Planner
      • Quick Access Shopping List
      • Ingredient Alert
      • Prep Ahead Plans
      • Hosting Event Plans
      • Wellness & Health Plans
    • Recipe Filter
    • Courses & Community
    • Tips for family’s
      • Getting Kids On-board
      • Planning for Picky Eaters
      • New to Meal Planning
      • Meal Planning Tips & Tricks
    • Nourishing Resources
    • Members Offers
    • What’s New This Week
    • Events
    • Membership Tutorials
    • About Well Nourished
    • FAQ
  • Recipes
    • Meals
      • 30 Minute Meals
      • Budget Friendly
      • Chicken & Turkey
      • Fish & Seafood
      • Freezable Meals
      • Make-ahead Meals
      • Meat
      • Pasta and Noodles
      • Pork recipes
      • Slow Cooked
      • Vegetarian
    • Sweet Recipes
      • Baked Sweets
      • Desserts
      • Ice-blocks
      • No-bake Sweets
    • Breakfast
    • Healthy Lunchbox
    • After School Snacks
    • Savoury Snacks
    • Sides & Salads
      • Salads
      • Side Dishes
    • Soups
    • Drinks & Smoothies
    • Dips
    • Holidays & Entertaining
    • Sauces & Dressings
    • Sourdough Baking
    • Fermenting
    • Staples
    • Members only
    • Members only
  • Shop
    • Membership and Programs
    • Ebooks
    • Free Stuff
  • Affiliates
  • About
    • About Well Nourished
    • Testimonials
    • Join the Family
    • FAQ
  • Resources
    • Find a Practitioner
    • Find whole food
      • ACT
      • NSW
      • NT
      • SA
      • QLD
      • TAS
      • VIC
      • WA
    • Products and Services I Value
    • Whole foods pantry list
    • Ingredients Glossary
  • Wellness Hub
    • Inflammation
    • Perimenopause & Menopause
    • Healthy Kids
      • Healthy Baby
      • Healthy Toddler
      • Healthy Child
      • Immune support for kids
      • Digestion & Food Allergies
      • Healthy Lunchboxes
    • Budgeting & Planning
    • Digestion & Intolerance
    • Immune Health
    • Food as Medicine
    • Foods to Avoid
    • Healthy Habits
    • Sugar
    • Carbs, Protein, Fats
      • Carbohydrates
      • Fats
      • Protein
    • Healthy Food Choices
    • Healthy Home
    • Stress & Mood Disorders
    • Healthy Mind
    • Maternal health
    • Health Challenges
  • Login
    • Well Nourished Family
    • Courses & Community
    • Affiliate Login
  • My account

thermomix

Savoury Veggie Crackers

February 7, 2018 | Healthy Lunchbox, Savoury Snacks

My kids are big veggie lovers now, but this hasnโ€™t always been the case. One of the tricks that really helped along the way was creating fun, nourishing snacks like these Savoury Veggie Crackers. Iโ€™ve written extensively about raising real food loving kids HERE – itโ€™s a topic Iโ€™m super passionate about. I also have a whole chapter in my ebook The Well Nourished Lunchbox dedicated to delicious ways to include vegetables in your childโ€™s diet (as well as over 50 sensational recipes, including loads of savoury cracker options). Click HERE to find out more.

One thing I know for sure, is the more vegetables your kids eat, the more they will enjoy and be open to eating them. So when my kids were little and reluctant to eat a wide variety of veggies, I used to hide them in everything I cooked, including sweet and savoury baking (as well as presenting them in their whole form throughout the day and with every meal). You can read my thoughts on the benefits and pitfalls of ‘hiding’ veggies for picky eatersย HERE.

I first made this cracker when my kids were teething (as a rusk of sorts). So I thought I’d re-invent it as a cracker my kids will enjoy now – and it’s safe to say they do! I love adding extra veggies anywhere I can and this ย cracker is really quick and easy to make. I hope you and yours enjoy it too.

Health benefits

Spinach adds a wealth of vitamins and minerals, including iron, calcium, and vitamins A and C. Wholemeal spelt flour provides fibre and complex carbohydrates, while optional sesame seeds and nutritional yeast add extra protein, healthy fats, and B vitamins. These crackers are a wholesome alternative to store-bought varieties, which often contain refined ingredients, vegetable oils and additives.

Ingredients

These vegan crackers feature a base of wholemeal spelt flour combined with pureed spinach, olive oil, and sea salt for a nutritious and delicious dough. Optional ingredients like garlic granules or garlic powder, sesame seeds and nutritional yeast enhance both flavour and nutritional value.

How to make these Savoury Veggie Crackers

To make these crispy crackers, start by blending the spinach and water in a food processor until smooth. Mix in olive oil, salt, sugar, baking powder, and any optional ingredients like sesame seeds or garlic powder. Gradually add the flour, adjusting as necessary until the dough reaches a play-dough-like consistency. Roll the dough out thinly with a rolling pin between sheets of parchment paper, cut into squares with a sharp knife (or a pizza cutter), and bake until crispy.

Serving suggestions and how to store

These dairy-free crackers are a great addition to a snack platter or paired with your favourite dip. Store them in an airtight container for up to a week, or freeze them and pop them into lunchboxes straight from the freezer for an easy snack.

Vary Savoury Veggie Crackers to suit your dietary needs

For a gluten-free or grain-free version, substitute the spelt flour with a gluten-free or paleo flour. These variations may need additional baking time to crisp up properly. If you’re in the mood for something fun and colourful, try replacing the spinach with beetroot for pink crackers. To make this recipe garlic and sesame-free, simply omit those ingredients.

Take a look at the variations (below the main recipe) for suggestions to alter the recipe to suit any specific dietary requirements.


For more delicious, easy to make healthy savoury snack recipes, click HERE.
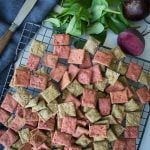
Savoury veggie crackers - These Savoury Veggie Crackers are a delicious, very easy to make and a great way to include a little veggies. They are wheat, dairy, nut and egg-free and have a gluten-free option too.
Print Recipe
4.91 from 10 votes

Veggie Crackers

These Savoury Veggie Crackers are a healthy and tasty snack option, perfect for lunchboxes or as a crispy, savoury bite with dips or spreads. Made with spinach (or beetroot) for a vibrant colour and a boost of nutrients, these crackers are packed with flavour and can easily be adapted to suit different dietary needs.
Prep Time10 minutes mins
Cook Time25 minutes mins
Total Time35 minutes mins
Course: Snack
Servings: 50 crackers
Author: Georgia Harding

Ingredients

  • 60 ml water (ยผ cup)
  • 50 g baby spinach (2 large handfuls)
  • 1 tbsp extra virgin olive oil -extra virgin
  • 2 tsp sea salt
  • 1 tsp coconut sugar or rapadura
  • 1 tsp baking powder
  • 2 tbsp sesame seeds -optional
  • 1 tbsp nutritional yeast -optional
  • 1 tsp garlic granules -or powder, optional (I've also used a clove of garlic processed with the spinach too)
  • 200 g wholemeal spelt flour (1ยพ cups approx.) see below for GF

Instructions

  • Pre heat the oven to 180โ„ƒ/350โ„‰.
  • In a high speed blender mix the water and spinach, scraping the sides until pureed. Thermomix 1 minute, speed 5 (you will need to scrape the sides quite a few times).
  • Add the olive oil, sea salt, sugar, baking powder (and any optional ingredients) and mix together until combined. Thermomix 20 seconds, speed 4.
  • Add the flour and mix until a dough the consistency of play-doh forms (so it holds together but doesn't stick to your hands).
  • IMPORTANT - All whole flours are slightly different in the rate they absorb water. This is the reason white (highly refined flours) are used in processed foods because they bring consistent results. So you may need to adjust the amount of flour (or water) slightly to achieve the right consistency as described above (especially with the GF variation below).ย 
  • Form into a rough disc, place between two sheets of baking paper (or silicone sheets). I use 'If you Care' brand of baking paper, it's very non stick and can even be reused (it's that good).
  • Roll until VERY thin (1-2mm). If they aren't thin enough they won't crisp up so keep rolling until the dough stops expanding. Remove the top piece of parchment and cut the dough with a pizza cutter or plastic ruler (my new way to get the squares nice and even).ย 
  • Lift this carefully onto a baking tray. 
  • Bake for 20-25 minutes. I find the outside rows cook quicker than the inside squares so I often take it from the oven at 20-25 minutes, remove the outer rows and return the middle crackers which are still not crisp enough to the oven for 5 minutes or until they are dry and crunchy.

Store

  • In an airtight container. They can also be frozen and packed into the lunchbox (from frozen). 

Notes

Gluten or grain-free

I've recipe tested these crackers with both gluten-free and paleo flours (both are also nut-free). I found these needed extra time in the oven to crisp up.ย 

Beetroot (pink crackers)

Replace the spinach with 50g of raw beetroot (about half a small beetroot), peeled and diced. This makes for little pink crackers.ย 

Garlic and sesame-free

Simply omit from the recipe.
ย 
ย 

I'd love to hear how you enjoyed these - post your feedback in the comments below.ย 

Healthy Chocolate Caramel Muesli Bar

January 24, 2018 | Healthy Lunchbox, After School Snacks, Baked Sweets

I have a sneaking suspicion that this weeksย Chocolate Caramel Muesli Bar is going to be popular. I’ve had a few requests for a healthy caramel slice recipe and though it looks nothing like the sugar laden three layer slice, it is a super delicious, nourishing caramel choc treat.

As a kid I spent every weekend at my nan’s house and we cooked and baked together- a lot! Most of my childhood memories are centred around tending to our chickens and ducks, digging for potatoes (my favourite job as the kids in my favourite Enid Blighton book ‘The Faraway Tree’ used to dig for new potatoes) and long sessions of cooking in her old wood-fired stove, always experimenting, always creating ‘new’ recipes and searching for delicious flavour combo’s.

However as an adult, whilst I’ve always loved cooking meals, it wasn’t until I had kids (and they started school) that I baked again. Once my youngest noticed all the biscuits and crackers her friends had in their lunchbox (and wanted the same) I realised the only thing I could do was to get my bake on again. The rest they say, is history!

A healthy-ish treat

I always try to inject as much nutrition as I can into all of my recipes, including sweet treats. I’ve made this Chocolate Caramel Muesli Bar wheat-free and nut-free so it’s good for a school lunchbox snack. The seeds and wholegrains really help to add protein, fibre, good fats and a bit of sustenance to this sweet treat. The cacao adds antioxidants, and using rice malt syrup or honey as a sweetener helps avoid the refined sugars typically found in store-bought bars. My kids feel like they’ve hit the jackpot with this slice – it’s a new favourite.

Ingredients

The base of this sticky muesli bar recipe is made with pantry staples including butter, oats, spelt flour, mixed seeds, and cacao powder. The caramel layer is a simple mix of rice malt syrup (or your preferred sweetener), coconut milk, and a pinch of sea salt for balance. Itโ€™s all-natural, with no preservatives or artificial ingredients.

How to make Healthy Chocolate Caramel Muesli Bar

To make these bars, youโ€™ll start by cooking a simple sweet caramel sauce in a small saucepan while mixing the base ingredients. Press most of the oat mixture into a baking pan lined with baking paper (parchment paper), layer with the gooey caramel, then crumble the remaining oat mix on top. Bake until golden, let it cool, and refrigerate to firm up before slicing into bars.

Serving suggestions and how to store

These bars are perfect as a snack and in the school lunchbox. Store them in an airtight container in the fridge, or freeze for longer storageโ€”theyโ€™re great to pack in a lunchbox straight from the freezer.

Vary this healthy chocolate caramel muesli bar to suit your needs

For a gluten-free version, simply swap the spelt flour for gluten-free flour and the oats for quinoa flakes. To make it dairy-free, replace the butter with coconut oil. You can even add nuts like hazelnuts or pecans for a nuttier twist, or use regular cream if youโ€™re not avoiding coconut.

Take a look at the variations (below the main recipe) for suggestions to alter the recipe to suit many dietary requirements.


For more delicious, easy to make healthy bars, slices and sweet treats, click HERE.

Chocolate caramel muesli slice - This Chocolate Caramel Muesli Bar is a delicious, nut-free, whole foods lunchbox treat. It's easy to make and has variations for gluten and dairy free too.
Print Recipe
4.80 from 68 votes

Chocolate Caramel Muesli Bar

This healthy Chocolate Caramel Muesli Bar is a delicious, wholesome treat that satisfies your sweet tooth. Packed with oats, seeds, and a thin layer of caramel, itโ€™s the perfect snack for school lunches or a snack. Plus, it's super easy to make!
Prep Time15 minutes mins
Cook Time20 minutes mins
Total Time35 minutes mins
Course: Snack
Servings: 18 slices
Author: Georgia Harding

Ingredients

Base / crumble

  • 125 g butter -cubed
  • 170 g rice malt syrup, honey or maple syrup (ยฝ cup)
  • ยฝ tsp bicarbonate of soda
  • 120 g mixed seeds (1 cup approx.) I used sunflower seeds and pepitas
  • 120 g wholemealย speltย flour (1 cup)
  • 200 g rolled oats (2 cups) or quinoa flakes (or a mixture)
  • 30 g cacao powder (4 tbs approx.) unsweetened Dutch process or raw

Caramel

  • 115 g rice malt syrup, honey or maple syrup (โ…“ cup)
  • 120 ml canned coconut milk (ยฝ cup) preferably full-fat, I use Ayam brand
  • 1/8 tsp sea salt

Instructions

  • Pre-heat the oven to 180โ„ƒ / 350โ„‰ (fan-forced).
  • Begin with the caramel.
  • In a small saucepan mix the sweetener, coconut milk and sea salt and bring to a bubbling simmer. Simmer rapidly (it looks a bit foamy on top) for about 10 + minutes or until the caramel starts to thicken. Remove from the heat and allow to cool (it will further thicken as it cools).
  • Whilst the caramel cooks/cools, make the slice.
  • In a small pot melt the butter and sweetener, mixing to combine. Add the bicarb and stir well.
  • Place the seeds in a food processor and grind into a meal. Add the flour, oats (or quinoa flakes) and cacao and mix until well combined.
  • Add the butter/ sweetener mix and process to combine. The mixture should come together into a coarse dough.
  • Line a small tin (27cm x 18cm) with baking paper. Press โ…” of the mixture into the base of the tin and press down very firmly with wet hands. I like to make sure the outer edges sit a little higher than the middle so I get an even coverage without the caramel making its way down the sides.ย 
  • Top with the caramel. It is not a thick layer as a traditional slice would be, rather a randomly gooey, thin layer. More caramel means a lot of sugar which is why I've kept it minimal. 
  • Crumble the remaining dough over the caramel pressing lightly.
  • Bake for approximately 20 minutes or until just golden brown.
  • Allow to cool in the pan, refrigerate until firm and then cut into slices (chilling it allows for it to be sliced without crumbling).

Thermomix Method

    Caramel

    • Heat the sweetener, coconut milk and sea salt, 10-15 minutes, temp varoma, speed 3 (cap ajar or off so the steam can escape) or until it thickens (this can vary a bit). You can set this aside to cool and use the bowls without washing it. 

    Base

    • Grind your seeds and set aside. No need to rinse the bowl.
    • Melt the butter and sweetener 1 minute, temp 90, speed 3 or until melted and combined. Add the bicarb and mix 5 seconds speed 3. 
    • Add the rest of the base ingredients and the butter/sweetener and mix 15 seconds, speed 4. You may need to scrape the sides a few times to fully combine.
    • Assemble as above.

    Store

    • Airtight in the fridge or freezer. You can pack in school lunch boxes from frozen.

    Notes

    Gluten-free

    Substitute the spelt for gluten-free flour and the oats with quinoa flakes (rolled quinoa). Many fans have reported this is great made with buckwheat flour.ย 

    Dairy-free

    Substitute the butter with coconut oil.

    Vegan

    Chose rice malt or maple syrup as your sweetener. Substitute the butter with coconut oil.

    Nutty

    The seeds can be substituted with any nuts. I love this with chopped hazelnuts or pecans or walnuts.

    Coconut-free

    Replace the coconut milk in the caramel with regular cream.ย 
    ย 

    After more healthy lunchbox inspiration?

    My best selling ebook The Well Nourished Lunchboxย has you covered and is choc-a-block full of healthy lunchbox inspiration - and not just sweet but heaps of savoury crackers, sandwich-free lunch recipes and so much more. In fact, it's 150 pages of goodness!
    Click HERE to find out more about this fabulous ebook (and read the many, many reviews).

    ย 

    ย 

    ย 

    I'd love to hear how your kids like this slice? I have a feeling it is going to be very popular. Comment and/or rate this recipe below (it really helps my recipes to reach more people so thanks in advance).ย 

    Detox Ice Blocks

    January 10, 2018 | After School Snacks, Ice-blocks

    At this time of year, Iโ€™m trying my hardest to wean myself and my kids off the sweet stuff (itโ€™s been a very indulgent festive season) while really refocusing on including as many veggies in our diet as possible. One of my favourite ways to do this is with these detox ice blocks – a simple, refreshing treat that feels indulgent but is actually packed with goodness. Right now my main aim is to load as much nourishment into our meals and snacks as possible, leaving little room (or desire) for anything else. The plan is to have us all back on track in time for school to start again in a couple of weeks (read more here about why kids fall into the trap of craving processed foods).

    The weather these past few weeks in QLD has been really hot and the kids have been asking for ice blocks after big mornings in the sun nipper/swim training. So I thought I’d whip something up that’s not only delicious, but helps them refuel and rehydrate. I freeze these in my low tox stainless steel iceblock moulds.

    The nutrient dense veggies are well hidden behind the sweetness of the fruit. I personally don’t add in the extra sweetener, but taste the mixture prior to freezing and decide if you think you need to add it.

    Health benefits

    Beetroot is an anti-inflammatory, antioxidant, detoxifying and extremely nutrient rich vegetable. Research suggests it improves stamina and sports performance (this fact alone appeals to my sport loving kids). Zucchini (also know as courgette), is extremely low in calories and loaded with fibre. It is also a great source of potassium.

    PS – I’ve written before about using smoothies to include extra vegetables in your diet (and therefore more nourishment), read more HERE if you’d like more inspiration for ‘hiding veggies’.

    Ingredients

    The key ingredients in this refreshing treat include beetroot, strawberries or raspberries, banana, zucchini, and coconut water. You can customise it by adding a protein powder for an extra boost, swapping the coconut water with nut milk, or using full-fat natural yoghurt for a creamier texture. This versatile recipe can also be made without banana by using mango instead.

    How to make Detox Ice Blocks

    To make these healthy treats, simply blend the beetroot, berries, banana, zucchini, and coconut water in a high-speed blender until smooth. Pour the mixture into ice block molds and freeze until set. If you’re using a Thermomix, blend on speed 9 for about 60 seconds, scraping the sides as needed.

    Serving suggestions and how to store

    Once set, these ice blocks make a delicious and hydrating snack or treat. Store any leftovers in the freezer, and enjoy them whenever you need a refreshing detox boost. You can also make a batch ahead of time for a weekโ€™s worth of healthy snacks.

    Vary Detox Ice Blocks to suit your dietary needs

    This detox ice block recipe is easy to adjust for various dietary needs. For a coconut-free version, simply swap the coconut water for nut milk. If you’re looking for a creamy version, replace the coconut water with full-fat natural yogurt or coconut yogurt. You can also replace the banana with mango for a different twist, or add a scoop of clean protein powder for an extra protein boost.black pepper, lemon juice digestion immunity vitamin c flavor ice cube tray ice cubes compounds favourite way freshย 

    These Detox Ice Blocks include 2 serves of veggies and are perfect for a refreshing, nutrient-packed treat.
    Print Recipe
    5 from 9 votes

    Detox Ice Blocks

    These simple ice blocks include two veggies in this delicious, nourishing treat.
    Prep Time5 minutes mins
    Cook Time1 hour hr
    Total Time1 hour hr 5 minutes mins
    Course: Snack
    Servings: 6
    Author: Georgia Harding

    Ingredients

    • 1 small beetroot -raw, peeled & quartered
    • 250 g strawberries or raspberries (2 cups) fresh or frozen
    • 1 banana/s
    • ยฝ small zucchini/s -quartered
    • 250 ml coconut water (1 cup)
    • 85 g rice malt syrup, honey or maple syrup (ยผ cup) optional

    Instructions

    • In a high powered blender, blend all of the ingredients until smooth.ย If using a Thermomix, 60 seconds, increasing slowly to speed 9 (scrape the sides).
    • Divide between ice block moulds and freeze until set firm. 

    Notes

    Coconut-free

    Replace the coconut water with a nut milk.

    Make it creamy

    Replace the coconut water with full-fat natural yoghurt or coconut yoghurt.ย 

    No banana

    Replace the banana with mango.

    Add Protein

    I often add a scoop of a wholefoods protein powder. GoodnessMeย have a fabulous selection of clean protein powders, you can take a lookย HERE.

    TIPS

    • I've set these ice blocks in brilliant (and low-tox) stainless steel ice block moulds which you can shop for HERE.ย 
    • This recipe also makes a delicious smoothie (just add a cup of ice prior to blending it).ย 

    ย 

    I hope your family loves this recipe. Post any questions or comments below.ย 

    Chocolate Fudge Wreath

    December 20, 2017 | Holidays & Entertaining, Desserts

    I try to make all of my recipes as simple and fuss-free as possible and this decadent chocolate fudge cake is no exception. It has a moist, dense texture and is very, very chocolatey so a little goes a very long way.

    I’ve made it festive by creating Chocolate Fudge Christmas Wreath and whilst it looks a bit fussy to make, it couldn’t be easier. It’s certainly not an everyday treat, rather a special occasion dessert.

    As I’ve mentioned many times, my nan instilled a love of cooking in me from a very early age. My earliest memories of my childhood are of cooking with her in her big old kitchen (which was complete with a wood fired oven). I also remember cooking with chocolate, always Plaistowe’s dark chocolate as she had worked for many years in the Plaistowe’s Chocolate Factory in West Perth (so I’ll attribute my love of dark chocolate to my nan also). This recipe is based on one of her go-to cakes, she called it the ‘fours’ cake as it has four ingredients, 4 blocks of chocolate, 4 eggs and a cup each of cream and caster sugar. Cooking it in a ring tin I find helps this dense cake set best.

    This recipe is right up there with my Raspberry Coconut Slice for taking me back to my nans kitchen and the endless hours we spent tinkering there. I don’t make this very often as the sweet stuff doesn’t sit too well with me these days, but if I have a big crowd to impress with an indulgent but easy to make dessert, then this is an absolute fave. I hope you love it too.

    Health benefits

    Using dark chocolate with a high cocoa content provides antioxidants and is lower in sugar than milk chocolate. Coconut milk adds creaminess while offering healthy fats, and eggs contribute to the cakeโ€™s structure, providing protein.

    Ingredients

    There’s just four ingredients in this chocolate fudge cake recipe include dark chocolate, coconut milk, and a choice of sweetener (rice malt syrup, honey, or maple syrup). The cake is topped with whipped cream, fresh berries, and a berry sauce, making it an indulgent yet balanced dessert. Optional ingredients like roasted hazelnuts or liqueurs like Frangelico can elevate the flavour even more.

    How to make this chocolate fudge wreath

    Start by melting the chocolate, coconut milk, and sweetener together, then blend in the eggs to create a smooth batter. The cake is baked in a steam bath, which helps it stay moist and fudgy. Once cooled, invert the cake onto a serving platter and decorate with whipped cream, berries, and mint leaves. Serve with a side of fresh berry sauce.

    Serving suggestions and how to store

    This chocolate cake is best served at room temperature to allow the rich chocolate flavours to shine. Pair it with the berry sauce to balance the richness. Store any leftovers in an airtight container in the fridge for up to a week, or freeze for longer storage.

    Vary this chocolate fudge to suit your dietary needs

    For a dairy-free option, use dairy-free chocolate and serve with coconut cream or coconut yogurt. If you’re coconut-free, simply replace the coconut milk with regular cream. You can also make an adult version by adding a splash of Frangelico or Kahlua for a boozy twist. This really is the best chocolate cake recipe.

    Take a look at the variations (below the main recipe) for suggestions to alter the recipe to suit any specific dietary requirements (and tastes).


    For more delicious, festive healthy dessert recipes, click HERE.

    Healthy Chocolate Fudge - four ingredients for a great Christmas dessert
    Print Recipe
    4.77 from 47 votes

    Chocolate Fudge Wreath (four ingredient dessert)

    This Chocolate Fudge Wreath is a decadent and rich dessert that's perfect for festive celebrations or any special occasion. The combination of dark chocolate, coconut milk, and eggs creates a dense, fudgy cake that pairs beautifully with a fresh berry sauce and whipped cream. With its festive wreath shape, this dessert is sure to be a showstopper at your table.
    Prep Time10 minutes mins
    Cook Time45 minutes mins
    Total Time55 minutes mins
    Course: Dessert
    Servings: 12
    Author: Georgia Harding

    Ingredients

    • 400 g dark chocolate – broken into pieces
    • 270 ml canned coconut milk – full-fat
    • 85 g rice malt syrup, honey or maple syrup (ยผ cup)
    • 4 egg/s – large

    Topping

    • 300 ml cream -whipped
    • 185 g strawberries or raspberries (1ยฝ cups) for berry sauce
    • Fresh berries and mint leaves -to decorate
    Metric – US Customary

    Instructions

    • Preheat your oven to 180ยฐC/350โ„‰ (fan forced).
    • Grease a ring cake tin really well (with butter or coconut oil). In this pic I used a 25cm bundt tin.ย If your tin is old or not non-stick, you may want to add in baking paper tags to help to leaver it out of the tin.
    • Bring a small pot of water to boil, turning it down to a low simmer. Place the chocolate, coconut milk and sweetener into a large stainless steel bowl and sit over the pot. Stir until the chocolate has melted and the ingredients are well combined. Remove from the heat and set aside, allow to cool to luke warm.
    • Once it's cooled (enough so you can hold your finger in the mix (I know you want to lol), beat the eggs into the chocolate mixture and mix until well combined.
    • Pour the mixture into your prepared, well greased ring tin. Place the tin in a deep roasting dish and pour hot water into the roasting dish until the water level is about half to two thirds the way up the sides of the ring tin. You are making a basic steam bath here and the moist air helps this cook through, whilst keeping it lovely and moist.
    • If you happen to have a ‘steam’ oven, you can simply cook it in this (without the steam bath). 
    • Bake for about 35-45 minutes or until the batter is set firm.
    • Leave to cool at room temperature then store in the fridge overnight or until ready to serve.
    • Once ready to serve, bring back to room temperature and remove from the tin by inverting onto a serving plate. If you have trouble removing, shake the tin and sit the tin in hot water for a minute to loosen it. I just jiggle/ tap it on the bench and sit in hot water until it releases (be patient, it can take a few tries).ย 
    • Make a berry sauce by blending the fresh strawberries and/ or raspberries until smooth. You can strain the seeds from the coulis if you prefer a very smooth sauce (I personally don't bother). Put aside in a small serving jug (this can also be made ahead if you like). This sauce really helps cut through the richness of the cake.
    • Now get creative and decorate the wreath with whipped cream, berries and mint. 
    • Serve with the berry sauce in a side jug immediately (or return to the fridge again until ready to serve). 

    Thermomix Method

    • Preheat your oven to 180ยฐC/350โ„‰.
    • Grease a ring cake tin really well (with butter or coconut oil).
    • Grate the chocolate 30 seconds speed 8. Add the coconut milk and sweetener and heat 50โ„ƒ, 2 minutes, speed 5.
    • Once the mixture has cooled a little (to 37), add the eggs and mix 30 secs, speed 4 or until well combined.
    • Follow the rest of the method above.

    Store

    • Store in an airtight container in the fridge or freezer.

    Notes

    Dairy-free

    Use a dairy-free chocolate and serve with coconut cream or coconut yoghurt.

    Coconut-free

    Replace the coconut milk with cream.ย 

    Hazelnut

    I sometimes add roasted hazelnuts. Roast the nuts and then rub the skins off before roughly chopping and stirring into the batter. You can use any nut, but I think chocolate and hazelnut are a match made in heaven.ย 

    Adult version

    I have also made this over the years with Frangelico and Kahlua – 30-60ml mixed in with the eggs.ย 
    ย 

    I’d love your feedback on this beautiful recipe. Wishing you a very Merry Christmas – I hope you have found loads of deliciousness here at Well Nourished to inspire a wonderful Christmas Day feast!

    Self Saucing Ginger Puddings

    December 13, 2017 | Holidays & Entertaining, Desserts

    I love food traditions! However try as I will, I really struggle with eating Christmas pudding. I love a good dessert on special occasions, but the pud leaves me zapped of energy, unable to focus and mentally flat. Not the nicest way to end Christmas festivities! So this week I thought I’d share how I offset a spike in blood sugar with this protein rich dessertย whilst still enjoying these decadent Self Saucing Ginger Puddings.

    What causes ‘that’ feeling after dessert

    So why does Christmas Pudding (and many other high sugar desserts) leave most people feeling rotten? When you eat a really sweet dessert (highly refined carbohydrate), your body responds by producing a large amount of insulin to remove the glucose from your bloodstream, directing it into muscle, fat, liver and various cells to be metabolised (so your body can use it for fuel).

    Once this sudden influx of insulin has done it’s job, your blood sugar drops suddenly and at this point you will be left feeling flat and lacking energy. Soon after, you’ll possibly feel hungry again or crave more sweet stuff so the cycle is repeated leaving you physically and emotionally labile. One minute you’re up, next you’ll come crashing down.

    Note- I’m not talking in terms of diabetes here, rather an otherwise healthy persons response to high sugar foods.

    How to have your dessert, minus the mood and energy swings

    So if you enjoy a little sweet treat every now and again (it’s Christmas after all), your best bet is to design it so that the amount of insulin released is more gradual. A lower-sugar dessert made with high-fibre whole foods (as opposed to highly refined carbohydrate), a complete protein and good fats is a great place to start. This combination of food groups helps to temper the breakdown of carbohydrate and conversion to glucose so you don’t feel the highs and lows previously described.

    I add a wholefoods protein powder to my desserts as it provides fibre, a complete source of protein and good fats to both nourish and help my blood sugars remain stable, whilst I, enjoy a delicious dessert (without an energy crash, mood swings and brain fog).

    The vast world of protein powders

    Navigating the many types of protein powders available is tricky business. Many brands are derived from feed-lot, grain-fed cows (also often fed GMOโ€™s), highly processed soy proteins and contain franken-sugars, fructose, maltodextrin starches (aggravate blood sugars and the GIT), additives and more yuk ingredients.

    Most also contain absolutely no plant fibre, good fats or micronutrients (vitamins and mineral) so nutritionally they are incomplete and not at all reflective of a well rounded, whole food meal. Thankfully, there are a select few which offer balanced nutrition and do what we need them to do โ€“ provide a sustaining, nutritious supplement, and hereโ€™s the clincher, that actually tastes good. Itโ€™s just got to taste good right?

    What to look for when choosing protein powders

    When choosing a wholefood-based protein powder, there are several key factors to consider to ensure youโ€™re getting a good-quality and effective product:

    Ingredients: Look for a protein powder that is derived from wholefood sources, such as pea protein, brown rice protein (preferably non GMO, sprouted and fermented), hemp protein, or a blend of these. If youโ€™re okay with dairy, choose a Whey based protein powder, ensure it is grass-fed and/or organic. Avoid products with additives, artificial flavours, excess sugar or artificial sweeteners.

    Nutritional Profile: Assess the nutritional content beyond just protein. Look at the levels of essential amino acids, vitamins, and minerals present in the powder. A good wholefood-based protein powder will offer a range of nutrients beyond just protein.

    Allergen Information: Consider any allergies or dietary restrictions. Wholefood-based protein powders are often suitable for those with common allergies (e.g., dairy, soy, gluten), but always check the label for potential allergens.

    Taste and Texture: Personal preference matters too. Choose a protein powder that tastes good to you and mixes well with your favourite fruits and fluid (I love making smoothies with coconut water and yoghurt) or add protein powder to recipes like pancakes, overnight oats or chia puddings. Some wholefood-based powders can have a grainier texture, which may be a consideration.

    By considering these factors, you can select a wholefood-based protein powder that aligns with your dietary preferences, nutritional needs, and taste preferences, ensuring you get the most out of your protein supplement.

    GoodnessMe have a fabulous selection of clean protein powders, you can take a look HERE.

    Ingredients

    This recipe uses butter or macadamia nut oil, milk (regular or plant-based), an egg, coconut sugar, fresh ginger, cinnamon, wholefood protein powder, wholemeal spelt flour, baking powder, and sea salt. For the self-saucing syrup, youโ€™ll need rice malt syrup, honey, or maple syrup combined with hot water.

    How to make these self saucing ginger pudding

    To prepare these ginger self saucing puddings, start by blending the butter, milk, egg, coconut sugar, ground ginger, and cinnamon until frothy. Add in the rest of the dry ingredients including the protein powder, flour, baking powder, and salt, mixing until just combined. Pour the batter into greased ramekins and place them on a baking tray or sit them in a baking dish. Prepare the syrup by mixing your choice of sweetener with boiling water and pour it over the batter mixture. Bake at 180โ„ƒ (fan-forced) for 20-25 minutes, until the tops are golden and crisp, with a sticky sauce at the base. If you own a Thermomix, we’ve also included Thermomix instructions for this recipe.

    Serving suggestions and how to store

    Serve these self saucing ginger puddings hot out of the oven, ideally with a dollop of double cream or coconut cream and fresh berries for added flavour and colour. Leftovers (if any!) can be stored in the fridge and gently reheated, though theyโ€™re best enjoyed fresh when the sauce is still warm and gooey.

    Vary these self saucing ginger puddings to suit

    For gluten-free self saucing puddings, swap the spelt flour with a gluten-free flour blend. To make it dairy-free, replace the butter with macadamia nut oil, use a plant-based milk, and opt for a vegan protein powder. If youโ€™d like to skip the protein powder, try ground nuts or seeds as a tasty alternative.

    For more delicious, easy to make healthy dessert recipes, click HERE.

    Print Recipe
    5 from 5 votes

    Self Saucing Ginger Puddings

    Whilst this Self Saucing Ginger Pudding is satisfyingly sweet, because it contains a nice balance of complex carbohydrate, plenty of protein and healthy fats, it won't leave you feeling low like many desserts - Christmas Pudding I'm looking at you!!
    Prep Time10 minutes mins
    Cook Time25 minutes mins
    Total Time35 minutes mins
    Course: Dessert
    Servings: 4
    Author: Georgia Harding

    Ingredients

    • 80 g butter or macadamia nut oil -melted
    • 120 ml milk (of choice) (ยฝ cup)
    • 1 egg/s -beaten
    • 50 g coconut sugar or rapadura (โ…“ cup approx.)
    • 2 tbsp ginger root -finely grated fresh
    • 1 tsp ground cinnamon
    • 60 g wholefood protein powder - vanilla or a neutral flavour
    • 65 g wholemealย speltย flour (see gluten and grain-free below)
    • Pinch sea salt
    • 2ย  tsp baking powder

    Syrup

    • 85 g rice malt syrup, honey or maple syrup
    • 180 ml hot water (ยพ cup)

    Instructions

    • Preheat your oven to 180โ„ƒ/350โ„‰ (fan forced). Grease 4 ramekins.
    • In a blender or food processor, mix together the butter, milk, egg, coconut sugar, ginger and cinnamon until well combined and frothy.
    • Add the wholefood protein powder, flour, sea salt and baking powder.
    • Mix until just combined (don't over mix or the pudding will become heavy).
    • Divide the batter between the four ramekins (approx. 1ยฝ cup capacity) and place on a small baking tray (makes it easier to pop in the oven and catches any overflow).
    • In a small jug make the syrup by combining the sweetener and hot water. Mix to combine and carefully pour over the batter (over a spoon).
    • Place in the oven and bake for 20-25 minutes or until the puddings are golden and crisp on top. The sauce will be absorbed into the middle and base of the ramekin (forming a lovely sticky syrup).

    Thermomix method

    • Preheat your oven to 180โ„ƒ/ 360ยฐF (fan-forced). Grease 4 ramekins.
    • Melt the butter, temp 90, 1 min, speed 4. Add theย butter, milk, egg, coconut sugar and cinnamon. Blend speed 1 min, speed 4.
    • Add the wholefood protein powder, flour, sea salt and baking powder. Mix 3 seconds, speed 2 (you may need to scrape the sides with the spatula to fold the last of the lour through the batter). Don't over mix of the pudding will become heavy.
    • Divide the batter between the four ramekins and place on a small baking tray (makes it easier to pop in the oven).
    • In a small jug make the syrup by combining the sweetener and hot water. Mix to combine and carefully pour over the batter.
    • Place in the oven and bake for 20-25 minutes or until the puddings are golden and crisp on top. The sauce will be absorbed into the middle and base of the ramekin (forming a lovely sticky syrup).

    Serve

    • Enjoy hot out of the oven with double cream and berries.

    Notes

    Gluten-free

    Substitute the spelt with your favourite gluten-free flour mix.

    Dairy-free

    Replace the butter with macadamia nut oil, choose a dairy-free milk and a vegan wholefood protein powder.

    No protein powder

    Replace with ground nuts (nut meal) or ground seeds.ย 
    ย 
    ย 

    I'd love to hear how you like this delicious pudding? It's my families new favourite dessert! Post a comment or a question below.ย 

    Healthy Gingerbread (and a lovely spice mix to gift)

    November 29, 2017 | Healthy Lunchbox, Baked Sweets, Holidays & Entertaining

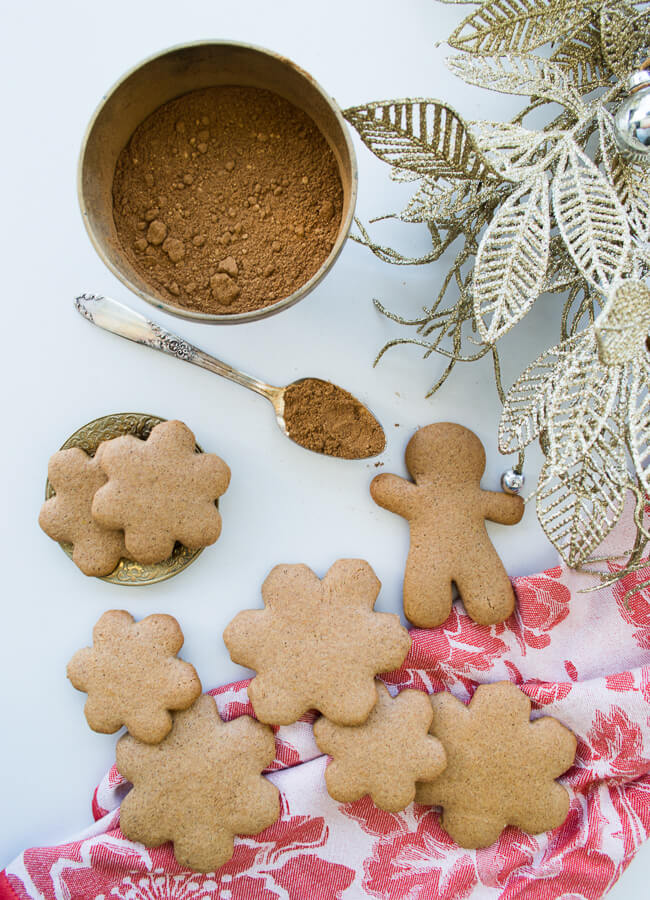
    This healthy gingerbread recipe is a delicious way to bring festive flavours into your home, without the excess sugar and refined ingredients often found in store-bought gingerbread.ย  As well as healthy gingerbread cookies, it makes fabulous gingerbread men and gingerbread houses too. And even though it’s perfect for Christmas, with its nourishing spice blend, you can also enjoy it all year long.

    Whilst I was developing the perfect spice blend, I ended up with quite a lot of it. Because there’s only so many gingerbread biscuits a family can eat, I started experimenting with other ways to enjoy this nourishing, healing blend and came up with quite a few yummy drinks and eats.

    As usual, I just don’t know where to stop when it comes to sharing yumminess, so, I thought I’d share it all! I think the spice mix would make a lovely gift – especially as it is very hardy and has a very long shelf life.

    How would you use it I hear you ask? Here are a few ideas:

    • Add it to hot chocolate (or even your latte)
    • Add it to my delicious basic cake mix (think spiced tea cake)
    • Sprinkle it over baked sweet potato (with a dollop of butter)
    • Add it to your favourite pancake batter (it could replace the spices in this Carrot Cake Pancake recipe)
    • Mix it with maple syrup and drizzle it over yoghurt
    • Add it to my No-bake Muesli Bar (replace the cinnamon)
    • Or add it to your favourite chocolate bliss ball recipe
    • Add it to your banana smoothie – a flavour match made in heaven!

    Really, the possibilities are endless!

    Health benefits

    Gingerbread spices like cinnamon, ginger, and turmeric arenโ€™t just tasty, they also offer a range of health benefits. Cinnamon helps stabilise blood sugar, ginger supports digestion, and turmeric provides anti-inflammatory properties. By making your gingerbread at home, youโ€™re avoiding the vegetable oils and high sugar content typically found in commercial versions, giving your body a healthier treat.

    Ingredients

    The spice mix includes cinnamon, ginger, nutmeg, and clove – ingredients that not only add flavour but also provide nourishment. Combined with wholemeal spelt flour and a natural sweetener like maple syrup, these biscuits are wholesome and delicious without the need for processed ingredients. You can adjust the spice blend to suit your taste, making the gingerbread flavour as ginger-y or mild as you prefer.

    How to make healthy gingerbread

    Making these spelt gingerbread biscuits is simple. Start by combining your dry ingredients, including the spice mix, flour, and bicarbonate of soda. Then mix the melted butter, milk, and maple syrup before adding the wet ingredients to the dry ingredients to form a dough. Once the cookie dough has chilled, roll it out and use cookie cutters for festive shapes. After baking, allow the biscuits to cool completely before enjoying – they firm up as they cool, making them the perfect texture.

    If you own a Thermomix, we’ve also included Thermomix instructions for this recipe.

    Serving suggestions and how to store

    Enjoy these gingerbread biscuits with a hot cup of tea or even use them as edible gifts during the festive season. Feel free to frost them to make them extra celebratory. Store them in an airtight container in the fridge, or freeze them to enjoy later. They also make great treats for lunchboxes if you’re looking for a healthy snack option.

    Vary this healthy gingerbread to suit your dietary needs

    To make these gingerbread biscuits gluten-free, swap the spelt flour for almond meal and arrowroot, or use your preferred gluten-free flour. For a vegan option, use coconut oil instead of butter and choose a non-dairy milk. If youโ€™re looking to reduce fructose, replace the maple syrup with rice malt syrup for a low-fructose version thatโ€™s just as tasty. They are egg-free so perfect for those with egg allergies.

    Take a look at the variations (below the main recipe) for suggestions to alter the recipe to suit any specific dietary requirements.

    For a healthy Gingerbread Loaf recipe, click HERE.

    Or for Gingerbread granola, click HERE.

    Healthy Ginger bread and spice mix
    Print Recipe
    4.77 from 67 votes

    Healthy Gingerbread (and a lovely spice mix to gift)

    This Gingerbread recipe is versatile and delicious. Make it into biscuits, gingerbread boys or girls, or any shape you like really. 
    Prep Time20 minutes mins
    Cook Time10 minutes mins
    Total Time30 minutes mins
    Course: Snack
    Servings: 20 biscuits
    Author: Georgia Harding

    Ingredients

    Spice mix

    • 2 tbsp ground cinnamon
    • 2 tbsp ground ginger
    • 1 tbsp mixed spice
    • 1 tsp ground nutmeg
    • 1 tsp ground clove
    • ยผ tsp ground turmeric
    • ground black pepper -to taste

    Gingerbread biscuit

    • 180 g wholemealย speltย flour (1ยฝ cup) gluten-free variation below
    • 1-2 tbsp spice mix -how much you add depends on how ginger-y you like your biscuits
    • ยผ tsp bicarbonate of soda
    • Pinch sea salt
    • 50 g butter - melted (ยผ cup)ย 
    • 30 ml milk (of choice) (2 tablespoons)
    • 85 g maple syrup (ยผ cup)

    Instructions

    • Preheat your oven to 150ยฐC/300ยฐF (fan forced).
    • In a mixing bowl, combine the flour, spice mix, bicarbonate of soda and salt.
    • In a blender or food processor, mix melted butter, milk and maple syrup until well combined.
    • Add the wet to the dry ingredients and mix together until dough forms. If the mixture seems a little wet, add a little more flour, or dry add more milk (it should be like playdough and not stick to your fingers).
    • Roll into a ball, wrap in baking paper and refrigerate for 30-60 minutes.
    • If you aren't bothered with shapes, roll the dough into a log, chill and then cut the log into slices (to form round biscuits).
    • Or to cut shapes, place the dough between two pieces of baking paper and roll to approximately 2-3 millimetres thick.ย If your kitchen is warm, work quickly as soft dough is hard to shape.
    • Cut shapes with a cookie cutter, place on a lined or greased baking tray and bake for 10 minutes or until golden (gluten-free may need a bit longer).
    • Leave on the tray until completely cooled. They firm as they cool.

    Thermomix method

    • Melt butter 1 minute, temp 90 speed 3.
    • Add the milk and maple syrup and mix 30 sec, speed 4.
    • Add the dry ingredients and mix 30 sec, speed 4 until a thick dough forms.
    • Continue as above.

    Store

    • Store in an airtight container in the fridge or freezer.

    Notes

    Gluten and grain-free

    Substitute spelt flour with 180g almond meal plus 2 tablespoons arrowroot powder. Or, for a firmer gluten-free cookie use half buckwheat/almond meal. Alternatively replace the spelt with your favourite gluten-free or paleo flour.

    Dairy-free and vegan

    Choose a non-dairy milk and replace the butter with coconut oil (it will produce a tougher biscuit once cooled).

    Low-fructose

    Replace the maple syrup with rice malt syrup as your sweetener.
    ย 

    I'd love to hear how you like this versatile recipe? Also if you can add to my list of ways to use the spice mix, that would be wonderful. Post a comment below or rate this recipe.

    Healthy Ginger bread and spice mix

    Rich Chocolate Tarts

    November 15, 2017 | Holidays & Entertaining, Desserts

    I can’t quite believe I’m writing this but it’s that time of year – Christmas is fast approaching so I thought it time to roll out a few festive delights, starting with these delicious, easy to whip-up Rich Chocolate Tarts. Who doesn’t love a rich chocolate tart?!

    This is a great make-ahead dessert for Christmas day as you can prepare all the components in advance and then assemble just prior to serving. The buckwheat flour makes for a really simple, biscuity pastry crust. I love to use it in gluten-free baking because it is such a cost effective flour. I hope you love it!

    Health benefits

    This dessert is packed with wholesome ingredients, including buckwheat flour, a gluten-free alternative rich in fibre and nutrients. The cashew cream provides healthy fats, while cacao is a great source of antioxidants. Sweetened naturally with rice malt syrup or maple syrup, these tarts offer a refined sugar-free option.

    Ingredients

    This recipe includes ingredients such as raw cashews, coconut water, maple syrup or rice malt syrup, and cacao powder, which come together to create a creamy, smooth filling. The chocolate pastry is made with buckwheat flour, butter, coconut sugar, and cacao powder, resulting in a rich, gluten-free base. Fresh fruit like berries or cherries adds a fresh flavour to balance the richness of the chocolate.

    How to make these healthy chocolate tarts

    To make these tarts, start by preparing the chocolate cashew cream. Blend the soaked cashews with cacao powder, coconut water, and a natural sweetener until smooth and creamy, then set the mixture aside in a bowl. For the pastry, combine buckwheat flour, butter, coconut sugar, and cacao powder to form a dough. After chilling the dough, roll it out and bake it in tart tins. Once the pastry has cooled, assemble the tarts by filling the shells with the chocolate cashew cream. Finish by garnishing with fruit and shaved dark chocolate (optional).

    Serving suggestions and how to store

    Serve these tarts chilled, garnished with fresh fruit (my favourites are fresh raspberries, blueberries, strawberries and cherries) and shaved dark chocolate (optional). Store them in an airtight container in the fridge for up to two days. Any leftover pastry dough can be refrigerated or frozen for future use.

    Vary rich chocolate tarts to suit your dietary needs

    This recipe can be adapted to suit different dietary preferences. For a nut-free version of the chocolate filling, replace the cashew cream with whipped cream, crรจme fraรฎche, or coconut yoghurt. For a vegan option, use maple syrup as the sweetener, replace the egg with a chia egg, and substitute the butter in the pastry with coconut oil. If youโ€™re short on time, you can use pre-made chocolate shortcrust pastry and fill it with the chocolate cashew cream, crรจme fraรฎche or coconut yoghurt for a quick and easy version.

    This adaptable dessert is perfect for a variety of dietary needs, ensuring everyone can enjoy this decadent treat!\


    For more easy to make, delicious healthy dessert recipes, click HERE.

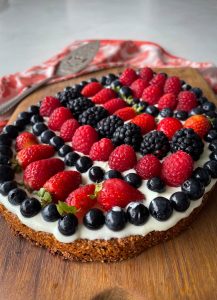
    These Rich Chocolate Tarts are a great make-ahead healthy dessert, perfect for any special occasion or treat!
    Print Recipe
    4.75 from 8 votes

    Rich Chocolate Tarts

    A delicious, yet nourishing dessert that is sure to impress the crowds. Remember to allow soaking time for the cashews. 
    Prep Time20 minutes mins
    Cook Time7 minutes mins
    Total Time27 minutes mins
    Course: Dessert
    Servings: 8
    Author: Georgia Harding

    Ingredients

    Chocolate Cashew Cream

    • 125 g raw cashew nuts (approx. 1 cup) soaked 3-4 hours, or overnight
    • 60 ml coconut water (ยผ cup)
    • 85 g rice malt syrup or maple syrup (ยผ cup)
    • 2-3 tbsp cacao powder (unsweetened Dutch process or raw)

    Chocolate Pastry

    • 280 g buckwheat flour
    • 125 g butter room temperature
    • 80-100 g coconut sugar or rapadura (approx. ยฝ cup)
    • 2 tbsp cacao powder (unsweetened Dutch process or raw)
    • 1 egg/s

    Fruit

    • 1 cup/s fruit -of your choice. I love fresh berries or cherries (think Black-forest flavours)
    Metric - US Customary

    Instructions

    Chocolate Cashew cream

    • Start with the cashew cream. It can be made a day or so ahead, up to you. Soak the cashews for 3-4 hours or overnight. Drain and rinse.
    • To make the chocolate cream, blend the soaked cashews in a powerful food processor or high speed blender until a coarse texture. If using a Thermomix 20 seconds speed 4.
    • Add the rest of the ingredients and blend again until a silky smooth cream is formed. If using a Thermomix 30 seconds, speed 4-5 (you may need to scrape the sides once or twice).
    • Set it aside until you're ready to serve.

    Chocolate Pastry

    • Pre-heat your oven to 180โ„ƒ (fan forced) and grease one large or four small springform tart tins.
    • In a food processor, combine the butter and buckwheat flour until a crumb like texture forms. If using a Thermomix 20 seconds, speed 4.
    • Add in the remaining ingredients and mix until the dough forms a disc. If using a Thermomix 30-40 seconds, speed 4. As you mix it it should come together.
    • Wrap the dough in baking paper and pop in the fridge for 1 hour.
    • Cut the dough in half (you have enough for two large tarts or 8 small tarts - see tip below). Any leftover dough can be refrigerated or frozen until needed.
    • Roll the dough to about 5mm thickness. It's important to work quickly, especially in a hot kitchen - as the dough softens, it's harder to work with. Cut the pastry to suit the tin you are using. You may need to bring the pastry back together and re-roll to use it all up. You can mend any tears or thin areas by pushing the dough into the tin with your fingers.
    • Any leftover you can cut into shapes to decorate or just enjoy as biscuits.
    • Cover the tarts with a sheet of baking paper and weight it to blind bake the shells.
    • Cook for just 7 minutes for a small tart, 10 for a larger one. Remove from the oven and cool in the tins for a few minutes, then, when cool enough to handle, carefully push out of the base and cool completely on a wire wrack.
    • Keep in an airtight container in the fridge or freezer until ready to serve.

    To serve

    • Top the shells with the cashew cream and garnish with fruit and shaved dark chocolate (optional, as pictured).

    Tip

    • Individual tarts are most fool proof as the larger tarts can crack when cutting (unless the pastry is cooked perfectly).

    Store

    • Store in an airtight container in the fridge.

    Notes

    Cheats version

    Use the Careme Chocolate Shortcrust for the quickest dessert ever! You can even fill the cases with creme fraiche and fresh fruit for an even quicker dessert (if dairy-free is not a concern).ย 

    Nut-free

    Fill the cases with whipped cream or creme fraiche or coconut yoghurt (if dairy and nut-free)

    Vegan, dairy-free and egg-free options

    Choose maple syrup as your sweetener for vegan and replace the egg with chia-egg. Replace the butter in the pastry with coconut oil (this will produce a tougher shell once it cools).ย 
    ย 
    ย 

    I hope you love this dessert. I'd love to hear what you think, feel free to post a comment below.ย 

    Protein powders for fussy kids

    August 24, 2017 | Healthy Child

    In my experience, insufficient dietary protein is surprisingly common, especially amongst picky eaters. The one thing that a swing towards processed foods has done, is dramatically reduced the amount of protein many kids (and some adults) consume. You see, most processed convenience foods are generally a combination of fat and carbohydrate (breads, breakfast cereals, crackers, muesli bars, pasta and noodles). Anything with a shelf life is generally protein deficient.

    A vicious circle

    Itโ€™s a bit of a vicious circle because kids who are lacking protein also often reject eating it, preferring high energy foods like refined, simple carbohydrate. They may also have a poor appetite for โ€˜mealsโ€™ and often just want to snack throughout the day. Poor variety is another issue, where they may eat protein but only from one source e.g.; dairy is common.

    To make matters worse, Iโ€™ve found these kids are often also deficient in a number of key nutrients (found in good amounts in, you guessed it, protein-rich foods). These micronutrients not only support their health, but help to build a robust appetite for other good foods (like veggies).

    Why do we need protein anyway?

    We all need protein to build new cells and repair tissue. As kids are still growing (often rapidly), it is especially critical that they are consuming adequate amounts. Protein is used extensively by our bodies, everyday. It’s used to make digestive enzymes, to repair the digestive tract, to make antibodies to fight infection, to grow skin, hair and nails, to make blood cells, for strong bones, to build muscle, to make hormones, to stabilise our blood sugarโ€ฆ.I could go on forever really.

    We cannot store protein, so itโ€™s safe to say, that in order to replace, rebuild and repair, we need to consume protein very regularly.

    Signs of protein deficiency

    In our society, it is rare to see frank protein deficiency.ย However, in my experience, subclinical signs are increasingly common, especially in picky eaters. These include:

    • poor immune responses (getting sick frequently or difficulty recovering from illness)
    • poor appetite or very picky (or more of a snacker, craving simple carbohydrates)
    • poor concentration and trouble learning
    • moodiness and mood swings
    • poor sleep patterns
    • muscular weakness, aches and pains
    • poor growth and development (failure to thrive)
    • skin problems
    • delayed wound healing

    Breakfast protein is SO important

    Breakfast is a meal where protein is most critical, but is often lacking the most. No matter the claims, itโ€™s a stretch to find anything in the supermarket isles thatโ€™s nutritionally adequate for breakfast. Not only that, but most exceed the World Health Organisation’s (WHO) recommended daily intake for sugar in one foul swoop.

    A couple of years ago, I was a parent helper in my son’s class each week. One week, I noticed he was unable to focus, yawning and fidgeting a lot, grumpy and just out of sorts, not the boy I knew. I had a think about what heโ€™d had for breakfast and realised that although heโ€™d eaten a lot (quantity wise), it wasnโ€™t particularly protein-rich (whole grain sourdough and a big fruit smoothie). So I did a little experiment the next few months, alternating between a very protein-rich breakfast and one light on protein (on the days I helped out). The result was clear to me just how essential breakfast protein was for his ability to focus and learn.

    Studies also support the importance of breakfast protein, showing repeatedly that children who donโ€™t have enough breakfast protein are prone to sleep, behavioural and learning challenges. For more information about the importance of dietary protein and lots of ways to include it in your diet, click here.

    Protein supplementation

    As you know, Iโ€™m a huge advocate of persisting to teach kids to love eating a good variety of whole foods – first and foremost. If you have a picky eater The Raising Well Nourished Kids Podcast is worth a listen to support you to support your young people in developing healthy eating habits and positive relationships with and through food. You can listen on Apple Podcasts, Spotify, YouTube or your favourite podcast App!ย 

    However, just as medicine is required occasionally for illness, supplementation is often critical in restoring the appetite and desire for whole foods, especially in picky eaters. Protein supplementation is also often required for people who suffer chronic illness, are athletes or suffering with food intolerance which restricts their protein intake (egg, nut, dairy allergies for example).

    It is also very helpful for those mornings that go pear-shaped and a sustaining brekkie is required quickly. As much as Iโ€™d like to serve a nutritionally balanced, high protein brekkie each and every morning, some days time is just stretched (like when my kids have a 5am swim squad and we are up at 4.30am) and a protein powder supplement is invaluable.

    The vast world of protein powders

    Navigating the many types of protein powders available is tricky business. Many brands are derived from feed-lot, grain-fed cows (also often fed GMOโ€™s), highly processed soy proteins and contain franken-sugars, fructose, maltodextrin starches (aggravate blood sugars and the GIT), additives and more yuk ingredients.

    Most also contain absolutely no plant fibre, good fats or micronutrients (vitamins and mineral) so nutritionally they are incomplete and not at all reflective of a well rounded, whole food meal. Thankfully, there are a select few which offer balanced nutrition and do what we need them to do – provide a sustaining, nutritious supplement, and hereโ€™s the clincher, that actually tastes good. Itโ€™s just got to taste good right?

    What to look for when choosing protein powders

    When choosing a wholefood-based protein powder, there are several key factors to consider to ensure you’re getting a good-quality and effective product:

    Ingredients: Look for a protein powder that is derived from wholefood sources, such as pea protein, brown rice protein (preferably non GMO, sprouted and fermented), hemp protein, or a blend of these. If you’re okay with dairy, choose a Whey based protein powder, ensure it is grass-fed and/or organic. Avoid products with additives, artificial flavours, excess sugar or artificial sweeteners.

    Nutritional Profile: Assess the nutritional content beyond just protein. Look at the levels of essential amino acids, vitamins, and minerals present in the powder. A good wholefood-based protein powder will offer a range of nutrients beyond just protein.

    Allergen Information: Consider any allergies or dietary restrictions. Wholefood-based protein powders are often suitable for those with common allergies (e.g., dairy, soy, gluten), but always check the label for potential allergens.

    Taste and Texture: Personal preference matters too. Choose a protein powder that tastes good to you and mixes well with your favourite fruits and fluid (I love making smoothies with coconut water and yoghurt) or add protein powder to recipes like pancakes, overnight oats or chia puddings. Some wholefood-based powders can have a grainier texture, which may be a consideration.

    By considering these factors, you can select a wholefood-based protein powder that aligns with your dietary preferences, nutritional needs, and taste preferences, ensuring you get the most out of your protein supplement.

    GoodnessMe have a fabulous selection of clean protein powders, you can take a look HERE.

    Protein Powders can be mixed into any smoothie you like really. This is a delicious, super simple recipe that we often have for breakfast or for an after school pre-sport snack (I pop it in a thermos to keep it nice and cold)โ€ฆ

    Protein powders for fussy kids (and a free sample for you to try)
    Print Recipe
    5 from 1 vote

    Black Forrest Breakfast Smoothie

    A nutritionally balanced breakfast or snack, this Black Forrest Breakfast Smoothie is super quick and easy to make.
    Prep Time5 minutes mins
    Total Time5 minutes mins
    Course: Breakfast, Snack
    Servings: 2 (or 1 adult, 2 kids)

    Ingredients

    Simply blend together:

    • 1-2 serve/s wholefood protein powder
    • 250 ml milk (of choice) (1 cup) or coconut water or just water
    • 120 ml natural, Greek or coconut yoghurt (ยฝ cup)
    • 100 g frozen raspberries (1 cup) or cherries
    • 1 tbsp cacao powder - unsweetened Dutch process or raw

    Instructions

    • Blend all of the ingredients in a high speed blender or food processor until smooth and icy. If using a Thermomix, blend 30 seconds speed 7.

    Notes

    Supercharge it

    I think smoothies and parfaits are a great opportunity to โ€˜boostโ€™ nutrition, especially in veggie fussy kids. A little avocado, raw cauliflower, zucchini, baby spinach or sweet potato sit unrecognisable behind this breakfast if youโ€™d like to try it (though youโ€™ll need a good quality high speed blender to make it smooth). This post talks more about hiding vegetables in smoothies.

    Important

    Please speak to your nutritionally trained health care practitioner to determine if your or your child's individual nutritional requirements are being met. This post is not intended to diagnose or prescribe, merely help you to make an informed choice.

    Avocado Blueberry Pancakes

    August 10, 2017 | Breakfast, After School Snacks

    These Avocado Blueberry Pancakesย are my latest recipe to feature on JamieOliver.com.ย I was asked to put a twist on Jamieโ€™s simple One Cup Blueberry Pancakesย โ€“ something simple to whip up for a fast, healthy breakfast or snack.

    These have become my families favourite pancake which Iโ€™m glad about because they are super nutritious and really quick and easy to make. Even though they are not overly keen on avocado, they agree it adds a lovely texture to these pancakes.

    These Avocado Blueberry Pancakes are low in sugar, sweetened only with the maple syrup to serve. If you feel this will be a problem for kids used to sweetener in pancakes, feel free to add a couple for tablespoons of coconut sugar or rapadura to the pancake batter (with the wet ingredients).

    Health benefits

    These pancakes are packed with nutrients. Avocado provides healthy fats, fibre, and vitamins, while blueberries are rich in antioxidants and vitamin C. Using spelt flour adds whole grain goodness, and the option for coconut milk makes it a great choice for dairy-free diets. Together, these ingredients create a meal thatโ€™s both nourishing and satisfying.

    Ingredients

    The pancakes come together with a blend of cinnamon, avocado, milk (dairy or coconut), a natural fat like butter or macadamia oil, an egg, vanilla extract, spelt flour, baking soda, sea salt, and blueberries. Maple syrup is the perfect topping for a touch of sweetness.

    How to make avocado blueberry pancakes

    In a high speed blender, mix cinnamon, avocado, milk, fat, egg, and vanilla until completely smooth. Add spelt flour, baking soda, and salt, folding in gently until just combined. Fold in the blueberries. Heat a pan with butter or oil, add batter, and cook until bubbles form and the edges brown. Do not try to move of flip any sooner as they will fall apart. Flip carefully and serve hot with a drizzle of maple syrup.

    Serving suggestions and how to store

    Serve these pancakes fresh with maple syrup or a dollop of yogurt for added creaminess. To store, place leftovers in an airtight container in the fridge for up to 2 days. Reheat in a pan before serving.

    Vary these avocado blueberry pancakes to suit your needs

    For a gluten-free version, substitute spelt flour with a high-quality gluten-free flour. For a dairy-free option, use coconut milk and macadamia oil. Replace the egg with chia egg or aquafaba for an egg-free variation. To make it vegan, combine the dairy-free and egg-free options.


    For more healthy pancake recipes, click HERE.

    Avocado Blueberry Pancakes are a healthy and delicious twist on classic pancakes, perfect for breakfast or a snack.
    Print Recipe
    4.67 from 15 votes

    Avocado Blueberry Pancakes

    A delicious, highly nutritious breakfast or snack that the whole family will enjoy. 
    Prep Time10 minutes mins
    Cook Time10 minutes mins
    Total Time20 minutes mins
    Course: Breakfast, Snack
    Servings: 4

    Ingredients

    • ยฝ tsp ground cinnamon
    • 1 avocado/s -medium sized
    • 180 ml milk (of choice) (ยพ cup)
    • 1 tbsp butter, ghee or macadamia oil
    • 1 egg/s (see egg-free below)
    • ยฝ tsp vanilla -powder, essence or paste
    • 115 g wholemealย speltย flour (1 cup) see GF below
    • 1 tsp bicarbonate of soda
    • ยฝ tsp sea salt
    • 50 g blueberries (ยฝ cup) fresh or frozen
    • 2 tbsp butter, ghee or macadamia oil

    Serve

    • 80 ml maple syrup

    Instructions

    • In a blender or food processor, mix the cinnamon, avocado, milk and fat of your choice, egg and vanilla until well combined and smooth. If using a Thermomix 30 second, speed 6.
    • Add the spelt flour, baking soda and sea salt and mix until just combined.ย If using a Thermomix 10 seconds, flour symbol.
    • Lastly fold in the blueberries.
    • Heat the fat in a cast iron or non-stick pan over a moderate heat.
    • Add the pancake batter to the pan and cook until the batter starts to bubble and the edges brown. Don't try to move or flip them before the edges are brown as they can fall apart more easily if not cooked well on one side.
    • Carefully flip and serve hot with maple syrup.

    Store

    • Store in an airtight container in the fridge.

    Notes

    Gluten-free

    Substitute the spelt for a good quality gluten-free flour.

    Dairy-free

    Choose coconut milk and macadamia oil for your fat.

    Egg-free

    Replace the egg with chia egg or aquafaba. I've had lots of feedback that this works a treat.

    Fructose friendly

    Don't add any extra sugar to the batter and serve with rice malt syrup instead of maple syrup.ย 

    Vegan

    Combine the dairy and egg-free variations.

    I'd love to hear how you like this recipe. Post your comments and questions in the comments below.

    Cumin Scrambled Eggs with Yoghurt, Green Olives and Flatbread

    July 13, 2017 | 30 Minute Meals, Vegetarian, Breakfast

    These Cumin Scrambled Eggs with Yoghurt, Green Olives and Flatbread is a breakfast that my hubby often makes on the weekend, at least the scrambled egg part. Itโ€™s become our new family favourite breakfast and is the next of my recipes to feature on JamieOliver.com – itโ€™s my spin on Jamie’s Silky Masala Eggs.

    I think the flavours of the cumin scrambled egg with the yoghurt (or labne), green olives and olive oil are a match made in heaven.

    Health benefits

    Eggs are packed with high-quality protein and essential vitamins. The addition of yoghurt provides gut-friendly probiotics, while green olives offer healthy fats and antioxidants. Cumin adds digestive benefits and anti-inflammatory properties, making this meal both nourishing and delicious.

    Ingredients

    To make this dish, youโ€™ll need eggs, cumin, sea salt, black pepper, olive oil or butter, a dollop of thick yoghurt, green olives (sliced), and flatbread (store-bought or homemade). You can add extra herbs or spices to your eggs for an even more flavourful experience.

    How to make Cumin Scrambled Eggs

    Start by whisking the eggs with cumin powder, salt, and pepper in a small bowl. Heat olive oil or butter in a pan over low-medium heat, then pour in the egg mixture. Stir gently until the eggs are soft and creamy. While the eggs are cooking, warm the flatbread in the oven or on a skillet. Once the eggs are ready, serve them on a plate, topping with a generous spoonful of yoghurt, sliced green olives, and a side of warm flatbread.

    Serving suggestions and how to store

    Serve the cumin scrambled eggs with yoghurt, olives, and flatbread immediately, garnished with fresh herbs or a drizzle of olive oil if desired. For leftovers, store the scrambled eggs and yoghurt separately in airtight containers in the fridge for up to 2 days. Flatbread can be kept in a sealed bag or airtight container for a day or two and reheated when needed.

    Vary this cumin scrambled eggs to suit your dietary needs

    For a dairy-free option, replace the yoghurt with a plant-based alternative such as coconut yoghurt or cashew cream. You can also use gluten-free flatbread or substitute with rice cakes or other gluten-free bread if preferred. Adjust the spices according to your taste by adding paprika, coriander (cilantro) or a pinch of chilli flakes for heat.

    My Cumin Scrambled Eggs, with Yoghurt, Green Olives and Flatbread is a delicious and nourishing breakfast or anytime meal.
    Print Recipe
    4.67 from 6 votes

    Cumin Scrambled Eggs with Yoghurt, Green Olives and Flatbread

    My Cumin Scrambled Eggs, with Yoghurt, Green Olives and Flatbread is a delicious and nourishing breakfast or anytime meal. My whole family adore this recipe
    Prep Time20 minutes mins
    Cook Time15 minutes mins
    Total Time35 minutes mins
    Course: Breakfast
    Servings: 4

    Ingredients

    Spelt flatbread:

    • 180 g wholemealย speltย flour (1ยฝ cups)
    • 1 tsp sea salt
    • 1 tbsp extra virgin olive oil -or melted butter/ghee
    • 60 ml water (ยผ cup)
    • 1 tbsp extra virgin olive oil -or melted butter or ghee to cook with

    For the eggs:

    • 8-10 egg/s (large)
    • 60 ml milk (of choice) (ยผ cup) of your choice
    • 1 tsp ground cumin
    • ยผ tsp ground turmeric
    • ยฝ tsp sea salt - or to taste
    • ground black pepper -to taste
    • 120 g labne (or natural yoghurt) (ยฝ cup) or thickset full-fat natural or Greek yoghurt
    • 8 Sicilian green olives
    • 1 tbsp extra virgin olive oil -extra virgin, to serve
    • 1 lemon/s -cut into quarters, to serve (optional)

    Instructions

    • Start with the flatbread. Combine spelt flour and salt in a large bowl. Add the olive oil and mix with your fingers until itโ€™s crumbly (you can also do this in a food processor or Thermomix, 10 sec speed 5). Slowly add water and mix until the dough just comes together (If using a Thermomix, 10 seconds, speed 3). If the dough doesn't come together easily, mix in a little more water, teaspoon by teaspoon.
    • Turn out the dough onto a lightly floured surface and knead until the dough is smooth and no longer sticks to your fingers, about 2 minutes. (If using a Thermomix, flour symbol, 2 minutes). Cover with a damp cloth and let it rest for 15 and up to 30 minutes.
    • Whilst your flat breads are resting - in a large bowl or jug whisk the eggs, milk, cumin, turmeric, sea salt and black pepper until the eggs are frothy. Set aside.
    • Plate up your labne or yoghurt, making a little well in the middle of it to hold a little olive oil. Add the Sicilian green olives and some leafy greens (dressed with olive oil, sea salt and pepper).
    • Divide the dough into 8 balls. Lightly flour a rolling pin and a clean work surface. Flatten and roll it out, picking it up and rotating it to make sure it isn't sticking, until quite thin and about 15cm in diameter. Repeat with the remaining dough, placing them on baking sheets so they don't touch.
    • Heat a large cast-iron skillet over medium-high heat and rub with a little butter or oil to coat the cooking surface. Add the flat bread and cook for about 30 seconds to 1 minute each side until slightly puffed. Wrap them in a clean tea-towel to keep warm. Repeat with the remaining breads, stacking and covering them as you go to keep them warm and pliable.
    • Once the flat bread is cooked, heat a little more oil or butter in the pan and pour in your eggs, folding the mixture over with a wooden spoon. Remove as soon a the egg is just set, taking care not to over cook.
    • Add the scrambled eggs and flat bread to the plates and serve immediately.
    • I love to serve with wedges of lemon.

    Notes

    Dairy-free

    Sub the yogurt for coconut yoghurt,omit the milk in the scramble and choose olive oil to cook in/ for the flat bread.

    Gluten-free

    Sub the spelt for a good quality gluten-free โ€˜breadโ€™ flour.

    Mid-week 'fast' versionย 

    We often have this for breakfast mid week and obviously don't have the time to make the flat bread. So we just do the scramble with a dollop of yoghurt on top, drizzle of oil, handful of salad greens and toast. Not as pretty, but tastes as good and it's really quick to make too. We also love kim chi with this.
    ย 

    I can't wait to hear what you think. Post a comment below or rate this recipe.ย 

    Healthy Breakfast Tart

    May 10, 2017 | Breakfast, Desserts

    With Motherโ€™s Day approaching I thought Iโ€™d share a gorgeous little recipe that my whole family adores โ€“ a healthy, yet easy to make Healthy Breakfast Tart. This recipe also features on JamieOliver.com as my spin on the great manโ€™s Mini super-fruit breakfast wraps.

    This healthy breakfast tart is a delicious, wholesome way to start your day. With a crunchy, nutty base and a creamy yoghurt filling, it’s both satisfying and nutritious. Topped with your favourite fresh or stewed fruits, it’s as versatile as it is tasty.

    I know this tart might look a bit complicated and decadent but it really is neither. Itโ€™s also extremely versatile and intolerance friendly and you can alter the toppings to suit your tastes or to what ever is in season.

    So Happy Mothers Day to each and every amazing mumma. I hope your family spoil you rotten!

    Health benefits

    Packed with healthy fats from nuts and seeds, this breakfast tart also provides fibre from chia seeds and oats (or quinoa flakes for a gluten-free option). Topping it with Greek or coconut yogurt adds a dose of probiotics for gut health, while fresh fruit offers antioxidants and natural sweetness.

    Ingredients

    This tart recipe couldn’t be easier to make. The granola like base is made from a mix of chia seeds, nuts or seeds, rolled oats (or quinoa flakes), coconut oil, rice malt syrup or honey, vanilla extract and warming spices like cinnamon, cardamom, and ginger. The filling is simply thick Greek or coconut yogurt, topped with fresh or stewed fruit of your choice for a naturally sweet finish.

    How to make this healthy breakfast tart

    To make the crust of this fruit tart, blend chia seeds and nuts or seeds in a food processor until fine. Add oats, coconut oil, sweetener, spices, and a bit of water, then pulse until the mixture forms a dough. Press the dough into a greased springform tart pan and bake for 15 minutes. Let it cool, then top with yogurt and your favourite fresh fruit like berries or kiwi or banana.

    Serving suggestions and how to store

    This tart is best served fresh with a generous topping of fresh fruit (or stewed fruit if you prefer). Itโ€™s perfect for breakfast or brunch, and slices neatly for easy serving. You can store leftovers in an airtight container in the fridge for up to two days, but it’s best enjoyed the same day for optimal freshness.

    Vary this healthy breakfast tart to suit your needs

    For a gluten-free or grain-free version, use quinoa flakes instead of oats. To make it dairy-free or vegan, swap the Greek yogurt for coconut yogurt. If you’re avoiding nuts, replace them with seeds like sunflower or pumpkin seeds, and for a coconut-free option, use macadamia nut oil in the base.

    Take a look at the variations (below the main recipe) for suggestions to alter the recipe to suit any specific dietary requirements.


    For more delicious, easy to make, healthy breakfast recipes, click HERE.

    Healthy Breakfast fruit tart - This Healthy Breakfast Tart is a versatile, nourishing start to the day. It suits grain, gluten, dairy, fructose, egg & nut-free. Thermomix method included.
    Print Recipe
    4.94 from 15 votes

    Healthy Breakfast Tart

    This quick and easy to prepare tart is super nourishing so good enough for breakfast but pretty enough for dessert (or just dessert for breakfast)!
    Prep Time10 minutes mins
    Cook Time15 minutes mins
    Total Time25 minutes mins
    Course: Breakfast, Dessert
    Servings: 4

    Ingredients

    Base

    • 1 tbsp chia seeds
    • 120 g mixed nuts or seeds (ยพ cup)
    • 65 g rolled oats (โ…” cup) or rolled quinoa flakes
    • 60 g coconut oil (ยผ cup) melted if solid
    • 85 g rice malt syrup or honey ยผ cup approx.)ย taste the batter and alter the sweetness to taste
    • 1 tsp vanilla -paste or powder
    • 1 tsp ground cinnamon
    • 1 tsp ground cardamom
    • ยฝ tsp ground ginger
    • 1 tbsp water

    Filling

    • natural, Greek or coconut yoghurt
    • Fresh or stewed fruit of your choice

    Instructions

    • Preheat your oven to 180โ„ƒ/ 350โ„‰. Grease a spring form round or rectangle tin.
    • In a food processor grind the chia to a fineย meal. If using a Thermomix, blend 10 seconds, speed 8.
    • Add the nuts and/or seeds and grind to a meal. If using a Thermomix, grind 7-8 seconds, speed 8.
    • Now add the rest of the base ingredients and pulse to just combine and break up the oats. If using a Thermomix, turbo x 3-4 pulses.
    • It should form a dough that sticks together when pressed.
    • Press into yourย spring form tin with wet finger tipsย and bake for 15 minutes.
    • Remove from the oven, allow to cool until warm, then removeย from the tin.
    • Top with unsweetened Greek or thick-set natural yoghurt and top with fresh fruit (fig, blueberries, strawberries, kiwi-fruit, mint) or even stewed fruit.

    Store

    • Store in an airtight container in the fridge.

    Easter Inspired Breakfast Tart

    • To make this Easter inspired breakfast tart, I made a mould for the biscuit base from tin foil by folding strips and stapling together then forming into an 'egg' shape.
    • This is the side on view of this cute little Breakfast Tart. It slices beautifully into neat portions too so it's easy to serve.

    Notes

    Gluten and grain-free

    Choose rolled quinoa flakes instead of oats.

    Dairy-free and vegan

    Replace the Greek yoghurt with coconut yoghurt.

    Nut-free

    Choose seeds (mix of sunflower and pumpkin seeds is lovely) and coconut oil.

    Coconut-free

    Choose the macadamia nut oil for the base.

    Tip

    You can prepare the base and store it airtight until ready to serve.
    ย 
    ย 

    How yum is this? I'd love to hear what your favourite topping is - post your twists in the comments below.

    Anzac Cream Popsicles

    April 24, 2017 | Ice-blocks

    These Anzac Cream Popsicles are a nostalgic twist on a classic Australian treat. Combining the buttery, oat goodness of Anzac biscuits with creamy milk and a hint of vanilla, theyโ€™re the ultimate treat for a hot summer day with simple ingredients and easy customisations.

    Thereโ€™s a reason why some flavour combos are so popular โ€“ because they just work and taste good! As a kid I loved dunking biscuits in creamy milk โ€“ I wasnโ€™t allowed to do it too often, except at my Nans house. Generally, it was an Anzac Bikkie straight out of the oven that I lovingly dunked until the last part dissolved between my fingers (Iโ€™m one for trying to make good things last as long as possible). Anyhow, Iโ€™m sure this is how the popular ice-cream flavour โ€˜cookies and creamโ€™ was born?

    So as I took a batch of Anzacs out of the oven yesterday, I had an urge to road test my new stainless steel Onyx popsicle moulds and these Anzac Cream Popsicles were born. My kids are bursting at the seams to tuck into one, hope you enjoy this Anzac come nostalgic inspired treat.

    Health benefits

    This low sugar recipe offers a fun way to enjoy homemade treats with control over ingredients. Coconut cream is a great dairy-free alternative, and the sweetness can be adjusted to suit your preference.

    Ingredients

    The recipe features Anzac biscuits, milk or nut milk, cream or coconut cream, sweetener (like maple syrup or honey), and vanilla. These ingredients come together to create a creamy, flavour-packed frozen treat.

    How to make these Anzac cream popsicles

    To make these frozen treats, start by breaking one Anzac biscuit into small pieces and placing them into popsicle moulds. In a blender, combine the remaining biscuit with milk, cream, sweetener, and vanilla extract until smooth. Pour the mixture into the moulds over the biscuit pieces and freeze until set. If using a Thermomix, blend for 20 seconds at speed 6 for a perfectly smooth consistency.

    Serving suggestions and how to store

    Enjoy these popsicles straight from the freezer on a warm day. Store them in the moulds or transfer them to an airtight container to avoid freezer burn.

    Vary these Anzac cream popsicles to suit your dietary needs

    For a dairy-free and vegan option, opt for nut milk and coconut cream, and use a dairy-free version of the Anzac biscuit. Gluten or grain-free versions are easily achieved by using the corresponding Anzac biscuit recipe. To add a fruity twist, mix in chopped strawberries before freezing.

    Anzac cream popsicles - These Anzac Cream Popsicles are a super simple to make Anzac inspired treat. Think a healthy take on Cookies and Cream. Recipe includes thermomix method.
    Print Recipe
    5 from 1 vote

    Anzac Cream Popsicles

    My Aussie twist on 'Cookies and Cream' Ice cream - a delicious, guilt-free sweet treat the whole family will love.
    Prep Time10 minutes mins
    Freeze4 hours hrs
    Total Time4 hours hrs 10 minutes mins
    Course: Dessert
    Servings: 6 popsicles

    Ingredients

    • 2 Anzac biscuits
    • 370 ml milk (of choice) (1ยฝ cups)
    • 60 ml cream or coconut cream (ยฝ cup)
    • 1-3 tbsp maple syrup (or rice malt or honey) amount depends upon the level of sweetness required
    • 1 tsp vanilla -powder, extract or essence

    Instructions

    • Break pieces off one of the Anzacย biscuits and divide between six popsicle moulds.
    • Blend together the remainingย Anzac biscuit with the milk, cream, sweetener and vanilla (If using a Thermomix 20 seconds, speed 6).
    • Top withย the blended mixture and freeze immediately.

    Notes

    Dairy-free and vegan

    Choose nut milk/ coconut cream and the dairy-free version of my Anzac biscuit.

    Gluten and Grain-free

    Bake the gluten/grain-free version of my Anzac biscuit.

    Add strawberries

    Next batch Iโ€™m adding chopped strawberries to the mix.
    ย 

    I'd love to hear how you enjoy thisย icyย treat - post a commentย below.ย 

    Creamy Lemon Thyme Dip

    April 19, 2017 | Healthy Lunchbox, After School Snacks, Dips

    This Creamy Lemon Thyme Dip combines roasted cauliflower, creamy cannellini beans, and aromatic herbs for a fresh and zesty dip. Itโ€™s a healthy alternative to store-bought cream cheese dips (or hummus), bursting with flavour and perfect for entertaining or as an everyday snack.

    So weโ€™re coming into winter here in Australia and itโ€™s a time to optimise immune function and avoid seasonal bugs. Food is always the best medicine and prevention is way better than cure โ€“ so itโ€™s certainly a good time for me to share this immune boosting Creamy Lemon Thyme Dip. Itโ€™s delicious, creamy texture often appeals to kids, so itโ€™s sure to be popular with the whole family.

    Health benefits

    This dip is especially good because it has a boost from one of natures most protective and nourishing vegetables โ€“ cauliflower. Move over oranges, cauliflower is a rich source of Vitamin C and contains many detoxifying, anti inflammatory, antioxidants to protect the body against disease.ย The garlic, thyme and rosemary are all immune boosting herbs and the cannellini beans are a fabulous source of fibre, antioxidants and protein (which is so essential for a healthy immune system).

    Ingredients

    This dairy-free, healthy dip features roasted cauliflower, cannellini beans, fresh garlic, thyme, rosemary, lemon zest and juice, olive oil, and seasoning. These simple ingredients blend into a creamy, flavour-packed spread.

    How to make this creamy lemon thyme dip

    Begin by roasting cauliflower florets until tender, as roasting enhances their natural sweetness and adds depth of flavour. Once cooled, combine the cauliflower with cannellini beans, minced garlic, fresh herbs, lemon zest and juice, olive oil, and seasoning in a food processor. Blend until smooth and creamy. For a Thermomix, simply follow the chopping and blending instructions for quick preparation.

    Serving suggestions and how to store

    Serve this dairy-free dip in a bowl drizzled with olive oil alongside raw or steamed vegetables, crackers, sourdough, or crispy baked pita chips. Feel free to sprinkle with chives or your favourite fresh herbs too. Store in an airtight container in the fridge, with a thin layer of olive oil to preserve freshness. It can also be frozen for later use.

    Vary this creamy lemon thyme dip to suit your needs

    For a garlic-free option, swap the garlic for a pinch of cumin powder and chilli powder to maintain a savoury depth.


    For more delicious, healthy dip recipes, click HERE.

    This Creamy Lemon Thyme Dip is a deliciously healthy and versatile option, perfect for serving with veggies, crackers, or sourdough. Packed with cauliflower, cannellini beans, and fresh herbs, it's a flavourful addition to any snack or meal.
    Print Recipe
    5 from 2 votes

    Creamy Lemon Thyme Dip

    This Creamy Lemon Thyme Dip is especially good because it has a boost from one of natures most protective and nourishing vegetables โ€“ cauliflower. This is one delicious, nutritious dip!
    Prep Time10 minutes mins
    Total Time10 minutes mins
    Course: Appetizer
    Servings: 4

    Ingredients

    • 250 g cauliflower (approx. 2 cups) broken into florets
    • 425 g can cannellini beans -drained and rinsed
    • 1 clove/s garlic -minced
    • 1 tsp fresh thyme leaves -picked off stems
    • ยฝ tsp fresh rosemary leaves -finely chopped
    • 1 lemon/s -zest
    • 2 tbsp lemon juice
    • 1 tbsp extra virgin olive oil -extra virgin
    • Sea salt and freshly ground black pepper -to taste

    Instructions

    • Preheat the oven to 180โ„ƒ/350โ„‰.
    • Bake the cauliflower until just tender (approx 15 minutes) and allow to cool. You could also steam it if you prefer (I think baking gives it a better flavour though).
    • Place all of the ingredients into a food processor and blend until creamy.
    • It can be made ahead and the lovely flavours develop with time.

    Thermomix Method:

    • Bake your cauliflower as above.
    • Mince the garlic, 2 seconds, speed 7 (you may need to scrape the sides and repeat).
    • Add the thyme and rosemary and chop, 5 seconds, speed 7 (until finely chopped).
    • Add the rest of the ingredients and blend 30 seconds, speed 5.

    Serve

    • with a drizzle of olive oil
    • with raw or lightly steamed vegetables
    • with crackers or crusty sourdough (I have an awesome selection of easy to make home made savoury crackers in my ebook โ€˜The Well Nourished Lunch Boxโ€™ โ€“ one of them is pictured here)
    • with crispy baked pita or mountain bread

    Store

    • Drizzle with olive oil to seal it. Store in in airtight container in the fridge.
    • Can also be frozen.

    Notes

    Garlic-free

    Substitute the garlic with a pinch each of cumin powder and chilli powder.
    ย 

    I'd love to hear how you like this recipe. Post a comment and/or rate his recipe below.ย 

    Almond Berry Scone Cake

    March 8, 2017 | After School Snacks, Baked Sweets

    This Almond Berry Scone Cake is a healthy twist on a classic scone, combining the rich flavour of almond meal with bursts of juicy berries. It’s simple to make, naturally sweetened, and adaptable to various dietary needs, making it a crowd-pleaser for any occasion.

    Because my kids go to a nut-free school, we often use after school as a time to include the beneficial fats and phytonutrients found in nuts. This Almond Berry Scone Cake isย one of my kids favourite after school or weekend snacks. I love it too because it’s easy and quick to make and I have to say, I’m a bit partial to this delicious treat!

    It also make a fabulous dessert served with cream or vanilla bean ice-cream.

    Health benefits

    Almond meal is a fantastic source of healthy fats, protein, and vitamin E, while berries add a boost of antioxidants and natural sweetness. With the option to use natural sweeteners, this cake is a nutritious alternative to traditional baked treats.

    Ingredients

    The batter in this scone recipe combines a wholesome blend of almond meal, arrowroot or tapioca flour, shredded coconut, lemon zest, and a choice of natural sweeteners like honey or maple syrup. Fresh or frozen berries add a fruity burst to every bite, while vanilla extract and baking powder bring balance and lift to the cake.

    How to make almond berry scone cake

    Start by combining the wet ingredients, including the melted coconut oil, your chosen sweetener, and an egg, until smooth. Mix in the dry ingredients – almond meal, arrowroot, coconut, lemon zest, vanilla, and baking powder until well combined, then gently fold in the berries. Once the batter is ready, transfer it to a baking tin lined with parchment paper (baking paper), smoothing the surface with a wet spoon. Bake in a preheated oven until golden and cooked through, allowing the cake to cool slightly before serving.

    Serving suggestions and how to store

    This almond scone cake is best served warm or at room temperature, either on its own or accompanied by a dollop of coconut yoghurt, Greek yogurt or cultured cream (creme fraiche). For added crunch, you can top the batter with slivered almonds (or sliced almonds) before baking. Leftovers should be stored in an airtight container in the fridge, where they will keep for a few days, or in the freezer for longer storage.

    Vary this almond berry scone cake to suit your dietary needs

    For a fructose-friendly version, use rice malt syrup as the sweetener. If you prefer a coconut-free option, replace the coconut oil with melted butter and omit the shredded coconut in favour of more almond meal. Egg-free adaptations can be made by substituting the egg with a chia egg or aquafaba, and a vegan version is achieved by using both a plant-based sweetener and the egg-free adjustment. This recipe is not suitable for nut-free diets, but my Well Nourished Lunchbox ebook offers plenty of nut-free options. Hazelnut meal works beautifully in place of almond meal for a richer flavour, and sliced stone fruits are a delicious alternative to berries, offering a seasonal twist to this versatile cake.


    For more delicious, easy to make healthy cakes and sweet treats, click HERE.

    A delicious Almond Berry Scone Cake that's naturally sweetened, gluten-free, and perfect for a healthy treat. Try it with coconut yoghurt or cultured cream for an extra indulgence.
    Print Recipe
    4.93 from 14 votes

    Almond Berry Scone Cake

    This moist, grain, gluten and dairy-free Almond Berry Scone Cake is so easy to make (just blend and bake) and really delicious. It's sure to become a firm favourite. 
    Prep Time10 minutes mins
    Cook Time30 minutes mins
    Total Time40 minutes mins
    Course: Dessert, Snack
    Servings: 4

    Ingredients

    • 50 g coconut oil (ยผ cup) melted
    • 85 g rice malt syrup, honey or maple syrup (ยผ cup)
    • 1 egg/s
    • 150 g almond meal (1ยฝ cups)
    • 2 tbsp trueย arrowroot flourย  (or tapioca flour)
    • 20 g shredded coconut (ยผ cup)
    • 1 lemon/s -zest
    • 1 tsp vanilla -powder, extract or essence
    • 1 tsp baking powder
    • 60 g berries (ยผ cup) of your choice, fresh or frozen

    Instructions

    • Preheat the oven to 180โ„ƒ/350โ„‰ (fan-forced).
    • In a food processor or with a hand mixer combine the coconut oil, sweetener and egg. If using a Thermomix 10 seconds, speed 4.
    • Add the almond meal, arrowroot, coconut, lemon zest, vanilla and baking powder and mix until well combined. If using a Thermomix 20 seconds, speed 4 (scraping the sides)
    • Fold the berries intoย the batter. If using a Thermomix 10 seconds, reverse speed 1-2.
    • Line a small round cake tin (I used 16cm tin) with baking paper and scrape the thick batter into the tin.
    • Using a wet spoon, gently shape the batter into the base of the tin.
    • Bake for 30-40 minutes (until cooked in the middle).

    Serve

    • Serve as is or with a little coconut yoghurt or cultured cream on the side.
    • You can also top with slivered or flaked almonds for a nice crunchy top.

    Store

    • Store in an airtight container in the fridge or freezer.

    Notes

    Fructose friendly

    Choose rice malt as your sweetener.

    Coconut-free

    Replace the coconut oil with melted butter and replace the shredded coconut with more nut meal.

    Egg-free

    Substitute the egg with a chia egg or aquafaba.

    Vegan

    Choose the dairy-free version and rice malt or maple syrup as your sweetener.

    Nut-free

    This is not the recipe for you.ย For 150 pages of nut-free recipes, take a look at my super popular ebook 'The Well Nourished Lunchbox'. Click HERE to find out more and read the rave reviews.

    Hazelnut

    This is lovely with hazelnut meal too.

    Another fruit

    I love this with sliced stone fruit too.
    ย 

    Let me know how you like it โ€“ post a comment below (I'd be extra appreciative if you rate it too) !

    Fruit Crumble Muesli Bar

    February 6, 2017 | Healthy Lunchbox, After School Snacks, Baked Sweets

    This Fruit Crumble Muesli Bar is the perfect balance of wholesome ingredients and natural sweetness, making it a go-to snack for busy days or a treat in the kids’ lunchboxes. Itโ€™s a versatile recipe thatโ€™s easy to adapt with your favorite seasonal fruits, and the base doubles as both a crunchy foundation and a crumbly topping. Plus, itโ€™s super easy to make and packed with nutrients from oats, seeds, and fruit.

    I love to make this slice if I need to use up over ripe fruit. Iโ€™m not a fan of using dried fruit (like dates/sultanas etc) in baking as I find it gives me a big sugar rush (followed by brain fog and energy slump) and Iโ€™ve also noticed my kids desire for sugar increases if they eat dried fruit. So I prefer to use fresh fruit in my baking and this Fruit Crumble Muesli Bar is one of my families favourite whole food treats.

    Health benefits

    Packed with oats, mixed seeds, and seasonal fruit, these muesli bars provide a great source of fibre, healthy fats, and vitamins. Oats in herbal medicine are known for supporting nervous system health while seeds like sunflower and pepitas are rich in essential fatty acids and minerals. The fruit filling offers a natural sweetness, full of antioxidants and fibre, making this a healthy, nut-free snack.

    Ingredients

    This recipe includes simple, wholesome ingredients like rolled oats, mixed seeds, coconut, and your favourite seasonal fruit. You can easily adapt it with gluten-free or dairy-free substitutions, depending on your dietary needs.

    How to make Fruit Crumble Muesli Bar

    Start by prepping the crumble mixture and pressing two-thirds of it into the base of your lined baking tin. While it bakes for 10 minutes, soften your fruit filling on the stove. Then, layer the fruit over the baked base, top with the remaining crumble, and bake until golden brown. Let it cool before slicing for the perfect, non-crumbly bars.

    If you own a Thermomix, we’ve also included Thermomix instructions for this recipe.

    Serving suggestions and how to store

    These bars are perfect for an on-the-go snack or as a dessert. Store them in an airtight container in the fridge, or freeze them to pack in lunchboxes straight from the freezer. You can also serve them warmed up with a little cream for an indulgent treat.

    Vary fruit crumble muesli bar to suit your needs

    For a gluten-free version, swap the spelt flour for gluten-free flour and use quinoa flakes instead of oats. If you’re dairy-free or vegan, coconut oil makes an excellent substitute for butter, and maple syrup or rice malt syrup works as a sweetener. You can even switch out the seeds for chopped nuts if you want a nutty twist! Take a look at the variations (below the main recipe) for suggestions to alter the recipe to suit many specific dietary requirements.

    My favourite fruits in the fruit crumble muesli bar

    I tend to choose fruits that have seen better days to make this recipe – like over ripe plums, pears, strawberries, raspberries or blueberries. Or floury apples often end up in this bar (I love them combined with rhubarb or berries to make berry crumble bars).


    For more delicious, easy to make healthy snacks and treats, click HERE.

    This delicious Fruit Crumble Muesli Bar is great for school lunches & can be frozen for a hassle free snack. Nut, gluten, dairy-free options.
    Print Recipe
    4.95 from 50 votes

    Fruit Crumble Muesli Bar

    Nut and dried fruit-free, this Fruit Crumble Muesli Bar is a delicious, nourishing edition to any lunchbox. It freezes well also, so it's great to batch-bake.
    Prep Time15 minutes mins
    Cook Time30 minutes mins
    Total Time40 minutes mins
    Course: Dessert, Snack
    Servings: 12

    Ingredients

    Base / crumble

    • 125 g butter or coconut oil -cubed
    • 170 g rice malt syrup, honey or maple syrup (ยฝ cup)
    • ยฝ tsp bicarbonate of soda
    • 120 g mixed seeds (1 cup approx.) I used sunflower seeds and pepitas
    • 120 g wholemealย speltย flour (1 cup)
    • 200 g rolled oats (2 cups) or quinoa flakes (or a mixture)
    • 50 g desiccated coconut (ยฝ cup)
    • 1 tsp ground cinnamon

    Filling

    • 1 cup/s your choice of seasonal fruit (fresh plum, apricot, nectarine, peach, berries, apple, pear, cherries) -finely diced or sliced
    • 2 tbsp rice malt syrup, honey or maple syrup (optional)
    • 1 tbsp butter
    • 1 tbsp chia seeds

    Instructions

    • Pre-heat the oven to 180โ„ƒ / 350โ„‰ (fan-forced).
    • In a small pot melt the butter and sweetener, mixing to combine. Add the bicarb and stir well.
    • I pulse the seeds in a food processor to break them up and make a finer slice (but you donโ€™t have to).ย Mix the seeds, flour, oats (or quinoa), coconut and cinnamon in a bowl.
    • Add the butter/ sweetener mix and stirย to combine.
    • Line a small tin (27cm x 18cm) with baking paper. Press โ…” of the mixture into the base of the tin and press down firmly with wet hands and bake for 10 minutes. The remaining โ…“ will formย the crumble top (so set aside until after the fruit is ready).
    • Whilst this is baking, put all the filling ingredients into the small pot (that you used in the first stage, no need to wash). Iโ€™ve used cherries and plums in this photograph as they are in season right now
    • Simmer until the fruit starts to soften, stirring occasionally.
    • Once the base is cooked, top with the fruit mixture and with wet hands, place with the rest of the crumble over the fruit.
    • Bake for approximately 20 minutes or until just golden brown.
    • Allow to cool in the pan, refrigerate until firm and then cut into slices (cooling it allows for it to be sliced without crumbling).

    Thermomix Method

    • Melt the butter and sweetener 1 minute, temp 90, speed 3ย or until melted and combined.ย Add the bicarb and mix 5 seconds speed 3. Set aside.
    • Pulse the seeds, turbo button 3-4 times (check through the lid after each pulse to chop as required). Add the rest of the crumble ingredients and the butter/sweetener and mix 15 seconds, speed 3. You may need to scrape the sides to fully combine.
    • The fillingย can also be cooked in the TMX, all of the ingredients into the bowl, temp 90, 100, reverse speed 1. The time depends upon the fruit (softer fruit needs less time), approx 3-5 minutes.
    • Assemble as above.

    Store

    • Airtight in the fridge or freezer. You can pack in school lunch boxes from frozen. I also love this heated up with fresh cream โ€“ very indulgent!!

    Slice gone 'green' (or flecked green)

    • You may have noticed that your seed containing cakes, slices or cookies turn or fleck 'green'. I can explain...Sunflower seeds contain chlorogenic acid which reacts with the baking powder and bicarb when it's heated and turns various shades of green when cooled. To reduce the โ€˜shrek-lookโ€™ you can reduce the baking powder or bicarb (by about a third) or add 2 tsp lemon juice or vinegar to the wet ingredients. But remember - even if they do turn green, they are completely safe to eat.

    Notes

    Gluten and grain-free

    Substitute the spelt for gluten free flour and the oats with quinoa flakes (rolled quinoa).

    Dairy-freeย 

    Substitute the butter with coconut oil.

    Vegan

    Choose rice malt or maple syrup as your sweetener. Substitute the butter with coconut oil.

    Nutty

    The seeds can be substituted with any nuts. I love this with chopped almonds and pecans or walnuts.

    Fructose friendly

    Choose rice malt syrup for your sweetener and low fructose fruits for the filling (raspberries, rhubarb is my fave).

    Coconut-free

    Replace the coconut with ยผ cup of ground seeds or nut meal (if nut free isn't important).ย 

    After more healthy lunchbox inspiration?

    My best selling ebook The Well Nourished Lunchboxย has you covered and is choc-a-block full of healthy lunchbox inspiration - and not just sweet but heaps of savoury crackers, sandwich-free lunch recipes and so much more. In fact, it's 150 pages of goodness!
    Click HERE to find out more about this fabulous ebook (and read the many, many reviews).
    ย 

    I think this is one of my favourite snacks - would love to hear how you and your kids like it? Comment and rate this recipe below.ย 

    Lime Coconut Popsicles

    January 13, 2017 | Ice-blocks

    The summer swelter is in full swing here in Australia. With many days this week too hot to even contemplate turning the oven on, Iโ€™ve been experimenting with icy treats so I thought Iโ€™d share my favourite so far โ€“ย  Lime Coconut Popsicles.

    These Lime Coconut Popsicles are a refreshing and creamy treat perfect for warm days! With a blend of coconut milk, lime, and avocado, they deliver a tropical flavour with a delightful hint of tartness. And you don’t need an ice cream maker to make them.

    Iโ€™ve frozen half of this batch into little cups for the kids to take to school when they are back. I pack them from frozen and by morning tea time they are soft ice cups that they just love (they eat them with a small spoon).

    Health benefits

    Limes are high in vitamin C for immune support, while avocado provides healthy fats, creating a satisfying creaminess. Coconut milk adds a dose of fibre and the coconut water essential electrolytes, making these popsicles as nourishing as they are refreshing.

    Ingredients

    Combine canned full-fat coconut milk, fresh lime juice and lime zest, rice malt syrup or honey, coconut water, and avocado. Toasted shredded coconut adds extra texture at the base of each popsicle.

    How to make coconut lime ice cream

    In a blender, blend the coconut milk, lime juice, sweetener, coconut water, and avocado until smooth. Adjust sweetness if needed. Sprinkle toasted coconut at the bottom of popsicle moulds, pour in the blended mixture, insert sticks, and freeze until solid.

    Serving suggestions and how to store

    Enjoy these popsicles straight from the freezer. Store any extras in the freezer for up to a month in an airtight container for easy access to a refreshing snack.

    Vary these lime coconut popsicles to suit your needs

    These popsicles are dairy-free, gluten-free, egg-free and nut-free. For a fructose-friendly option, use rice malt syrup or stevia. For a coconut-free version, replace coconut milk with a nut or cow’s milk. To keep it vegan, opt for rice malt syrup or maple syrup as your sweetener.

    Take a look at the variations (below the main recipe) for suggestions to alter the recipe to suit many specific dietary requirements.


    If you are after more lunchbox inspiration, my โ€˜Well Nourished Lunchboxโ€™ ebook has a 150 pages of inspiration and information. Find out more or shopย HERE.


    For more easy to make, healthy sweet recipes, click HERE.

    Lime coconut ice blocks - These Lime Coconut Popsicles are a creamy-tangy treat that the whole family will love. Easy to make, nourishing and really delicious. Dairy & gluten-free.
    Print Recipe
    No ratings yet

    Lime Coconut Popsicles

    Slightly sweet. slightly sour - these Lime Coconut Popsicles are a refreshing, yet nourishing treat for a hot day.
    Prep Time5 minutes mins
    Total Time1 hour hr
    Course: Dessert, Snack
    Servings: 6 popsicles

    Ingredients

    • 270 ml canned coconut milk (I used the Ayam brand)
    • 4 lime/s (ยฝ cup or 120ml) plus zest one lime
    • 60 ml rice malt syrup, honey or maple syrup (ยผ cup)
    • 60 ml coconut water (ยผ cup) or plain water
    • 1 avocado/s -peeled and stone removed
    • 25 g shredded coconut -toasted

    Instructions

    • In a powerful blender or food processor, blend all of the ingredients (except the shredded coconut) together until smooth and creamy. TMX 30 sec, speed 9.
    • Taste and adjust the sweetest to suit your taste (I like a lot of tang, but you can add more sweetener if you find them too tart).
    • Sprinkle a little toasted coconut into the base of your popsicleย moulds, followed by theย blended mixture. Add a popsicle stick and freeze until solid.
    • Remove from the moulds to enjoy.

    Notes

    Fructose friendly

    Choose rice malt syrup as your sweetener or sweeten with stevia.

    Coconut-free

    Replace the coconut milk with full-fat cow or nut milk.

    Vegan

    Choose rice malt or maple syrup as your sweetener.
    ย 
    ย 

    Love to hear how you like these zesty ice blocks. Post a comment below.ย 

    Healthy Choc-Hazelnut Truffles

    December 7, 2016 | After School Snacks, Holidays & Entertaining, No-bake Sweets

    These Healthy Choc-Hazelnut Truffles are a delicious, no-bake treat thatโ€™s perfect for satisfying chocolate cravings. Made with wholesome ingredients like hazelnut meal, coconut, and cacao powder, theyโ€™re easy to prepare and ideal for a quick dessert or snack.

    I’m always looking for shortcuts in the kitchen so many of my ‘bliss ball’ types of recipes often become slices (and my cup cakes often become big cakes)! I don’t do fiddly so well but at Christmas time, I am happy to put in just a little extra effort. So whilst with this recipe you definitely can use store bought hazelnut meal, I personally love to roast raw hazelnuts then grind them myself – it just lends an incredible flavour to this treat.

    Health benefits

    Hazelnuts offer a good source of protein and healthy fats, while cacao powder provides antioxidants for a healthy boost. Coconut oil adds a creamy texture and medium-chain fatty acids, making these truffles a satisfying, nutrient-rich indulgence.

    Ingredients

    To make these vegan chocolate hazelnut truffles, combine hazelnut meal, rice malt syrup or honey, shredded coconut, melted coconut oil, cacao powder, and vanilla extract. For the coating, use additional cacao powder and desiccated coconut.

    How to make these healthy choc-hazelnut truffles

    These chocolate truffels have the shortest prep time. In a food processor, blend the hazelnut meal, sweetener, coconut, coconut oil, cacao powder, and vanilla until the mixture comes together. Roll into small balls, then using two forks, coat each truffle in a mixture of cacao powder and desiccated coconut. Place them on a lined baking sheet in the freezer to set.

    Serving suggestions and how to store

    Serve these chocolate hazelnut truffles directly from the fridge or freezer for a firm, chilled treat. Store in an airtight container in the freezer to keep them fresh.

    Vary these healthy choc-hazelnut truffles to suit your needs

    These are already a grain-free, gluten-free, egg-free, dairy-free truffle. For a nut-free option, replace hazelnuts with ground sunflower seeds. If coconut isnโ€™t suitable, use extra ground nuts instead. For a fructose-friendly or vegan version, choose rice malt syrup or maple syrup as the sweetener.

    Take a look at the variations (below the main recipe) for suggestions to alter the recipe to suit many specific dietary requirements.


    For more delicious, easy to make healthy sweet treats, click HERE.

    Chocolate hazelnut truffle - These easy to make but deliciously decadent Healthy Choc-Hazelnut Truffles are a wonderful Christmas sweet treat because they can be made ahead and frozen.
    Print Recipe
    4.56 from 9 votes

    Choc-Hazelnut Truffles

    A decadent, easy to make treat - these Choc-Hazelnut Truffles are sure to become a firm favourite. Gluten, grain and dairy-free.ย 
    Prep Time15 minutes mins
    Total Time15 minutes mins
    Course: Dessert, Snack
    Servings: 30 truffles (approx.)

    Ingredients

    • 200 g hazelnut meal (2 cups) hazelnuts roasted or dehydrated, skins rubbed off and then ground to a meal, taking care not to over grind it so it becomes oily or nut butter!
    • 80 g rice malt syrup, honey or maple syrup (ยผ cup)
    • 100 g shredded coconut (1ยฝ cup)
    • 100 g coconut oil (ยฝ cup) melted
    • 20 g cacao powder -unsweetened Dutch process or raw
    • 1 tbsp vanilla -powder, extract or essence
    • 15 g cacao powder -to coatย them (1 tbsp)
    • 3 tbsp desiccated coconut -to coat them

    Instructions

    • In a food processor combine on low speed the hazelnutย meal, sweetener, coconut, coconut oil, cocoa and vanilla until just combined. If using a Thermomix 5 seconds. You can also mix by hand, just make sure the coconut oil is in its liquid form.
    • You are aiming for a mixture that rolls into small balls easily, so if it's too dry add a little more coconut oil or sweetener, if too wet, add more hazelnut meal.
    • Mix the extra cacao and coconut together in a small bowl and using two forks, roll each of the balls to coat.
    • Place on a tray (lined with parchment paper) and pop in the freezer to set.
    • They can be made weeks ahead in preparation for Christmas Day.

    Tip

    • These must be kept chilled or they will melt on a warm day.ย  I often double this recipe to make a bigger batch (trust me, youโ€™ll be wanting more)!

    Store

    • Store airtight in the freezer until ready to serve.

    Notes

    Fructose friendly

    Choose rice malt syrup as your sweetener.

    Nut-free

    Replace the hazelnuts with toasted sunflower seeds, ground.

    Coconut-free

    Replace the coconut with more ground nuts.ย 

    Vegan

    Choose rice malt or maple syrup as your sweetener.
    ย 

    I LOVE these โ€“ how about you?ย ย For 10 Healthy Chocolate recipes, get your free ebook here!

    Matcha Yoghurt Panna Cotta with Raspberry Ice

    November 28, 2016 | No-bake Sweets, Desserts

    This Matcha Yoghurt Panna Cotta with Raspberry Ice is a beautiful dessert that combines the creamy richness of panna cotta with a hint of earthy matcha and the bright, tangy flavour of raspberry ice. It not only tastes fabulous, but will also help to protect and support your body through the festive season. You have a choice of making it with dairy or dairy-free. Perfect for a light yet indulgent treat.

    Health benefits

    Either way it is a delicious, nourishing, gluten-free dessert because not only is it a fabulous source of antioxidants (via the Matcha and berries), but it also supports your digestion too (via the organic gelatin and probiotics in the yoghurt). The raspberries are also rich in vitamin C. Itโ€™s a light, refined-sugar-free treat that can be made dairy-free or vegan. Food as medicine!

    Ingredients

    For the raspberry ice, youโ€™ll need raspberries, water, rice malt syrup (or maple syrup), and lime juice. The matcha green tea panna cotta base includes coconut milk (or cream), vanilla extract, sweetener, matcha (green tea powder), gelatin, and natural yogurt (or Greek yogurt).

    How to make this matcha yoghurt panna cotta

    This gluten-free, low-sugar matcha panna cotta has a really short prep time. For the raspberry ice, blend raspberries, water, sweetener, and lime juice, then freeze until solid. For the panna cotta, warm coconut milk or cream in a small saucepan with vanilla, sweetener, and matcha, then whisk in gelatin. Blend with yoghurt until smooth, then pour into ramekins and chill for 4 hours. When ready to serve, scrape the raspberry ice and top each panna cotta.

    Serving suggestions and how to store

    Serve garnished with fresh mint leaves and a sprinkle of matcha powder. Store leftovers in an airtight container in the fridge for up to 3 days.

    Vary this matcha yoghurt panna cotta to suit your needs

    For a dairy-free matcha panna cotta, use coconut milk and coconut yogurt (such a great dairy-free dessert). If you prefer a coconut-free dessert, use regular cream and yoghurt.

    Remember to take a look at the variations (below the main recipe). Here, you’ll find suggestions to alter the recipe to suit your dietary goalsย  (dairy-free and fructose friendly).


    For more delicious, easy to make healthy desserts and sweet treats, click HERE.

    Matcha panna cotta
    Print Recipe
    5 from 1 vote

    Matcha Yoghurt Panna Cotta with Raspberry Ice

    A beautiful, delicious and nourishing dessert - this Matcha Yoghurt Panna Cotta with Raspberry Ice is really easy to make and surprisingly good for you.
    Prep Time15 minutes mins
    Cook Time10 minutes mins
    Chill4 hours hrs
    Total Time4 hours hrs 25 minutes mins
    Course: Dessert
    Cuisine: Asian
    Servings: 2 people

    Ingredients

    Raspberry Ice

    • 125 g raspberries (1 cup) fresh or frozen (defrosted)
    • 80 g water (โ…“ cup)
    • 2 tbsp rice malt syrup or maple syrup
    • 1 tbsp lime juice

    Matcha Yoghurt Panna Cotta

    • 270 ml canned coconut milk -or regular pouring cream
    • 1 tsp vanilla -powder, extract or essence
    • 2 tbsp rice malt syrup or maple syrup
    • 2 tsp matcha (I use Matcha Tea Haus everyday blend)
    • 2 tsp grass-fed or organic gelatin
    • 250 g natural, Greek or coconut yoghurt (1 cup) or coconut yoghurt

    Instructions

    Raspberry Ice

    • In a powerful food processor or blender, blend all of the ingredients together to a puree. If using a Thermomix 10 seconds, speed 7.
    • Line a small tray with baking paper and pour the puree (through a sieve, optional) into the lined tin. Freeze until solid (you can make this ahead).

    Matcha Yoghurt Panna Cotta

    • Place the coconut milk or cream into a medium sized pot over a low heat.
    • Add the vanilla, sweetener and matcha and stir well until the mixture just starts to warm (it needs to be only luke warm, so don't overheat). If using a Thermomix 1 minute, temp 70, speed 2.
    • Sprinkle over the gelatin, let it sit for a minute and then whiskย in. If using a Thermomix 30 seconds, speed 3.
    • Add this mixture andย the yoghurt into a blender and mix at a medium speed to ensure it is super smooth. If using a Thermomix 30 seconds, speed 5-6.
    • Taste the mixture to ensure it is sweet enough. I personally love this unsweetened, but if you feel you need more sweetness, add more rice malt or maple syrup and blend to combine.
    • Divide the mixture between 2 ramekins. Pop in the fridge for about 4 hours (or more) to set.
    • To invert your pannacotta from the mould, sit in a bowl of hot water for 3 seconds, run a knife just around the rim of the mould and carefully invert onto a serving plate. You could also set itย in a glass (and don't invert).
    • Scrape the raspberry ice with a fork and place on top of the panna cotta.
    • Garnishย with mint leaves and a sprinkle of matcha powder and serve immediately.
    • Enjoy!

    Store

    • Airtight in the fridge.

    Notes

    Dairy-free

    Choose the coconut milk and coconut yoghurt.ย 

    Coconut-free

    Choose the cream and regular yoghurt.
    Please note, this is a sponsored post. Know that I will only ever share products or services on this website that I believe will add value or benefit the health of the Wellย Nourishedย community.ย 
    ย 

    I'd love to hear how you enjoy this delicious Panna Cotta? Post a comment below.ย 

    Raw Coffee Slice

    November 9, 2016 | No-bake Sweets, Desserts

    This Raw Coffee Slice is a rich and creamy treat thatโ€™s perfect for coffee lovers. With a nutty hazelnut base, a creamy coffee cashew layer, and a choice of dark chocolate toppings, itโ€™s a deliciously indulgent dessert thatโ€™s both gluten-free and can be made vegan.

    With the silly season fast approaching, I thought it timely to share a decadent desert that is perfect for entertaining (or even Christmas day). Dessert is something I always look to pre-prepare and this can be made weeks ahead if necessary. When I have friends over I really don’t want to spend a minute more than necessary in the kitchen (I hate missing out)!

    I know I share lots of kid friendly recipes here (and if you check below I have a chocolate variation that is more family friendly). But sometimes it’s nice to have something just for the grown-ups. Having said that – my daughter is crazy for coffee flavoured anything (she’ll even try to sip black, unsweetened coffee if given the chance). I think I may have developed my kids taste for ‘bitters’ a bit too much!!

    Health benefits

    Made with raw cashews and hazelnuts, this slice is packed with healthy fats, fibre, and magnesium to support health and energy levels. Coffee offers an antioxidant boost, while the dark chocolate topping adds richness and a dose of flavonoids.

    Ingredients

    For the base, youโ€™ll need hazelnuts, rice malt syrup (or honey/maple syrup), and cacao powder. The filling combines soaked cashews, your choice of sweetener, coconut oil, and espresso coffee. For the topping, use melted dark chocolate or make a raw chocolate alternative if you prefer.

    How to make Raw Coffee Slice

    To make the base, grind hazelnuts until they form a meal, then mix with sweetener and cacao until combined. Press into a lined tin and freeze. For the filling, drain and blend cashews, adding sweetener, coconut oil, and coffee, blending until smooth. Spread over the base and freeze until set. Top with melted chocolate or raw chocolate and chill until firm.

    Serving suggestions and how to store

    Cut into squares once set and store in an airtight container in the fridge for up to a week or in the freezer for longer storage. These are delicious straight from the freezer for a treat!

    Vary this Raw Coffee Slice to suit your needs

    For a vegan option, use rice malt or maple syrup and raw chocolate. If youโ€™re not a coffee fan, replace it with extra cacao and water for a double chocolate flavour. For a coconut-free version, swap coconut oil with cacao butter.

    Take a look at the variations (below the main recipe) for suggestions to alter the recipe to suit many specific dietary requirements.


    For more delicious, easy to make healthy sweet recipes, click HERE.

    Raw coffee chocolate slice - This Raw Coffee Slice is an easy to make vegan cheesecake slice that will impress coffee lovers. It's dairy- & gluten-free, a delicious after dinner treat
    Print Recipe
    4.75 from 4 votes

    Raw Coffee Slice

    I think Chocolate and Coffee are a match made in heaven. This nourishing Raw Coffee Slice is a guilt-free slice of heaven. Gluten, dairy, refined sugar and grain-free. 
    Prep Time20 minutes mins
    Total Time1 hour hr
    Course: Dessert
    Servings: 12 squares

    Ingredients

    Base

    • 200 g hazelnuts
    • 85 g rice malt syrup, honey or maple syrup (ยผ cup)
    • 1 tbsp cacao powder (unsweetened Dutch process or raw)

    Filling

    • 350 g raw cashew nuts (soaked for minimum 2-3 hours)
    • 85 g rice malt syrup, honey or maple syrup (ยผ cup)
    • 70 g coconut oil (โ…“ cup)
    • 50-70 ml espresso coffee -cooled (approx. 2 shots)

    Chocolate topping (2 choices)

    Melted Chocolate

    • 150 g dark chocolate -melted

    OR Raw Chocolate

    Instructions

    Base

    • Grind the hazelnuts in a food processor or powerful blender until a meal forms. If using a Thermomix, 5 seconds, speed 7.
    • Add the sweetener and cacao and mix until well combined. If using a Thermomix, 10 seconds, speed 4.
    • Press into a lined 20 x 30cm slice tin and put in the freezer whilst you make the filling.

    Filling

    • Drain the liquid from your cashews and rinse well.
    • Process to form a paste. If using a Thermomix, seconds, speed 7.
    • Add the rest of the ingredients and process until smooth and creamy. If using a Thermomix, 1 minute, speed 7. You may need to scrape the sides a few times.
    • Spread the filling over the base and put back in the freezer to set (about 20 minutes).

    Chocolate topping

    • Either melt the dark chocolate in a bowl over a pot of hot water or make the raw chocolate by combining all the ingredients together.
    • Once the filling is set, pour over the melted chocolate and set in the freezer (approx. 5 minutes).
    • Cut it into squares and store in the freezer until ready to serve.

    Store

    • Store in an airtight container in the fridge or freezer.

    Notes

    Don't like coffee?

    Replace it with a heaped tablespoon of cacao and 70ml water for a double chocolate slice.

    Vegan and dairy-free

    Chooseย raw chocolate on top. For vegan choose rice malt or maple syrup as your sweetener.

    Fructose friendly

    Choose rice malt syrup as your sweetener.

    Coconut-free

    Replace the coconut oil with cacao butter.
    ย 
    ย 

    I love receiving your feedback, post a comment below.ย 

    Creamy Mexican Chicken

    October 19, 2016 | Make-ahead Meals, Chicken, Freezable Meals

    This Creamy Mexican Chicken recipe combines tender chicken with rich flavours from chipotle, tomatoes, and almonds. The dish is finished with a zesty guacamole and fresh coriander, making it perfect for a hearty family meal thatโ€™s loaded with flavour and nourishment whilst being easy to prepare.

    I love to cook โ€“ itโ€™s almost a kind of creative release when I step into the kitchen. I rarely plan too far beyond a core ingredient (generally protein) and never really know whatโ€™s going to happen until I check out what veggies and flavour boosters are in the fridge.

    This is basically how I bring recipes together to share with you. I put together a combination of flavours in a first run and if I think it is up to a โ€˜Well Nourishedโ€™ standard, I scribble it on a piece of paper and come back to it another day for a formal trial run (and hope I can find that piece of paper โ€“ I really need a better system).

    My aim with every recipe is obviously to make it as delicious and nourishing as possible (and also simple to make). In my household, it doesnโ€™t matter how โ€˜healthyโ€™ a meal is, if it doesnโ€™t taste good, then no ones happy (kids because they donโ€™t like it, hubby and I because they are complaining, foodโ€™s going to waste and we donโ€™t want it for the lunch the next day because we arenโ€™t really enjoying it also)!!

    But I digress โ€“ back to this recipe for Creamy Mexican Chicken which simply ticks all the boxes. Delicious, nutritious, tasty as anything and SO quick and easy to make. There are no complaints when this is on the menu!

    Health benefits

    This gluten-free dish offers protein from chicken and black beans, which also add fibre for a filling and balanced meal. Almonds provide healthy fats and vitamin E, while chipotle adds a smoky spice rich in antioxidants. With the avocado in guacamole, youโ€™ll also get a boost of healthy monounsaturated fats.

    Ingredients

    To make this creamy Mexican chicken, youโ€™ll need boneless chicken thighs, garlic, canned tomatoes, chipotle in adobo sauce, raw almonds, celery, chicken broth or stock, black beans, fresh coriander (fresh cilantro), avocados, lime juice, and seasoning. These ingredients come together to create a smoky, creamy, and satisfying meal.

    How to make creamy Mexican chicken

    In a blender, combine the garlic, tomatoes, chipotle, almonds, celery, stock, and salt to create a smooth sauce. Pour the sauce over the chicken and black beans in a large pot, then simmer on low heat for about 30 minutes. For guacamole, mash the avocado with lime juice and season to taste. When the chicken is tender, stir in the fresh coriander, and serve with guacamole on the side.

    Serving suggestions and how to store

    Serve this dish with a slaw, rice, or as a filling for tacos, corn tortillas or flour tortillas. Leftovers can be stored in an airtight container in the refrigerator and it freezes well too. Reheat gently over low heat to preserve the creaminess of the sauce.

    Vary this creamy Mexican chicken to suit your needs

    For a vegan version, substitute the chicken with tempeh and use vegetable stock. Make it nut-free by swapping almonds for sunflower seeds. If youโ€™re cooking gluten-free, check that your chipotle is certified gluten-free. For a slow-cooked option, bake in a cast iron pan at 150ยฐC for 90 minutes for a melt-in-your-mouth result. This can certainly cooked in a slow cooker. However, as the speed and temperature varies between the many brands of slow cookers, base the amount of liquid you add and the cook time on a similar style of recipe in the guide book for your specific slow cooker. The general rule of thumb is to halve the liquid and double the cook time, but understanding your own slow cooker is the best guide.

    Take a look at the variations (below the main recipe) for suggestions to alter the recipe to suit many specific dietary requirements (including vegan).


    For more delicious, easy to make healthy meal recipes, click HERE.

    Creamy Mexican Chicken - This Creamy Mexican Chicken is super quick and easy to make and a delicious, healthy meal. It is dairy-free, gluten-free and family friendly.
    Print Recipe
    4.95 from 20 votes

    Creamy Mexican Chicken

    Seriously simple to make, but SO delicious to eat. This Creamy Mexican Chicken is just divine and gluten, grain and dairy-free.
    Prep Time10 minutes mins
    Cook Time30 minutes mins
    Total Time40 minutes mins
    Course: Main Course
    Cuisine: Mexican
    Servings: 4

    Ingredients

    • 500 g boneless and skinless chicken thighs -roughly diced (or drumsticks)
    • 2 clove/s garlic -finely chopped
    • 400 g diced tinned tomatoes
    • 1-2 chipotle in adobe sauce *see note below
    • 70 g raw almonds (ยฝ cup)
    • 3 stick/s celery -roughly chopped
    • 120 ml chicken broth or stock (ยฝ cup)
    • 1 tsp sea salt - or to taste
    • 400 g canย black beans -drained and rinsed (or 1 cup cooked black beans)
    • 1 bunch/s fresh coriander leaves -finely chopped

    Quick guacamole

    • 2 avocado/s -peeled and flesh removed
    • 1 lime/s (small) - juice
    • Sea salt and freshly ground black pepper -to taste

    Instructions

    • * Note - Chipotle in Adobe sauce are available in most big supermarkets or gourmet delis. They are the flavour hero of this dish and give it a little heat and a beautiful smokey flavour (obviously the more you add the spicierย it becomes - 1 chili pepper is still mild, 2 chili peppers add a tiny amount of heat). Once you've opened the can, store leftovers in an airtight glass jar in the fridge. They last forever this way and trust me, you will make this meal again! If you happen to have the paste (so no visible chili peppers), then 1tsp is about the same as 1 chipotle chilli.
    • If you don't have chipotle you can sub with a heaped teaspoon of cumin and smokey paprika. This option will have no heat at all. If you only use just one chipotle, perhaps add ยฝ teaspoon of cumin and smokey paprika too.
    • Placeย the garlic, tomatoes, chipotle, almonds, celery, stock and sea salt in a food processor or high speed blender and process until smooth. If using a Thermomix, 1 minute, speed 7.
    • Put yourย chicken thighs into a large pot with the black beans and sauce, cover and simmerย over a low to moderate heat for approx. 30 minutes. If using a Thermomix, add the chicken and black beans to the sauce and cook 30 minutes, temp 90, reverse lowest speed.
    • To make the guacamole, mash the avocadoย and mix with the lime juice and seasoning.
    • Once the chicken is cooked, mix through the coriander and serve with the guacamole (and anyย of the suggestions below).

    Serve

    • with a slaw or simple salad (here I've served it with shredded cabbage, mint, shallots and grated carrot tossed in the juice of one lime) 
    • with rice or quinoa (a good choice for corn-free)
    • as a sauce for nachos in tacos or tortilla wraps if your not dairy-free, my family love a dollop of sour cream too 

    Make-ahead

    • Re-heat in a pot over a low heat until just hot.

    Store

    • Store in an airtight container in the fridge.
    • Can also be frozen.

    Grab Bag Formula Method

    • If you've done the **Grab Bag Formula Short Course, this is the method to convert this recipe...
    • Place the garlic, tomatoes, chipotle, almonds, celery, stock and sea salt in a food processor or high speed blender and process until smooth.
    • Into your Grab Bag, place the chicken thighs, sauce and black beans. Carefully seal your Grab Bag. I close most of the seal then press out as much air as I can then complete the seal. Place the Grab Bag in the freezer.
    • To cook, remove the Grab Bag from the freezer, place on a baking tray and thaw in the fridge overnight.
    • Tip the contents of the Grab Bag into a large oven proof dish (with a tight fitting lid) or Dutch oven. It may still be a bit frozen; thatโ€™s okay. Place the lid on the pot, set your oven to 150ยฐC/300ยฐF (fan-forced) and cook for 2 hours.
    • ** The Grab Bag Formula Short Course is available to purchase for just AU$46 HERE.
      OR
      If you are a full-access Well Nourished Family member, the course is included in your membership and you can access in the members portal - HERE.

    Notes

    Vegan

    Replace the chicken with slices of tempeh and the broth with vegetable stock.ย 

    Nut-free

    Replace the almonds with toasted sunflower seeds.

    Slow cooked

    I have also slow cooked this in a cast iron pan in the oven 150โ„ƒ for 90 minutes.

    Garlic-free

    Replace the garlic with a tsp of cumin powder.

    Legume-free

    Simply omit the beans.

    Gluten-free

    Just make sure the Chipotles are gluten-free (generally they are but please check if you are coeliac).
    ย 

    Hope you enjoy it and I'd love to hear how you enjoy it? Post a comment below.

    Spiced Breakfast Muffin

    October 5, 2016 | Breakfast, After School Snacks, Baked Sweets

    I know you are just going to love this Spiced Breakfast Muffin recipe. Itโ€™s protein rich, gluten-free, grain-free and dairy-free, but super light and fluffy in texture. Its also really easy to whip up and the muffins freeze really well too. My kids often have these on their way to early morning swim squads or for afternoon tea โ€“ perfect high energy food! They are only slightly sweet, so if you’d like to add more sweetener for a sweet muffin, do so.

    The best breakfast

    In my many years consulting as a naturopath and assessing patients diets, the one meal where many people struggled (nutritionally), was breakfast. I found that so many people were searching for more energy, productivity and better general health; spending large sums of money on supplements and searching for the โ€˜magic bullet,โ€™ but also neglecting the one meal that could improve both their short and long-term health.

    Those patients that took my advice and changed their ways reported at follow up consults that since eating a nourishing breakfast, they snacked less and found it easier to make healthier food choices right throughout the day. They had better concentration, a happier mood and more energy to exercise. They also had the motivation to prepare a healthy dinner in the evening.

    In my professional opinion, if you want to improve your overall health and wellbeing, start the day right with a nourishing breakfast. That’s the reason why my very first book ‘Rise and Shine’ was focussed on starting the day by fuelling your body with a wholesome brekkie.

    Health benefits

    There’s so much nutrition in these very low sugar, gluten free breakfast muffins. Sweet potatoes are a fantastic source of fibre and vitamins, while apples add natural sweetness and antioxidants. The nut butter provides healthy fats and protein (along with the eggs and buckwheat flour), making these muffins a satisfying and nutrient-dense breakfast option. The warming spices, such as cinnamon and mixed spice, help regulate blood sugar and enhance flavour.

    Ingredients

    This recipe combines nutrient-rich sweet potatoes and apples with creamy nut butter to create a dense and deliciously light muffin base. I recipe tested this with almond butter, cashew butter and also ABC (almond, brazil, cashew).ย The addition of buckwheat flour and bicarbonate of soda (baking soda) helps the muffins rise, while a choice of natural sweeteners like honey or rice malt syrup gives a gentle sweetness.

    Instructions to make these gluten-free spiced breakfast muffins

    Begin by steaming the diced sweet potato and apple until soft. Puree them in a blender or food processor, then combine with nut butter, spices, eggs, and sweetener. Add the dry ingredients – buckwheat flour and bicarbonate of soda, blending until everything is incorporated. Pour the muffin batter into lined muffin tin and bake until a skewer comes out clean.

    Serving suggestions and how to store

    These muffins are delicious served warm with a pat of butter or alongside your favourite smoothie. Store them in an airtight container in the fridge for a few days, or freeze for longer storage.

    Vary this spiced breakfast muffin to suit your needs

    For a nut-free option, substitute the nut butter with sunflower seed butter or hulled tahini. You can also experiment with different gluten-free flours, such as almond meal (almond flour), depending on your preference. If you prefer sweeter muffins, drizzle with honey or maple syrup after baking.

    Take a look at the variations (below the main recipe) for suggestions to alter the recipe to suit many specific dietary requirements.


    For more delicious, make ahead, healthy breakfast recipes, click HERE.

    This Spiced Breakfast Muffin is a light & fluffy gluten-free way to start the day or treat. They are easy to make & dairy-free too.
    Print Recipe
    4.88 from 24 votes

    Spiced Breakfast Muffin

    These Spiced Breakfast Muffins are a nourishing, gluten-free way to start your day. Made with sweet potato, apple, and a blend of spices, they offer a balance of natural sweetness and warmth from cinnamon and mixed spice. Plus, they pack in plenty of protein and healthy fats thanks to the nut butter base.
    Prep Time10 minutes mins
    Cook Time20 minutes mins
    Total Time30 minutes mins
    Course: Breakfast, Snack
    Servings: 12 muffins

    Ingredients

    • 200 g sweet potato/s -peeled and diced 1-2cm
    • 1 green apple -peeled and diced (large)
    • 250 g nut butter (1 cup) *see note below
    • 1 tsp ground cinnamon
    • 2 tsp mixedย spice
    • Pinch sea salt
    • 3 egg/s
    • 85 g rice malt syrup, honey or maple syrup (ยผ cup)
    • 30 g buckwheat flour (ยผ cup)
    • 2 tsp bicarbonate of soda

    Instructions

    • Preheat the oven to 180โ„ƒ/350โ„‰ (fan-forced). Line your muffinย tray with safe, non-stick largeย muffinย cases.
    • Start with steaming the sweet potato and apple until cooked (mine took aboutย 5 minutes).
    • Once they are cooked, allow to cool for a few minutes and puree in a food processor or highย speed blender. If using a Thermomix, blend 10 seconds, speed 5.
    • Add the rest of the ingredients and blend until just combined. If using a Thermomix mix 20 seconds, speed 5.
    • Pour the batter into the muffin cases and bake for 15-20 minutes or until cooked (skewer inserted is clean).

    Serve

    • warm with butter
    • with a smoothie (our favourites are Coco-beet Berry Smoothie, Tropical Green Smoothie, or a Chocolate Breakfast Smoothie.

    Store

    • Store in an airtight container in the fridge or freezer.

    Notes

    Nut-free

    You can sub the nut butter with hulled tahini and/ or sunflower seed butter (Sunbutter). Iโ€™ve also had feedback that using regular butter half half with the sun butter works well too (though havenโ€™t tested it myself).

    Another flour

    You can certainly use another flour if you wish โ€“ any flour (except coconut) or even almond meal can be subbed 1:1.

    Timesaving tip

    Steam your apple/ sweet potato at dinner time and simply blend and bake in the morning - delicious hot muffins for brekkie.ย 

    No sweet enough

    These are not super sweet, especially if you make them with rice malt syrup. If you bake them and would like them to be sweeter, then serve with honey or maple.ย 
    ย 
    ย 

    I just adore this recipe, it will definitely become a staple in my household. Iโ€™d love to hear what you think, post a comment below and let me know what you think.

    Thai Vegetable Stir Fry

    September 28, 2016 | Make-ahead Meals, Freezable Meals, Vegetarian

    This Thai vegetable stir fry is a fresh, vibrant dish packed with colourful veggies and a rich, creamy sauce made from coconut milk and cashews. With loads of flavour from ginger, garlic, and a hint of lime, this stir fry is delicious and can be served over rice, noodles, or even quinoa.

    This super tasty Thai Vegetable Stir Fry isย my next twist on Jamie Oliverโ€™s “10 recipes to save your life.” It’s a delicious, easy to make meal that proves vegetables need not be boring or tasteless!

    As part of Jamie Oliverโ€™s Food Revolution, I was one of 10 people selected world-wide to put my spin on 10 of Jamieโ€™s favourite staple recipes. This is #8, my twist on Jamieโ€™s โ€˜Veggie Noodle Stir Fry’

    Health benefits

    The massive variety of seasonal vegetables is enough to make this Stir Fry a very healthy meal loaded with fibre, vitamins, minerals and antioxidants. The cashew nuts add good fats and protein. The lime juice, zest and also the ginger and garlic support immune function. The tofu is a great protein source for vegetarians.

    Coriander (also called cilantro) is a classic example of food as medicine.ย  It is extremely anti-inflammatory, anti-bacterial and also an amazing detoxifier and heavy metal chelator. Medicinally, it is used frequently for arthritis, inflammatory digestive disorders and to bind and excrete heavy metals in the blood. Needless to say, it is a very beneficial addition to any diet.

    Ingredients

    For this gluten-free recipe, youโ€™ll need fresh ginger, garlic cloves, coriander, (cilantro), lime, fish sauce, canned coconut milk, toasted cashews, mushrooms, carrots, broccoli, cauliflower, snow peas, red capsicum, and firm organic tofu (optional). A garnish of coriander leaves and sliced spring onions finishes it off beautifully.

    How to make creamy Thai stir-fried vegetables

    To make the stir fry sauce, process the ginger, garlic, chilli, coriander, lime zest and juice, fish sauce, coconut milk, and half the cashews in a blender until smooth. Warm the sauce on low heat, then set aside. In a wok, stir-fry the vegetables over a medium high heat starting with shiitake mushrooms, followed by carrots, broccoli, cauliflower, snow peas (or sugar snap peas), and capsicum (bell peppers). Mix with the warmed sauce, then serve as is or over rice or noodles, garnished with the remaining cashews, coriander and spring onion (green onions).

    If you own a Thermomix, we’ve also included Thermomix instructions for this recipe.

    Serving suggestions and how to store

    Serve this stir fry over rice, noodles, or zoodles and top with fresh coriander and cashews. Leftovers can be stored in the fridge or freezer in an airtight container for easy meal prep. Just reheat on low heat until warmed through.

    Vary this Thai vegetable stir fry to suit your needs

    For a soy-free version, replace tofu with chicken, or simply omit it. To make it nut-free, swap the cashews for sunflower seeds. Vegetarians or vegans can replace fish sauce with sea salt. You can also skip the garlic and add extra ginger for a garlic-free version. You could also swap the coriander for thai basil if you’re not a fan.

    Take a look at the variations (below the main recipe) for suggestions to alter the recipe to suit many specific dietary requirements.


    For more delicious, easy to make vegetarian meals, click HERE.

    Thai veggie stir-fry - This Thai Vegetable Stir Fry is an easy to make, super tasty vegetarian (vegan) meal that the whole family will love. Recipe includes Thermomix method.
    Print Recipe
    4.94 from 16 votes

    Thai Vegetable Stir-fry

    A quick to make, super tasty stir-fry sauce. It has such a beautiful flavour that will make your veggies shine. Gluten, grain and dairy-free. 
    Prep Time15 minutes mins
    Cook Time15 minutes mins
    Total Time30 minutes mins
    Course: Main Course
    Servings: 4

    Ingredients

    • 1 tbsp ginger root -peeled (approx. 5 cm)
    • 2 clove/s garlic
    • 1 red chilli/s (optional)
    • ยฝ bunch/s fresh coriander leaves -and stems
    • 1 lime/s -juice and zest
    • 1 tbsp fish sauce
    • 250 ml canned coconut milk (1 cup)
    • 150 g raw cashew nuts (1 cup) toasted
    • 75 g mushrooms (I used shiitake), sliced (1 cup approx.)
    • 2 carrot/s -sliced
    • 1 broccoli -broken into florets
    • ยฝ cauliflower -broken into florets
    • 10 snow peas (or green beans)
    • 1 red capsicum/s -sliced
    • 180 g firm organic tofu -cubed (optional)
    • ยฝ bunch/s fresh coriander leaves -to garnish
    • 2 spring onion/s -sliced, to garnish

    Instructions

    • In a food processor or powerful blender, process the ginger, garlic, chilli and coriander (leaves and stems) to a fine paste. If using a Thermomix 10 seconds, speed 7.
    • Add the lime zest, juice, fish sauce, coconut milk and half the cashew nuts. Process until it forms a smooth sauce and put half the sauce in a small pot over a low heat to warm (don't let it boil). Taste and adjust the balance of flavours (it should be pretty good, but best to check). If using a Thermomix 20 seconds, speed 8. Then heat 5 minutes, temp 90, speed 2.
    • Now prepare and cook your vegetables.
    • Heat a little oil (I use coconut or macadamia nut oil) in a wok or large frypan over a high heat. Add the mushrooms and cook for one minute stirring constantly. Add the carrot, broccoli and cauliflower and stir for a minute then add the snow peas, capsicum and tofu.
    • Cook, stirring for another minute or so then take off the heat.
    • In a big mixing bowl combineย the warmed sauce and vegetables (so the vegetables are covered in sauce).

    Serve

    • Serve as is or over noodles, zoodles, rice or quinoa and garnish with the remaining cashew nuts.

    Make-ahead

    • Re-heat in a pot over a low heat until just hot.

    Store

    • The leftover sauce (or finished dish) are perfectย to refrigerate or freeze in a jar or airtight container for your next, fast stir fry.ย You can of course use all of the sauce if you like your stir-fry saucy!

    Notes

    Soy-free

    Feel free to replace the tofu with cooked chickenย ย (I often use left over roast chook). Replace the tamari with coconut aminos and sea salt.

    Nut-free

    Replace the cashews with the same amount of sunflower seeds.

    Vegetarian and vegan (and seafood-free)

    Replace the fish sauce with a teaspoon of sea salt.ย 

    Legume-free

    Replace the tofu with chicken or simply omit it.

    Garlic-free

    Replace the garlic with an extra 2cm piece of ginger.ย 

    Safe, non-stick Wok (minus toxic teflon)

    I own the Solidteknics 30cm Dual Handle wok - my most used and favourite piece of cookware. I also use it for cooking pasta dishes, it's the perfect size and shape. Click HERE to shop for their great range of non stick cookware (that lasts a life time - legit!).
    ย 
    ย 

    I'd love your feedback on this delicious staple. Post a comment or rate this recipe.

    Healthy Nut Butter Brownie

    September 20, 2016 | After School Snacks, Baked Sweets

    This healthy nut butter brownie is a delicious way to satisfy your chocolate cravings with a nutritious twist! Made with a base of almond or cashew butter, a touch of tahini, and sweetened naturally, these brownies are rich, fudgy, and perfect as a wholesome treat.

    It’s a super simple and a delicious school holiday sweet treat that the kids can easily make themselves. After the first batch my 12 yr old declared a pinch of sea salt would make them better. So the next lot we added the sea salt and I agree, they were even more delicious (so my little protรฉgรฉ is tracking well – ha ha)!

    Health benefits

    These gluten-free, grain-free brownies are packed with healthy fats from nut butter, which can help keep you satisfied without a sugar spike. With dark chocolate and optional cacao powder for an antioxidant boost, theyโ€™re a more nourishing way to indulge in a chocolatey treat. Plus, the egg adds a small dose of protein, helping balance these brownies out for a more filling snack.

    Ingredients

    For this recipe, youโ€™ll need these wholesome ingredients – your favourite nut butter (such as almond or cashew), hulled tahini, an egg, a liquid sweetener like rice malt syrup, honey, or pure maple syrup, a touch of bicarbonate of soda, sea salt, and dark chocolate chips or chunks. If you need a dairy-free option, choose a dairy-free chocolate or cacao nibs.

    How to make healthy nut butter brownie

    Preheat your oven to 180ยฐC (fan-forced) and line a loaf tin with baking paper. Blend all ingredients except the chocolate (pieces or chips) in a food processor until well combined, or mix by hand in a medium bowl if your nut butter is soft enough. Taste the batter and adjust sweetness if desired. Fold in the chocolate chips, pour into your baking dish lined with parchment paper, and bake for 15โ€“17 minutes or until golden on top. Let cool slightly before slicing into 8โ€“10 squares.

    Serving suggestions and how to store

    Enjoy these nut butter brownies on their own or paired with a dollop of yogurt or a side of fresh berries. Or for dessert you could serve with ice-cream or cream. Store in an airtight container at room temperature for up to 2 days, or freeze for up to a month for a convenient snack option.

    Vary this healthy nut butter brownie to suit your needs

    For a double-chocolate version, add 30g of raw cacao or unsweetened cocoa powder to the batter. Make it dairy-free by choosing a dairy-free chocolate. If you prefer a sesame-free option, simply replace tahini with more nut butter. For a fructose-friendly treat, stick with rice malt syrup as your sweetener. While peanut butter can be used, almond or cashew butter generally yields the best texture. Sorry, this is not suitable for vegan. For more brownie recipes, click HERE.ย 

    Take a look at the variations (below the main recipe) for suggestions to alter the recipe to suit many specific dietary requirements.


    For more easy to make, delicious, healthy sweet recipes, click HERE.

    Nut butter brownie - This Healthy Nut Butter Brownie is gluten, grain and dairy-free, super easy to make and really delicious. The recipe includes the Thermomix method.
    Print Recipe
    5 from 5 votes

    Healthy Nut Butter Brownie

    Seriously simple, this nourishing Nut Butter Brownie is so delicious and as easy as can be to make. 
    Prep Time10 minutes mins
    Cook Time20 minutes mins
    Total Time30 minutes mins
    Course: Snack
    Servings: 10

    Ingredients

    • 260 g nut butter (1 cup) eg; almond, cashew, ABC, hazelnut (not peanut)
    • 1 tbsp hulled tahiniย 
    • 1 egg/s
    • 85 g rice malt syrup, honey or maple syrup (ยผ cup)
    • ยฝ tsp bicarbonate of soda
    • Pinch sea salt
    • 50 g dark chocolate -buttons (or chopped up squares, I've used Green and Blacks dark chocolate chopped up). For dairy-free use a dairy-free chocolate or cacao nibs.

    Instructions

    • Pre-heat oven to 180ยฐC/ 350ยฐF (fan forced). Line a large loaf tin (I used 24 x 13cm) with baking paper.
    • Add all the ingredients except the chocolate into a food processor and blend until combined. If using a Thermomix, blend 10 seconds, speed 5.
    • If your nut butter is soft enough, you can also mix this by hand with a bit of muscle.
    • I recommend tasting the batter to check it will be sweet enough for your tribe. You can add more if you think you need to, or add more chocolate chunks.
    • Fold in the chocolate. If using a Thermomix reverse, 5 seconds, speed 4.
    • Press into the base of the tin and bake for 15-17 minutes until they have risen and are golden brown on top.
    • Allow to cool a little and slice into 8-10 squares.

    Store

    • In an airtight container for 2 days or freeze for up to a month.

    Notes

    Double-choc

    Add 30g of raw cacao or Dutch process cocoa to the batter.

    Dairy-free

    Choose a dairy-free chocolate.ย 

    Sesame-free

    Replace the tahini with nut butter.

    Fructose friendly

    Choose rice malt syrup as your sweetener.ย 

    Peanut butter

    I think the other nut butters listed produce the best texture.
    ย 
    If you're after a nut-free sweet treat, my beautiful ebookย "The Well Nourished Lunchbox" contains over 50 nut free recipes - you can find out more about itย HERE.
    ย 

    I'd love to hear how you like this simple, yet delicious treat. Post a comment or rate this recipe.ย 

    Zucchini Mint Feta Soup (in just ten minutes)

    August 25, 2016 | Make-ahead Meals, Freezable Meals, Vegetarian, Soups

    This zucchini mint feta soup is a comforting and nourishing dish thatโ€™s perfect for any season. Easy to make, it combines the mild taste of zucchini with the freshness of mint and the creaminess of feta, making it a delicious addition to your meal rotation.

    One vegetable my kids really dislike is zucchini (or spew-kini as they like to call it).ย For those of you who have followed me for a while, you’ll know that my kids have a great appetite for whole foods and genuinely loveย a wide range of vegetables. One of the reasons this is the case is because no matter what, I have and always will, persist with offering them vegetables, even the ones previously proclaimed ‘gross’!

    Spew-Kini or not, they eat zucchini mostย days because it sits well behind other flavours, undetected. But not one to hide every unliked vegetableย (more about why hiding food is not the best approach here), I also regularly present it in its whole form and like with this soup, often they surprise me and love it. This Zucchini Salad is another surprise favourite (apparently raw is less like ‘spew’)

    The best part about this soup is that it is incredibly quick and easy to make and the result is surprisingly very tasty (because lets face it, it’s not the most flavoursome veggie).

    Health benefits

    Packed with nutrients, this creamy soup offers a great way to boost your vegetable intake. Zucchini is low in calories and high in fibre, which supports digestive health. The feta cheese provides calcium and protein, essential for strong bones and muscle health. The mint and home-made bone broth, are a fabulous digestive tonic, perfect for keeping those important good bugs happy, happy. With just a few simple ingredients, this soup is a great choice for a healthy meal.

    Ingredients

    For this recipe, youโ€™ll need onion, clove garlic, zucchini, and chicken stock or bone broth. Season with sea salt and freshly ground black pepper to taste, and add fresh mint leaves picked from the stems, along with crumbled feta cheese.

    How to make this creamy zucchini soup

    In a medium-sized pot, sautรฉ your diced onion in a little olive oil, butter, or ghee for about 2 minutes until translucent. Add the crushed garlic and diced zucchini, followed by the broth and seasoning. Bring everything to a boil, then simmer for 7-10 minutes until the zucchini is tender. Allow the mixture to cool slightly, then stir in the fresh mint before pureeing it in a blender or with an immersion blender until smooth and creamy.

    If you own a Thermomix, we’ve also included Thermomix instructions for this recipe.

    Serving suggestions and how to store

    Serve your zucchini, mint, and feta soup warm, topped with extra feta and additional seasoning, if desired. Leftovers can be stored in an airtight container in the fridge for up to 3 days or frozen for longer storage. Reheat over a medium heat until warmed through.

    Vary zucchini mint feta soup to suit your dietary needs

    To make this soup vegetarian, simply substitute the chicken stock with vegetable broth. For a dairy-free version, omit the feta or replace it with cashew cheese or coconut yogurt, and choose olive oil for cooking. If you’re looking for a vegan option, follow the same substitutions. If you want to skip onion and garlic, you can use finely diced fennel sautรฉed with a pinch of cumin and chilli flakes for a different twist.

    Take a look at the variations (below the main recipe) for suggestions to alter the recipe to suit many specific dietary requirements.


    For more delicious, quick and easy to make healthy soups, click HERE.

    This zucchini mint feta soup couldn't be easier to make & is very tasty. It takes just 10 minutes to make this healthy soup too.
    Print Recipe
    4.84 from 12 votes

    Zucchini Mint Feta Soup

    This has to be the quickest soup ever. Nutrient rich and delicious, myย Zucchini Mint Feta Soup is sure to become a favourite.
    Prep Time5 minutes mins
    Cook Time10 minutes mins
    Total Time15 minutes mins
    Course: Soup
    Servings: 2

    Ingredients

    • 1 onion/s - diced
    • 1 clove/s garlic - crushed or diced
    • 300 g zucchini/s - diced
    • 250 ml chicken broth or stock (1 cup)
    • Sea salt and freshly ground black pepper - to taste
    • ยผ bunch/s fresh mint leaves - picked from the stems
    • 90 g feta cheese - crumbled (ยฝ cup)

    Instructions

    • In a medium sized pot, sautรฉย your onion in a little olive oil, butter or ghee for about 2 minutes.
    • Add your garlic, diced zucchini, broth and seasoning and bring to the boil. Cook at a rolling simmer for 7-10minutes or until the zucchini has softened.
    • Allow to cool a little, add the mint and then puree in a blender until smooth and creamy.
    • Serve with a dollop (or crumble) of feta and more seasoning (if needed).

    Thermomix Method

    • Chop the onion and garlic, 5 seconds, speed 4.
    • Add the fat of your choice and sautรฉ the onion for 2 minutes, temp 100, speed 1.
    • Add the zucchini and process 5 seconds, speed 5.
    • Add the broth and seasoning and cook for 8 minutes, 100, speed 2.
    • Allow to cool a little, add the mint and puree 30 seconds, speed 7-8.
    • Serve as above.

    Make-ahead

    • Re-heat in a pot over a low heat until just hot.

    Store

    • Store in an airtight container in the fridge or freezer.

    Notes

    Vegetarian

    Use vegetable broth (stock) instead of the chicken stock.

    Dairy-free

    Omit the feta or replace with cashew cheese or coconut yoghurt. Choose olive oil to cook in.

    Vegan

    As per vegetarian and dairy-free above.ย 

    Onion and garlic-free

    Replace the onion and garlic with a small bulb of fennel, finely diced and sautรฉed with a pinch of cumin and chilli flakes.ย 
    ย 

    Let me know how you like this simple soup. Post a comment below.ย 

    • <
    • Page 1
    • Interim pages omitted …
    • Page 14
    • Page 15
    • Page 16
    • Page 17
    • Page 18
    • Page 19
    • >

    Primary Sidebar

    Join the community

    Social Media

    Join over 140,000 followers

    Nourish Your Inbox

    Nourish Your Inbox!

    Christmas Meal Planning Ebook

    Sign up today for your FREE:
    โ€ข Chocolate Ebook
    โ€ข Subscribers Only Special Offers
    โ€ข Practical Health & Nutrition Tips
    โ€ข New Whole Food Recipes

    WN App

    Join the Family

    Join the Family

    Join The Family

    The Well Nourished Family Membership is your complete solution to your families health and wellbeing. With 1200+ whole food recipes and SO MUCH MORE. Join for a limited time for over 80% OFF!

    JOIN & SAVE 80%

    Upgrade Your Membership – Recipe Only

    Health Programs & Courses – Public

    Health Programs & Courses

    Health Programs & Courses

    Whether you’re looking for effortless meal creation, lunchbox inspiration or strategies to raise adventurous eaters, our expert-led resources will guide you every step of the way.

    Find Out More

    Programs and Courses – FAM only

    Affiliate promo – public

    Become an Affiliate

    Looking to partner with a respected, Australian-run health and wellness brand to expand your reach and your income?

    Find out More

    Featured Lunchbox Ebook – Public

    From the Shop

    See More

    Footer

    Logos

    Well Nourished HomepageWell Nourished

    As featured on

    Footer-social

    Connect with us

    • About Well Nourished
    • Sitemap
    • Contact
    • Privacy Policy
    • Website Terms of Use
    • Affiliates

    ยฉ Well Nourished 2026

    A Firstnature site

    Not feeling quite yourself?
    If you're dealing with skin flares, gut issues, fatigue or joint pain, this five-minute quiz will help you understand what's actually driving it.
    TAKE QUIZ

    Rate This Recipe

    Your vote:


    A rating is required
    A name is required
    An email is required