• Skip to primary navigation
  • Skip to main content
  • Skip to primary sidebar
  • Skip to footer

Well Nourished HomepageWell Nourished

Simple recipes, whole foods, inspired health

  • Family Members
    • Recipe Filter
    • Quick Access Shopping List
    • Membership Tutorials
    • How to be Well Nourished
    • About Well Nourished
    • Where to Shop and what to Buy
    • FAQ
  • Family Members
    • Meal Plans
      • G’s Spring Meal Plan
      • G’s Autumn Meal Plan
      • My Weekly Planner
      • Quick Access Shopping List
      • Ingredient Alert
      • Prep Ahead Plans
      • Hosting Event Plans
      • Wellness & Health Plans
    • Recipe Filter
    • Courses & Community
    • Tips for family’s
      • Getting Kids On-board
      • Planning for Picky Eaters
      • New to Meal Planning
      • Meal Planning Tips & Tricks
    • Nourishing Resources
    • Members Offers
    • What’s New This Week
    • Events
    • Membership Tutorials
    • About Well Nourished
    • FAQ
  • Recipes
    • Meals
      • 30 Minute Meals
      • Budget Friendly
      • Chicken & Turkey
      • Fish & Seafood
      • Freezable Meals
      • Make-ahead Meals
      • Meat
      • Pasta and Noodles
      • Pork recipes
      • Slow Cooked
      • Vegetarian
    • Sweet Recipes
      • Baked Sweets
      • Desserts
      • Ice-blocks
      • No-bake Sweets
    • Breakfast
    • Healthy Lunchbox
    • After School Snacks
    • Savoury Snacks
    • Sides & Salads
      • Salads
      • Side Dishes
    • Soups
    • Drinks & Smoothies
    • Dips
    • Holidays & Entertaining
    • Sauces & Dressings
    • Sourdough Baking
    • Fermenting
    • Staples
    • Members only
    • Members only
  • Shop
    • Membership and Programs
    • Ebooks
    • Free Stuff
  • Affiliates
  • About
    • About Well Nourished
    • Testimonials
    • Join the Family
    • FAQ
  • Resources
    • Find a Practitioner
    • Find whole food
      • ACT
      • NSW
      • NT
      • SA
      • QLD
      • TAS
      • VIC
      • WA
    • Products and Services I Value
    • Whole foods pantry list
    • Ingredients Glossary
  • Wellness Hub
    • Inflammation
    • Perimenopause & Menopause
    • Healthy Kids
      • Healthy Baby
      • Healthy Toddler
      • Healthy Child
      • Immune support for kids
      • Digestion & Food Allergies
      • Healthy Lunchboxes
    • Budgeting & Planning
    • Digestion & Intolerance
    • Immune Health
    • Food as Medicine
    • Foods to Avoid
    • Healthy Habits
    • Sugar
    • Carbs, Protein, Fats
      • Carbohydrates
      • Fats
      • Protein
    • Healthy Food Choices
    • Healthy Home
    • Stress & Mood Disorders
    • Healthy Mind
    • Maternal health
    • Health Challenges
  • Login
    • Well Nourished Family
    • Courses & Community
    • Affiliate Login
  • My account

thermomix

Hazelnut Chai Spice Cookies

January 20, 2014 | After School Snacks, Baked Sweets

These Hazelnut Chai Spice Cookies are the perfect blend of warm, cozy spices and nutty goodness. Theyโ€™re a simple, wholesome treat you can whip up in no time, making them a great snack or treat option. With flavours of cinnamon, cardamom, and ginger, these cookies are ideal for the colder months or whenever you crave something warming.

They are also gluten-free, dairy-free, grain-free, egg-free and low fructose. They only take minutes to make and are the perfect after school snack or weekend treat for the kids.

Health benefits

Made with hazelnut meal and natural sweeteners, these cookies offer a nutrient-dense alternative to traditional treats. The hazelnuts are a rich source of protein, essential fats, and fibre. They also contain antioxidants and many minerals. The coconut oil is so very nourishing. The cinnamon stabilises blood sugar levels for a sustained release of energy. The ginger and cardamon are warming spices that support digestion.

Ingredients

Youโ€™ll need hazelnut meal, coconut oil, rice malt syrup or honey, vanilla extract, cinnamon, cardamom, ground ginger, and a bit of tea or water to bring it all together. This mix creates a rich, spiced flavour profile with a chewy texture.

How to make Hazelnut Chai Spice Cookies

In a medium bowl or food processor, combine all the ingredients until well mixed. Roll tablespoons of the mixture into balls and place them on a baking sheet (tray) lined with baking paper (parchment paper). Flatten each one with a fork and sprinkle a little extra cinnamon on top if you like. Bake at 150โ„ƒ for around 15 minutes until golden. They firm up as they cool.

Serving suggestions and how to store

These cookies are best enjoyed fresh out of the oven (once cooled) but can be stored in an airtight container in the fridge or freezer. They make a great addition to your afternoon tea or as a sweet treat any time of day.

Vary these Hazelnut Chai Spice Cookies to suit your needs

To make these Hazelnut Chai Spice Cookies low-fructose, opt for brown rice syrup instead of honey. For a vegan option, choose rice malt or maple syrup as your sweetener. You can even throw in some cacao nibs or dark chocolate for a chai-spiced chocolate twist! No hazelnut meal? Almond flour or meal works just as well.

Take a look at the variations (below the main recipe) for suggestions to alter the recipe to suit your specific dietary requirements.

For more delicious, healthy and easy to make wholefood treats, clickย HERE.

Hazelnut Chai Cookie
Print Recipe
5 from 5 votes

Hazelnut Chai Spice Cookies

The chai and hazelnut flavours in this Hazelnut Chai Spice Cookies are a match made in heaven. They are easy to make and really delicious!
Prep Time10 minutes mins
Cook Time15 minutes mins
Total Time25 minutes mins
Course: Snack
Servings: 12 cookies

Ingredients

  • 150 g hazelnut meal (1ยผ firmly packed cups)
  • 55 g coconut oil (ยผ cups) melted if solid
  • 85 g rice malt syrup or honey (ยผ cup approx.)
  • 1 tsp vanilla -powder, extract or essence
  • 1 tsp ground cinnamon
  • 1 tsp ground cardamom
  • ยฝ tsp ground ginger
  • 1 tbsp tea -or water (this is important or they will spread)

Instructions

  • Preheat your oven to 150โ„ƒ/300ยฐF (fan-forced).
  • In a mixing bowl or food processor, combine all of the ingredients above until well combined (if you have a Thermomix mix 5-10 seconds, speed 5).
  • Roll tablespoons of the mix in your hands and place them onto a tray lined with baking paper (parchment paper).
  • Flatten with the back of the fork. Sprinkle a little extra cinnamon on top (optional).
  • Bake for 15 minutes or until starting to brown on top.

Store

  • In an airtight container in the fridge or freezer.

Notes

Low-fructose

Use the brown rice syrup, not honey.

Vegan

Choose rice malt or maple syrup as your sweetener.

Choc-Chip Chai

Add cacao nibs or a piece of dark chocolate. SO yum!

No hazelnut meal?

You can use almond meal instead.

Coconut-free

Replace with macadamia nut oil.
ย 

I love these cookies, I hope you do to? As always I'd love your feedback. Please post aย comment or rate this recipe below.

Turkey Lemon Feta Mini Meatballs, Baby Burgers or Sausage Rolls

January 14, 2014 | Budget Friendly, Make-ahead Meals, Chicken, Freezable Meals, Healthy Lunchbox, After School Snacks, Savoury Snacks

These Turkey Lemon Feta Mini Meatballs, Baby Burgers or Sausage Rolls are the ultimate versatile dish for any occasion. Whether you’re packing a healthy lunchbox, hosting a party, or simply looking for a quick family dinner, this recipe has you covered with three tasty options in one. I often make these for my kids parties – they go down really well with kids and adults alike.

These are a high-protein meal or snack and a really tasty way to ‘hide’ extra nourishment in the form of vegetables. They can be pre-prepared, frozen and leftovers areย fabulousย for school lunch boxes too.

Health benefits

Packed with protein rich turkey, fibre packed veggies, and the tangy flavour of lemon and feta, this recipe is a nutritious alternative to traditional meatballs or sausage rolls. By using quality ingredients, you’re ensuring a meal thatโ€™s not only delicious but also full of natural goodness.

Ingredients

The recipe features turkey mince, fresh garlic, red onion, and a mix of finely grated carrot and zucchini for added moisture and nutrition. Mint or parsley, lemon zest, and crumbled feta add a burst of fresh flavour, while fresh breadcrumbs help bind everything together. Simple seasonings like salt and pepper tie it all together.

How to make these turkey meatballs, hamburgers or sausage rolls

Start by mixing all the ingredients in a large bowl or food processor until well combined. Choose your preferred optionโ€”whether mini meatballs, baby burgers, or sausage rollsโ€”and follow the specific cooking instructions for each. Bake, grill, or roll as needed, and youโ€™ve got a versatile dish ready to serve.

Serving suggestions and how to store

Serve the mini meatballs with pasta, in wraps, or with vegetable sticks for a kid-friendly lunchbox option. The baby burgers are perfect for parties or a casual weekend lunch, while the sausage rolls make an excellent snack or picnic food. Store leftovers in an airtight container in the fridge or freezer, and simply reheat when needed.

Vary turkey lemon feta sausage rolls, meatballs or burgers to suit your needs

For a gluten-free version, use gluten-free breadcrumbs and pastry. Dairy-free? Omit the feta or replace it with cashew nuts or nutritional yeast. If youโ€™re avoiding eggs, leave them out, though the patties may be a bit softer. You can also swap turkey mince for chicken mince or pork mince, depending on your preference.

If you’re tired of searching the internet for lunchbox inspo, look no further than my best selling ebook ‘The Well Nourished Lunchbox.’ It’s all the inspiration you’ll ever need to pack a delicious, whole foods lunchbox, quickly and easily!


For more healthy sausage roll recipes, clickย HERE.

Turkey meatballs, burgers, sausage rolls
Print Recipe
4.80 from 20 votes

Turkey, lemon and feta mini meatballs, baby burgers or sausage rolls

This delicious Turkey, lemon and feta combination can be made into meatballs, sausage rolls or hamburgers. Both adults and kids love this recipe - its my go to for parties and celebrations. 
Prep Time15 minutes mins
Cook Time30 minutes mins
Total Time45 minutes mins
Course: Main Course
Servings: 4

Ingredients

  • 500 g turkey mince (you can substitute chicken mince)
  • 1 clove/s garlic -finely chopped or crushed
  • 1 red onion/s (small) peeled and finely diced
  • 2 tbsp fresh mint leaves (finely diced) or parsley leaves
  • 1 carrot/s -finely grated
  • 1 zucchini/s -finely grated
  • 1 egg/s -lightly beaten
  • 1 lemon/s -zest
  • 30 g fresh breadcrumbs (ยผ cup) see below for gluten-free
  • 100 g feta cheese -crumbled or cubed (see below for dairy free)
  • Sea salt and freshly ground black pepper

Instructions

  • In a large mixing bowl or food processor, simply mix all of the ingredients together until they are combined well.
  • Then choose your preferred dishย  from the options below.
  • Sometimes, I'll use half of the mix for sausage rolls and the other half, is made into meatballs for the next day's lunch boxes.

Thermomix Method

  • If you need to, make your breadcrumbs from a frozen slice of bread, 10 seconds, speed 6. Set aside.
  • Add your garlic, onion (halved), mint or parsley, carrot and zucchini (chunks) and chop, 10 seconds, speed 5.
  • Add the mince, breadcrumbs, egg, lemon zest, feta and seasoning and combine on reverse, 20-30 seconds, speed 3 (you may need to scrape the sides to help it along).

Mini-meatballs

  • Preheat your oven to 180โ„ƒ/350ยฐF (fan-forced).
  • With damp hands, roll small balls and place on a baking tray lined with baking paper.
  • Bake for 20-30 minutes or until cooked through and browning on top. Serve warm or cold.
  • I love these for the kids lunch box; either with a salad or vegetable sticks or as a wrap or fresh spring roll filler.
  • Alternatively, you could add a lovely tomato puree and serve over pasta - spaghetti and meatballs!

Baby Burgers

  • With damp hands, roll small balls and place on a baking tray lined with baking paper, then flatten with the back of a fork.
  • Place on a preheated BBQ or grill pan to cook.
  • Serve in little dinner rolls with the salad and sauce of your choice. They can be held together by running a toothpick through the centre if need be.
  • For a grain-free option, serve in lettuce cups, san chou bow style.
  • These make a delicious, healthy party food or a fast weekend lunch.

Sausage rolls

  • Preheat your oven to 180โ„ƒ/350ยฐF (fan-forced).
  • Beat one egg in a cup with a tablespoon of milk.
  • Take a sheet of all-butter puff or short crust pastry and cut it in half (or better still make your own pastry). Careme brand have a fabulous wholemeal spelt puff pastry that is my personal favourite. 
  • Place the mince mixture along the centre of each half. Brush one edge of the pastry with the egg wash and fold the pastry over the mince.
  • Place on a baking tray (seam side down). Top with a little more egg wash and sprinkle over sesame seeds.
  • Cut into approximately 5cm long rolls and bake for 20 minutes or until the pastry is golden brown. Serve warm.
  • Perfect party food or for a picnic or weekend lunch.

Tip

  • For green phobic kids, peel the zucchini and omit the parsley/mint (or just process it very finely so it can't be detected).

Make-ahead

  • Allow to defrost fully before re-heating/ cooking. Re-heat in a low oven until just hot.

Store

  • Store in an airtight container in the fridge or freezer. All options can be frozen either raw or cooked.

Notes

Gluten-free

Use gluten-free breadcrumbs, rice crumbs or quinoa flakes to bind. Use a gluten-free pastry for the sausage rolls and gluten free buns or lettuce cups for the baby burgers.

Dairy-free

Omit the feta or replace with chopped cashew nuts and/or a tablespoon of nutritional yeast.

Egg-free

Omit the egg altogether (they just aren't as firm).

Sesame-free

Omit the sesame seeds in the sausage rolls (you can sprinkle with poppy seeds instead)

Onion and garlic-free

Replace the onion and garlic with finely diced fennel (from half a small bulb) and a pinch of chilli flakes.

Chicken or pork

Also delicious with chicken or pork mince.
ย 

Like these? Why not post a comment below or rate this recipe.

ย 

Turkey lemon feta meatballs

Cacao Rough (Raw Vegan Chocolate Slice)

November 27, 2013 | After School Snacks, No-bake Sweets

This Cacao Rough (raw vegan chocolate slice) is the ultimate treat for anyone looking for a quick and easy chocolate fix that’s also nourishing! Made with wholesome ingredients, itโ€™s perfect for satisfying your sweet tooth while still keeping things healthy. Plus, it’s raw, vegan and gluten-free making it suitable for a variety of diets and a bit of a change from many dried fruit, high sugar energy ball or bar recipes about.

I think they are so delicious – a bit of a cross between a coconut rough and chocolate crackle. There’s something distinctly nostalgic about these beauties.

Health benefits

This delicious chocolate slice features almond meal for a protein boost (about 2 grams protein per serve), good fats and mood elevating amino acids and minerals. While cacao powder offers antioxidants that many chocolate lovers appreciate. The coconut oil adds healthy fats, and chia seeds are a great source of omega-3 fatty acids, making this treat both tasty and nourishing. Plus it’s refined sugar-free for the win! Many people find dried fruit, particularly medjool dates, really set off sugar cravings and energy/concentration slumps. Thatโ€™s why you largely wonโ€™t find date loaded sweet recipes here at Well Nourished.ย 

Ingredients

To whip up this scrumptious dairy-free treat, you’ll need almond meal, cacao powder, your choice of sweetener (like rice malt syrup, honey, or maple syrup), shredded coconut, coconut oil, optional chia seeds, and vanilla. Feel free to add extras like cacao nibs or a pinch of sea salt for that perfect sweet and salty combo.

How to make this raw vegan chocolate slice

Simply blend the almond meal, sweetener, coconut, coconut oil, chia seeds, raw cacao powder, and vanilla in a food processor, high speed blender or a mixing bowl until well combined. Press the mixture firmly into a lined tray with a spatula, sprinkle with cacao nibs and salt (optional), then pop it in the freezer for 10-15 minutes to set. The prep time is just so quick! Once firm, slice it into squares, and itโ€™s ready to enjoy!

If you own a Thermomix, we’ve also included Thermomix instructions for this recipe.

Serving suggestions and how to store

These little squares of goodness are perfect for a quick snack or dessert – or anytime you have a chocolate craving! Store them in an airtight container in the fridge for up to a week or freeze them for longer-lasting treats. Just remember, they need to stay chilled or they might melt on warmer days.

Timesaving tip

I often double this recipe to make a bigger batch (trust me, you’ll be wanting more)!

Vary this raw vegan chocolate slice to suit your needs

For a refreshing twist, add peppermint essence for a minty flavour. If you want to go nut-free, substitute the almond meal with ground sunflower seeds. You can also make it low-fructose by using rice malt syrup, or swap cacao for carob powder if you prefer. And donโ€™t forget, doubling the recipe is always a good ideaโ€”trust me, you’ll want more!

Check out the variations below the main recipe for tips on how to adapt it to your specific dietary needs.

AND if you love this but want more gut healing support, try these Peppermint Belly Bliss Bites.

For more delicious, healthy and easy to make wholefood treats, clickย HERE.

This raw vegan chocolate slice recipe is also dairy, gluten and fructose free and so simple to make. It's a delicious sweet treat.
Print Recipe
4.80 from 44 votes

Cacao Rough

This delicious Cacao Rough is the most satisfying chocolate treat. It is easy to make and the most delicious raw chocolate slice I have ever tried. 
Prep Time5 minutes mins
Chill30 minutes mins
Total Time35 minutes mins
Course: Snack
Servings: 20 squares

Ingredients

  • 100 g almond meal (1 heaped cup)
  • 30 g cacao powder (ยผ cup) unsweetened Dutch process or raw
  • 85 g rice malt syrup, honey or maple syrup (ยผ cup)
  • 50 g shredded coconut (1 cup)
  • 100 g coconut oil (ยฝ cup)
  • 20 g chia seeds (ยผ cup) optional
  • 1 tbsp vanilla -powder, extract or essence

Optional extras

  • 1 tbsp cacao nibs - add a nice crunch
  • Pinch sea salt -optional but I quite like a sweet and salty taste

Instructions

  • In a food processor combine on low speed the almond meal, sweetener, coconut, coconut oil, chia seeds, cocoa and vanilla until just combined (if using a Thermomix speed 4, for 5 seconds).
  • You can also mix by hand, just make sure the coconut oil is in its liquid form.
  • Press the mixture firmly into a small lined tray (approx. 17 x 27cm). Sprinkle with the optional cacao nibs and sea salt if you like and press into the mixture with the back of a spoon.
  • Place in the freezer to set for 10-15 minutes.
  • Once set, remove from the tin and chop into little squares.

Store

  • Store in an airtight container in the fridge or freezer.

Notes

Peppermint slice

Add a few drops of peppermint essence for a delicious mint chocolate flavour.

Hazelnut

Use hazelnut meal for a chocolate hazelnut slice.

Add crunch

Mix in 1/4 cup of Buckinis (activated buckwheat groats).ย 

Low-fructose

Choose rice malt syrup as your sweetener.

Nut-free

Replace the almond meal with toasted and ground sunflower seeds.

Vegan

Choose rice malt or maple syrup as your sweetener.

Cacao-free

Replace the cacao with carob powder.
ย 
ย 

I LOVE these - how about you? Post a comment or rate this recipe below. For 10 moreย Guilt-free Chocolate recipes, subscribe to my FREEย newsletter.

Quinoa Patties

November 20, 2013 | Budget Friendly, Make-ahead Meals, Freezable Meals, Vegetarian, Healthy Lunchbox, Savoury Snacks

These Quinoa Patties are a fantastic way to enjoy a nutritious and delicious meal that’s packed with flavour and goodness. Perfect as a snack, lunchbox treat, or a light dinner, these patties are versatile and easy to whip up, making them a hit with both kids and adults. Plus, theyโ€™re a great way to sneak in some veggies!

Health benefits

Quinoa is a superfood I just love. It is a complete protein, providing all nine essential amino acids, while leafy greens contribute vitamins and minerals that support overall health. The addition of garlic and parmesan cheese not only enhances flavour but also adds beneficial nutrients. The eggs combined with the quinoa make this a wonderful, protein-rich vegetarian meal with approximately 18 grams of protein per serve.

Ingredients

For these yummy quinoa patties, youโ€™ll need quinoa, parmesan cheese, garlic, spring onions, leafy greens (like kale or spinach or even fresh chives), fresh breadcrumbs, eggs, and seasoning with sea salt and black pepper.

How to make Quinoa Patties

Start by washing the quinoa well to remove any bitterness, then cook it in a saucepan according to these instructions and let it cool. In a food processor, blend the cheese, cloves garlic, and spring onions, then process the bread to make bread crumbs (if making them). Next, mix in the eggs and chopped greens, combining everything together in a medium bowl. Shape the mixture into patties and cook them in a fry pan or skillet in either coconut oil, olive oil or butter until golden brown on both sides.

Serving suggestions and how to store

These quinoa cakes are delicious served with avocado salsa, guacamole, or your favourite dips like pesto or hummus. They can be enjoyed warm or cold, making them perfect for lunchboxes or meal prep. Store any leftovers in an airtight container in the fridge for up to a week, or freeze them (with baking or parchment paper separating them) for a quick meal option later.

Vary this to suit your dietary needs

To make these patties gluten-free, simply use gluten-free bread or rolled quinoa. For a dairy-free version, omit the cheese and consider adding nutritional yeast and a good pinch of sea salt for flavour. If you’re not a fan of leafy greens, feel free to substitute them with grated carrot or sweet potato for a different twist.

Take a look at the variations (below the main recipe) for suggestions to alter the recipe to suit your specific dietary requirements.


Quinoa patties
Print Recipe
4.75 from 8 votes

Quinoa Patties

These quinoa patties are delicious hot or cold, as a side dish or as the main event. They are just so versatile, nourishing and delicious. 
Prep Time20 minutes mins
Cook Time15 minutes mins
Total Time35 minutes mins
Course: Main Course
Servings: 4

Ingredients

  • 180 g quinoa (1 cup)ย washed very well
  • 45 g parmesan cheese (ยฝ cup) grated
  • 2 clove/s garlic -peeled and crushed
  • 1 bunch/s spring onion/s -white part finely diced
  • 30 g leafy greens -like kale, spinach, basil or another herb (1 cup approx.)
  • 60 g fresh breadcrumbs (1 cup) or gluten-free breadcrumbs
  • 4 egg/s
  • Sea salt and freshly ground black pepper - to taste

Instructions

  • After washing your quinoa very well in a fine sieve to remove the bitter saponins, cook your quinoa in a saucepan (instructions here). If you have time to soak the quinoa in water with a splash of apple cider vinegar (for up to 12 hours) this will improve its digestibility.
    Once cooked set aside to cool.
  • In a food processor or powerful blender, grate your cheese and chop your garlic and spring onion.ย Set aside in a large mixing bowl.
  • Now process your bread (works well from frozen) to a crumb.  Add to the cheese mix.
  • Without rinsing your bowl, process you eggs and greens until the greens are a chopped up as necessary. I like them a little in tact, but for veggie phobic kids, you may like to process them to a liquid.
  • Now mix all the ingredients together until well combined and season well.
  • In a large frypan, add a good couple of tablespoons of coconut oil or butter (or a mix of both).
  • Heat over a moderate heat and drop a good heaped tablespoon of the quinoa mixture into the oil. This recipe should make approx. 15-16 patties.
  • Press down a little with the back of a spatula.
  • Cook until the edges start to brown. Carefully turn and brown the other side.
  • Eat immediately or allow to cool and store in the fridge.

Thermomix method

  • Soak the quinoa overnight, drain and rinse. If no time to soak, rinse several times, rubbing it so the bitter saponins are washed away. Cook in the basket with 700ml of water, Varoma temp, speed 4, 12minutes if soaked, 15minutes if just rinsed or until the little white tail on the seed appears.
  • Set aside to cool and dry your TMX bowl.
  • Process you cheese, garlic, and onion, 10 seconds, speed 4. Set aside.
  • Make your breadcrumbs by processing frozen bread (broken into pieces), 10 seconds, speed 6. Set aside.
  • Chop the leafy greens, 5 sec, speed 4. Add the eggs and process 5 seconds speed 4.
  • Add back the cooked quinoa, breadcrumbs and cheese/onion mix. Season and mix on reverse, 10 seconds, speed 3 (you may need to scrape the sides).
  • In a large frypan, add a couple of tablespoons of coconut oil or butter (or a mix of both).
  • Heat over a moderate heat and drop a good heaped tablespoon of the quinoa mixture into the oil.
  • Press down a little with the back of a spatula.
  • Cook until the edges start to brown. Carefully turn and brown the other side.
  • Eat immediately or allow to cool and store in the fridge.

Serve

  • With a squeeze of lemon juice
  • With avocado tomato salsa (pictured) or guacamole
  • With pesto or hummus
  • With salad
  • With grilled meat or fish and salad for a largerย meal

Make-ahead

  • They can be eaten cold or re-heated in the oven or a sandwich press.

Store

  • Store in an airtight container in the fridge.
  • Can also be frozen.
  • My kids love these in their school lunchbox.

Notes

Gluten-free

Use gluten free bread or rolled quinoa.

Dairy-free

Just omit the cheese (you can add in ยผ cup nutritional yeast for more flavour).

No greens

You can substitute the greens with grated carrot or sweet potato.
ย 
ย 

Love to hear your thoughts on these delicious patties. ย You can comment or rate this recipe below.

Chicken and Mushroom Brown Rice Risotto

November 5, 2013 | Make-ahead Meals, Chicken, Freezable Meals

This gluten-free Chicken and Mushroom Brown Rice Risotto is a comforting and nutritious twist on a classic favorite. Unlike traditional risotto that relies on arborio rice, this version uses wholesome brown rice for added fibre and flavour, making it a delicious and satisfying meal. It’s easy to prepare, allowing you to precook the rice and whip up this risotto in just 10 minutes.

I first made this many years ago. A restaurateur friend of mine teased me about messing with a ‘classic.’ Once he tasted it he was grateful I dared to mess!

Health benefits

This chicken risotto is packed with nutritious ingredients like chicken, mushrooms, chicken broth and fresh vegetables, providing a great source of protein and vitamins. The use of brown rice adds more fibre, promoting digestive health, while the addition of fresh herbs and greens boosts its nutrient profile.

Ingredients

You’ll need dried porcini mushrooms, butter, garlic, a large onion, celery sticks, boneless chicken thighs, assorted mushrooms, fresh thyme, zucchini, dry white wine, leftover cooked brown rice, chicken stock or bone broth, grated parmesan cheese, and baby spinach, topped off with flat-leaf parsley for garnish.

How to make this Chicken and Mushroom Brown Rice Risotto

To create this risotto, start by soaking the porcini mushrooms in boiling water. Sautรฉ the garlic, onion, and celery in butter, then add diced chicken until it turns opaque. Incorporate chopped porcini and assorted mushrooms, zucchini, and thyme, and cook until soft. Next, add the pre-cooked brown rice, a splash of white wine, reserved porcini liquid, and chicken stock, simmering until the stock is absorbed. Stir in spinach and cheese until melted and wilted, season with sea salt and black pepper then serve topped with fresh parsley.

Serving suggestions and how to store

Pair this hearty risotto with a crisp salad for a complete meal. Store any leftovers in an airtight container in the fridge for up to three days or freeze for later enjoyment. Reheat gently on the stovetop, adding a splash of broth if needed to restore creaminess.

Vary this brown rice risotto to suit your needs

For a dairy-free version, substitute the butter with ghee or olive oil and replace cheese with cashew cream and nutritional yeast. To make it vegetarian, increase the mushroom content and add walnuts, swapping chicken broth for vegetable stock. Vegan options can also be achieved with the same substitutions, and for those with onion or garlic sensitivities, fennel or chili powder can be excellent alternatives.

Print Recipe
4.75 from 8 votes

Chicken and Mushroom Brown Rice Risotto

A delicious, nutty Chicken and Mushroom Brown Rice risotto that's easier to make than traditional risotto and more nutritious. 
Prep Time20 minutes mins
Cook Time25 minutes mins
Total Time35 minutes mins
Course: Main Course
Servings: 4

Ingredients

  • 10 g dried porcini mushrooms
  • 1 tbsp butter
  • 1 clove/s garlic -diced
  • 1 onion/s (large) diced
  • 2 stick/s celery -finely diced
  • 500 g boneless and skinless chicken thighs -diced
  • 200 g mushrooms -sliced (an assortment is nice, Swiss brown, shiitake, oyster)
  • 1 tbsp fresh thyme leaves
  • 1 zucchini/s -julienned or ribboned
  • 60 ml white wine (ยผ cup)
  • 2 cup/s leftover cooked brown rice (1 cup or 185 g when uncooked)
  • 250 ml chicken broth or stock (1 cup)
  • 100 g parmesan cheese -grated (1 cup)
  • 30 g baby spinach (optional)
  • ยฝ bunch/s flat leaf parsley -chopped
  • Sea salt and freshly ground black pepper -to taste

Serve

  • Salad (to serve)

Instructions

  • Place the porcini mushrooms in a small bowl and just cover with a little boiling water. Set aside.
  • In a large non-stick pan, melt the butter over a low heat. Add the garlic, onion and celery and cook with the lid on for a few minutes just to sweat and soften (not too brown).
  • Add the chicken and continue to cook for a few more minutes until the chicken just starts to turn opaque.
  • Remove the porcini mushrooms from the water, reserving the soaking water.
  • Chop the porcini mushrooms then add to the pan with the rest of the mushrooms, zucchini, and thyme leaves and cook for a few minutes until the mushroom starts to soften.
  • Add the rice and a splash of white wine, the reserved porcini liquid, followed by the stock and simmer for 5 minutes, stirring often until the stock is almost all absorbed.
  • Turn off the heat and stir in the spinach and cheese. Once the spinach has wilted and the cheese melted through the dish, top with parsley and serve immediately.

Thermomix method

  • If cooking the brown rice in the Thermomix, add enough water to cover the blades. Place the rice in the basket and cook 20 minutes (if un-soaked) or 18 minutes if soaked, Varoma temp, speed 4.
  • Place the porcini mushrooms in a small bowl and just cover with a little boiling water. Set aside.
  • In a dry thermomix bowl, grate the parmesan, 10 seconds, speed 7-8. Set aside. 
  • Now chop the garlic, 3 seconds, speed 7. Add the onion and celery and chop 10 seconds, speed 4. 
  • At this point I personally transfer it to the stove top as the volume of chicken and mushrooms makes it very hard to cook evenly in the the thermomix. Also it's not like a regular risotto that requires lots of stirring. Once the chicken and mushrooms are cooked, it is only 5 minutes away from serving. 

Make-ahead

  • Re-heat in a pot over a low heat until just hot.

Store

  • Store in an airtight container in the fridge or freezer.

Notes

Dairy-free

Replace the butter with ghee or macadamia or olive oil and the cheese with cashew nut cream (savoury version) and nutritional yeast.

Vegetarian

Replace the chicken with an extra cup of mushrooms and a handful or two of walnuts. Replace the chicken broth with vegetable stock.

Vegan

Use dairy-free and vegetarian options.

Onion-free

Replace the onion with a small bulb of finely diced fennel.ย 

Garlic-free

Replace the garlic with a pinch of chilli powder.
ย 

I prefer this brown rice version more than regular risotto - do you agree? ย Post your thoughts in the comments below.

Cashew Nut Cream

October 17, 2013 | Dips, Sauces and Dressings

Cashew nut cream is a deliciously creamy and versatile alternative to dairy cream, perfect for adding richness to both sweet and savoury dishes. With just a few simple ingredients, itโ€™s easy to whip up and can be customised to suit your taste or dietary needs.

Health benefits

This basic cashew cream is a great gluten-free, plant-based option that’s packed with healthy fats, making it a nourishing addition to many recipes. Cashews are a source of healthy monounsaturated fats, magnesium and a great source of protein. Plus this is really delicious.ย Itโ€™s a good choice for those looking to reduce dairy or incorporate more plant-based foods into their diet.

Ingredients

All you need is 60g of raw cashew nuts and some filtered water to make a basic cashew nut cream. You can also adjust the flavour with vanilla and sweeteners, or add lemon juice and herbs or nutritional yeast for a savoury twist or cheesy flavour.

How to make this cashew nut cream recipe

To make this vegan cashew cream, first, grind the raw cashews into a fine meal using a high-speed blender or food processor. Soak them in water for 2-6 hours, then drain and blend until a smooth texture. Add water a tablespoon at a time until you reach your desired consistency. Customise with sweeteners, vanilla extract, herbs, or salt depending on how you plan to use it (if you are after a sweet or savoury cream). If you own a Thermomix, we’ve also included Thermomix instructions for this recipe.

Serving suggestions and how to store

Cashew nut cream is perfect as a dairy-free topping or sauce for desserts, soups, or savoury dishes (like a pasta sauce or white sauce). It keeps well in an airtight container in the fridge for up to 3 days or can be frozen for longer storage.

Vary this cashew nut cream recipe to suit your needs

Make it sweet with vanilla and maple syrup for desserts, or turn it into a savoury cashew cream with miso paste or herbs. If you need a faster version, you can simmer the cashews for 5 minutes instead of soaking them, though it won’t be raw.

Cashew Nut Cream
Print Recipe
No ratings yet

Cashew Nut Cream

A delicious, dairy-free alternative to regular cream, this Cashew Nut Cream is a must for all dairy-free and vegan cooks. 
Prep Time5 minutes mins
Total Time2 hours hrs 5 minutes mins
Course: Side Dish
Servings: 1 cup

Ingredients

  • 60 g raw cashew nuts (ยฝ cup)
  • Filtered water -see below

Instructions

  • Grind the cashews to a fine meal in a high-speed blender (thermomix 5 seconds, speed 8). Place the cashew nuts into a small bowl and pour over  enough water to cover them well. Allow to soak for 2-6 hours (but no longer than 8).
  • Strain the water from the nuts and place in a high-speed blender.
  • Blend at the highest speed until smooth and creamy (if using a Thermomix, blend 30 seconds, speed 8). You really need a good blender like a Vitamix or Thermomix to achieve a really creamy consistency and you may need to scrape down the sides a few times too.
  • Add extra water, tablespoon by tablespoon to reach the desired consistency. The more water you add the thinner the cream or the less you add the thicker the cream.
  • Eat it as is, or choose your flavour...

Make it sweet

  • Add  ยฝ teaspoon of vanilla and 1-2 tablespoons of rice malt syrup (fructose free) or maple syrup. Mix through until well combined.

Make it sour

  • To make sour cream, add sea salt and a little lemon juice to taste.

Make it savoury

  • Mix through a little miso paste or nutritional brewers yeast or onion powder or fresh herbs and seasoning. I make this quite thick like a cream cheese for a delicious butter spread replacement.

Fast track it

  • If you've cut yourself short or don't have the time or patience to wait for the nut meal to soak, you can gently simmer it for 5 minutes (though it is no longer raw).

Store

  • Airtight in the fridge for up to 3 days.
  • Can also be frozen.

Notes

Have you tried cashew nut cream before? ย How do you use it or anything else to add?

ย 

Strawberry Chia Pudding

October 9, 2013 | Breakfast, After School Snacks, No-bake Sweets

This Strawberry Chia Pudding recipe is a super simple, healthy, and delicious treat thatโ€™s perfect for breakfast, dessert or even an afternoon snack. Made with fresh strawberries, creamy coconut milk, and chia seeds, this recipe comes together in minutes and thickens beautifully in the fridge for a satisfying, naturally sweet pudding. It’s also the perfect no-prep, make ahead brekkie for those days where you need to get going quickly.

Health benefits

The strawberries are a delicious berry with a great antioxidant profile. The coconut milk contains fats which support the immune system, brain, and digestion. Read more about the health benefits of coconut here. The chia seeds are a fibre rich, high protein source of omega-3s and are responsible for the gelatinous consistency. This gluten-free, vegan pudding will keep you full and energised!

Ingredients

For this recipe, youโ€™ll need fresh strawberries, canned coconut milk, chia seeds, and your choice of natural sweetener like honey, maple syrup, or rice malt syrup. A touch of vanilla extract and lime zest adds extra flavour, making this pudding both refreshing and satisfying.

How to make strawberry chia seed pudding

Making strawberry chia pudding is as easy as tossing everything into a blender and giving it a good blitz until smooth. Then, pop it in the fridge for at least 4 hours (or overnight) to let the chia seeds work their magic. If it gets too thick, just stir in a bit of coconut milk or water to loosen it up. With such a short prep time and easy method, anyone can make and enjoy this!

Serving suggestions and how to store

Serve this pudding in a glass, jar or bowl, topped with extra fresh strawberries (or banana), Greek yogurt or a sprinkle of your favourite granola for a bit of crunch. It stores well in an airtight container in the fridge for up to 4-5 days, making it a great make-ahead option for busy mornings or meal prepping. It can also be frozen.

Vary this to suit your dietary needs

If you’re avoiding coconut, swap the coconut milk for almond milk, oat milk, or any dairy alternative. You can also adjust the sweetness to your liking by using more or less syrup or even adding a touch of stevia for a sugar-free option. Feel free to add in vanilla protein powder or some hemp seeds to increase the protein in this chia pudding.

More Chia Pudding recipes HERE.ย 

Strawberry Chia pudding
Print Recipe
4.77 from 13 votes

Strawberry Chia Pudding

This zesty, delicious strawberry chia pudding has such lovely balance of flavours and it's so simple to make. 
Prep Time5 minutes mins
Total Time4 hours hrs 5 minutes mins
Servings: 4

Ingredients

  • 400 g fresh strawberries (approx.) hulled
  • 400 ml canned coconut milk
  • 85 g rice malt syrup, honey or maple syrup (ยผ cup) or more or less to taste
  • 1 tsp vanilla -powder, essence or paste
  • 100 g chia seeds (ยฝ cup)
  • 1 lime/s -zest

Instructions

  • Throw it all in a blender and blend on a very high speed until well mixed. Thermomix 30 seconds, speed 6.
  • Refrigerate for 4-24 hours. The longer it is refrigerated, the thicker it becomes.
  • If you find it has become too thick, mix through a little more coconut milk or water to thin it out.
  • Serve in a glass garnished with fresh strawberries.

Tip

  • Some kids (or even adults), don't like the 'tapioca-like' texture of the chia seed. If this is the case just process it for longer or until it smoothes out.

Store

  • Store in an airtight container in the fridge.

Notes

Coconut-free

Replace the coconut milk with a nut milk or dairy milk.

Boost the protein

Stir through your favourite protein powder. I love usingย this collagen proteinโ€”itโ€™s flavourless, so it works beautifully across all kinds of recipes without altering the taste. You can also add hemp seeds or the Power Booster recipe.
ย 
ย 

I'd love to hear how you enjoyed this delicious chia pudding - post a comment or rate this recipe below.

Healthy Chocolate, Almond and Coconut Bars

September 17, 2013 | After School Snacks, No-bake Sweets

These healthy Chocolate, Almond and Coconut Bars are the best heathy raw chocolate slice recipe – perfect when you’re craving something sweet but still want a wholesome snack. They’re packed with nourishing ingredients and so simple to make, making them an ideal option for busy days when you need a quick energy boost. Plus, with a rich layer of dark chocolate on top, they feel indulgent whilst they are packed full of nutrition.

Health benefits

This gluten-free recipe uses whole foods like almond meal and coconut to provide healthy fats and fibre, while dark chocolate adds a touch of antioxidants. The almonds provide mood and energy elevating proteins, minerals and fats. The coconut oil is are amazing for the brain, immune and metabolic health. You can also adjust the sweetness to suit your taste preferences, making it a flexible and satisfying snack. This is a whole food treat that is very satisfying and tastes amazing!

Ingredients

The star ingredients in this heathy raw chocolate slice recipe include almond meal, desiccated coconut and nut butter, which come together to create a rich and delicious base. You’ll also need a natural sweetener like honey, maple syrup, or rice malt syrup, along with coconut oil, vanilla extract, and a hint of coconut flour for structure. To finish it off, melt dark chocolate (or chocolate chips) to top the bars to form the chocolate layer.

How to make this heathy raw chocolate slice recipe

Making healthy raw treat is super easy! Just blend all the ingredients, except for the chocolate, in a food processor until everything comes together in a sticky paste. Press the mixture into a lined tin that’s approximately and refrigerate until firm. After that, melt the dark chocolate and spread it over the top. Pop the tray back into the fridge until the chocolate is just set, then slice and enjoy! The best part is no oven is required and they take just 15 minutes to prepare! If you own a Thermomix, we’ve also included Thermomix instructions for this recipe.

Serving suggestions and how to store

This heathy raw chocolate slice recipe are great as a healthy, low sugar bar or dessert and pair perfectly with a hot cup of tea or coffee. Keep them stored in an airtight container in the fridge to maintain their firmness, or pop them in the freezer if you want to keep them longer.

Vary this heathy raw chocolate slice recipe to suit

For a low-fructose option, use rice malt syrup and make my raw chocolate for the topping. If you love Nutella, try swapping the almond meal for hazelnut meal and using hazelnut butter for a rich, nutty twist. Looking for a nut-free snack? Check out my no-bake muesli bar recipe or my healthy chocolate coconut slice for delicious alternatives.

Take a look at the variations (below the main recipe) for suggestions to alter the recipe to suit your specific dietary requirements.

For more delicious, healthy and easy to make wholefood treats, clickย HERE.

This raw vegan chocolate slice recipe is also dairy, gluten and fructose free and so simple to make. It's a delicious sweet treat.
Print Recipe
4.80 from 44 votes

Cacao Rough

This delicious Cacao Rough is the most satisfying chocolate treat. It is easy to make and the most delicious raw chocolate slice I have ever tried. 
Prep Time5 minutes mins
Chill30 minutes mins
Total Time35 minutes mins
Course: Snack
Servings: 20 squares

Ingredients

  • 100 g almond meal (1 heaped cup)
  • 30 g cacao powder (ยผ cup) unsweetened Dutch process or raw
  • 85 g rice malt syrup, honey or maple syrup (ยผ cup)
  • 50 g shredded coconut (1 cup)
  • 100 g coconut oil (ยฝ cup)
  • 20 g chia seeds (ยผ cup) optional
  • 1 tbsp vanilla -powder, extract or essence

Optional extras

  • 1 tbsp cacao nibs - add a nice crunch
  • Pinch sea salt -optional but I quite like a sweet and salty taste

Instructions

  • In a food processor combine on low speed the almond meal, sweetener, coconut, coconut oil, chia seeds, cocoa and vanilla until just combined (if using a Thermomix speed 4, for 5 seconds).
  • You can also mix by hand, just make sure the coconut oil is in its liquid form.
  • Press the mixture firmly into a small lined tray (approx. 17 x 27cm). Sprinkle with the optional cacao nibs and sea salt if you like and press into the mixture with the back of a spoon.
  • Place in the freezer to set for 10-15 minutes.
  • Once set, remove from the tin and chop into little squares.

Store

  • Store in an airtight container in the fridge or freezer.

Notes

Peppermint slice

Add a few drops of peppermint essence for a delicious mint chocolate flavour.

Hazelnut

Use hazelnut meal for a chocolate hazelnut slice.

Add crunch

Mix in 1/4 cup of Buckinis (activated buckwheat groats).ย 

Low-fructose

Choose rice malt syrup as your sweetener.

Nut-free

Replace the almond meal with toasted and ground sunflower seeds.

Vegan

Choose rice malt or maple syrup as your sweetener.

Cacao-free

Replace the cacao with carob powder.
ย 
ย 

I LOVE these - how about you? Post a comment or rate this recipe below. For 10 moreย Guilt-free Chocolate recipes, subscribe to my FREEย newsletter.

This healthy raw chocolate slice recipe is vegan, gluten, dairy & fructose free. It' an easy to make, delicious and nutritious snack.
Print Recipe
4.77 from 30 votes

Healthy Chocolate, Almond and Coconut bars

One of my all time favourite chocolate-y treats these Healthy Chocolate, Almond and Coconut bars are easy to make, nutritious and delicious. 
Prep Time15 minutes mins
Total Time1 hour hr 15 minutes mins
Course: Snack
Servings: 12 bars

Ingredients

  • 300 g almond meal (2ยฝ firmly packed cups)
  • 80 g desiccated coconut (1 cup approx.) or shredded
  • 130 g nut butter (ยฝ cup) I like the ABC nut spread
  • 4 tbsp rice malt syrup, honey or maple syrup -adjust the amount to make these more, or less sweet to suit your taste
  • 100 g coconut oil (ยฝ cup)
  • 1 tbsp vanilla
  • 1 tbsp coconut flour
  • 100 g dark chocolate -melted

Instructions

  • Mix all ingredients (except the chocolate) together in a food processor/mixer until well combined and forming a rough paste.
  • If you have a Thermomix, mix 30 seconds, speed 4.
  • Pour into a slice tin (approx. 17 x 27cm) lined with baking paper (parchment paper).
  • Refrigerate until set (about an hour).
  • Once set, melt the chocolate in a bowl placed over a pot of simmering water, stirring continually. Spread evenly with a spatula over the almond mix and refrigerate again until the chocolate is just set (10 minutes). You an also melt chocolate in the thermomix (see basic cookbook for directions).
  • Remove from the tin and slice into small bars.
  • Remember to keep these in the fridge or freezer. As with any raw coconut oil based product, they'll melt if not kept cold!

Store

  • Store in an airtight container in the fridge.

Tip

  • To get a good cut on the slice without cracking the chocolate, take out of the fridge or freezer for about 30 mins (approx) before slicing and you can also use a hot knife.

Notes

Low-fructose and dairy-free or vegan

Choose rice malt syrup for your sweetener for low fructose. Even though the 85% chocolate is very low in fructose, you may like to make some dairy-free raw chocolate for the top.ย Here is the recipe.

Nutella like

Swap the almonds for ground hazelnuts and use hazelnut butter for a match made in heaven.
Want something grainy and nut free? Check out my No Bake Muesli Bar here, or my biscuity Healthy Chocolate Coconut Slice, here.

Nut-free

This is not the recipe for you.ย For 150 pages of nut-free recipes, take a look at my super popular ebook 'The Well Nourished Lunchbox'. Click HERE to find out more and read the rave reviews.
ย 
ย 

These are so divine. I'd love you to try them then tell me what you think by posting a comment.

Homemade Hamburger (and why you need to avoid the rest)

August 28, 2013 | Foods to Avoid, Budget Friendly, Make-ahead Meals, Red Meat, Freezable Meals, Healthy Lunchbox

This healthy hamburger recipe is quick, easy, and a family favourite. I usually make my own patties because homemade burgers are a genuinely healthy meal, but only when you skip the takeout. The best part? These come together faster than ordering and picking up takeaway!

After seeing an intact McDonalds hamburger that was five years old and completely free of mould or any kind of decay, I can confirm the longevity of the McDonalds burger is no urban myth. I would never touch a fast food or frozen burger of any kind!

Even Jamie Oliver has been on the fast food giants back recently. In a graphic youtube video, he describes that when producing hamburger mince, “basically, we’re taking a product that would be sold in the cheapest ways for dogs” and after being washed with ammonium hydroxide (which is what forms the bulk of your household disinfectants) ‘is being given to human beings.’ย  Jamie goes on to ask “why would any sensible human being put meat filled with ammonia in the mouths of their children?”

So I regularly make up healthy homemade hamburgers in batches and freeze them to throw on the BBQ when the need arises. They are truly delicious, healthy and very simple to make.

Health benefits

Homemade hamburgers give you complete control over what goes into your meal, allowing you to use fresh, nutrient-rich ingredients. The inclusion of vegetables like carrots and zucchini not only boosts the flavour but also adds fibre and essential vitamins, making these burgers a more balanced option compared to typical fast food versions. There is nothing that you can buy that compares to these burger patties nutritionally!

Ingredients in this healthy burger recipe

This burger recipe calls for a blend of beef mince, fresh breadcrumbs, herbs like basil or parsley, and a mix of veggies, including red onion, carrots and zucchini, to create a juicy and delicious patty. Simple seasonings like garlic, mustard, oregano, sea salt and black pepper bring everything together, giving you a burger that’s both satisfying and nutritious.

How to make this healthy hamburger recipe

To make healthy burgers, start by preparing your fresh breadcrumbs, grating the vegetables and finely chopping the herbs. Place them into a mixing bowl. Mix everything together with the beef mince, egg, and seasonings until you can form firm patties. Cook them over a medium-high heat on the BBQ grill or in a skillet or pan until they’re perfectly done. Customise your burger with your favourite toppings, sauce and enjoy the homemade goodness!

Serving suggestions and how to store

Serve these homemade burger patties with your favourite accompaniments like your favourite salad, grated carrot, slices of cheddar cheese, avocado, tomato, fresh greens, and grilled onions. Go the extra mile by adding crispy bacon, fried egg, pickles or grilled pineapple. I also recommend to toast the buns on the BBQ for added flavour and texture. Leftover burgers can be stored in an airtight container in the fridge. You can also freeze the burgers either before or after cooking, making them perfect to prep ahead.

Vary this healthy hamburger recipe to suit your dietary needs

Make these burgers gluten-free by using gluten-free breadcrumbs or quinoa flakes. For a grain-free option, try binding the patties with nut meal and wrap in a lettuce cup. If you need an egg-free version, simply omit the egg; the patties might be a bit softer but will still taste great. You can even sub the ground beef for another ground meat like minced / ground turkey or chicken. For a fabulous Veggie burger take a look at THIS RECIPE.

Check out the variations below the main recipe for tips on how to adapt it to your specific dietary needs.


Healthy Hamburger recipes including gluten and grain free options. Also why you really need to avoid anything but home made.
Print Recipe
4.74 from 15 votes

Homemade Hamburger

Looking for a healthier alternative to store-bought hamburgers? This Healthy Homemade Hamburger recipe is packed with fresh veggies, herbs, and quality beef, making it a nutritious and delicious choice. Say goodbye to unnecessary additives and preservatives, and hello to a burger that's as wholesome as it is tasty. These are perfect for picky eaters who love burgers!
Prep Time15 minutes mins
Cook Time15 minutes mins
Total Time30 minutes mins
Course: Main Course
Servings: 6

Ingredients

  • 500 g beef mince (approx.)
  • 25 g fresh bread crumbs (ยฝ cup)
  • 1 red onion/s -quartered & grated
  • 1 clove/s garlic -crushed
  • 2 tbsp fresh basil or parsley -leaves picked
  • 1 carrot/s (small) quartered & grated
  • 1 zucchini/s (small) quartered & grated
  • 1 tbsp dried oregano
  • 1 tbsp dijon mustard
  • 1 egg/s
  • Sea salt and freshly ground black pepper
  • 6 burger buns (to serve)
  • Salad (to serve)

Instructions

  • If you want to make these burgers the good old fashioned way, then just throw all the ingredients into a bowl and mix with your hands, squeezing the mixture until it comes together.
  • I personally find it easier and quicker to make them in a food processor or Thermomix.
  • Start with processing your bread to make fresh crumbs and set aside. If using a Thermomix 30 seconds, speed 8.
  • Now process the onion, garlic, fresh herbs and vegetables and process until finely chopped. If using a Thermomix 10 seconds, speed 5.
  • Add back the breadcrumbs plus the mince, egg, oregano, dijon and seasoning and combine on reverse. If using a Thermomix 30 seconds reverse speed 4 (you may need to scrape the sides a few times).
  • If the mixture feels very wet, add more breadcrumbs until you are able to form firm patties. This is important for them to hold together.
  • Form you patties into the sizes you want (I do some big for adults, some small for the kids), throw on a preheated BBQ or in a pan over a high heat.
  • It's important to make sure the bottom is well cooked before flipping them so they hold together. Also don't try to move them about until the bottom half is very well cooked.

Serve

  • I always put all of my accompaniments in little bowls on the table and my kids build their own. Personally, I love grated carrot, grated cheese, lettuce or some type of greens, sprouts, grilled onions, grated fresh beetroot, pieces of fresh pineapple for a Hawaiian touch.

Tip

  • I also love to chargrill the cut side of my burger buns to crisp them up and add some char flavour.
  • I also melt the cheese on the burger patty too (by closing the BBQ hood for the last few minutes).

Store

  • Store in an airtight container in the fridge.
  • Can also be frozen either the raw patties or cooked. Fully de-frost before cooking/ re-heating.

Notes

Gluten-free

Use gluten-free breadcrumbs or quinoa flakes or chickpea flour to bind.

Grain-free

Use quinoa flakes or nut meal to bind them and serve in a lettuce cup with salad, San Choy Bow style.

Egg-free

You can certainly leave the egg out, the patty just won't be as firm (but it will still taste great).

Double-up

Double the batch to load the freezer with your own fast food.

Leftovers?

Great for tomorrow's lunch box. Sometimes I make four patties and roll the rest of the hamburger mince into meatballs.ย 
ย 
ย 

Hope it has inspired you to get in the kitchen or find another fast food alternative. Any comments or question, please leave them below.ย 

Herbalicious

August 22, 2013 | Dips

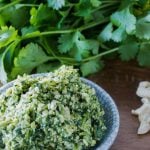
Herbalicious is a versatile, herb-packed sauce that can elevate just about any dish with fresh, vibrant flavours. Itโ€™s easy to whip up, combining a medley of fresh herbs with garlic, capers, lemon, and olive oil for a zesty boost to meat, pasta, or veggies. Perfect for when you want to bring a garden-fresh punch to your meal!

This is my go-to sauce when I need to turn a bland meal into something really special. Having a herb garden helps. It’s also great when you have bought herbs for another dish and have some left over but don’t quite know what to do with them. Anything goes here, you really can’t go wrong.

Health Benefits

This salsa verde recipe is brimming with nutrient-rich herbs and leafy greens, offering a simple way to add variety and flavour to your meals. Itโ€™s a delicious way to sneak in some extra greens and herbs. All of the herbs all have their own medicinal qualities and are extremely nutritious. They are green and possess all of the nutritional benefits of green leafy vegetables. I’ve touted the benefits of leafy greens here. All of these herbs are also very immune supportive. The olive oil is essential for the absorption of fat-soluble vitamins from the mix and the garlic, lemon juice and zest gives it even more of an immune kick.

Ingredients

To make this, youโ€™ll need a mix of fresh herbs like parsley, basil, coriander (fresh cilantro), oregano, and more. Cloves garlic, capers, lemon zest and juice (or lime juice and zest), and olive oil bring everything together. The best part? You can customise the herb blend based on what you have on hand!

How to make this Salsa Verde recipe (green salsa)

Simply toss your garlic, herbs, leaves, and capers into a food processor, Thermomix or high speed blender and pulse until finely chopped. Then, mix in the olive oil, lemon zest, and juice until youโ€™ve got the perfect consistency. Season with salt and pepper, and itโ€™s ready to use!

Serving suggestions and how to store

Herbalicious is incredibly versatile โ€“ drizzle it over protein (grilled meats, fish or eggs), toss it through pasta or rice, use it as a salad dressing or serve as a dip with tortilla chips. It also works wonders as a spread for sandwiches or in a burger. Store it in an airtight container in the fridge, or freezer for later use.

Vary this Salsa Verde recipe to suit your needs

If you want to make it spicy, just add a red chilli or ย jalapeรฑo. To bulk it up into a pesto, mix in some nuts and grated Parmesan. Get the kids involved too โ€“ let them help pick the herbs, and theyโ€™ll be more likely to give this โ€œgreen power ranger sauceโ€ a try!

Healthy salsa verde
Print Recipe
No ratings yet

Herbalicious

Herbalicious is a delicious salsa verde that is a great accompaniment to any meat, chicken or fish. It takes a simple meal to the next level (taste and nutrition wise).
Prep Time10 minutes mins
Total Time10 minutes mins
Servings: 1 cup

Ingredients

  • 1 sprig rosemary -leaves pulled off the stem (if you have it, not essential)
  • 1 clove/s garlic -crushed
  • 1 tbsp capers -drained
  • 2 cup/s mixed fresh herbs and leaves (approx. of mixed leaves like parsley, basil, coriander, oregano, chives, thyme, sage, tarragon, lemon sorrel, kale and or spinach. ย I like to use mostly a selection of as many different herbs so that no one flavour dominates. Though if you love a particular flavour, then let it shine! The kale or spinach should add a bit of bulk but no real flavour)
  • 1 lemon/s -zest and juice
  • 60 ml extra virgin olive oil (ยผ cup) extra virgin
  • Sea salt and freshly ground black pepper

Instructions

  • In a processor or Thermomix, place the garlic, herbs (picked off the woody stems), leaves and capers and pulse until finely chopped.
  • Add the lemon juice, zest and olive oil and mix through the chopped greens until combined. Thermomix 30 seconds, speed 2.
  • Taste, season and add more olive oil or lemon juice if necessary until the flavour is just right.

Use it...

  • Over any meat, chicken or fish, grilled, barbequed or roasted.
  • Mixed through, pasta, rice or quinoa.
  • As a salad dressing or over steamed vegetables.
  • Stirred through tuna in a sandwich or salad.
  • Drizzle over eggs at breakfast, it's seriously versatile.
  • I just wouldn't use it with any Asian-inspired dish or a dish that already has very strong flavours.

Store

  • Store in an airtight container in the fridge.
  • Can also be frozen.

Notes

Make it spicy

By adding a red chilli or ย jalapeรฑo.

Make it go further

Add nuts and parmesan to make a pesto or a thicker accompaniment.

Kids in the Kitchen

Get the kids to pick the leaves off the stems into the salad spinner and let them wash and spin the leaves. ย They are more likely to try it if they've been involved in making it and once they do try it, I'm sure most will love it. ย You can also cut a deal with fussy small people to try it and then name it. ย Kids often respond to fun names. ย My son calls this his green power ranger sauce (for super fast legs and super-strong muscles).
ย 
ย 

I'd love to hear what your kids come up with (even the not so complimentary ones)! Post a comment below.

Carrot Cake Slice

August 20, 2013 | Healthy Lunchbox, Baked Sweets

This healthy Carrot Cake Slice recipe is a wholesome, nut-free treat thatโ€™s perfect for lunchboxes or an afternoon snack. Packed with grated carrot, mixed seeds, and just the right amount of sweetness, itโ€™s a delicious way to sneak in some extra nutrition while still satisfying your sweet tooth. Guaranteed to delight even fussy little (and big) people.

Health benefits

This healthy carrot cake recipe is so nourishing and tastes so good. Carrots are full of beta-carotene, which is great for immune health, while the mixed seeds add a boost of fibre, healthy fats, and important minerals like zinc. Plus, using wholemeal spelt flour provides extra fibre and nutrients, making this slice a nutritious alternative to traditional carrot cake. ย The orange zest is a great immune booster too.

Ingredients

The star of the show is, of course, the carrot, paired with currants or sultanas for natural sweetness. Wholemeal spelt flour and mixed seeds add texture and a healthy twist, while spices like cinnamon, nutmeg or ground ginger give it a warm, comforting flavour. This recipe keeps it simple with pantry staples, but it makes the best carrot cake.

How to make this Carrot Cake Slice

Itโ€™s as easy as mixing your grated carrot, dried fruit, and dry ingredients in one bowl, while beating your eggs, butter, and orange zest in another. Combine everything, pour the batter into a slice tin (lined with parchment paper), and bake until firm and golden. Youโ€™ll have a deliciously moist slice in no time. We’ve also included a Thermomix method if you use one.

Time saving tip

I use a lot of ground seeds in my baking. One, because my lunchbox treats need to be nut free and secondly because seeds are very nutritious. For example, pepitas are a rich source of zinc, a mineral that often assists fussy eaters. So instead of supplementing to improve their desire and palate for food, include pepitas where you can. My kids aren’t a fan of their flavour so I grind them. If you plan to use them this way, you can grind a small batch of one or a mixture of seeds to keep in the fridge in an airtight glass container ( a jar is good).

Carrot Cake Slice has gone ‘green’ (or flecked green)

You may have noticed that your seed containing cakes or cookies turn or fleck ‘green’. I can explain…Sunflower seeds contain chlorogenic acid which reacts with the baking powder and bicarb when it’s heated and turns various shades of green when cooled.

To reduce the โ€˜shrek-lookโ€™ you can reduce the baking powder or bicarb (by about a third) or add 2 tsp lemon juice or vinegar to the wet ingredients. But remember – even if they do turn green, they are completely safe to eat. You might even like to use this as a way to turn cakes green on purpose?

Serving suggestions and how to store

Enjoy this refined sugar free carrot cake slice plain or top it with a simple buttercream icing (or cream cheese frosting) and top with shredded coconut for an extra treat. It’s also lovely served with a dollop of Greek yogurt for dessert. Store any leftovers in an airtight container in the fridge for a few days, or freeze them for later. Itโ€™s a great make-ahead option for busy mornings or lunchbox fillers. I generally pack from frozen and let it thaw in the lunchbox (but I live in a very warm climate).ย 

Vary this Carrot Cake Slice to suit your needs

For a dairy-free version, swap the butter for macadamia oil or coconut oil. If you need a gluten-free carrot cake, replace the spelt with a mix of rice and buckwheat flour, or go grain-free with almond meal (or almond flour).ย  For carrot cake cupcakes, pour the batter into a lined muffin tin.

Take a look at the variations (below the main recipe) for suggestions to alter the recipe to suit your specific dietary requirements.


For more delicious, healthy and easy to make wholefood treats, clickย HERE.

Healthy carrot cake slice with shredded carrots, nuts, and warm spicesโ€”a moist, wholesome treat.
Print Recipe
4.88 from 31 votes

Carrot Cake Slice

This delicious Carrot Cake Slice is easy to make and with a serve of vegetables, is a great edition to the kids lunchbox. 
Prep Time10 minutes mins
Cook Time25 minutes mins
Total Time35 minutes mins
Course: Snack
Servings: 8

Ingredients

  • 1 carrot/s -large (about 140g) grated
  • 70 g currants (ยฝ cup) or sultanas or raisins
  • 115 g wholemealย speltย flour (1 cup)
  • 70 g mixed seeds (ยฝ cup) ground. I grind sunflower, sesame, linseeds and pumpkin seeds but any combo will work. Can also use a nut meal, but no longer nut-free.
  • 60 g coconut sugar or rapadura (ยผ cup)
  • 1 tsp bicarbonate of soda (please measure carefully)
  • 1 tsp baking powder
  • 1-2 tsp ground spices (whatever you like eg; cinnamon, nutmeg, cardamom, ginger, mixed spice)
  • 120 g butter (ยฝ cup) melted (or macadamia oil)
  • 3 egg/s
  • 1 orange/s - zest (take care not to include the white pith which can be bitter)

Instructions

  • Preheat your oven to 150โ„ƒ/300ยฐF (fan forced). Line a small 20 x 30cm tin with greaseproof paper.
  • Grate the carrots.
  • In a mixing bowl mix the carrot, dried fruit, and all dry ingredients.
  • In a small bowl or jug beat the eggs, butter or oil and zest together.
  • Add to the dry ingredients and mix until just combined.
  • Pour into the tin and bake for 20 - 25 minutes or until firm to touch in the middle.

Thermomix method

  • Grind your seeds, 30 sec, speed 8. Set aside. If you are grinding your own gluten or grain-free flour do this now also.
  • Weigh and grate your chopped carrot, 5 seconds, speed 5. Set aside.
  • Melt the butter, 1 minute, 80 degrees, speed 4.
  • Add the eggs and zest and mix 30 seconds, speed 5.
  • Add the carrot and dried fruit and mix, 30 seconds, reverse speed 3.
  • Add the flour, seeds, sugar, spices, bicarb and baking soda. Mix 5-10 seconds until just combined (scraping the sides), speed 4. Don't over-mix as it will become tough.

Ice it

  • You can add any icing - I love a simple buttercream with 70ย gย butterย (at room temperature, 20ย mlย lemon juiceย (no more or it may split) 3ย tbspย rice malt syrup or honey plus 3ย tbspย tapioca flourย (or arrowroot).

Store

  • In an airtight container or it can be frozen in an airtight container or bag.

Notes

Make it nutty

If you want to add half a cup of walnut halves or pecans to this cake, feel free though obviously it wouldn't be nut-free or suitable for school lunches.

Dairy-free

Replace the butter with macadamia oil, though now not nut free.

Gluten-free

Replace the spelt with half rice, half buckwheat flour (or another GF flour).

Grain-free

Replace the spelt flour with 100 gram (1 cup) almond meal (now not nut-free).

Don't want to grind the seeds

Replace with almond or hazelnut meal or LSA, though now not nut free.

Low-fructose

Replace the rapadura with 80 -100gram brown rice syrup. Replace the dried fruit with coconut.

Chocolate version

Omit the dried fruit and zest and add 30 gram of cacao powder at stage 6 of the method.

After more healthy lunchbox inspiration?

My best selling ebook The Well Nourished Lunchboxย has you covered and is choc-a-block full of healthy lunchbox inspiration - and not just sweet but heaps of savoury crackers, sandwich-free lunch recipes and so much more. In fact, it's 150 pages of goodness!
Click HERE to find out more about this fabulous ebook (and read the many, many reviews).

ย 

Do you like this recipe? Let me know, or post a question in the comments below or rate the recipe.

Fruit Whip – with a little hidden goodness

August 6, 2013 | Breakfast, Healthy Lunchbox, After School Snacks

A healthy breakfast, after school or weekend snack or dessert for kids and adults alike…this filling, delicious Fruit Whip is just the thing. Just don’t tell them about the secret creamy ingredient – avocado!

The first time my daughter saw me put the avocado in the Thermomix, ย she went into protest mode. She had no where to go though when I told her that it was the way I had made it for many years! She had to get over it because she just loves the taste and creamy texture! But for very fussy kids, you may want to distract your kids when the avocado goes in to begin with!

Health benefits

This Fruit Whip is so much more nourishing than a banana smoothie. Avocado is a fibre rich source of potassium, healthy fats and many essential vitamins and minerals. It’s anti-inflammatory and supports heart, brain and eye health. There’s more potassium and plant given goodness from the banana and anti-oxidant rich berries. The natural yoghurt is important for digestive health. For more on the health benefits of yoghurt and my favourite brands, click here. This Fruit Whip is a nutrient-dense, energy-boosting snack that kids (and adults) will love.

Ingredients

Youโ€™ll need an avocado, banana, frozen berries, plain yoghurt (or Greek yogurt) , a touch of honey or rice malt syrup for sweetness (if needed), and a dash of vanilla. Super simple and wholesome!

How to make this fruity, avocado smoothie

Toss everything into a blender and blend until smooth and creamy. If itโ€™s too thick, just add a splash of milk or coconut milk to reach your desired consistency. Serve it in a cup, and youโ€™re good to go! If you have a Thermomix we have also included instructions.

Serving suggestions and how to store

Serve it as is or freeze it into popsicle moulds or ice blocks for a fun, healthy treat. You can store leftovers in the fridge or freezer, and itโ€™s perfect for lunchboxes as a frozen yogurt cup that softens by morning tea time.

Vary this carrot cake slice to suit

For a dairy-free version, swap out the yogurt for coconut yogurt or cream. Add a handful of spinach or kale for extra greens. Or give it a protein boost it with a scoop of vanilla protein powder. It’s super versatile!

For more delicious, healthy and easy to make wholefood treats, clickย HERE.

Fruit whip made with fresh fruit and hidden nutritious ingredientsโ€”light, creamy, and healthy.
Print Recipe
4.84 from 18 votes

Fruit whip - with a little hidden goodness

Fruit Whip is the ultimate quick and easy treat thatโ€™s perfect for breakfast, a snack, or even a healthy dessert. This creamy blend of avocado, banana, and berries comes together in no time, and I promise, no one will ever guess thereโ€™s avocado in there!
Prep Time5 minutes mins
Total Time5 minutes mins
Course: Breakfast, Dessert, Snack
Servings: 2

Ingredients

  • 1 avocado/s (medium-large) flesh
  • 1 banana/s
  • 100 g frozen raspberries (1 cup) or blueberries or mixed berries
  • 7 tbsp natural, Greek or coconut yoghurt
  • 1 tbsp rice malt syrup, honey or maple syrup -optional
  • 1 tsp vanilla -extract, paste or powder
Metric - US Customary

Instructions

  • Throw all of the ingredients into a high speed blender or food processor and blend until smooth and creamy (If using a Thermomix, blend for 30 seconds, speed 6-7).
  • Serve it in a cup with a spoon. You can add a little milk, coconut or almond milk if it is too thick or to turn this into a smoothie.
  • Trust me, they will NEVER know this has avocado in it!

Store

  • Store in an airtight container in the fridge or freezer.

Notes

Protein boost

I often add a wholefoods protein powder, especially when my kids have sport. GoodnessMeย have a fabulous selection of clean protein powders, you can take a lookย HERE. Or add a tablespoon of chia seeds or hemp seeds or my Power Booster recipe.

Add some green

A few baby spinach leaves or kale leaves will increase the nutrition (but may make the colour a little unappealing). Your call.

Dairy-free and vegan

Replace the yogurt with coconut yogurt or coconut cream.

Popsicles

Freeze it into popsicle moulds for a super healthy frozen treat.

Frozen yogurt cups

This is great for the the lunch box. ย Freeze in little cups and by morning tea time it will be soft enough to eat. ย Remember to pack a spoon.

Fill a re-usable food pouch

Also a great food pouchย filler (no spoon required). ย 

Breakfast

I generally serve this with something like cheese and tomato on toast or boiled eggs as my kids enjoy a big breakfast.ย 

ย 

ย 

My kids love this fruit whip. Try it and let me know the verdict by commenting below.

Hummus – much more than a dip!

August 1, 2013 | Healthy Lunchbox, After School Snacks, Savoury Snacks, Dips

This is my deliciously healthy Hummus recipe, of course with some interesting variations and colours too. There’s more to hummus than just a dip or a snack, so check out the variations below. I like my hummus to have a creamy consistency, but if you prefer it a little course, then just process it less.

Health benefits

The chickpeas are a high fibre, protein rich legume with a decent mineral profile (including good amounts of iron). The tahini is also a good source of protein and very rich in calcium. The lemon, garlic, and spices will strengthen your immune responses and the olive oil is a rich source of monounsaturated fat. Why wouldn’t you eat it?

WARNING! ย Most shop bought hummus, contain dangerous vegetable oils, so please make your own, it’s so very simple to do so. For more about why you must avoid vegetable oils, click here.

Ingredients

To make this gluten-free hummus youโ€™ll need a can of chickpeas, garlic clove, tahini, lemon juice, extra virgin olive oil, and spices like cumin and cinnamon to bring it all together. Aquafaba (the liquid from the can) makes it extra creamy!

How to make this healthy homemade Hummus

Simply throw all the ingredients into a food processor and blend until smooth and creamy. You might need to scrape the sides a couple of times to get the perfect consistency. Sea salt and pepper really brings out the flavour so don’t forget to season it well. Drizzle with olive oil and top with dukkah or sesame seeds before serving. Or a sprinkle of paprika adds lovely colour prior to serving too. If you use a Thermomix, we’ve also included the Thermomix method.

Serving suggestions and how to store

Serve this healthy hummus recipe with veggies (like carrot, red peppers, cucumber, cherry tomatoes, radish etc) , pita bread, corn chips or use it as a spread on sandwiches, wraps or rolls. It’s a perfect accompaniment to falafel (To store, cover with a layer of olive oil and refrigerate in an airtight container for up to a week. It can also be frozen for later!

Vary this healthy hummus recipe to suit your needs

For a sesame-free version, swap the tahini for natural yogurt. You can also get creative with flavours by adding roasted vegetables like beetroot, carrots, or pumpkin for a colourful twist! Or mix hummus with yogurt for a tasty sauce over meats or salads. Take a look at the variations below the recipe to suit your tastes and supplies best.


Homemade hummus made with chickpeas, tahini, and lemonโ€”versatile and perfect for dips, spreads, and more.
Print Recipe
5 from 5 votes

Hummus - much more than a dip!

Hummus is so much more than just a dip! This creamy, delicious spread made with chickpeas, tahini, and a hint of garlic and cumin is super versatile. Whether you're scooping it with veggies, spreading it on toast, or using it as a sauce, hummus is a must-have in any kitchen.
Prep Time15 minutes mins
Total Time15 minutes mins
Course: Snack
Servings: 1 cup

Ingredients

  • 425 g can chickpeas - drained and rinsed
  • 1 clove/s garlic - finely diced or crushed
  • 4 tbsp hulled tahiniย  - halve if using unhulled
  • 1 lemon/s - juice (zest optional)
  • 2 tbsp water - or the liquid from the can (aquafaba) makes it extra creamy
  • 2 tbsp extra virgin olive oil - extra virgin
  • ยฝ tsp ground cumin
  • ยฝ tsp ground cinnamon
  • ยฝ tsp sea salt - to taste
  • ground black pepper - to taste

Instructions

  • Add all of the ingredients into your food processor and process until smooth and creamy. You may have to scrape down the sides a few times to get an even consistency.
  • Serve drizzled with more olive oil and sprinkle with sesame seeds or dukkah.
  • Alternatively, try one of my variations below.

Thermomix

  • Add the garlic and chop, 5 sec, speed 6.
  • Add the chickpeas and process 5 sec, speed 5. 
  • Add the rest of the ingredients and process, 10 seconds, speed 4 scraping down the sides a few times.

Store

  • Drizzle a layer of olive oil over the hummus to seal it. Store in an airtight container in the fridge.
  • Can also be frozen.

Notes

Sesame-free

Replace the tahini with natural yoghurt. This also makes it a lot more creamy (and more like a store bought hummus according to my recipe testers).

Garlic-free

Simply omit (the cumin and chilli will do for flavour).

Roast beetroot hummus

Add a small roasted beetroot and a tablespoon of yogurt to your processor for a pretty pink, very nourishing dip.ย  This is lovely with coriander leaves too.

Carrot or pumpkin hummus

Add steamed or roasted carrot or pumpkin and process through with the other ingredients.

Green supreme

Blend through some greens, either herbs like coriander or basil, or even kale or spinach.

Make a sauce or dressing

Mix equal parts hummus to yogurt and use as a sauce over lamb, chicken, fish, vegetables or salad.ย  You may also like to add a little extra lemon or some lime. ย Add a teaspoon of cumin for a lovely Moroccan or Indian accent.

On toast

Spread on toast with slices of tomato and /or a mound of leafy greens, is delicious and a very healthy breakfast, lunch or snack.ย  You can even add a poached egg for extra protein.

ย 

ย 

How do you eat your hummus? ย Add your suggestions below, I'd love to hear from you.

Quick and Easy Dhal Recipe

July 30, 2013 | Budget Friendly, 30 Minute Meals, Make-ahead Meals, Freezable Meals, Vegetarian

This Quick and Easy Dhal recipe is a nourishing meat free meal. I personally try to have regular meat free meals and this gluten-free dhal is nutritious and filling. It’s also great for a last minute meal as I always have the ingredients in the pantry. It’s often my backstop when I forget to take meat from the freezer or if the day escapes me. Serve it with rice or quinoa and a big leafy salad, or some steamed vegetables and you have a perfectly balanced, protein rich vegetarian meal.

Health benefits

The red lentils are full of fibre, many beneficial plant nutrients and offer a vegetarian form of protein, the almond meal completes it (as does serving it with rice or quinoa). The garlic, ginger and various spices are great digestives, anti-inflammatory, anti-oxidant and immune supportive. The coconut milk is also wonderful for your immune system, read more about it here.

Ingredients in this easy dhal recipe

Youโ€™ll need red split lentils, broth, coconut milk, a mix of spices like cumin, coriander, turmeric, mustard seeds and garam masala, and some fresh veggies like carrot and zucchini. Donโ€™t forget the garlic, ginger, and a squeeze of fresh lime (or lemon juice) to brighten everything up!

How to make a quick and easy dhal

Sautรฉ your onion, garlic, ginger, and spices in a large pan on the stovetop until fragrant, then toss in the grated veggies, lentils, broth and coconut milk. Let it simmer at a medium heat for about 20 minutes until the lentils are tender and the flavours come together. Finish with fresh coriander (cilantro), lime juice and a good pinch of sea salt (salt really brings out the flavour) and youโ€™ve got yourself a delicious, hearty meal. If you have a Thermomix, we’ve also included the thermomix method too.

Serving suggestions and how to store

This dhal is perfect served over brown rice, basmati rice, quinoa, or cauliflower rice. Or with a side of naan bread is delicious too. You can also enjoy leftovers on toast for a quick breakfast. Store it in an airtight container in the fridge for up to 3 days or freeze for up to 3 months. I often double this recipe to make a big batch to freeze so I can have a night off cooking in the future.

Vary this easy dhal recipe to suit your dietary needs

To keep it vegan, use coconut oil, coconut milk and choose vegetable broth. If you’re avoiding nuts, just leave out the almond meal. For dairy-free choose coconut oil rather than ghee. Want to add more veggies? Go aheadโ€”pumpkin, spinach, or cauliflower would be great here!


Get a glimpse of the more of the amazing recipes we offer? DOWNLOAD YOUR FREE EBOOK


Healthy, quick and easy dhal- This one pot easy dhal recipe is a traditional, very nutritious meal that the whole family will love. Its fast to make and a balanced vegetarian meal.
Print Recipe
5 from 40 votes

Quick and Easy Dhal Recipe

This quick and easy dhal is my go-to when I want a comforting, nourishing meal without too much fuss. It's packed with flavour, creamy coconut milk, and hearty lentils that come together in about 20 minutes. Perfect for busy nights or meal prep! It's one of my most popular recipes for good reason.
Prep Time10 minutes mins
Cook Time20 minutes mins
Total Time30 minutes mins
Course: Main Course
Cuisine: Indian
Servings: 6

Ingredients

  • 2 tbsp butter, ghee or coconut oil
  • 1 onion/s (large) peeled and diced
  • 3 clove/s garlic - peeled and sliced or crushed
  • 1 tbsp ginger root - peeled and finely grated
  • 1 tsp cumin seeds
  • 1 tsp ground cumin
  • 1 tsp ground coriander
  • 2 tsp garam masala
  • 2 tsp mustard seeds
  • 1 tsp ground turmeric
  • 1 carrot/s (large) grated
  • 1 zucchini/s - grated
  • 350 g roma tomatoe/s - roughly chopped or 1 can of tinned tomatoes
  • 200 g split red lentils - dried (1 cup)
  • 400 ml canned coconut milk - or cream (the cream gives a richer, creamier consistency)
  • 350 ml chicken broth or stock - or vegetable stock or water
  • 3 tbsp almond meal
  • chilli flakes -to taste
  • Sea salt and freshly ground black pepper - to taste (the salt really brings out the flavour a lot here)
  • 1 lime/s - juice and zest to finish
  • 1 bunch/s fresh coriander leaves - roughly chopped

Optional-

  • 6 fresh curry leaves - optional but yummy

Serve

  • Rice, quinoa or cauliflower rice (to serve)

Instructions

  • In a medium sized pot, over a low to moderate heat, add the butter, ghee or coconut oil. Sautรฉ the onion, garlic, ginger and spices for two minutes.
  • Now add the grated carrot, zucchini,ย tomatoes, lentils, coconut milk, stock or water and almond meal. Season well, stir and leave to simmer ย for 15 to 20 minutes until the lentils are cooked and most of the moisture is absorbed.
  • Finish with coriander leaves and lime. Season again if necessary (sea salt lift the flavours in this so make sure you add it) .
  • I always serve this with brown rice or quinoa and either fresh or dried chilli so the heat can be adjusted by each individual.

Thermomix method

  • Chop the garlic and ginger, 2 seconds, speed 5. Add the onion, carrot, and zucchini and chop 5-10 seconds speed 5.
  • Add the spices and a tablespoon of ghee or coconut oil and sautรฉ 5 minutes, speed 2, temp 100.
  • Now add the tomatoes, lentils, coconut milk, stock or water and almond meal, a good pinch of sea salt and pepper, and cook 20 minutes, reverse speed 1, temp 100.

Serve

  • Serve with fresh lime and coriander leaves over rice, cauliflower rice or quinoa.
  • Its lovely on toast for breakfast (with or without an egg).

Make-ahead

  • Re-heat in a pot over a low heat until just hot.

Store

  • Airtight in the fridge or freezer. The flavour actually improves with time.
  • * a little extra cooking time might be needed if your lentils are not split.

Grab Bag Formula Method

  • If you've done the **Grab Bag Formulaย Short Course, this is the method to convert this recipe...
  • Place all the dhal ingredients (except the lime and fresh coriander) into the Grab Bag.
  • Carefully seal your Grab Bag. I close most of the seal then press out as much air as I can then complete the seal. Place the Grab Bag in the freezer.
  • To cook, remove the Grab Bag from the freezer, place on a baking tray and thaw in the fridge overnight.
  • Tip the contents of the Grab Bag into a large oven proof dish (with a tight fitting lid) or Dutch oven. It may still be a bit frozen; thatโ€™s okay.
  • Place the lid on the pot, set your oven to 150ยฐC/300ยฐF (fan-forced) and cook for 2 hours.
  • Finish with coriander leaves and lime. Season again if necessary (sea salt lifts the flavours in this so make sure you add it).
  • **ย Theย Grab Bag Formulaย Short Course is available to purchase for just AU$46ย HERE.
    OR
    If you are a full-accessย Well Nourished Familyย member, the course is included in your membership and you can access in the members portal -ย HERE.

Notes

Vegan

Choose coconut oil and coconut milk.

Coconut-free

Replace the coconut milk with full-fat natural yoghurt and choose ghee or butter.

Grain-free

Serve over a baked potato or sweet potato, cauliflower rice or quinoa.

Nut-free

Just leave the almond meal out.

Turn it into a soup

Add a little extra stock and blend to make a delicious Indian red lentil soup.

Make it meaty

You can use this as a curry base (sauce) and add any meat you like to this.

Make it go further

Add in a can of drained and rinsed chickpeas

More vegetables

You can also add extra vegetables. Pumpkin, sweet potato, peas, chopped celery, beans, cauliflower, and broccoli would work well. I also love a couple of handfuls of baby spinach added at the very end.

Breakfast

Leftovers are totally delicious on wholegrain toast for a protein rich breakfast.

Tip

  1. A little natural yogurt or coconut cream on top of the dhal also often helps little ones adjust to the spiciness.
  2. If you're serving it with rice, cook-up extra (2 cups) and make my Baked Brown Rice Pudding for a quick, healthy breakfast tomorrow.

ย 

ย 
ย 

Do you like a good dhal? ย This is based on a traditional dhal I learned to make in India. ย I'd love to hear how you like it!


LOVED THIS RECIPE? ENTER YOUR DETAILS TO GET YOUR FREE RECIPE BOOK WITH 5 SIMPLE DINNERS

Chicken and Almond Curry

July 23, 2013 | Make-ahead Meals, Chicken, Freezable Meals

My family and I love this delicious, easy to prepare Indian healthy Chicken and Almond Curry recipe. This healthy chicken curry recipe is almond based and free of tomatoes, which is a nice change from the common tomato heavy curries. It is very aromatic, mild and so delicious – I’d encourage you to try it for the whole familyย  (the cinnamon flavour often really appeals to kids).

After spending almost a year in India (about 11 years ago), I came to adore the aromatic flavours of Indian cuisine. This is a very traditional curry, something you would definitely find in a market in India (ok, of course, I’ve added a few extra nutritious bits)! Before I went to India, I was frightened by the prospect of Indian cuisine for breakfast, lunch and dinner. But now, I just can’t get enough. Leftover chicken curry for breakfast is delicious.

Health benefits of this healthy chicken curry recipe

This chicken curry recipe is filled with nourishing ingredients, from protein-packed chicken to nutrient-rich ground almonds and spices. The calcium rich, probiotic yoghurt adds a lovely creaminess, while the immune supportive, antioxidant rich spices bring warmth and depth of flavour. The coriander is very detoxifying and nourishing.

Ingredients

Youโ€™ll need tender chicken thighs, garlic, ginger, and a selection of fragrant spices like cumin, coriander, and turmeric. Almond meal and flaked almonds give the dish its signature nuttiness, while yoghurt (or coconut milk for dairy-free) adds that perfect creamy texture. Peas and fresh coriander round things out for a bright, fresh finish.

How to make chicken and almond curry

Start by marinating the chicken with ginger, garlic, and lemon for a flavor boost. Toast the almonds, then sautรฉ the onions and spices until aromatic. Stir in the chicken and almond meal, followed by the yogurt and optional currants. Let it all simmer gently, and toss in peas just before serving. Top with fresh coriander and toasted almonds for that perfect final touch!

Serving suggestions and how to store

Serve this curry with rice, quinoa, or cauliflower rice alongside a simple green salad or steamed veggies. Or add a side of Naan Bread. It keeps well in the fridge in an airtight container, and the flavours only get better over time. You can even double the recipe and freeze some for a quick dinner later on!

Vary this healthy chicken curry recipe to suit your dietary needs

This healthy chicken curry recipe is super flexible! Swap yogurt for coconut cream if youโ€™re dairy-free, or replace chicken with chickpeas or tofu for a vegetarian version. If you’re avoiding nuts, sunflower seeds can take the place of almond meal. Grain-free? Pair it with baked sweet potato or cauliflower rice instead of rice!

Chicken and almond curry with a creamy, spiced sauceโ€”rich, flavorful, and comforting.
Print Recipe
4.81 from 36 votes

Chicken and Almond Curry

This Chicken and Almond Curry is a hearty, comforting dish thatโ€™s packed with flavor. With its creamy almond base and a mix of fragrant spices, itโ€™s a crowd-pleaser thatโ€™s surprisingly simple to make. Whether youโ€™re feeding the family or meal-prepping for the week, this curry is a must-try!
Prep Time15 minutes mins
Cook Time30 minutes mins
Total Time45 minutes mins
Course: Main Course
Cuisine: Indian
Servings: 4

Ingredients

  • 500 g boneless and skinless chicken thighs -diced
  • 4 clove/s garlic -peeled and finely chopped
  • 2 tsp ginger root -peeled and finely grated, a lemon zester works well
  • 1 red chilli/s (small) finely chopped to taste (or serve as a side at the table)
  • ยฝย  lemon/s -juice
  • 50 g flaked or slivered almonds (ยฝ cup) toasted
  • 2 onion/s -peeled and sliced
  • 1 cinnamon quill
  • 4 cardamom pods -crush slightly with the top of a knife handle
  • 3 clove/s
  • 1 tsp ground cumin
  • 1 tsp ground coriander
  • 1 tsp ground turmeric
  • 50 g almond meal
  • 20 g currants or sultanas -optional
  • 300 g natural, Greek or coconut yoghurt
  • Sea salt and freshly ground black pepper - to taste
  • 75 g peas (ยฝ cup) fresh or frozen
  • ยฝ bunch/s fresh coriander leaves -to serve

Serve

  • Rice, quinoa or cauliflower rice (to serve)
  • Steamed vegetables (to serve)

Instructions

  • In a large bowl mix the chicken, ginger, garlic, optional chill and lemon juice. Marinade for an hour or so (not essential, but best).
  • In a large fry pan, toast the slivered or flaked almonds over a low heat and set aside.
  • Now heat a tablespoon or so of coconut oil or ghee over a low to medium heat and cook the onion until it starts to soften. 
  • Add the cinnamon stick, cardamom pods, and cloves and cook for a few minutes until you can smell them. Then add cumin, coriander, turmeric powders and almond meal.
  • Mix together, add the chicken to the pan and stir gently until the chicken starts to turn opaque (only a few minutes).
  • Next add the yoghurt and currants or sultanas, season with salt and pepper and mix well.
  • Cover and simmer slowly for 20-30 minutes stirring occasionally, making sure it doesn't stick to the bottom of the pan.
  • Just before serving stir in the peas and top with coriander and the toasted almonds.

Serve

  • I like to serve this with brown or basmati rice (or  quinoa), and a green salad or simply some steamed vegetables, dressed with lime juice and olive oil. If I'm feeling lazy I'll just add some broccoli, cauliflower and or carrots to the curry just before it's served to lightly cook in the sauceโ€ฆ.a complete meal is served.

Make-ahead

  • Re-heat in a pot over a low heat until just hot.

Store

  • Store in an airtight container in the fridge.
  • Can also be frozen (I think the flavour improves with freezing so consider doubling the recipe and freezing it for another dinner next week).

Thermomix

  • I personally find more depth of flavour from stove top cooking with curries and just use my TMX to chop. But if you wan to cook the entire dish in the TMX, here's how...
  • Chop the ginger, garlic and chilli 5 seconds, speed 7. In a large bowl mix the chicken, ginger, garlic, optional chill and lemon juice. Marinade for an hour or so (not essential, but best).
  • Toast the almonds.
  • Chop the onion, 5 seconds, speed 4 (scrape the sides). Add the ghee or oil and cook 100, 4 minutes, speed 1.
  • Add the spices and cook another 3 mins, 100, speed 1.
  • Add the chicken, almond meal, currants/sultanas, yoghurt, salt and pepper (mix to combine with a spatula) and cook 30 mins, 100, reverse speed 1 with the basket over the lid so it doesn't spit.
  • Add the peas for the last few minutes of cooking.
  • Serve as above.

Notes

Dairy-free

Use coconut oil to sautรฉ the onion and coconut milk or cream instead of yoghurt.

Vegetarian

Replace the chicken with chickpeas or 500g of firm tofu, diced (or a mix).

Vegan

Use the dairy free and vegetarian substitutions.

Nut-free

Replace the almond meal with ground sunflower seeds.

Garlic-free

Simply omit the garlic and increase the ginger to a 5cm piece.ย 

Grain-free

Serve with a baked sweet potato or cauliflower rice.
ย 
ย 

How has this curry been received in your household? Let me know, post a comment below.

The Easiest, Most Nourishing Choc Chip Cookie Ever

July 17, 2013 | After School Snacks, Baked Sweets

These Healthy Chocolate Chip Cookies are my idea of the perfect treat. They suits most dietary leanings and take minutes to make, which is always a bonus. I think itโ€™s the ultimate and easiest healthy chocolate-chip cookie recipe ever!

Truth be known, baking is not my forte. Mind you neither was photography until I put my mind to it and found I really enjoyed itโ€ฆand there lies the issue. I LOVE cooking, but because I prefer to freestyle in the kitchen rather than follow a formula, baking and I sometimes donโ€™t see eye to eye. I baked a lot as a child (with my nan), but not much as a young adult so I was a bit out of practice by the time I had kids. Luckily my kids are very forgivingโ€ฆI think they are just happy for something with a little sweetness, even if it doesn’t look overly appealing!

Anyway, one rainy Queensland summer, I find myself out ofย eggsย and craving a little deliciousness. With a cakeyย treatย ruled out, I fluked these delights. These beauties (which took a few attempts to perfect) are the best and my kids love them for an after-school snack or weekendย treat.

The best thing about this grain-free, healthy cookie recipe is that if you do manage to stop at one or two and wait a while, you will find yourself satisfyingly full. These nourishing choc chip cookies are one of my personal favourites to make for my kids lunchboxes. They are a perfect blend of chewy goodness and the texture is just like a store bought one (only better!). The flavours melt together in your mouth and the little bursts of chocolate really give you that feel good, treat feeling.

PS- they can be frozen (which will save you eating them all in one hit).

Health benefits

Are the cookies healthy? Well, firstly almonds are a rich source of protein, essential fats, and fibre. They also contain antioxidants and mood elevating amino acids. The coconut oil, by now, you will know how I love this. You can find out more about its amazing health benefits here. If you add cacao nibs or dark chocolate, prepare for a magnesium boost and an antioxidant hit that rivals green tea. These cookies really do bring together nutritious ingredients like almond meal and cacao nibs, making them a great option for a more mindful treat.ย 

Ingredients

For these chocolate chip cookies youโ€™ll need almond meal as the base, along with coconut oil, rice malt syrup or honey (or even maple syrup) and a touch of vanilla extract. For that classic choc chip flavour, cacao nibs or dark chocolate chips are the stars of the show. Donโ€™t forget a splash of water to help hold it all together!

How to make Healthy Choc Chip Cookies

The method for these Healthy Chocolate Chip Cookies is so simple where you just fold your dry ingredients into the wet ingredients until fully combined. There is both a traditional method using a large mixing bowl or if you have a Thermomix (or food processor) you can save time and utensils by following along with those instructions. Using baking paper ensures your cookies donโ€™t stick to the sheet pan when cooking and the bake time is so quick, only 15 minutes!

Vary the Healthy Choc Chip Cookies to suit your dietary needs

There are so many variations to suit dietary needs with these healthy chocolate chip cookies. The recipe is already gluten-free as is, but you can also make it dairy-free with the use of cacao nibs and removing the choc chips. As mentioned before, the low fructose option is made by the use of rice malt syrup and cacao nibs. You can replace the coconut oil with macadamia oil for the coconut-free version. It can even be made completely vegan by using rice malt syrup to sweeten and just the cacao nibs! For the almond free version, you simply replace the almond meal with hazelnut meal which will make it into a delicious nutella choc-chip cookie.

Serving suggestions and how to store

These Healthy Choc Chip Cookies are perfect with a cup of tea or as a snack anytime. Store them in an airtight container in the fridge or freezer to keep them freshโ€”theyโ€™ll stay crisp and delicious for days or freeze for up to 3 months.

For more delicious, healthy and easy to make wholefood treats, clickย HERE.

ย 
Nourishing chic chip cookies made with wholesome ingredientsโ€”easy, healthy, and delicious.
Print Recipe
4.76 from 53 votes

The easiest, most nourishing choc chip cookie ever

These choc chip cookies are the ultimate combination of easy and nourishing! With just a few simple ingredients, you can whip up a batch of cookies that are not only delicious but packed with wholesome goodness. Perfect for a sweet treat any time of day.
Prep Time10 minutes mins
Cook Time15 minutes mins
Total Time25 minutes mins
Course: Snack
Servings: 10 cookies

Ingredients

  • 150 g almond meal (1ยผ firmly packed cups)
  • 55 g coconut oil (ยผ cup) melted if solid
  • 50-85 g rice malt syrup or honey (ยผ cup approx.) taste the batter and alter the sweetness to taste
  • 1 tsp vanilla -powder, extract or essence
  • 2 tbsp cacao nibs -or dark chocolate chips, or both
  • 1 tbsp water (must be added or they go flat)

Instructions

  • Preheat your oven to 150 โ„ƒ/300ยฐF (fan-forced). It's preferable to use weight measurements, the recipe will need less adjusting if you do so.
  • In a mixing bowl or food processor, combine all of the ingredients above until just combined.
  • If using a Thermomix, mix 5 seconds, speed 4.
  • Scrape the sides to incorporate the bits around the edge.ย 
  • **The mixture should be thick and sticky (like in the video below so if it feels very wet, it's important to add more almond meal).
  • Roll tablespoons of the mix in your (wet) hands and place them onto a tray lined with baking paper.
  • Flatten slightly with the back of the fork. The cookies above have cacao nibs through them (I put a little piece of Green and Blacks 85% chocolate on top in this pic too).
  • Bake for 15 minutes or until starting to brown on top. The longer they cook, the crisper they become.
  • Allow to cool fully. They will firm up as they cool.

Store

  • Store in an airtight container in the fridge or freezer.

Notes

Dairy-free

Just use cacao nibs and leave out the choc chips.

Low-fructose

Use the brown rice syrup and cacao nibs.

Coconut-free

Replace the coconut oil with macadamia nut oil.

Vegan

Choose rice malt syrup to sweeten and cacao nibs as choc-chips.ย 

Almond-free (aka Nutella choc-chip cookie)

Replace the almond meal with hazelnut meal.

Nut-free

This is not the recipe for you. This Spelt Chocolate Chip Cookie is incredible and nut-free.ย 

For 150 pages of nut-free recipes, take a look at my super popular ebook 'The Well Nourished Lunchbox'. Click HERE to find out more and read the rave reviews.
ย 

What do you think of this recipe? Please let me know if you've tried it by leaving a comment and rating below.

Get your kids in the kitchen cooking and with these video instructions, even little ones can follow along.

No bake, Nut-free Muesli Bar

July 11, 2013 | Healthy Lunchbox, No-bake Sweets

This healthy no bake muesli bars is nut-free and a quick and easy snack that’s perfect for lunchboxes or as an on-the-go treat. Packed with wholesome ingredients like oats, seeds, and coconut, itโ€™s a great option when you want something nutritious that doesn’t require turning on the oven.

These fast treats came about one morning when I opened the freezer and alas, no lunch box fillers. No time to bake, what could I do but invent a nut-free,ย healthy no bake muesli bars? QUICKLY!

Health benefits

Well, the oats are a nourishing, high fibre, nerve supporting food. The seeds and coconut provide good fats, protein, and energy (of the slow release kind). The cinnamon further stabilises blood sugars. If you use brown rice syrup, they are also fructose friendly. These simple treats are full of nutrition and will sustain, satisfy and nourish your body – they are the perfect healthy snack. They are also great for kids with nut allergies.

Why these homemade granola bars are SO much better than any supermarket breakfast or muesli bar…

Here I go, getting on my high horse again. But the health claims on these bars just make me shudder. A warning would be more appropriate in many cases. Many commercial bars have almost as much sugar as a chocolate bar, alarming amounts of highly processed vegetable or seed oils (find out why you need to avoid these here) and ‘fruit’ that is more a product of chemistry than nature. These homemade muesli bars are whole and nourishing in ways that any supermarket or even health food brands could never be. For my detailed analysis of why there’s nothing good or healthy about processed muesli bars, click here.

These nut free granola bars are just too easy to make, so no excuses for processed bars anymore;)

Ingredients

Youโ€™ll need rolled oats, a variety of seeds (sesame, pumpkin, sunflower, and chia), desiccated coconut, ground cinnamon, butter, and your choice of sweetenerโ€”rice malt syrup or raw honey. For a bit of extra flavour or texture, add dried fruit (like sultanas or cranberries) or cacao nibs.

How to make these healthy no bake muesli bars

Start by combining the butter, sweetener, and cinnamon in a small pot over low heat until melted. You can either toast the oats, seeds, and coconut for a richer flavour or use them raw for a quicker option. Mix the dry ingredients with the melted butter mixture in a bowl and press it all firmly into a lined slice tin. Pop it into the freezer for 10 minutes to set, then slice into bars. We’ve also included a Thermomix method too!

Serving suggestions and how to store

These muesli bars are perfect for lunchboxes or a quick snack at home. Store them in the fridge or freezer to keep them firm. For lunchboxes, freeze the bars and pack them from frozen to keep them fresh until snack time. In warmers climates, pack against an ice brick to keep them well chilled.

Vary this healthy no bake muesli bars recipe

For a dairy-free version, use coconut oil or ghee. To make it gluten-free, swap the oats for quinoa flakes. If youโ€™re avoiding fructose, use rice malt syrup instead of honey, and for a vegan option, use rice malt syrup and coconut oil. You can also adjust the seeds based on preference or leave out the ones your kids donโ€™t like! Or add chocolate chips (or a chocolate drizzle) for a special treat.ย 

For a crispy baked Choc Chip Muesli Bar click HERE.

Or browse our whole range of Muesli Bars HERE.

Or, for more delicious, healthy and easy to make wholefood treats, click HERE.


No-bake nut-free muesli bar with oats, seeds, and dried fruitโ€”healthy and easy to make.
Print Recipe
4.54 from 30 votes

No bake, nut free muesli bar

An easy to make, nutritious snack these  No bake, nut free muesli bars are really delicious and so much better than anything store bought. Keep them in the freezer for a snack on the go. 
Prep Time10 minutes mins
Freeze10 minutes mins
Total Time20 minutes mins
Course: Snack
Servings: 12

Ingredients

  • 100 g rolled oats (1 cup) see gluten-free below
  • 60 g sesame seeds (ยฝ cup)
  • 60 g pumpkin seeds (ยฝ cup)
  • 60 g sunflower seeds (ยฝ cup)
  • 1 tbsp chia seeds ground is best, or flax seeds
  • 60 g desiccated coconut (1 cup) or shredded
  • 1 tsp ground cinnamon
  • 125 g butter
  • 170 g rice malt syrup or honey (ยฝ cup) you can play around with the amount of sweetener - as my families palate has become less sweet over time, I generally only add ยผ cup of RMS and even less if using honey these days

Optional

  • 80 g dried fruit (ยฝ cup) organic or additive-free preferably
  • 30 g cacao nibs (ยผ cup)

Instructions

  • In a small pot, combine the butter, sweetener and cinnamon over a low heat, stirring until combined. If using a Thermomix, heat 2mins, temp 90, speed 3.
  • You have a couple of options here. For a tastier slice, throw the oats, seeds, and coconutย into a large pan and toast over a low heat for 5-10 minutes, stirring often (the coconut will colour and the pepitas will start to pop).

OR

  • Combine the dried ingredients raw.
  • Add the dried mix to the butter / sweetener mix, (plus dried fruit or cacao nibs if using) and mix until combined. If using a Thermomix, blend 30sec, reverse, speed 3 (you may need to scrape the sides). See my lunch box tip below.
  • Press into a small slice tin lined with baking paper (I use a wet stainless steel serving spoon). Put it in the freezer for 10 minutes or until set.
  • Remove from the tin and cut into squares.

Store

  • It is best to keep refrigerated or frozen.

Notes

Dairy-free

Use coconut oilย or ghee instead of butter. If using coconut oil, you will just need to make sure it is kept cold or it will fall apart more quickly than the butter version.

Gluten and grain-free

Useย quinoa flakes (may just need to increase the quantity slightly).

Low-fructose

Use brown rice syrup instead of honey.

Vegan

Choose rice malt as your sweetener. Use coconut oil instead of butter (it will need to be kept chilled).

Sesame-free

Replace them with another seed or nut.

Coconut-free

Replace the coconut with ground seeds or nuts.ย 

Do kids fuss over the seeds orย consistency?

Either leave the ones they dislike out and increase those they do like, or grind them up. You can even process the whole mix of dried ingredients to make a finer, less chunky slice.

Lunchbox Tip

For a slice that holds together better, use butter or ghee (coconut oil melts more rapidly) and process the mixture so it is fine and sticks together better (TMX 10sec, speed 5). Use the back of a big wet spoon to really compact it into the tray.ย My kids prefer this to a chunky consistency and it is definitely better for holding together in the lunch box. Also, store it in the freezer and pack from frozen in an insulated lunch box (with a cold pack). It will be defrosted and ready to eat come morning tea.
There are over 50ย delicious, easy to make nut-free recipes in my best selling ebookย โ€œThe Well Nourished Lunchboxโ€ โ€“ more details and a video of whatโ€™s insideย HERE. Whilst your there, check out the amazing reviews for the ebook.ย 
ย 
ย 

Have a play with this recipe. Please let me know if you discover any interesting variations and I'd love to receive your comments below.

ย 

Coriander & Lime Pesto

July 9, 2013 | After School Snacks, Savoury Snacks, Dips

This coriander lime pesto is the best Iโ€™ve ever made, so I just had to share the recipe. I found myself with a lot of coriander in the garden and my lime tree heavy with fruit. So hereโ€™s what I madeโ€ฆ a very seasonal, extremely healthy coriander and lime pesto.

Whilstย coriander pestoย is a delicious, nutritiousย dipย orย salad dressing, you can also think about it as an accompaniment to grilled or BBQโ€™d fish orย chicken. I also make Asian inspired omelettes and serve them with a dollop of this pesto. Even a fried rice or a stir fry would tasteย better and offer moreย nutritionย with this pesto on top.

But a word of warning. This makes the shop bought stuffย tasteย like baby food!

Health benefits

Well, letโ€™s start with the amazing healingย herbย coriander (also called cilantro in some cultures and clinical research). Coriander is a classic example of food as medicine. It is extremely anti-inflammatory, anti-bacterial and also an amazing detoxifier and heavy metal chelator. Medicinally, it is used frequently for arthritis, inflammatory digestive disorders and to bind and excrete heavy metals in the blood. Needless to say, it is a very beneficial addition to any diet.

Theย cashew nutsย and cheese add good fats andย protein. Theย lime juice, zest and also theย garlicย further support immune function. So really, this pesto is just what the doctor ordered this winter.

The most deliciousย flavourย combination, my Coriander and lime pesto is a lovely change from the traditional basil variety.

Ingredients

Theย ingredientsย in thisย coriander pesto are only a short list. Choose a good bunch of fresh coriander (fresh cilantro) and a clove of garlicย that suits the amount ofย garlicย flavourย you like – I always opt for a large clove! Toastedย Cashew nutsย give the texture for the pesto andย parmesan cheeseย adds aย tasteย of cheese andย saltย to the mix.ย Lime juiceย lifts the freshness of the pesto and the macadamia nut oil makes sure the coriander is nice and smooth to theย taste. A red chilli is optional- depending on who will be eating this or what sort ofย dishย you will use it with, include the chilli with or without seeds according to the heat you like.

How to make coriander lime pesto

This coriander lime pesto can be made a variety of ways according to what equipment you have in your kitchen. The simplest and quickest way is to use a food processor (or Thermomix) – grate the parmesan cheese together with the garlic and set this mixture aside in a medium sized mixing bowl. Then the fresh coriander and toasted cashews go into the food processor and are chopped small – not too small as you want the cashews to give texture. Tip this mixture in with the parmesan cheese and garlic, add the lime juice and zest and macadamia nut oil. Give this all a food stir with a spatula until combined! I always give mine a little taste to check the balance of flavours. Add more lime juice or a pinch of salt (or more parmesan) to adjust as needed.

If you donโ€™t have aย food processor or blender, then the next best way is the traditional way with a mortar and pestle (where the name โ€˜pestoโ€™ comes from!). Use the mortar and pestle to crush theย cashews, coriander andย garlicย then add to a mixing bowl with the grated parmesan,ย lime juice and zest and macadamia nut oil (or extra virgin olive oil), stirring well to combine.

Vary this coriander lime pesto to suit your dietary needs

Coriander orย cilantro pestoย lends itself to MANY variations. You can of course make this aย basil pestoย by substituting the fresh coriander for fresh basil. To make thisย dairy-free, theย parmesan cheeseย can be omitted and a few goodย tablespoonsย of nutritional yeast flakes used with aย pinchย ofย saltย instead. Using ground macadamia nuts can also be a way to mimic the texture of theย parmesan cheeseย if desired.

If you need to avoid nuts, you can choose toasted sunflower seeds instead- they have a very similar texture toย cashew nuts. If youโ€™d like to just use a different nut, thenย pine nutsย are a popular choice, as well as macadamia nuts or almonds.

If youโ€™re out of limes, thenย lemon juiceย and zest can work too for the zesty finish!

Serving suggestions and how to store

This pesto is fantastic over pasta, stirred into quinoa, or used as a dressing for roasted veggies. I love it over eggs or with chicken or fish fro dinner. You can even use it as a spread for sandwiches or wraps.

Because this pesto is made from fresh ingredientsย without any additives, it will only last a few days in the fridge. I flatten out the surface of the pesto and drizzle over a little bit ofย olive oilย to seal the top and slow down the discolouration. Make sure it is in anย airtight container as well.ย Pesto can also be frozen and used through warmย dishesย such asย pastaย when thawed- either freeze in anย airtight containerย or freeze inย ice cube traysย then transfer to a container when solid.

If you don’t like coriander – try this Basil Pesto.

Coriander and lime pesto with fresh herbs, nuts, and a zesty citrus twistโ€”perfect for adding flavor to any dish.
Print Recipe
4.63 from 29 votes

Coriander and lime pesto

This Coriander & Lime Pesto is a zesty twist on the classic pesto, packed with fresh herbs, citrus, and crunchy toasted cashews. Itโ€™s a quick and versatile sauce that can brighten up just about any dish, from salads to sandwiches, and everything in between.
Prep Time10 minutes mins
Total Time10 minutes mins
Course: Appetizer
Servings: 1 cup

Ingredients

  • 1 bunch/s fresh coriander leaves
  • 1 clove/s garlic -crushed (if not using a processor)
  • 60 g raw cashew nuts (ยผ cup) toasted
  • 30 g parmesan cheese (2 tablespoons) finely grated
  • 1 lime/s juice and zest
  • 20 ml macadamia nut oil (1 tablespoon) or olive oil

Optional

  • 1 red chilli/s

Instructions

  • In a food processor grate the parmesan and garlic and set aside. Thermomix 10 seconds, speed 6.
  • Place the coriander and cashews in the processor and pulse until just chopped. Thermomix pulse 2-3 times or until chopped when you look through the lid.
  • Mix in the parmesan, lime juice and zest and macadamia oil (and optional chill) until combined and serve. Thermomix 10 seconds reverse speed 3.

Store

  • Drizzle with a little olive oil to seal it and prevent it discolouring.
  • Store in an airtight container in the fridge.
  • Can also be frozen in a airtight container or even in ice-cube trays (and then cubes put into an airtight container once frozen).

Notes

Dairy-free and vegan

Omit the parmesan. I'd suggest adding a couple of tablespoons of nutritional yeast for cheese flavour and even a handful of ground macadamia nuts to replace the parmesan, but that's optional too.

Nut-free

Replace the cashews with the same amount of sunflower seeds.

Different nut

I love this with macadamia nuts too.ย 

Variations (for the kids)

One of my blog readers recently shared how she got her children to eat leafy greens. She makes pesto and not just the basil variety. She also adds in kale, spinach or whatever else the market has on offer. Spinach is very mild tasting, so you could easily add this to any type of pesto, without the kids noticing.

Tip

Seek out a really good, flavoursome coriander and fresh lime. I've made coriander pesto in the past and it's been good, but not this good. Your farmers market will have the freshest, most seasonal produce for the most delicious and nutritious pesto.

ย 

Do you have any pesto combinations that you just love? Please share them by commenting below.

Raw Chocolate Recipe

June 26, 2013 | No-bake Sweets, Desserts

I make my own sugar (fructose) free chocolate. This dairy-free Raw Chocolate recipe uses only nourishing, whole ingredients. It takes minutes to make, my kids LOVE it, I can consume it without overdoing it and I find it simply satisfying! Itโ€™s quite funny, my kids think my chocolate is a really indulgent, special treat! Well, it is, but unbeknown to them, itโ€™s also very healthy.

There are a couple of versions I make (and then a couple of versions within those versions), by now you know how I love my versions right? Anyway, today Iโ€™m just going to keep it simple and show you a couple of basic combinations.

Raw cacao butter is the fat pressed at low temperatures from the cacao bean. It has an amazing aroma and makes a chocolate that doesnโ€™t melt quite as quickly as chocolate made with coconut oil. It is, however, quite expensive and the blocks need to be chopped up or shaved to melt, whereas the coconut oil melts easily (in summer it will be a liquid anyway). You can find out more about the health benefits of coconut oil here.

You can make this chocolate with either one, or, a combination of the two. Either version forms an antioxidant rich, very nutritious and delicious chocolate.

Health benefits

Raw cacao powder is rich in antioxidants and has many trace minerals such as magnesium, potassium and iron. There is a lot of literature about the benefits of chocolate, but many of these benefits are undone by the amount of sugar and other additives that chocolate can contain. Making your own chocolate gives you control over the ingredients and allows you to adjust the sweetness to YOUR tastes.ย 

Ingredients

This raw vegan chocolate recipe features just three ingredients!ย 

Cacao butter or cocoa butter can be a little tricky to source but any health/ wholefoods store or online shop should stock it. It lasts for years in the pantry so if you buy in bulk it can end up being cheaper per kilo. Cacao butter smells amazing and truly gives the best texture and mouthfeel of this chocolate.

Cacao powder is the powder from the cacao bean and is processed at low temperatures. Cocoa powder is similar but has been roasted and thus is a little less bitter than the raw. I use cacao powder as my ingredient of choice but if you only have cocoa powder in the pantry, then you can use that too.

You can choose the sweetener that suits your needs – if you like the most natural, local sweetener, choose local raw honey. If youโ€™d like to be low fructose, choose the rice malt syrup. If you love maple syrup then you can use that one for its delicious flavours. You can adjust the amount to have the chocolate a little sweeter if you like too.ย 

How to make this raw chocolate recipe

This is truly as simple a method as possible!ย 

In a medium sized saucepan over low heat, melt the cacao butter until just warm (not hot). Make sure you don’t over heat the mixture, it should be barely lukewarm (not hot).

The smell of this melting cacao butter is just divine! Donโ€™t be fooled though, it doesnโ€™t really have much of a taste at this stage! If you are using coconut oil, you only need to soften it in your saucepan.

I then use a whisk to stir through the cacao powder and sweetener. Your main goal is to ensure there are no lumps of cacao and that everything is thoroughly combined- the whisk enables this to happen easily. If you donโ€™t have a whisk, even some electric beaters (use carefully!) or a stick blender would work to combine the cacao butter, cocoa and sweetener.

If you have a Thermomix, it is incredibly easy to pop it all in, set the melting temperature of 50ยฐC and mix together on Speed 1 until smooth, then pour into your mould.

For cute bite-sized servings, I pour into baking cases. Otherwise I line a dish or tray with baking paper and make a block or โ€˜barkโ€™ with extra ingredients like roasted nuts and dried fruit.

How to vary this raw chocolate recipe

To make this chocolate vegan, use rice malt syrup or maple syrup. To have low-fructose chocolate, choose the rice malt syrup as your liquid sweetener. You can add nuts such as roasted almonds or cashews, seeds such as pepitas, shredded coconut, vanilla extract, dried fruit and much much more to make as many variations as you like with this chocolate.ย 

Store

This raw chocolate recipe melts at quite a low temperature so I keep this in my fridge in an airtight container. If I want to take it somewhere, it will stay solid for a few hours next to an ice pack.

For more delicious, healthy and easy to make wholefood treats, clickย HERE.

Raw chocolate made with cacao, coconut oil, and natural sweetenersโ€”a healthy, indulgent treat.
Print Recipe
5 from 9 votes

Raw chocolate recipe

This is a simple way to make healthy raw chocolate. It's as good as the processed kind.
Prep Time5 minutes mins
Cook Time10 minutes mins
Chill10 minutes mins
Total Time25 minutes mins
Course: Dessert, Snack
Servings: 200 grams

Ingredients

  • 200 g cacao butter (1 cup) or raw, extra virginย coconut oil (or a combination of 100gram of each), melted
  • 30 g cacao powder (ยผ cup) unsweetened Dutch process or raw
  • 2-4 tbsp rice malt syrup, honey or maple syrup -you can adjust the sweetness to your taste

Instructions

  • Simply melt the cacao butter or coconut oil over a very low heat (I find placing in a bowl over hot water is best), or Thermomix (temp 50, speed 1) until just melted. If making with just coconut oil, it only needs to be softened, not melted to make it.
  • Add the cacao powder and sweetener, mix until well combined. Pour into chocolate moulds or mini cupcake baking cups. You can also spread out over a baking sheet to make a bark. 
  • Place in the freezer immediately to set (don't delay with this). 
  • Once set, keep in an airtight container in either the fridge or freezer.

Tips

  • A few people have had issues with the sweetener and base fat not combining completely. Make sure you don't over heat the mixture, it should be barely luke warm (not hot).ย 
  • If you happen to overheat it, add a tbsp of coconut cream and try mixing with a stick blender or whipping it up in a blender just before pouring into a mould and get it into the freezer to set asap!

Store

  • Because both coconut oil and cacao butter melt when exposed to even a little heat, these chocolates always need to be kept cold (especially important if you use coconut oil for the fat). So, unfortunately, they are no good for picnics or lunch boxes (unless packed against an ice pack).

Notes

Coconut-free

Choose cacao butter rather than coconut oil.ย 

Fructose friendly

Choose rice malt syrup as your sweetener. You can also sub the sweetener for stevia if you enjoy the taste.

Vegan

Choose rice malt or maple syrup as your sweetener.

Add nuts

Roasted nuts are delicious set into this raw chocolate.ย 

Peppermint chocolate

Add as few drops of peppermint oil or essence.ย 

Make Peanut Butter Cups

Recipe HERE.ย 
ย 
ย 

Enjoy and please let me know what you think by posting a comment below. Who'd have thought chocolate could be so very healthy?

Roast Vegetables, Three Ways (that even the kids will like)

June 24, 2013 | Vegetarian

This Roast Vegetables, Three Ways recipe is a versatile and easy way to transform simple veggies into delicious meals the whole family will enjoy – even the kids! Whether you want a hearty side dish, a rich pasta sauce, or a nourishing soup, these roasted veggies have you covered. With just a few simple ingredients, you can create multiple dishes with minimal effort. It’s a wonderful and delicious way for hiding vegetables in meals.

Health benefits of hiding vegetables in meals

This recipe is perfect for parents to help with hiding vegetables in meals (for picky eaters). Packed with a variety of colourful vegetables, this recipe provides a wholesome way to enjoy seasonal produce. Roasting brings out their natural sweetness, and it’s an easy way to incorporate more fibre rich, plant-based foods into your meals.

What you need to make Roast Vegetables, Three Ways

This recipe uses a variety of everyday vegetables like sweet potatoes, carrots, zucchini, and capsicum (bell peppers), combined with herbs, garlic, and a sprinkle of pumpkin seeds for crunch. For a richer flavour, add tomatoes to the mix if you’re making pasta sauce or soup. Optional extras like fennel or eggplant can switch things up.

How to make the base for these three recipes

Simply toss your chopped vegetables in olive oil, ghee, or butter, season with oregano, salt, and pepper, then spread them in a single layer onto a baking tray or baking sheet. Roast at 180โ„ƒ/350โ„‰ for 40-60 minutes, until tender. For the pasta sauce or soup versions, blend the roasted veggies, and you’re ready to go!

Serving suggestions and how to store

These roasted vegetables can be served as a side with any protein, or turned into a creamy soup or pasta sauce by blending them. Leftovers can be turned into a hearty salad with leafy greens, feta, or grains like quinoa. Store leftovers in an airtight container in the fridge, or freeze the soup and sauce versions for later.

Vary this to suit your dietary needs

For a vegan version, use olive oil and skip the cheese or meat additions. If you’re legume-free, simply avoid the beans in the soup or pasta sauce variations. Feel free to adapt the veggies based on what you have on hand!

Roast vegetables three waysโ€”delicious and kid-friendly, with a variety of flavors and textures.
Print Recipe
4 from 1 vote

Baked vegetables, three ways (that even the kids will like)

One simple tray of roasted vegetables can become three different meals. Here's how...
Prep Time10 minutes mins
Cook Time1 hour hr
Total Time1 hour hr 10 minutes mins
Course: Soup, Main Course, Salad

Ingredients

  • 1 large sweet potato/s -skin on and cubed (can sub pumpkin)
  • 3 carrot/s -unpeeled and sliced
  • 100 g mushrooms -Swiss brown or button, whole or quarter field
  • 1 zucchini/s -sliced or cubed
  • 1 red capsicum/s -roughly sliced
  • 2 red onion/s -peeled and quartered
  • 4 clove/s garlic -whole and unpeeled
  • 3 tbsp butter, ghee or olive oil -melted
  • 60 g pumpkin seeds (ยฝ cup)
  • 2 tbsp dried oregano
  • Sea salt and freshly ground black pepper -to taste

If making this into a pasta sauce or soup also include:

  • 6 vine ripened tomatoe/s -halved and placed cut side up on the roasting tray ( depending on the size of your tray, they may need to sit on top of the vegetables) or 2 punets of cherry tomatoes, whole. ย The vegetables sit very well behind the tomato flavour. ย However if your kids can still detect vegetables, then next time, remember to increase the amount of tomatoes and reduce the quantity of vegetables.ย  ย For very vegetable fussy kids, do this to begin with.

Optional extras:

  • 1 bulb fennel -quartered
  • 1 eggplant/s -small

Instructions

  • Preheat your oven to 180โ„ƒ/350ยฐF (fan-forced).
  • Take a large baking or roasting tray. Throw in all of your cut up vegetables, oregano, salt and pepper and ghee (or butter or olive oil) and toss to coat them all well.
  • Place you tomatoes, cut side up on top (sprinkle with a little extra oregano, salt and pepper). Scatter over the pepitas.
  • Place in the oven for about 40 - 60 minutes or until the vegetables are cooked through.
  • Drizzle with a little extra virgin olive oil, adjust the seasoning and serve as a side with any type of protein.

Soup

  • Squeeze the flesh from the garlic skin.
  • Throw all of the contents of the baking dish into a blender or food processor (or Thermomix), with a glug of EV olive oil, season well and blend on a high speed until pureed.
  • Add in some fresh basil or parsley to for extra goodness and flavour.
  • To add protein, include a can of brown lentils or canellini beans (drained and rinsed). These can be either stirred through or pureed too.
  • Add a little water or stock to achieve the desired consistency. I love a thick soup, so I would use only a little stock.

Pasta sauce

  • Squeeze the flesh from the garlic skin.
  • Throw all of the contents of the baking dish in a blender or food processor (or Thermomix), with a glug of EV olive oil, season well and blend on a high speed until pureed.
  • Add in some fresh basil or parsley too for extra goodness and flavour.
  • You could even add a spoon or two of your favourite pesto to the mix (or on top as I have pictured below).
  • To add protein, include a can of brown lentils or canellini beans (drained and rinsed). These can be either stirred through for texture or pureed to. You could also add a can of tuna, some diced bacon or chorizo sausage if you like.
  • Serve over pasta with grated cheese. I often mix this sauce through macaroni or tube pasta to coat it, add a little feta or goats cheese to if you like and top it with grated cheese. Bake in the oven for 10 minutes.
  • My favourite type of pasta is a gluten-free rice and quinoa pasta.

Salad

  • Let the vegetables cool down.
  • Toss salad leaves in a dressing of one part red wine vinegar to two parts extra virgin olive oil, seasoned well.
  • Add the cooledย  vegetables, gently toss and serve.
  • This is lovely with crumbled feta or goats cheese mixed through.
  • Add some legumes, tuna, cooked meat, brown rice or quinoa to make a real meal of it.

Store

  • Store in an airtight container in the fridge.
  • The soup and sauce versions can be frozen.

Notes

Vegan and vegetarian

Obviously avoid any of the meat/ cheese additions (stick with legumes for protein). For vegan choose olive oil.

Legume-free

Avoid the suggestions for beans/ pulses.ย 

ย 

There you have it. One dish, loads of healthy meals. Cook without boundaries. Enjoy and I'd love to receive your comments!

Cheese & Seed Crackers

June 17, 2013 | Healthy Lunchbox, Savoury Snacks

This healthy cheese cracker recipe is ย a really delicious, savoury addition to any nourishing lunch box or just to snack on. Itโ€™s impossible to buy a savoury cracker with this much nourishment and protein โ€“ add a few carrot sticks or other raw veggies and you have a perfectly delicious and nutritious morning or afternoon tea.

Health benefits

So what’s so good about this seed cracker recipe (apart from the taste, they really do have the best cheesy flavour)? The ground seeds pack in protein, loads of zinc, minerals, and healthy fats. ย These are so much more nutritious than any packet cracker. Instead of just filling a void with crackers that have little more than empty calories, why not make every mouthful count with these beauties. Children love the cheesy, buttery biscuit, and being nut-free, it makes them a perfect inclusion in the school lunch box. They are also so simple to make. Each cracker has approximately 3.5 grams of protein.

Warning – these are dangerously moreish! I dare you to stop at one.

Ingredients

To make these crackers, you’ll need cheddar cheese, parmesan, butter, mixed seeds (like sunflower seeds, sesame seeds, pumpkin seeds, and flax seeds), wholemeal spelt flour, lemon juice, and garlic. Optional extras include cayenne pepper, rosemary or any other herbs or spices you enjoy.

How to make this healthy cheese cracker recipe

Start by grinding your seeds in a food processor, then grate the cheeses and crush the garlic. Combine all ingredients into a processor or bowl to form a sticky dough. Roll the mixture into a sausage shape with baking paper (parchment paper), chill it for 30 minutes, then slice into discs. Bake at 170โ„ƒ/340ยฐF on a sheet pan or baking sheet (tray) for 15 minutes or until golden brown, and let them cool completely to crisp up.

Serving suggestions and storage

These homemade cheese crackers are perfect with your favourite dips, cheese platters, or just as they are for a quick snack. Store them in an airtight container for up to a week. You can also freeze them before or after baking to extend their shelf life. You can eat them straight from the freezer which is very dangerous because they are so moorish! Or enjoy at room temperature.

Vary this healthy cheese cracker recipe to suit your dietary needs

For a gluten-free version, swap the spelt flour for buckwheat flour. If you need to omit garlic or sesame seeds, you can easily adjust the recipe by leaving them out or substituting with other seeds (I love with chia seeds).

Tip

I grind up a seed mixture and store them in an airtight container in the fridge. I use them in lots of baking and even just over breakfast so I like to pre-prepare them to save time.

This recipe is one of many savoury cracker recipes in myย best selling ebook ‘The Well Nourished Lunchbox‘. Click HERE to read the rave reviews and find out more.


This healthy cheese cracker recipe is the most delicious, nourishing savoury snack. Packed with seeds & nourishing ingredients. Easy to make!
Print Recipe
4.70 from 23 votes

Cheese and Seed Crackers

These Cheese & Seed Crackers are a delicious, savoury snack thatโ€™s perfect for pairing with dips or enjoying on their own. Theyโ€™re super easy to make and packed with the goodness of seeds and cheese, making them a wholesome alternative to store-bought crackers.
Prep Time10 minutes mins
Cook Time15 minutes mins
Total Time25 minutes mins
Course: Snack
Servings: 20 crackers

Ingredients

  • 100 g cheddar cheese
  • 30 g parmesan cheese
  • 70 g butter -chilled and cubed
  • 120 g mixed seeds (1 cup) ground (I use 30g each โ€“ sunflower, sesame, pumpkin and flax seeds).ย  See tip below.
  • 60 g wholemealย speltย flour (ยฝ cup)
  • ยฝ lemon/s -juice
  • 1 clove/s garlic

Optional extras

  • ยฝ tsp cayenne pepper -this doesnโ€™t contribute any heat in this cracker though is great for the circulation and digestion, so give itย  a try.
  • ยผ tsp dried rosemary - or any other herb you enjoy

Instructions

  • Preheat the oven to 170โ„ƒ/340ยฐF (fan-forced) and line a large biscuit tray with baking paper.
  • Grind the seeds in a food processor. Thermomix 10-15 seconds, speed 8 (make sure you don't over grind them or they will release oils).
  • Grate the cheeses either by hand or in your food processor and crush the garlic. Thermomix 10 seconds, speed 5.
  • Add all of the ingredients into the processor and mix at a high speed until well combined forming a sticky but firm batter. Thermomix 30 seconds, speed 6.
  • Place the mixture onto a sheet of baking paper and roll into a sausage shape approximately 5cm in diameter (about as wide as a regular rice cracker). Place in the fridge for 30 minutes or more, unwrap and then cut into 5mm discs.  Place on the lined baking tray.
  • Bake for 15 minutes or until they begin to brown. Take care not to overcook as they can become a bit bitter.
  • Cool on the tray (they will harden as they cool) then put in an airtight container for up to a week (if they last that long!)

Store

  • You can freeze these either uncooked and cut and bake as needed or once baked in snap lock bags or airtight containers.

Notes

Gluten and grain-free

Substitute the spelt flour with buckwheat flour.

Garlic-free

Omit the garlic.

Sesame-free

Omit the sesame seeds (just replace with a tolerated seed)

No grinder

Substitute for LSA (but now not nut free)
ย 

Tip

I grind up quantities of seeds and store them in an airtight container in the fridge. I use them in lots of baking and even just over breakfast so I like to pre-prepare them.
ย 

So you may have guessed that these are a personal favourite. Let me know what you think? Post a comment or rate this recipe below.

ย 

Healthy Bolognese (with a few twists)

June 3, 2013 | Budget Friendly, Make-ahead Meals, Pasta and Noodles, Red Meat, Freezable Meals

While it may seem like reinventing the wheel, Iโ€™m excited to share this classic family favourite with a healthy twist. This Healthy Bolognese recipe is incredibly versatile and can be adapted to be vegetarian, gluten-free, or grain-free. Itโ€™s perfect for dinner or even breakfast, making it a multi-meal marvel. This simple recipe allows you to make every mouthful count nutritionally and ensures your efforts are rewarded with happy, healthy children.

Why homemade bolognese is a better choice

If you’ve fallen into the habit of using store-bought sauces for your mince, this recipe is for YOU! Making your own bolognese sauce takes only a few minutes and offers a superior taste and nutritional value. Unlike sterile supermarket sauces, which are often loaded with sugar and additives, this homemade version is fresh, delicious and packed with nutrients.

Boosting nutritional value with hidden vegetables

This Bolognese is a fantastic opportunity to add in a variety of healthy vegetables. By grating, finely chopping, or using a food processor, you can incorporate veggies that “disappear” into the sauce, making it perfect for fussy eaters who are averse to vegetables. This ensures that even the pickiest eaters get a nutrition boost without compromising on flavour.

Experimenting with different proteins

To keep things interesting and add variety, try using different types of protein in your Bolognese. Chicken or turkey mince are excellent alternatives to traditional beef or pork and offer their own unique flavours. This variation not only keeps meals exciting but also contributes to a balanced diet. Made with beef mince, this meal has about 35 grams of protein per serve.

The health benefits of herbs and tomatoes

The herbs used in this recipe support a healthy digestive system, adding both flavour and health benefits. Tomatoes are rich in lycopene, a powerful antioxidant that provides protection against various health issues. Incorporating these ingredients into your Bolognese not only enhances taste but also boosts its nutritional profile.

Personal experience with healthy bolognese

This Healthy Bolognese has become a staple in our family meal plan. Itโ€™s a hit with the kids, and I love knowing that Iโ€™m adding a nutritious, homemade sauce to their pasta. I often experiment with different vegetables and proteins to keep things fresh and exciting. Itโ€™s a versatile recipe that adapts well to various dietary needs and preferences. We love it topped with grated cheddar or parmesan cheese.

Why this recipe works

This Healthy Bolognese recipe offers a balance of taste and nutrition. Its versatility allows it to cater to different dietary requirements, while the homemade sauce ensures a healthier alternative to store-bought options. By adding vegetables and varying proteins, you create a meal that is both satisfying and beneficial for your family’s health.

Serving suggestions and how to store

Serve your Healthy Bolognese with pasta and a simple green salad for a complete meal. Bolognese is a great dish to pre-prepare and it also freezes really well. I often freeze leftovers in little glass pyrex containers. If time is an issue, double this recipe and freeze in ready to go batches. Just reheat over low heat and enjoy again!

Vary this to suit your dietary needs

Check out the variations below the main recipe for tips on how to adapt it to your specific dietary needs. For a gluten-free meal, opt for rice or quinoa pasta. If you’re following a grain-free or paleo diet, zucchini ribbons or baked potatoes make a great base. Vegetarians can swap the mince for lentils and mushrooms, and if youโ€™re looking to stretch the dish, adding lentils is a great way to do so! Or take a look at this Mushroom Walnut Bolognese and this incredible, not at all fishy Fish Bolognese.

Healthy bolognese made with lean meat, vegetables, and flavorful herbsโ€”packed with nutrition and flavor.
Print Recipe
4.92 from 12 votes

Healthy Bolognese (with a few twists)

My healthy Spaghetti Bolognese is such a versatile meal - check out my many variations for loads of inspiration for this family favourite.ย 
Prep Time15 minutes mins
Cook Time30 minutes mins
Total Time45 minutes mins
Course: Main Course
Cuisine: Italian
Servings: 4

Ingredients

  • 1 tbsp extra virgin olive oil - extra virgin
  • 2 onion/s - diced
  • 2 clove/s garlic - finely chopped or crushed
  • 500 g beef mince - or turkey or chicken mince (see below for vegetarian)
  • 2 bay leaf/s
  • 1 tsp dried rosemary - or 2 tablespoons of fresh
  • 1 tbsp dried oregano
  • 1 carrot/s - grated
  • 1 zucchini/s - grated
  • 1 stick/s celery - finely chopped
  • 75 g mushrooms -sliced (or processed if mushroom fussy) (1 cup)
  • 700 g tomato passata (puree) - or you can use 5-6 vine ripened tomatoes, diced on a plate to keep the juice
  • Sea salt and freshly ground black pepper - to taste
  • 1 bunch/s fresh basil leaves - roughly chopped (to serve)
  • 300 g pasta - of your choice (I love rice, quinoa spaghetti)

Optional extras

  • 1 tbsp tomato paste - for a richer tomato flavour if using fresh tomatoes

Serve

  • Salad (to serve)

Instructions

  • In a large pan or a pot with a lid, sautรฉ onions and garlic in a tablespoon of olive oil over a low to medium heat, for a couple of minutes until they start to soften, but not brown.
  • Add the mince (or lentils) and bay leaves, dried rosemary and oregano and cook until it just starts to brown (about 5 minutes) then add the vegetables, tomatoes (and tomato paste if using). Season to taste.
  • Place the lid ajar the pan. Simmer until the sauce starts to thicken, minimum 30 minutes. The longer you can let it simmer, the richer the sauce will become.
  • Turn off the heat and stir in the basil. Serve with al dente spaghetti (or one of the variations below).

Thermomix

  • Chop the carrot, zucchini and celery 10 sec, speed 4. Set aside.
  • Now place the garlic in the bowl. Chop 5 sec, speed 6.
  • Add the onion and chop 5 seconds, speed 4.
  • Add the olive oil and saute 2 mins, 100, speed 1.
  • Add the mince, bay leaves, dried rosemary and oregano and cook 5 mins, 100, reverse speed 1.
  • Add the vegetables, mushrooms and tomato passata and cook 20-30 mins, 100, reverse speed 1 (with the cap in place so it doesn't spit over your bench). Season to taste.
  • Once cooked stir in the basil. Serve with al dente spaghetti (or one of the variations below).

Serve

  • I like to serve this with a simple green salad.

Make-ahead

  • Re-heat in a pot over a low heat until just hot.

Store

  • Store in an airtight container in the fridge.
  • Can also be frozen.

Notes

Gluten-free

Use gluten free pasta (I love rice and quinoa spaghetti), or zucchini ribbons.

Grain-free or Paleo

Serve with zucchini ribbons or stuffed in a baked potato.

Vegetarian and vegan

Substitute mince with a can of brown lentils (rinsed and drained) and 200g finely diced mushrooms.

Half vegetarian (plant boost)

Substitute half the mince for brown lentils (rinsed and drained). Adding lentils to leftover sauce is a simple way to make it go further.

Breakfast

Leftover Bolognese is a delicious breakfast. Serve it on whole grain toast or as a side with eggs.

Baked Bolognese

Place any leftovers into a greased dish or bowl. Make an indent in the top and crack an egg or two into the hollow. Top with cheese andย pepitas and bake until cooked the way you like it.
ย 

How do you eat your Bolognese? Can you add any interesting variations? Please comment or ask questions below.

Vanilla Bean Cupcakes

May 27, 2013 | Healthy Lunchbox, Baked Sweets

These grain-free, gluten-free, nut-free and sugar-free Vanilla Bean Cupcakes are a classic favourite in our house. They are SO easy to make and with their light, fluffy texture and delicate vanilla flavour, theyโ€™re perfect for birthdays, special occasions, or simply a sweet treat to brighten your day. I often bake these with my kidsโ€”they love helping mix the ingredients and, of course, enjoying the delicious results.

Healthier Vanilla Bean Cupcakes

While cupcakes are typically considered a treat, this vanilla cupcake recipe is made with a few healthier twists. Cannellini beans, a key ingredient, are a great source of fibre and protein and are naturally gluten-free, making them a great option for those with dietary restrictions. Free-range or organic eggs add more quality protein and essential nutrients, while coconut flour offers a gluten-free alternative rich in fibre and healthy fats. The use of rice malt syrup, honey, or maple syrup instead of refined sugars provides a more natural sweetness with a lower glycemic index, helping to stabilise blood sugar levels.

Light moist texture

These Vanilla Bean Cupcakes stand out for their light and fluffy texture. Unlike many gluten-free muffins that can be dense and heavy, these cupcakes achieve a soft, airy crumb thanks to the precise combination of ingredients.

Step-by-Step Instructions

Making these Vanilla Bean Cupcakes is straightforward. Start by creaming the butter and sugar until light and fluffy in a medium mixing bowl (you may need to scrape the sides of the bowl). Then, add the eggs one at a time, mixing well after each addition. Incorporate the vanilla extract or vanilla bean paste and then gradually add the dry ingredients to the wet ingredients. Pour the batter into cupcake liners in a cupcake pan and bake until golden brown. Allow them to cool before frosting. We have also included a Thermomix method too.

Great to make a day ahead

I usually like baked goodies straight out of the oven, but these are actually best eaten the next day, especially if you think you can taste the beans or egg. This makes them perfect for birthdays or celebrations because they are even more delicious the next day.

Customising your vanilla bean cupcakes

Feel free to get creative with these easy vanilla cupcakes. You can add mix-ins like chocolate chips or fresh berries to the batter for a fun twist. For a decorative touch, frost with your favourite icing or decorate with edible flowers. You can also experiment with different flavours (check out the variations below the recipe for some ideas).

Make one big cake

This recipe also makes a fabulous ‘big’ vanilla cake too. Perfect for birthday parties (it’s been my kids cake every year since they were little). One batch makes one cake. I generally make a double batch and bake two cakes and layer with cream or ganache in between.

Personal experience with vanilla bean cupcakes

These cupcakes have become a family favourite, especially for birthday celebrations and special events. Baking them together is a cherished tradition in our home, and they always receive rave reviews from friends and family. I love how versatile they areโ€”whether dressed up with fancy frosting or enjoyed plain, theyโ€™re always a hit.

Serving suggestions and how to store

Top these cupcakes with your favourite icing (lots of suggestions below the recipe), whether itโ€™s a rich vanilla buttercream or a light dusting of icing sugar. They store best in the fridge in an airtight container for up to 3 days. Or store in the freezer in an airtight container for a few months. These are so great for meal prep or packing fast nut-free school lunches.

Vary this to suit your dietary needs (and taste)

Check out the variations below the main recipe for tips on how to adapt it to your specific dietary needs. For a low-fructose option, use rice malt syrup, and for a coconut-free version, swap the coconut flour for almond meal. You can also go dairy-free by using ghee or coconut oil instead of butter. Mix up the flavours by adding lemon, lime, or orange zest, fresh blueberries, or even a square of dark chocolate in the centre for a fun twist!

For a delicious, easy to make vegan vanilla cupcake – use THIS recipe.

Or for more delicious, healthy and easy to make wholefood treats, click HERE.


Vanilla bean cupcakes with a light, fluffy texture and natural vanilla flavorโ€”perfect for any occasion.
Print Recipe
4.92 from 23 votes

Vanilla bean cupcakes

One of my most popular recipes, these Vanilla bean cupcakes are just delicious and you'd never guess they are made with beans. 
Prep Time10 minutes mins
Cook Time20 minutes mins
Total Time30 minutes mins
Course: Snack
Servings: 8 cupcakes

Ingredients

  • 425 g can cannellini beans -drained and rinsed well
  • 5 egg/s -large (or 6 small eggs, see note below)
  • 1 tbsp vanilla -powder, extract or essence
  • 50 g butter -softened at room temperature
  • 85 g rice malt syrup, honey or maple syrup (ยผ cup)
  • 40 g coconut flour please weigh this, as it really needs to be exact
  • ยผย  tsp sea salt
  • ยฝ tsp bicarbonate of soda
  • 1 tsp baking powder (gluten free)

Instructions

  • Preheat the oven to 180โ„ƒ/350ยฐF(fan forced).
  • In a powerful blender or food processor, puree the rinsed beans, eggs, and vanilla until very smooth and set aside.
  • Without rinsing your food processor, mix together the butter and honey or brown rice syrup until very well combined.
  • Add back the pureed bean/egg mix and mix until well combined.
  • Now add the coconut flour, sea salt, bicarbonate of soda and baking powder.  Mix until combined and spoon into paper-lined cupcake moulds immediately. The batter does have a slightly thick but airy consistency that is unusual if you've never worked with coconut flour before.
  • Bake for 20 minutes for large and 15 minutes for mini cupcakes, or until lightly brown on top and springy to touch (like a regular cake).
  • Cool and top with your preferred icing (recommendations below).

Thermomix Method

  • Preheat the oven to 180โ„ƒ.
  • Mix the beans, eggs, vanilla, butter and sweetener for 1 minute, speed 7.
  • Add the coconut flour, sea salt, bicarbonate of soda and baking powder and mix 10 seconds, speed 4.
  • As per above method.

Note

  • Don't scrimp on the eggs or let the batter sit for too long. Not enough eggs and delaying getting it in the oven will result in a much heavier batter and cake.
  • I usually like baked goodies straight out of the oven, but these are actually best eaten the next day, especially if you think you can taste the beans or egg. 

Store

  • They are best stored in the fridge and can also be frozen in an airtight container or snap-lock bag.

Notes

Low-fructose

Choose rice malt syrup as your sweetener (optional pinch of stevia if you like also).

Coconut-free

Substitute the coconut flour for 100 grams of almond meal (though now obviously not nut free). I have also substituted for 40 grams of wholemeal spelt flour with success (no longer gluten-free if you substitute with spelt).

Dairy-free

Substitute the butter with ghee or coconut oil.

Lemon or lime cupcakes

Add the zest of one large lemon or lime to the egg/bean mix.

Orange cupcakes

Add the zest of one large orange to the egg/bean mix.

Blueberry cupcakes

Add ยผย cup of fresh or defrosted blueberries, mixed through the batter very gently at the very end.

Chocolate chip

Add aย ยผ cup of dark chocolate chips (I love the Green and Blacks 85% cacao chocolate). As I'm a bit of a stooge when it comes to my kids eating chocolate, I often just push a square of chocolate into the middle or place on top of the cupcake (this also saves me the effort of icing)!

Icing suggestions

Remember to make sure the cupcakes are completely cold before icing.

Fructose-free vanilla icing (gluten free too)

50grams of butter, softened at room temperature
A pinch of pure stevia powder
1 tablespoonย brown rice syrup
1 tablespoonย vanilla bean powder
Beat together until light and fluffy.

Cream cheese icing

50 grams cream cheese or quark
20 grams butter, softened at room temperature
1 tablespoon brown rice syrup
1 teaspoonย vanilla
Beat together until light and fluffy.

Cashew nut cream (dairy and gluten free)

ยฝ cup raw cashew nuts
ยผ cup water
1 teaspoonย vanilla
1 tablespoonย brown rice syrup or maple syrup (optional)
Soak the cashews in water for 3-4 hours. Strain and then process with the rest of the ingredients until smooth. You can add more or less water to the nuts to achieve the desired consistency. If you aren't organised enough to soak the cashews, then boil them gently for 5 minutes, then process.

Vanilla cream

Carton cream whipped until light and fluffy
1 teaspoonย vanilla
Beat ingredients together and place on top of the cupcake. You can also slice the top of the cake off, top with cream and replace the cake top with a slice of strawberry (like a butterfly cake).
ย 

Nourishing Anzac Biscuit

April 19, 2013 | Healthy Lunchbox, After School Snacks, Baked Sweets

This healthy Anzac Biscuit recipe is a wholesome twist on the Aussie classic, packed with nutrient-dense ingredients that still offer the familiar, comforting taste. They’re easy to make, perfect for snacks or lunchboxes, and a great way to sneak in extra nutrition without compromising on flavour.

Health benefits

This Nourishing Anzac Biscuit recipe combines wholesome ingredients that offer numerous health benefits. The butter provides healthy fats essential for energy and nutrient absorption. Wholemeal spelt flour adds fibre and essential nutrients, supporting digestive health. Desiccated coconut and mixed seeds, such as sunflower, flax, and pumpkin seeds, offer a rich source of healthy fats, protein, and antioxidants. Rolled oats support the nervous system and provide soluble fibre for sustained energy. Ground cinnamon helps regulate blood sugar levels by improving insulin sensitivity and enhancing glucose metabolism. Together, these ingredients create a balanced, nutrient-dense biscuit that satisfies cravings while supporting overall well-being.ย 

Ingredients

The combination of oats, shredded coconut, butter and your choice of honey, rice malt maple syrup forms the base of these biscuits (instead of refined golden syrup). While additional ingredients like seeds and nuts are included for extra crunch and nourishment. Each ingredient plays a part in making this treat not only tasty but also more nutritious compared to the traditional version.

How to make this healthy Anzac biscuit recipe

Simply mix the dry ingredients in one bowl and the wet ingredients in another. Combine them, roll the dough into small balls, and bake until golden. The biscuits will have a lovely chewy texture with a hint of crunch on the outside, making them the perfect healthy indulgence.

Make sure they’re sweet enough

I recommend that you taste the uncooked batter to see if you think it is sweet enough before baking. If not, add the extra rapadura or brown sugar, dried fruit or even cacao nibs. You want to keep the sugar content as low as possible, but you also want your kids to like them enough to enjoy eating these delicious, nourishing treats.

Time-saving Tip

I use a lot of ground seeds in my baking. One, because my lunchbox treats need to be nut free and secondly because seeds are so amazingly nutritious. For example, pepitas are a rich source of zinc, a mineral that often assists fussy eaters. So instead of supplementing to improve their desire and palate for food, include pepitas where you can. My kids aren’t a fan of their flavour so I grind them. If you plan to use them this way, you can grind a small batch of one or a mixture of seeds to keep in the fridge in an airtight glass container (a jar is good).

Serving suggestions and how to store

Serve these biscuits with a cup of tea or as an on-the-go snack. They’re great in lunchboxes or stored in an airtight container for up to a week. You can also freeze them cooked or freeze the dough and bake fresh batches whenever the craving hits!

This healthy Anzac biscuit recipe is a great postpartum snack

This nourishing Anzac biscuit recipe is especially beneficial for postpartum mums, offering a mix of nutrients that support recovery, energy, and overall well-being. The rolled oats are rich in fibre and slow-releasing carbohydrates, providing sustained energy to help combat postpartum fatigue. Oats are also known to support milk production in breastfeeding mothers. The healthy fats from butter, seeds, and coconut contribute to hormone balance and brain health, which are crucial during the postpartum period. The inclusion of mixed seeds and wholemeal spelt flour adds protein, essential fatty acids, and important minerals like magnesium and zinc, which support tissue repair and immune function. Cinnamon helps regulate blood sugar levels, offering a steady energy supply without sharp spikes. Altogether, these biscuits provide a comforting, nutrient-dense snack that supports the unique needs of new mums.ย 

Vary this healthy Anzac biscuit recipe to suitย 

Check out the variations below the main recipe for tips on how to adapt this oatmeal cookie to your specific dietary needs. To make these gluten-free, simply swap the oats for certified gluten-free oats. For a nut-free version, omit the nuts and replace them with extra seeds. You can also replace butter with coconut oil to make these dairy-free, keeping them suitable for various dietary preferences.


For more delicious, healthy and easy to make wholefood treats, clickย HERE.

Healthy Anzac biscuits made with oats, coconut, and maple syrupโ€”crunchy and nourishing treat.
Print Recipe
4.69 from 48 votes

Nourishing Anzac biscuit

A delicious, quick and super nourishing take on the classic. This is one of the most popular sweet treats here at Well Nourished!
Prep Time15 minutes mins
Cook Time20 minutes mins
Total Time35 minutes mins
Course: Snack
Servings: 15 biscuits

Ingredients

  • 100 g butter
  • 85 g rice malt syrup or honey (ยผ cup)
  • 1 tsp bicarbonate of soda
  • 30 g coconut sugar or rapadura (ยผ cup) this is optional if you need extra sweetness
  • 60 g wholemealย speltย flour (ยฝ cup)ย 
  • 50 g desiccated coconut (ยฝ cup)
  • 115 g rolled oats (1ยผย cup) see gluten-free below
  • 70 g mixed seeds (ยฝ cup)ย ground (such as sunflower seeds, flax seeds and pepitas) or use LSA (using LSA means it is no longer nut free) or almond meal
  • 30 g sesame seeds (ยผ cup)
  • 1 tsp ground cinnamon

Optional extras

  • 1 tbsp dried fruit
  • 1 tsp dulse flakes
  • 1-2 tsp ground ginger
  • 1 tbsp cacao nibs

Instructions

  • Pre-heat the oven to 180โ„ƒ/350ยฐF (fan forced) and line a large biscuit tray with baking paper.
  • In a large pot, gently heat the butter and honey or rice syrup until melted (over a low heat). Remove from the heat. Add the bicarbonate of soda and mix very well. ย 
  • Add the rest of the ingredients to the pot, and mix until well combined. The mixture should feel wet and sticky but presses together. If it feels a bit dry, add a tiny bit of water to bring them together.
  • With wet hands squeeze the mixture into approximately golf sized balls, press between your palms to flatten slightly and place well apart on the baking tray (they spread).
  • Bake until golden (approximately 10-20 minutes).
  • The longer they are baked the crispier they become. So if you like a slightly chewy biscuit remove just as they start to brown. For a crunchy biscuit, leave a little longer. I also find the gluten-free version cooks quicker still.
  • Cool, undisturbed on the tray (they will harden as they cool).

Thermomix Method

  • First, grind your seeds, 10 seconds, speed 8. Set aside.
  • Now melt your butter and syrup/honey, 1 minute, temp. 90, speed 3.
  • Add the bicarb and mix 10 seconds, speed 3.
  • Add the remaining ingredients and mix approx. 20 seconds, reverse, interval speed until combined.
  • Roll and bake as per above method.

Store

  • Store in an airtight container in the fridge or freezer.

Notes

Gluten and grain-free

Replace the oats withย quinoa flakes (or millet flakes or rice flakes) and spelt flour with buckwheat or a gluten-free flour.ย You may have to adjust the amounts so that the mixture is sticky and moist but able to be squeezed into balls (with wet hands). Just keep adding more rolled grain and gluten-free flour until it feels right.

Dairy-free

Replace the butter with coconut oil (but they do loose the classic buttery ANZAC flavour). You may need to adjust the oil quantities slightly so the dough holds together.ย 

Vegan

Choose the dairy-free variation and rice malt syrup as your sweetener.

Coconut-free

Replace the coconut with more ground seeds.

Sesame-free

Replace the sesame seeds with sunflower seeds.

Fructose friendly

Choose rice malt syrup as yourย sweetenerย and omit the rapadura.

Make an Anzac slice

Press this mixture firmly into a small slice tin lined with baking paper. Allow to cool fully and chill in the fridge before slicing (to get a crumb free slice).

Chocolate chip Anzacs

If I know I have fussy guests for morning tea, I often press a piece of dark chocolate onto the top of the flattened biscuit dough. This usually gets fuss pots over the line!
ย 
ย 

I love to receive feedback - post yours in the comments below. Do you have an ANZAC day family tradition?

"I have made your nourishing Anzacs several times now and my grandmother wants me to write out the recipe for her...she's 87 and has been baking for over seven decades, so I think that's a huge compliment!" ย Rachael, QLD
  • <
  • Page 1
  • Interim pages omitted …
  • Page 17
  • Page 18
  • Page 19

Primary Sidebar

Join the community

Social Media

Join over 140,000 followers

Nourish Your Inbox

Nourish Your Inbox!

Christmas Meal Planning Ebook

Sign up today for your FREE:
โ€ข Chocolate Ebook
โ€ข Subscribers Only Special Offers
โ€ข Practical Health & Nutrition Tips
โ€ข New Whole Food Recipes

WN App

Join the Family

Join the Family

Join The Family

The Well Nourished Family Membership is your complete solution to your families health and wellbeing. With 1200+ whole food recipes and SO MUCH MORE. Join for a limited time for over 80% OFF!

JOIN & SAVE 80%

Upgrade Your Membership – Recipe Only

Health Programs & Courses – Public

Health Programs & Courses

Health Programs & Courses

Whether you’re looking for effortless meal creation, lunchbox inspiration or strategies to raise adventurous eaters, our expert-led resources will guide you every step of the way.

Find Out More

Programs and Courses – FAM only

Affiliate promo – public

Become an Affiliate

Looking to partner with a respected, Australian-run health and wellness brand to expand your reach and your income?

Find out More

Featured Lunchbox Ebook – Public

From the Shop

See More

Footer

Logos

Well Nourished HomepageWell Nourished

As featured on

Footer-social

Connect with us

  • About Well Nourished
  • Sitemap
  • Contact
  • Privacy Policy
  • Website Terms of Use
  • Affiliates

ยฉ Well Nourished 2026

A Firstnature site

Not feeling quite yourself?
If you're dealing with skin flares, gut issues, fatigue or joint pain, this five-minute quiz will help you understand what's actually driving it.
TAKE QUIZ

Rate This Recipe

Your vote:


A rating is required
A name is required
An email is required