• Skip to primary navigation
  • Skip to main content
  • Skip to primary sidebar
  • Skip to footer

Well Nourished HomepageWell Nourished

Simple recipes, whole foods, inspired health

  • Family Members
    • Recipe Filter
    • Quick Access Shopping List
    • Membership Tutorials
    • How to be Well Nourished
    • About Well Nourished
    • Where to Shop and what to Buy
    • FAQ
  • Family Members
    • Meal Plans
      • G’s Spring Meal Plan
      • G’s Autumn Meal Plan
      • My Weekly Planner
      • Quick Access Shopping List
      • Ingredient Alert
      • Prep Ahead Plans
      • Hosting Event Plans
      • Wellness & Health Plans
    • Recipe Filter
    • Courses & Community
    • Tips for family’s
      • Getting Kids On-board
      • Planning for Picky Eaters
      • New to Meal Planning
      • Meal Planning Tips & Tricks
    • Nourishing Resources
    • Members Offers
    • What’s New This Week
    • Events
    • Membership Tutorials
    • About Well Nourished
    • FAQ
  • Recipes
    • Meals
      • 30 Minute Meals
      • Budget Friendly
      • Chicken & Turkey
      • Fish & Seafood
      • Freezable Meals
      • Make-ahead Meals
      • Meat
      • Pasta and Noodles
      • Pork recipes
      • Slow Cooked
      • Vegetarian
    • Sweet Recipes
      • Baked Sweets
      • Desserts
      • Ice-blocks
      • No-bake Sweets
    • Breakfast
    • Healthy Lunchbox
    • After School Snacks
    • Savoury Snacks
    • Sides & Salads
      • Salads
      • Side Dishes
    • Soups
    • Drinks & Smoothies
    • Dips
    • Holidays & Entertaining
    • Sauces & Dressings
    • Sourdough Baking
    • Fermenting
    • Staples
    • Members only
    • Members only
  • Shop
    • Membership and Programs
    • Ebooks
    • Free Stuff
  • Affiliates
  • About
    • About Well Nourished
    • Testimonials
    • Join the Family
    • FAQ
  • Resources
    • Find a Practitioner
    • Find whole food
      • ACT
      • NSW
      • NT
      • SA
      • QLD
      • TAS
      • VIC
      • WA
    • Products and Services I Value
    • Whole foods pantry list
    • Ingredients Glossary
  • Wellness Hub
    • Inflammation
    • Perimenopause & Menopause
    • Healthy Kids
      • Healthy Baby
      • Healthy Toddler
      • Healthy Child
      • Immune support for kids
      • Digestion & Food Allergies
      • Healthy Lunchboxes
    • Budgeting & Planning
    • Digestion & Intolerance
    • Immune Health
    • Food as Medicine
    • Foods to Avoid
    • Healthy Habits
    • Sugar
    • Carbs, Protein, Fats
      • Carbohydrates
      • Fats
      • Protein
    • Healthy Food Choices
    • Healthy Home
    • Stress & Mood Disorders
    • Healthy Mind
    • Maternal health
    • Health Challenges
  • Login
    • Well Nourished Family
    • Courses & Community
    • Affiliate Login
  • My account

lowfructose

Pumpkin Lasagne (with lots of twists)

June 4, 2015 | Budget Friendly, Make-ahead Meals, Pasta and Noodles, Freezable Meals, Vegetarian

My kids really don’t like pumpkin by itself (baked or steamed) – but they love it in soups (my favourite four recipes here) or in a lasagne or bake.  So today I thought I’d share my veggie packed, creamy Pumpkin Lasagne.

This pumpkin lasagne is packed with layers of flavour, combining roasted veggies, spinach, feta, and a rich tomato sauce. It’s a delicious, nutrient-dense twist on the classic lasagne, perfect for a cozy family dinner, and easily adaptable for various dietary preferences. This is a really versatile recipe, so customise it to suit your family.

Health Benefits

This lasagne is a fibre rich, supercharged veggie bonanza, including lots of different coloured vegetables. The hero of this dish – pumpkin, is a rich source of antioxidants especially vitamin A and many other vitamins, minerals and protective phytochemicals. With the option to go gluten-free, dairy-free, or grain-free, this lasagne is a nutrient-rich meal that can suit almost any dietary need.

Ingredients

This pumpkin lasagne recipe features a roasted pumpkin and vegetable base, mixed with quark or ricotta, spinach blended with feta, and a simple tomato layer. Whether you’re using fresh lasagne sheets or zucchini ribbons, you’ll layer up for a wholesome and hearty dish.

How to make this Pumpkin Lasagne

Start by roasting the pumpkin, carrots, cauliflower, onion, and cloves garlic until soft, then blend into a smooth puree. Sauté spinach, onion, and garlic, blend with feta, and then begin layering your lasagne with pasta or zucchini, alternating between the pumpkin and spinach mixture. Top with tomatoes and parmesan before baking.

If you own a Thermomix, we’ve also included Thermomix instructions for this recipe.

Serving suggestions and how to store

Serve your pumpkin lasagna with a fresh green salad for added crunch. If you want perfect slices, chill it first, slice and then reheat when needed. Store leftovers in an airtight container in the refrigerator or freezer for easy reheating.

Vary this pumpkin lasagne to suit your dietary needs

To make this dairy-free, use nutritional yeast instead of parmesan, and swap quark and feta with cashew nuts. For a gluten- or grain-free option, choose gluten-free pasta sheets or use zucchini ribbons. You can also make this egg-free or vegan by following the suggested swaps!

Check out the variations below the main recipe for tips on how to adapt it to your specific dietary needs.

Explore more delicious, easy to make vegetarian meals HERE.

Or a good variety of lasagne recipes HERE.
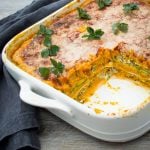
Pumpkin lasagne - Pumpkin Lasagne (with lots of twists) - this vegetable loaded lasagne is quick and easy to make. Includes variations for vegan, dairy, egg and gluten-free.
Print Recipe
4.79 from 56 votes

Pumpkin Lasagne (with lots of twists)

My favourite vegetarian meal, this Pumpkin Lasagne is a plant powered, delicious delight. Even though it has a few layers, it really is simple to make and worth every minute of prep. 
Prep Time20 minutes mins
Cook Time1 hour hr 10 minutes mins
Total Time1 hour hr 30 minutes mins
Course: Main Course
Servings: 6

Ingredients

Pumpkin layer

  • 1 kg pumpkin (butternut or Jap) peeled and roughly sliced
  • 2 carrot/s (large) roughly cut
  • 200 g cauliflower (1½ cups approx.) florets broken apart
  • 1 onion/s -peeled and sliced
  • 2 clove/s garlic -peeled and sliced
  • 1 tsp sea salt - or to taste
  • ground black pepper -to taste
  • 50 g butter, ghee or olive oil -melted
  • 120 g quark or ricotta cheese (½ cup)
  • 2 egg/s
  • 100 g parmesan cheese (1 cup) finely grated (though only half of this will go in the pumpkin puree, the rest is for the top)

Spinach layer

  • 50 g butter, ghee or olive oil -melted
  • 1 onion/s (large) peeled and diced
  • 1 clove/s garlic -peeled and crushed
  • 300 g baby spinach -washed
  • 100 g feta cheese -or goats feta

Tomato layer

  • 400 g diced tinned tomatoes
  • 1 tbsp dried oregano

Pasta layer

  • Fresh lasagne sheets - regular or gluten-free (or for grain-free, use a large zucchini, cut into ribbons) I have also layered both to increase the veggie content.
Metric - US Customary

Instructions

  • Preheat your oven to 180°C/350°F (fan-forced).
  • In a baking tray combine the pumpkin, carrots, cauliflower, onion, garlic and fat of your choice and toss together. I use the baking dish I plan to bake the final lasagne in (saves on washing up).
  • Bake for approximately 30 minutes or until the vegetables are soft (cooked through but not overcooked).
  • Whilst they are baking make your spinach layer by sautéing the onion and garlic in the pan with a little butter, ghee or coconut oil over a low heat until they start to soften (but not brown). Add the spinach and cook for a few minutes until the spinach wilts. Remove from the heat and place in a food processor (include any water from the wilting) with the feta or goat feta, and puree well. Set aside.
  • Once your vegetables are baked, allow to cool a little and then puree in a food processor with the quark or ricotta, eggs, half the parmesan and more seasoning if required. The consistency should be just runny enough to pour (so the lasagne doesn't end up too dry as the pasta sucks up moisture when cooking). If it is very thick add a little splash of water and process again.
  • Mix the oregano in with the tomatoes (I just add it to the can and gently mix).
  • Now arrange the lasagne using your chosen sheets of pasta or ribbons of zucchini.
  • Grease the baking dish and layer pasta (or zucchini), followed by a third of the pumpkin, pasta, half the spinach and repeat. Finish with the last third of pumpkin puree, followed by all of the tomatoes and top with the remaining parmesan cheese.
  • Bake for approximately 30-40 minutes or until brown on top and the pasta is cooked through.
  • Lasagne is always easiest to slice once chilled. If it is important to have nice neat slices, chill and then slice and then re-heat. Otherwise, serve immediately.

Thermomix Method

  • Grate the parmesan (10 seconds, speed 8). Set aside.
  • Follow step 1, 2 and 3 above.
  • For the spinach layer, chop the onion and garlic (3 seconds, speed 5). Scrape down the sides and add the fat of your choice (cook 3 minutes, temp 80, speed 1).
  • Add the spinach (cook 3 minutes, temp 90, speed 2).
  • Finally, add the feta and puree (10 seconds, speed 5). Set aside.
  • Without washing the bowl, puree your pumpkin mix (20 seconds, speed 5). Add half of the parmesan the quark, eggs and puree again (20 seconds, speed 6). Taste and season again if required.
  • Go to step 6 above, to finish.

Time saving tip

  • If you're not bothered about layers, you can combine the spinach and pumpkin to save time. Just add the onion and garlic (from the spinach layer) in the baking dish with the pumpkin/veggies and then puree all together with the spinach (raw is fine) and cheeses or DF options)

Serve

  • With a leafy green salad.

Make ahead

  • Re-heat in a low oven until just hot.

Store

  • Store in an airtight container in the fridge. I store it in a rectangle shaped oven proof glass pyrex or glass lock container so I can simply remove the lid and reheat in the storage container (saves washing up).
  • Can also be frozen.

Notes

Dairy-free

Sub the parmesan with the same amount of nutritional yeast and a good pinch of sea salt. Sub the quark for  ½ cup of cashew nuts (preferably soaked and throw them in with the vegetables to toast) and the feta for ¼ cup of cashew nuts (soaked) and a good pinch of salt. Top with chopped walnuts (and the other half of the nutritional yeast) instead of the parmesan.

Gluten and grain-free

Use gluten-free pasta sheets or for grain-free use zucchini. I often alternate pasta/zucchini.

Egg-free

Omit the eggs, it is still delicious, just not as firm. The lasagne in the photo is egg-free.

Vegan

Combine dairy-free and egg-free versions above.

Onion-free

Replace the onion with one large bulb of fennel, finely diced (and divided between the two layers).

Garlic-free

Replace the garlic with a teaspoon of cumin and a pinch of cayenne pepper. 


I'd love to hear how you like this family favourite. Post a comment and let me know (you could also simply rate the recipe).

Rhubarb Ginger Crumble

May 28, 2015 | Baked Sweets, Desserts

Rhubarb is one of those fruits (actually technically a vegetable), you either love or hate. I’m grateful my whole family love it as it is one of those nostalgic foods that takes me back to cooking with my nan. Though she was a whole lot more traditional in her use of it, I like to pair it with slightly less conventional flavours like ginger, coconut and almonds – like in this delicious rhubarb ginger crumble .

Like so many of my recipes, this is one is incredibly versatile, you could eat it for breakfast, or have it for dessert. It’s one of my most favourite flavour combos and nourishing to boot!

Health Benefits

Rhubarb is a high fibre vegetable and in Chinese herbal medicine, it is a rhizome used for supporting sluggish digestion (especially treating constipation and abdominal bloating). It has a very impressive nutrient profile including vitamin A, C, B complex and K, as well as being a fabulous source of many minerals. It’s one of the best plant sources of calcium (though its oxalate content does affect absorption). It is also a wonderful source of many protective antioxidants.

Ginger is awesome also for supporting a healthy digestion.

Ingredients

You’ll need fresh chopped rhubarb and for the crumble mixture coconut sugar or rapadura, rolled oats, almond meal, chopped raw almonds, shredded coconut, butter, ground cinnamon. For the syrup mix rice malt syrup (or honey) and fresh ginger for this scrumptious treat.

How to make this rhubarb crumble recipe

To whip up this easy crumble, preheat your oven, mix the syrup ingredients, toss the rhubarb with the syrup, and arrange it on a tray. For the crumble topping, combine the dry ingredients and rub in the cubes of butter before baking both the rhubarb and crumble until golden brown and delicious.

Serving suggestions and how to store

Serve this crumble warm with a generous dollop of sour cream, Greek yoghurt, or coconut yoghurt for a creamy contrast. Or for a delicious dessert serve with vanilla ice cream. Store leftovers in an airtight container in the fridge, and enjoy them as a quick snack or dessert.

Vary this rhubarb ginger crumble to suit

This rhubarb ginger crumble recipe is incredibly adaptable! For a low-fructose version, swap coconut sugar for rice malt syrup. You can easily make it grain-free by using rolled quinoa instead of oats. For dairy-free options, simply replace the butter with coconut oil and serve with coconut yoghurt. Vegan options are also available by substituting sweeteners and fats accordingly. Don’t like ginger? Just use extra cinnamon or cardamom instead!

Take a look at the variations (below the main recipe) for suggestions to alter the recipe to suit your specific dietary requirements.

For more delicious, healthy and easy to make wholefood treats, click HERE.

Rhubarb Ginger Crumble - this simple, nourishing crumble is a delicious breakfast or dessert. The recipe includes gluten-free variations.
Print Recipe
5 from 3 votes

Rhubarb Ginger Crumble

This delightful rhubarb ginger crumble is the perfect balance of tart and sweet. Not only is it a comforting dessert, but it's also versatile, allowing you to cater to various dietary needs with a few simple tweaks.
Prep Time10 minutes mins
Cook Time15 minutes mins
Total Time25 minutes mins
Course: Dessert
Servings: 4

Ingredients

  • 1 bunch/s rhubarb -leaves trimmed and cut to approx. 15cm lengths

Crumble

  • 30 g coconut sugar or rapadura (2 tablespoons )
  • 30 g rolled oats (¼ cup) see below for gluten & grain-free
  • 25 g almond meal (¼ cup)
  • 35 g raw almonds (¼ cup) chopped or almond flakes
  • 25 g shredded or desiccated coconut (¼ cup)
  • 50 g butter -at room temperature
  • ½ tsp ground cinnamon

Ginger syrup

  • 85 g rice malt syrup, honey or maple syrup (¼ cup)
  • 1 tbsp hot water
  • 1 tbsp ginger root -freshly grated or 1 tsp of ground ginger

Instructions

  • Preheat your oven to 180℃/350°F (fan forced). Line two small trays with baking paper.
  • In a small jug, mix the syrup ingredients until well combined.
  • Toss the rhubarb with the syrup and arrange in a single layer on one of the trays.
  • In a large mixing bowl combine all of the crumble ingredients and rub the butter in the dried ingredients until well combined. Alternatively, pulse in a food processor.
  • Arrange the crumble in a thin layer on the second lined baking tray.
  • Bake the rhubarb and crumble in the oven for approx. 15 minutes or until the rhubarb is just cooked through.
  • Divide the rhubarb between serving plates, spoon over the crumble and serve immediately with sour cream, full-fat natural or Greek yoghurt or coconut yoghurt.

Store

  • Store in an airtight container in the fridge.

Notes

Low-fructose

Replace the rapadura or coconut sugar with rice malt syrup (and choose RMS for the ginger syrup).

Grain and gluten-free

Replace the oats with rolled quinoa (flakes). This is one of my favourite crumble mixes.

Dairy-free

Sub the butter with coconut oil (or ghee if you tolerate it) and serve with coconut yoghurt or cashew cream.

Vegan

Choose rice malt or maple syrup as your sweetener. Sub the butter with coconut oil and serve with coconut yoghurt or cashew cream.

Nut-free

Replace the almond meal with desiccated coconut and the almonds with sunflower seeds (or shredded coconut).

Coconut-free

Replace the coconut with more nuts or oats.

Don't like ginger?

Then substitute it with cinnamon.

Apple Rhubarb crumble

For a pie type of crumble, dice the rhubarb (1-2cm), double the syrup and add in two large Granny Smith apples, peeled and diced. Pop in a baking dish and top with the crumble (I also double the quantity of crumble mix). Bake for approx. 30-40 minutes or until the fruit is cooked and the crumble browned. If your crumble has browned but your fruit isn't cooked through, cover with foil and continue to bake.
 

I'd love to hear how you like this flavour combo. Post a comment or rate this recipe.

Simple Sweet Corn Soup (a nourishing twist on this favourite)

May 21, 2015 | Budget Friendly, Make-ahead Meals, Freezable Meals, Vegetarian, Soups

As a kid, one of my favourite takeaway meals was Chinese. It was the 70’s and Chinese food was as fancy as it got in my young world. Even though it is probably my least favourite cuisine nowadays, one dish that conjures up all sorts of childhood memories is this nourishing Sweet corn Soup.

Health benefits

This soup is loaded with nutrition. The bone broth, is seriously a wonderful ‘super’ food, read more about its healing potential and benefits here. The ginger and garlic are warming, immune boosting herbs. The corn is a wonderful source of fibre, antioxidants and a long list of plant-based nutrients. The egg lends a good dose of protein.

Ingredients

This sweet corn soup recipe features chicken stock or bone broth as the base, complemented by ginger, garlic, and fresh corn for natural sweetness. Enhance the flavour with tamari, and add a beaten egg for richness. The cornflour (cornstarch) thickens the soup. Spring onions and white pepper provide a fresh finish, while optional ingredients like chicken, shiitake mushrooms, or fresh coriander can elevate the dish further.

How to make healthy sweet corn soup

Start by simmering the chicken stock with ginger, garlic, and sweet corn kernels or about 5 minutes. Stir in the tamari and adjust the seasoning to taste. If you prefer a thicker soup, add a cornflour mixture. Create a whirlpool in the soup and slowly drizzle in the beaten egg to form ribbons.

Serving suggestions and how to store

Divide the hot soup between two bowls, garnished with sliced spring onions, a sprinkle of white pepper, and optional fresh coriander (cilantro) or red chilli for a bit of heat. This soup can be stored in an airtight container in the fridge for a few days or frozen for later enjoyment.

Vary this sweet corn soup to suit

For a vegetarian option, simply swap the chicken stock for vegetable stock. Feel free to add more vegetables like carrots, peas, or spinach to boost the nutrient content. To make the soup soy-free, replace tamari with liquid or coconut aminos, and if you’re looking for an egg-free version, consider trying my Asian Noodle Soup instead.

Take a look at the variations (below the main recipe) for suggestions to alter the recipe to suit many specific dietary requirements.

More delicious, nourishing soup recipes HERE.

Simple Sweet Corn Soup (a nourishing twist on this favourite) -this is my version of the Chinese take-away favourite. Gluten, grain, dairy free, vegetarian
Print Recipe
5 from 5 votes

Simple Sweet Corn Soup (a nourishing twist on this favourite)

A nourishing twist on the classic, this Sweet Corn Soup is really easy to make and very nutritious, especially if you add in a veggie boost. 
Prep Time10 minutes mins
Cook Time10 minutes mins
Total Time20 minutes mins
Course: Soup
Cuisine: Asian
Servings: 2

Ingredients

  • 1 ltr chicken broth or stock (4 cups)
  • 1 tsp ginger root - finely grated 
  • 3 clove/s garlic - finely grated  or minced
  • 1 cob/s corn - kernels cut from the cob (as is, or minced in a food processor)
  • 1 tbsp tamari
  • 1 egg/s - beaten
  • 4 spring onion/s - sliced thinly
  • ¼ tsp white pepper - to taste
  • Sea salt - to taste
  • 1 tsp cornflour - mixed with 2 tablespoons of water (or arrowroot)

Optional extras

  • Chicken - cooked and diced or shredded (for more protein or to make this a Chicken and Sweet Corn Soup)
  • 50 g shiitake mushrooms - sliced (great for an immune boost)
  • ½ bunch/s fresh coriander leaves - chopped (great detoxifier)
  • 1 red chilli/s - finely sliced

Instructions

  • In a small pot, place your broth, ginger, garlic and corn (plus optional chicken or mushrooms) and simmer gently for 5 minutes.
  • Stir in the tamari, taste and add more sea salt if required. If you would like a thicker soup, add the cornflower mix at this point and stir through well. Personally, I'm happy with a clear soup.
  • With the soup at a slow simmer, stir to make a whirlpool and slowly drizzle the egg so ribbons form.

Serve

  • Serve with the spring onions, white pepper (and optional coriander or red chilli).

Make-ahead

  • Re-heat in a pot over a low heat until just hot.

Store

  • Store in an airtight container in the fridge or freezer.

Notes

Vegetarian

Use vegetable stock as your base.

Add more vegetables

I'm always up for more vegetables - you can really add in whatever vegetables take your fancy.

Soy-free

Replace the tamari with liquid or coconut aminos.

Egg-free

Give my Asian Noodle Soup ago, recipe here.


Love to hear what you think of this tasty, simple soup. Post a comment below.

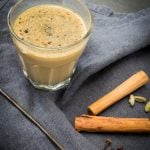
Immune Supportive Chai Tea Latte

May 13, 2015 | Drinks & Smoothies

I think it’s wonderful how food memories are formed – I have many but one of my most vivid is for Chai Tea Latte (the fancy ‘cafe’ name) given to India’s national beverage – Masala Chai, or just Chai.

My husband and I spent over 6 months living in our most favourite country (besides Australia of course) and definitely sampled our fair share of Chai. Almost every town we visited claimed ‘the best chai in India’ – though some of the best we had were from the chai wallah pacing the length of the trains (at all hours) with an urn on his head crying ‘chaiiiiyyyy, chaiiiyyyy….’ over and over. It was almost always sold in a small terracotta cup which when done, you threw out of the train window or smashed on the pathway (not a takeaway or foam cup in sight).

Like coffee, there was good and the not so good. Some chai brews were SO sweet that my husband called them ‘hot soft drink’.

The origins of Chai tea is steeped in Indian history and the ancient medicinal philosophy of Ayurveda. So traditionally, each family would have their own recipe based on the constitutions of family members. The blend of spices contains medicinal and healing properties such as relaxing the digestive tract, elevating the metabolism, and increasing waste and toxin excretion.

So on my stove top, far removed from the most fascinating and diverse country I have ever visited, I thought I’d introduce you to my recipe for a delicious, healing chai – and one of my most favourite hot drinks. This is a far cry from a chai tea bag or the flavoured syrups used in coffee shops in Australia – way more delicious and actually healing. It is also something my kids really love and something I believe helps to keep us well through winter.

Why is it healthy?

The spices are all wonderfully supportive to digestion and the respiratory tract so perfect for winter sickness:
Cloves – anti-oxidant, anti-inflammatory, anti-parasitic, calming and soothing to the gut and lungs
Cinnamon – anti-oxidant, anti-inflammatory, anti-microbial, improves circulation, balances blood-sugar levels
Cardamon – anti-oxidant, anti-inflammatory, anti-microbial, improves circulation, calming and soothing to the gut
Ginger – improves circulation, anti-inflammatory especially to the gut, respiratory and muscular-skeletal systems
Turmeric – powerful anti-oxidant, anti-inflammatory, anti-microbial and supports liver function (and, therefore, digestion)
Coconut oil – anti-microbial and offers immune support. It also helps to support the assimilation of the fat-soluble nutrients in the spices.
Vanilla –  anti-oxidant and anti-inflammatory

Ingredients

The chai latte is made with a combination of warming spices like cinnamon, cloves, cardamom, and ginger. You can customise it with your favourite tea (black or rooibos), and enhance the flavour with optional coconut oil or ghee for extra creaminess and health benefits. Sweeten with rice malt syrup or raw honey.

How to make Immunity Chai Latte

Simmer your choice of milk, spices, and ginger in a small pot for about 5 minutes. Add the tea bag and let it steep for a few minutes longer before straining the mixture into a cup. Sweeten with rice malt syrup or honey, and stir in optional coconut oil, ghee, or vanilla for an extra boost of flavour and nutrition.

Serving suggestions and how to store

Enjoy your chai tea latte fresh from the pot, garnished with a sprinkle of cinnamon or turmeric if desired. It’s best served immediately, but if you need to store it, refrigerate the mixture without the tea bag and reheat gently when ready to serve.

Vary this to suit your dietary needs

For a dairy-free version, substitute almond or coconut milk. You can also choose to sweeten the latte with rice malt syrup for a fructose-friendly option, and for those sensitive to caffeine, rooibos tea is a wonderful alternative to black or green tea.

Take a look at the variations (below the main recipe) for suggestions to alter the recipe to suit your specific dietary requirements.

Explore more healthy drink recipe HERE.

I share my favourite, easy to make Immune Supportive Chai Tea Latte recipe, full of health benefits to keep you well this winter.
Print Recipe
5 from 6 votes

Immune Supportive Chai Tea Latte

This Immune Supportive Chai Tea Latte is the perfect warming drink, packed with spices known for their immune-supportive properties. With the option to use a variety of teas, you can make this soothing blend to your taste, whether you prefer caffeine-free rooibos or traditional black tea.
Prep Time5 minutes mins
Cook Time5 minutes mins
Total Time10 minutes mins
Course: Drinks
Servings: 1

Ingredients

  • 250 ml milk (of choice) (1 cup)
  • 2 clove/s
  • ½ cinnamon quill
  • 3 cardamom pods -bruised by pressing with a knife or fork handle
  • 2 slice/s ginger root
  • 1 tea bag -fair-trade black, white or green tea or rooibos tea for caffeine-free*
  • ¼ tsp ground turmeric (or a slice of fresh root if you have it, optional but strongly recommended
  • 1 tsp coconut oil - or ghee (optional)
  • ½ tsp vanilla - powder, extract or essence (optional)
  • 1 tsp rice malt syrup or honey - to taste
  • *Rooibos tea is available from the tea aisle of supermarkets or health food stores. It is what I chose mostly (I'm a bit caffeine sensitive), always my choice for my kids.

Instructions

  • In a small pot, place your milk, cloves, cinnamon stick, cardamom pods and ginger and bring to a very low simmer for 5 minutes. If you are using the fresh root of turmeric, add this now too.
  • Add the tea bag and continue to simmer very gently for a few more minutes.
  • I just use a spoon to hold the solids aside as I pour the delicious liquid into a cup to enjoy.
  • Sweeten to taste and mix in the optional turmeric powder, coconut oil, ghee and vanilla powder.

Notes

Dairy-free and vegan

Substitute the milk for either almond milk (home made is best, otherwise choose a vegetable oil and sugar-free brand). You could also use a mix of almond milk and coconut milk for a creamier chai.

Fructose-friendly

Sweeten with rice malt syrup.

Coconut-free

Replace the coconut oil with ghee or just leave it out.
 

How do you like my real chai? Post a comment or rate this recipe. 

Download your FREE Immune Health Plan ebook – A practical guide filled with simple tips to help support your immune system so you and your family stay fighting fit this winter.

Healthy Baked Pancakes

May 7, 2015 | Breakfast, Baked Sweets

My family loves pancakes – lets face it, the batter is easy to whip-up. But it’s a real pain to stand over the stove flipping pancakes so that they are cooked just right, especially when you are making them for a big group. Because I love a shortcut, I’ve been working on a batter that bakes well and these Healthy Baked Pancakes are what I’ve come up with! Just in time for Mother’s Day these simple pancakes are full of nutrition.

Why are they healthy?

I’ve chosen to make the main batter gluten-free, grain-free, dairy-free and refined sugar-free (see ‘variations’ below for alternatives to suit your specific dietary requirements). So the almond meal and buckwheat flour base combined with the eggs, means they are a high protein pancake with a nice dose of essential fats from the almonds. The cinnamon helps to stabilise your blood sugars and more fibre and goodness from the apple.

Ingredients

You’ll need Granny Smith apples, eggs, coconut milk, coconut sugar, vanilla extract, almond meal, and buckwheat flour. The apples create a sweet, spiced base with a hint of cinnamon, while the pancake batter is light and fluffy with a touch of vanilla and apple cider vinegar for a nice lift.

How to make healthy baked pancakes

Start by melting butter or coconut oil in a cast-iron pan, then layer thinly sliced apples on the bottom and sprinkle with cinnamon and sugar. Blend the pancake batter in a food processor or blender or whisk in a large mixing bowl, pour it over the apples, and bake until set and golden brown. Once done, turn it out onto a plate, slice, and enjoy!

If you own a Thermomix, we’ve also included Thermomix instructions for this recipe.

Serving suggestions and how to store

Serve this baked pancake recipe with a dollop of yogurt or crème fraîche and drizzle with maple syrup for extra sweetness. Leftovers can be stored in an airtight container in the fridge for a quick, delicious breakfast the next day.

Vary these healthy baked pancakes to suit

To make this dish dairy-free, use coconut oil and coconut milk. For a nut-free option, substitute the almond meal with spelt or whole wheat flour. You can also swap the apples for other fruits like pears, strawberries, raspberries or bananas, depending on your preference.

For more pancake recipe inspiration, browse our recipes HERE.

Healthy Baked Pancakes - these are so much simpler & quicker than regular pancakes. Refined sugar free, gluten & dairy-free + thermomix method
Print Recipe
5 from 7 votes

Healthy Baked Pancakes

I love pancakes but I don't like standing over a stove and flipping them. So for the lazy cooks amongst us, this Healthy Baked Pancakes not only tastes amazing, but it is much quicker and easier to make.
Prep Time10 minutes mins
Cook Time20 minutes mins
Total Time30 minutes mins
Course: Breakfast, Dessert
Servings: 4

Ingredients

  • 2 Granny Smith apple/s -peeled, cored and sliced very thinly
  • 4 tbsp butter, ghee or coconut oil -depending upon the size of your pan, you need a good covering of fat.
  • 3 egg/s
  • 270 ml canned coconut milk (you could also use full-fat milk)
  • 3 tbsp coconut sugar or rapadura
  • 1 tsp apple cider vinegar (or lemon juice)
  • 1 tsp vanilla -powder, extract or essence
  • 1 tsp ground cinnamon (plus extra over the apple base)
  • ½ tsp sea salt
  • ¼ tsp bicarbonate of soda
  • 120 g almond meal (1 cup)
  • 60 g buckwheat flour (½ cup)

* you can just use straight almond meal but I prefer mixed with buckwheat

Serve

  • 250 g natural, Greek or coconut yoghurt (1 cup approx.)
  • maple syrup (to serve)

Instructions

  • Preheat your oven to 180℃/350℉ (fan-forced).
  • In an oven-proof pan (I used cast iron approx. 30cm) or non-stick baking dish, melt the butter, ghee or coconut oil so that it coats the base of the pan or dish well.
  • Arrange the apples to cover the base of the pan in a single layer. Sprinkle a little cinnamon over the apples and 1 tablespoon of the coconut sugar.
  • In a blender or food processor, combine the eggs, milk, remaining sugar, vinegar, vanilla, cinnamon, sea salt, bicarbonate of soda and mix until well combined. 
  • Add the flour and mix until well combined and all of the flour is incorporated. 
  • Pour over the apple and bake in your preheated oven for 20 minutes or until the pancake is set in the middle.
  • Turn out onto a plate, slice into pieces and enjoy with your favourite topping.

Thermomix Method

  • Start by grinding your almonds/buckwheat if you need to. I ground in total 60g of buckwheat and 120g of almond meal for 12 seconds, speed 8. Set aside.
  • In an oven-proof pan or non-stick (I used cast iron) baking dish, melt the butter so that it coats the base of the pan or dish well.
  • Arrange the apples to cover the base of the pan in a single layer. Sprinkle a little cinnamon over the apples and 1 tablespoon of the coconut sugar.
  • In your TMX bowl, combine the eggs, milk, remaining sugar, vinegar, vanilla, cinnamon, sea salt, bicarbonate of soda and mix 30 seconds, speed 4.
  • Add the flour and mix 10 seconds, speed 4.
  • Pour over the apple and bake in your preheated oven for 20 minutes or until the pancake is set in the middle.
  • Turn out onto a plate, slice into pieces and enjoy with your favourite topping.

Serve

  • With full-fat natural or coconut yoghurt, cream or sour cream and your favourite syrup.

Store

  • Store in an airtight container in the fridge.

Notes

Fructose-friendly

Replace the coconut sugar or rapadura with rice malt syrup and chose a low-fructose fruit (like blueberries).

Dairy-free

Choose either ghee or coconut-oil to coat your pan and coconut milk for the batter.

Nut-free (spelt flour version)

You can directly replace the grain-free flour for spelt flour or whole-wheat flour if you'd prefer.

Coconut-free

Replace the coconut sugar with rapadura and the coconut milk with the milk of your choice.

Another fruit?

Entirely possible - replace the apple with sliced Beurre Bosc Pears and add a sprinkle of ginger powder over the fruit. Berries, banana, rhubarb, stone fruit or even pineapple is delicious.

Boost the protein

Add in 2 scoops of whey or collagen protein powder into the batter. I love using this collagen protein - it’s flavourless, so it works beautifully across all kinds of recipes without altering the taste.


I love the simplicity of baking one big pancake, how about you? Share your comments below or rate this recipe.

Winter Sweet Potato Salad

April 30, 2015 | Budget Friendly, Make-ahead Meals, Vegetarian, Salads

Come winter time, I love to continue to eat salads as leafy greens are in season and I believe nature has given us an abundance of them for a reason (to keep us well through the sneezing season, for more on that click here). However I always ‘warm’ them up by adding cooked vegetables, nuts, seeds and most importantly warming aromatic herbs and spices. So I give you this Winter Sweet Potato Salad as a beautiful, nourishing addition to your winter salad list with loads of lovely textures and flavours.

Health benefits

Sweet potatoes are rich in beta-carotene, fibre, and antioxidants, while chickpeas add a good dose of plant-based protein and fibre. The leafy greens boost the vitamin and mineral content, making this salad a well-balanced meal.

Ingredients

For this sweet potato salad recipe you’ll need sweet potatoes, chickpeas, leafy greens like watercress, baby spinach, kale or rocket (arugula), and almonds for some crunch. A delicious dressing made with olive oil, lemon juice, and a hint of syrup ties it all together.

How to make roasted sweet potato salad

Roast the sweet potatoes on a baking sheet with almonds and garlic in a cinnamon-infused oil until tender. Meanwhile, sauté chickpeas with warming spices like cumin, cinnamon, and turmeric. Toss the leafy greens in a large bowl with a lemony dressing, and top with the roasted sweet potatoes, almonds, and chickpeas for a hearty salad.

Serving suggestions and how to store

This sweet potato salad is best served slightly warm or at room temperature, making it great for meal prep. Store any leftovers in an airtight container in the fridge, and toss with dressing just before serving to keep the greens fresh.

Vary this sweet potato salad recipe to suit 

For a nut-free option, swap the almonds with sunflower seeds or pumpkin seeds or any other nut (like pecans or walnuts). If you’re avoiding legumes, replace the chickpeas with cooked quinoa. You can also make it vegan by using olive oil instead of ghee or butter. For a more filling meal, add cooked quinoa, shredded chicken, or tuna. Or add in any other veggies you like, like avocado or red onion. Feta cheese or goats cheese would also be a lovely addition – it’s just so versatile!

Take a look at the variations (below the main recipe) for suggestions to alter the recipe to suit many dietary requirements.

For lots more sides and salad inspo, take a look at my hugely popular ebook ˜Well Nourished Sides and Salads’– where vegetables become the hero of the dish! It’s great value at just $9.95, click HERE to take a look.

For more delicious, easy to make sides and salad recipes, click HERE.

Sweet potato salad
Print Recipe
4.89 from 9 votes

Winter Sweet Potato Salad

This Winter Sweet Potato Salad is a warming, nourishing dish packed with seasonal flavours. Roasted sweet potatoes and spiced chickpeas are combined with fresh greens and a zesty dressing, making it the perfect salad to enjoy during cooler months.
Prep Time15 minutes mins
Cook Time30 minutes mins
Total Time45 minutes mins
Course: Salad
Servings: 4

Ingredients

  • 2 tbsp butter, ghee or coconut oil
  • 1 tbsp rice malt syrup or maple syrup
  • 1 tsp ground cinnamon
  • Sea salt and freshly ground black pepper - to taste
  • 1 sweet potato/s (large) diced into approx. 1.5cm chunks (you can peel it or leave the skin on)
  • 70 g raw almonds (½ cup)
  • 1 clove/s garlic - unpeeled
  • 100 g leafy greens -such as watercress (my preference), rocket or baby spinach.

Chickpeas

  • 1 tbsp butter, ghee or coconut oil
  • 425 g can chickpeas - drained and rinsed (or 1 ½ cups cooked chickpeas)
  • ½ tsp ground cinnamon
  • ½ tsp ground cumin
  • ¼ tsp ground turmeric
  • ¼ tsp sea salt - to taste
  • ½ lemon/s - zest and juice

Dressing

  • 3 tbsp extra virgin olive oil - extra virgin
  • 1 tbsp lemon juice
  • 1 tbsp rice malt syrup or maple syrup
  • Sea salt and freshly ground black pepper - to taste

Instructions

  • Preheat your oven to 180℃/350°F.
  • In a small pot combine the ghee, butter or coconut oil, syrup, cinnamon and seasoning over a low heat unit the fat has melted and ingredients combined.
  • Place the sweet potato, almonds and the whole garlic clove in a small baking dish and pour over the above mixture, tossing to coat the sweet potato and almonds well. Arrange in a single layer and bake for 20-30 minutes until the sweet potato is just cooked through.
  • Now prepare your chickpeas. Without rinsing the small pot, add the ghee, butter or coconut oil and heat gently to melt. Now add the chickpeas, spices and seasoning and stir over a low heat until you can start to smell the spices (just a few minutes).
  • Remove from the heat and stir in the juice and zest. Set aside.
  • Place you leafy greens in a serving bowl or plate.
  • Once the potato is cooked, remove from the oven and allow to cool.
  • Make you dressing by combining all of the ingredients, together with the flesh squeezed from the baked clove of garlic.
  • Just prior to serving, toss the dressing through the leaves to coat and top with the cooled sweet potato, almonds and chickpeas.

Make-ahead

  • Prep all of your ingredients and assemble/ dress the salad just prior to eating.

Store

  • Store in an airtight container in the fridge.

Notes

Nut-free

Substitute the almonds with sunflower seeds.

Legume-free

Replace the chickpeas with a cup of cooked quinoa or buckwheat.

Garlic-free

Omit the garlic, there are enough lovely flavours so you won't miss it. 

Fructose-friendly

Choose rice malt syrup as your sweetener.

Vegan 

Choose olive oil as your cooking fat.

Make it go further

Add a cup of cooked quinoa, diced or shredded chicken or a can of tuna.


I'd love to hear if you like this recipe as much as I do. Post a comment or rate this recipe (which really helps it to reach more people). 

Cauliflower Cheese Soup (with a dairy free option)

April 23, 2015 | Make-ahead Meals, Freezable Meals, Vegetarian, Soups

This Cauliflower Cheese Soup is a creamy, comforting dish packed with nutrients. The combination of cauliflower, cannellini beans, and parmesan makes it fibre rich and super satisfying, with a dairy-free option for those who need it.

After all “Cauliflower is nothing but a cabbage with a college education” Mark Twain

Health benefits

Like its cruciferous cousins, cauliflower is a rich source of many micronutrients (vitamins and minerals, especially folate and Vitamin C) not to mention, bursting with fibre. It also contains glucosinolates (sulphur containing plant chemicals) many of which have been researched for their promising anti-cancer properties. The cannellini beans in this dish add in some plant powered protein and additional fibre. The broth is calcium rich and heals the gut and soul and the onion and garlic further supports immune function.

Ingredients

You’ll need cauliflower florets, cannellini beans, onion, cloves garlic, chicken stock or bone broth, and parmesan cheese for the classic version. For serving, you’ll garnish with peas, chives, and a drizzle of lemon-infused olive oil.

How to make Cauliflower Cheese Soup (with a dairy free option)

Start by sautéing the onion and garlic in butter or ghee, then add the half head cauliflower, beans, and broth. Let everything simmer until the cauliflower is tender. After cooling slightly, blend it all together with parmesan until it has a smooth texture, then season to taste. Divide between four bowls and serve hot with peas, chives, and a drizzle of lemon-infused olive oil.

Serving suggestions and how to store

Serve this gluten-free cauliflower soup recipe as a light lunch or dinner, with a side of crusty bread or a green salad. It stores well in the fridge or freezer, so make a big batch for easy reheating on busy days.

Vary this cauliflower cheese soup to suit

For a dairy-free version, replace parmesan with nutritional yeast and use olive oil instead of butter. Omit the beans and peas for a legume-free option, or swap cauliflower for broccoli to create a delicious broccoli cheese soup.

Take a look at the variations (below the main recipe) for suggestions to alter the recipe to suit your specific dietary requirements.

For more delicious, nourishing and easy to make soup recipes, click HERE.

This Cauliflower Cheese Soup is a creamy, comforting dish packed with nutrients (includes a dairy-free option for those who need it).
Print Recipe
4.91 from 11 votes

Cauliflower Cheese Soup (with a dairy free option)

One of my families favourite ways to eat cauliflower, my Cauliflower Cheese Soup is tasty, easy to make and very nourishing. 
Prep Time10 minutes mins
Cook Time15 minutes mins
Total Time25 minutes mins
Course: Soup
Servings: 4

Ingredients

  • 1 large onion/s peeled and finely diced
  • 1 clove/s garlic peeled and chopped
  • 25 g butter, ghee or macadamia oil
  • 400 g cauliflower (approx. ½ head), broken into florets
  • 400 g can cannellini beans -drained and rinsed
  • 3-400 ml chicken broth or stock (I used chicken), recipe here
  • 50 g parmesan cheese -finely grated
  • Sea salt and freshly ground black pepper -to taste
  • 75 g peas (½ cup) blanched in boiling water
  • 2 tbsp fresh chives -chopped (to serve)
  • 2 tbsp lemon infused olive oil - I like Cobram Estate brand (to serve)

Instructions

  • In a large pot sauté the onion and garlic in the butter or ghee for a minute or two until just starting to soften, but not brown.
  • Add the cauliflower, cannellini beans, and stock and bring to the boil.  Simmer until the cauliflower is just cooked (and you can slice through it easily with a knife).
  • Remove from the heat and allow to cool a little.
  • Puree in a food processor or powerful blender with the parmesan cheese.
  • Taste and season if necessary.
  • Serve hot with the peas, chives and a drizzle of lemon infused olive oil.

Thermomix Method

  • Grate the parmesan, 5 seconds, speed 6 and set aside.
  • Chop the onion and garlic, 10 seconds, speed 5.
  • Add the butter and saute, temp. 100, 2 mins, speed 1.
  • Add the cauliflower and chop 10 seconds, speed 6.
  • Scrape down the sides, add the beans and broth and cook temp. 100, 15 mins, speed 2.
  • Add the parmesan and blend for 20 seconds, speed 6.
  • Season and serve as above.

Tip

  • Adjust the consistency of this by adding more or less broth.

Make-ahead

  • Re-heat in a pot over a low heat until just hot.

Store

  • Store in an airtight container in the fridge or freezer.

Notes

Vegetarian

Use vegetable stock.

Dairy-free and vegan

Just don’t add the cheese or replace with 2 tablespoons of nutritional yeast (which gives a very similar flavour). Taste it as you add the yeast gradually to achieve the level of 'cheesiness' you like. Use olive oil instead of butter or ghee.

Legume-free

Simply omit the beans/ peas to if you like and increase the cauliflower buy about a cup.

Onion and garlic-free

Replace them with a small bulb of fennel, diced and a pinch of chilli flakes or powder.

Broccoli cheese soup

Sub the cauliflower for broccoli for another delicious soup.
 

I love this soup - how about you. Did you try the dairy-free version? I'd love to hear how you like it. 

Raw Chocolate Easter Nests

March 26, 2015 | Holidays & Entertaining, No-bake Sweets

These Raw Chocolate Easter Nests are a fun and healthy twist on Easter treats and my answer to the baskets I’ve seen on Pinterest made from instant noodles, marshmallow, and chocolate. They are pretty easy to make and are something the kids can help you with too.

With a gluten-free, crunchy base of almonds and coconut, and a rich layer of homemade raw chocolate, they’re the perfect combination of indulgent and nutritious and a lovely easter recipe.

Health benefits

By making your own chocolate, you have control over the amount (and type) of sugar you add and guarantee avoiding added nasties. The healthy fats from the nuts and coconut increase the nourishment and really fill you up so you are less likely to overindulge.

Ingredients

You’ll need toasted slivered almonds, shredded coconut, and almond or hazelnut meal for the base. The raw chocolate is made from cacao butter or coconut oil, raw cacao powder, and your choice of natural sweetener like rice malt syrup, honey, or maple syrup.

How to make Raw Chocolate Easter Egg Nests

Toast the almonds and coconut, melt the cacao butter or coconut oil with cacao powder and sweetener, then mix with the nut and coconut base. Press the mixture into muffin tins to form nests, freeze until set, and you’re good to go!

Serving suggestions and how to store

Fill these dairy-free nests with mini chocolate eggs or a creamy cashew nut filling and berries for a lovely Easter dessert. Store them in the fridge or freezer in an airtight container, and serve directly from frozen for the best texture.

Vary these raw chocolate easter nests to suit

For a nut-free version, swap the almonds for more shredded coconut or toasted sunflower seeds. Choose rice malt syrup for a low-fructose option, and if you’re short on time, you can use melted dark chocolate instead of making raw chocolate from scratch.

Take a look at the variations (below the main recipe) for suggestions to alter the recipe to suit many specific dietary requirements.

For more delicious, healthy and easy to make wholefood treats, click HERE.

These Raw Chocolate Easter Nests are a cute, nourishing Easter treat or dessert. They are gluten-free, dairy-free & refined sugar-free.
Print Recipe
5 from 1 vote

Raw Chocolate Easter Nests

These cute little chocolate baskets are a healthy Easter treat or dessert.
Prep Time20 minutes mins
Cook Time5 minutes mins
Total Time25 minutes mins
Course: Dessert
Servings: 10

Ingredients

  • 300 g slivered almonds -toasted
  • 200 g shredded coconut (2 cups) toasted
  • 100 g almond meal (1 cup) or hazelnut meal

Raw chocolate

  • 200 g cacao butter (1 cup) or raw, extra virgin coconut oil (or a combination of 100 gram of each), melted
  • 30 g cacao powder (â…“ cup) unsweetened Dutch process or raw
  • 2-6 tbsp rice malt syrup, honey or maple syrup (you can adjust the sweetness to your taste)

Instructions

  • Toast your slivered almonds and coconut.
  • Melt the cacao butter or coconut oil over a very low heat, either in a small pot or Thermomix (temp 50, speed 1) until just melted.
  • Add the cacao powder and rice syrup, mix until well combined and the syrup is dissolved.
  • Combine the slivered almonds, coconut, and nut meal in a bowl. Add the raw chocolate and stir until well combined.
  • If you would like a darker nest, add a tablespoon or two more cacao.
  • Line a muffin tin and press one tablespoon of the mix into the base.  Add another tablespoon (approx.) and press into the sides to make a small basket.
  • Place in the freezer immediately to set.  Once set, remove the muffin casing and keep in an airtight container in the freezer until ready to serve.

Serve

  • filled with small chocolate easter eggs
  • filled with double cream or cashew nut cream and berries for an Easter dessert (my plan for Easter Sunday dessert)
  • make an easy berry coulis by pureeing any red berry with a tablespoon of water or cream (or your favorite liquor for an adults version). Push it through a sieve to remove the seeds

Notes

Nut-free

Replace the almonds with more shredded coconut or toasted sunflower seeds and the meal with desiccated coconut.

Low-fructose

Choose rice malt syrup as your sweetener

Feeling lazy

You can sub the raw chocolate with a good quality dark chocolate (I love Green and Blacks) melted. You can omit the almond meal if using regular chocolate.
 

Hope you have a wonderful Easter break. Love to see or hear about any of your Well Nourished Easter creations. Post a comment or even a picture!


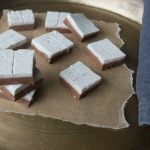
Mint Chocolate Fudge

March 16, 2015 | No-bake Sweets

Before kids, my husband and I lived in Ireland and made many life-long, dear Irish friends. After we left Ireland we backpacked through South America where we decided to ‘just get married.’ Now when you’re travelling, you have no idea what the date is, so we were really thrilled when we realised that we just happen to share our vows on St. Patricks Day (a lovely co-incidence).

So given today’s double special occasion, I thought I should share another of my favourite treats, a raw, gluten-free, dairy-free Mint Chocolate Fudge that I can’t make too often because I just can’t stop eating it! This green delight is for all my nearest and dearest Irish mates too – Happy St. Patricks Day.

Health benefits

Macadamia Nuts contain numerous health benefiting nutrients, minerals, antioxidants and vitamins that are essential for optimum health and wellness. They are a great source of protein, fibre and essential fats (and are my favourite tasting nut). The health benefits of coconut I’ve written about here and coconut oil here. A little spinach adds anther source of plant-based nutrition and is a wonderful natural ‘green’ colouring.

Ingredients

The mint layer uses desiccated coconut, macadamia nuts, peppermint oil (or peppermint extract), and a sweetener of your choice. The chocolate layer is made from cacao butter or coconut oil, cacao powder, and your preferred natural sweetener.

How to make healthy Mint Chocolate Fudge

Process the coconut and macadamia nuts into a smooth paste, then blend in the sweetener, peppermint oil, and optional spinach. Spread this minty mixture into a tray lines with baking paper (parchment paper) and freeze. Melt the cacao butter or coconut oil with cacao powder and sweetener, pour it over the mint layer, and freeze until set.

Serving suggestions and how to store

Store this fudge recipe in the fridge or freezer as it melts easily in warmer temperatures. Serve directly from frozen for the best texture and flavour.

Vary this mint chocolate fudge to suit

For a fructose-friendly version, use rice malt syrup. Make your own raw chocolate to keep it dairy-free and vegan. If you’re out of macadamias, cashews work just as well. No mint oil? Try using peppermint essence or even fresh mint!

Take a look at the variations (below the main recipe) for suggestions to alter the recipe to suit your specific dietary requirements.

For more delicious, healthy sweet treats, click HERE.

Raw mint chocolate fudge
Print Recipe
5 from 1 vote

Mint Chocolate Fudge

This Mint Chocolate Fudge is the perfect blend of creamy macadamia and coconut, with a refreshing mint layer topped off by a rich chocolate coating. A healthier alternative to store-bought treats, it's perfect for when you're craving something indulgent but wholesome.
Prep Time15 minutes mins
Cook Time30 minutes mins
Total Time45 minutes mins
Course: Dessert, Snack
Servings: 12

Ingredients

Mint Layer

  • 160 g desiccated coconut (2 cups)
  • 300 g macadamia nuts (2 cups)
  • 10-15 drop/s food grade peppermint oil or peppermint essence (I like a strong minty flavour, but you can adjust this to suit your taste by adding and tasting)
  • 85 g rice malt syrup, honey or maple syrup (¼ cup)
  • 1 handful/s baby spinach -stalks removed (optional)

Chocolate layer

  • 200 g cacao butter (1 cup) OR raw, extra virgin coconut oil (or a combination of 100 gram of each), melted. I used 100% coconut oil for this slice. You could also just melt dark chocolate if you'd prefer.
  • 30 g cacao powder (â…“ cup) unsweetened Dutch process or raw
  • 2-4 tbsp rice malt syrup, honey or maple syrup (you can adjust the sweetness to your taste)

Instructions

  • In a powerful blender or food processor, process the coconut and macadamia nuts, scraping the sides ever few seconds. You are looking to make a smooth paste. Don’t over process or it may separate. If you have a Thermomix, blend 30 seconds, speed 7-8.
  • Add the sweetener, peppermint oil, and spinach and blend until the spinach has been fully pureed, though. You don't have to add the spinach if you'd prefer a white over green mint layer. If you have a Thermomix blend 30 seconds, speed 5-6.
  • Spread over a small slice tin lined with baking paper (approx. 17 x 27cm) and freeze until firm to touch (approx. 30 minutes).
  • Make your raw chocolate once the mint layer is set by combining all of the ingredients over a very low heat, whisking together well. If you have a Thermomix, heat temp 37, 1 minute, speed 4.
  • Pour immediately over the mint layer and return to the freezer to set (approx. 10 minutes).

Store

  • Cut and store in the fridge or freezer. Like most raw treats it doesn't hold up in the heat so serve from frozen.

Notes

Fructose friendly

Choose rice malt syrup as your sweetener.

Dairy-free

Make your own raw chocolate for the chocolate layer.

Vegan

Choose rice malt or maple syrup as your sweetener. Make your own raw chocolate for the chocolate layer.

Macadamia Nut-free

Cashew nuts work well too.

No mint oil

You can sub peppermint essence or even fresh mint to replace the spinach (I haven't recipe tested this, but keen to next time I make it).
 

I'd love to hear how you like this - its a personal fave. Post a comment or rate this recipe.

Top Deck Gummies

March 11, 2015 | No-bake Sweets

I’m a huge fan of gelatinous treats and no better flavour combo than chocolate and coconut. Now I’m not a particularly patient person, so when it comes to using tiny moulds….well, let’s just say it has to be a special occasion! I much prefer the pour and set approach, which is how this little ‘Top-Deck Gummies” combo arose. That’s not to say you can’t get creative and use a cute little mould. You can also use patty pans (pictured below) or silicon moulds. My kids are planning to make these in Easter egg moulds for Easter treats.

So we were in the midst of a QLD storm and without power (which as we have our own water supply, this also means no water) so very inconvenient. The kids (and adults) were house-bound and hungry for chocolate – so the kids and I created this surprisingly yummy treat.

Health benefits

Gelatin is made from the bone and connective tissue of animals that has been dried and turned into a powder. I have written about the benefits of gelatin in this post about bone broth.

The biggest benefit of eating gelatin, in my opinion, is that it is a gut healer, which means better nutrient absorption (so greater nourishment) all round.  Also, if your gut is functioning well, then your nervous system is better supported too. Gelatin also reduces inflammation, improves joint integrity and for the vain amongst you – it improves the condition of your skin, hair and nails.  In fact, it’s said to be better then botox (and erase wrinkles, stretch marks and cellulite) – now I’ve got your attention!

I like to use THIS grass-fed gelatin to make gummies or jelly.

The benefits of coconut I’ve written about here, and raw cacao here.

Ingredients

Made with canned coconut milk, gelatin, vanilla, and raw cacao powder, these gummies are naturally sweetened with honey, maple syrup, or rice malt syrup. You can easily adjust the sweetness to your liking.

Instructions to make chocolate gummies

Whisk coconut milk, sweetener, and vanilla together while slowly adding the gelatin allowing it to bloom. Divide the remaining coconut milk, mixing one half with cacao and more sweetener. Gently heat and combine everything, then layer the chocolate and coconut in a tray or molds. Chill in the fridge until set.

Serving suggestions and how to store

Store these Top Deck Gummies in an airtight container in the fridge or freezer for a quick, healthy snack. If using silicone moulds, freeze the gummies to make removal easier.

Vary top deck gummies to suit your dietary needs

For a vegan option, try using agar agar instead of gelatin. If you’re avoiding fructose, use rice syrup as your sweetener. You can also swap coconut milk for nut milk or replace the cacao with carob powder for a caffeine-free alternative.

Take a look at the variations (below the main recipe) for suggestions to alter the recipe to suit your specific dietary requirements.

Take a look at this Strawberry Cream Gummy recipe plus more jellies HERE.

These Top Deck Gummies are a delicious, easy to make no-bake choc-coconut treat. Best of all they are healing to your gut - food as medicine!
Print Recipe
5 from 5 votes

Top Deck Gummies

Top Deck Gummies are a delicious, homemade treat combining rich chocolate and creamy coconut layers. These healthy gummies are simple to make, using only a few wholesome ingredients for a naturally sweet, chewy snack.
Prep Time10 minutes mins
Cook Time5 minutes mins
Chill1 hour hr
Total Time1 hour hr 15 minutes mins
Course: Snack
Servings: 15 gummies

Ingredients

  • 540 ml canned coconut milk (2 x 270ml cans) I like Ayam brand
  • 1 tsp vanilla -powder, extract or essence
  • 85 g rice malt syrup, honey or maple syrup (¼ cup)
  • 5-6 tbsp grass-fed or organic gelatin
  • 1 tbsp cacao powder -unsweetened Dutch process or raw
  • 1 tbsp rice malt syrup, honey or maple syrup

Instructions

  • In a small pot place, one can of coconut milk, vanilla and sweetener and whisk to combine.
  • Whilst whisking sprinkle the *gelatin over the coconut milk mixture to combine. It will thicken and bloom as you go. Set aside.
  • Divide the remaining can of coconut milk into two jugs. Add the cacao and extra tablespoon of sweetener to one-half of the mixture.  Stir to combine.
  • Now over a very low heat, gently heat the gelatin mix, taking care not to overheat (it should be just luke warm, no hotter). Stir continually as the gelatin starts to dissolve and become a smooth liquid. It should only reach lukewarm temperature.
  • Add half of this warmed gelatin mixture to the cacao mix, stir to combine.
  • Mix the remaining coconut milk with the gelatin mixture. You now have your chocolate and coconut layers.
  • Pour the chocolate layer into the base of a lined tray (alternatively, you can use individual moulds, mini cupcakes or patty pans -as pictured below).  Set in the fridge or freezer (only takes a few minutes).
  • Top with the coconut layer and again cool until set.

Store

  • Store in an airtight container in the fridge or freezer.
  • * Now I prefer the texture of this with 5 tablespoons of gelatin, though my daughter (not at all a jelly/gummy texture fan), much prefers a denser texture so 6 tablespoons are more palatable to her. Have a play, and let me know your preferred texture or follow the liquid to gelatin ratio on your brand of gelatin.

Tip

  • If using silicon moulds to set your gummies, freeze them to make removing them from the mould clean and simple.

Notes

Vegan and vegetarian

I haven't recipe tested this but you can substitute the gelatin with agar agar.

Fructose-friendly

Choose rice syrup as your sweetener.

Coconut free

Replace the coconut milk with nut milk.

Cacao-free

Replace the cacao with carob powder.


Who else loves this treat? I'd love for you to post a comment or rate this delicious recipe.

Top deck gummies

Summer Zucchini Salad

February 18, 2015 | Vegetarian, Salads

This beautiful, fresh, summer zucchini salad really showcases this season’s produce. I developed it as my garden has exploded with zucchinis, but seeing as zucchini is one of my kids least favourite vegetables, I had to think outside the square to make the most of my abundant supply. They dislike zucchini so much they have nick-named it ‘spew-chini,’ so I’ve had to work really hard to bring them around.

Zucchini has such a mild flavour, I really don’t get why they fuss over it – I think they main objection is if it is overcooked and sloppy. Because it hides well behind other flavours, over the past few months I’ve been giving most meals a veggie ‘boost’ with zucchini – they either haven’t noticed or haven’t complained. They are also happy to eat a simple zucchini soup (blended) and also really like this delicious salad (big cheer). They moaned at first when I served it, but they tried it and conceded that it was good.  My son now requests it (though my daughter is less inclined to give me a ‘zucchinis okay’ victory); with great joy, I can declare that the whole family loves this flavoursome salad.

This is just another example of if they don’t like it one way – then try it another. I very rarely concede that any whole food is permanently ‘yuk’ with my kids. I’m tenacious and one way or another I always find a way for them to like foods that nourish them.

Health benefits

Zucchini (also called courgette) is a high fibre, nutrient dense vegetable. Studies suggest some of the Phyto (plant) chemicals found in zucchini are beneficial to benign enlargement of the prostate. Basil is a rich source of many essential vitamins, minerals and antioxidant flavonoids, two of which have been shown to protect cells and DNA from radiation. Parsley is a detoxifying, iron-rich herb and the almonds lend some good fats and a little protein.

Plus, this salad is naturally gluten-free, dairy-free (if you skip the cheese), and vegan-friendly, catering to a variety of dietary preferences.

Ingredients

This simple salad features fresh ingredients such as zucchini ribbons, crisp radishes, and aromatic basil and parsley, all tossed in a fresh lemon juice, lemon zest and extra virgin olive oil dressing. Topped with shaved parmesan and toasted almonds, it’s a delicious combination of flavours and textures that will please everyone at the table.

How to make this raw zucchini salad

Start by shaving the zucchini into ribbons and tossing them with sea salt to soften. While the zucchini sits, prepare the dressing by mixing lemon juice, zest, olive oil, salt, and pepper. Rinse the zucchini, combine it with radishes, fresh herbs, and dressing, then serve topped with parmesan and flaked almonds.

Serving suggestions and how to store

Serve this salad immediately for the freshest taste, alongside grilled tempeh, chicken, fish, or any protein of your choice. If you have leftovers, store the components separately in airtight containers in the fridge. The zucchini can release water, so it’s best to mix everything just before serving to maintain texture.

Vary this to suit your dietary needs

For a dairy-free and vegan option, simply omit the parmesan. If you’re looking for a nut-free variation, replace the almonds with toasted sunflower seeds. To turn this salad into a more filling meal, add a cup of cooked quinoa and double the dressing. And if you’re worried about the radish’s spice, soak the sliced radishes in the dressing for a milder flavour that even kids will enjoy! Take a look at the variations (below the main recipe) for suggestions to alter the recipe to suit many specific dietary requirements.

For lots more sides and salad inspo, take a look at my hugely popular ebook ˜Well Nourished Sides and Salads’– where vegetables become the hero of the dish! It’s great value at just $9.95, click HERE to take a look.

Zucchini salad
Print Recipe
No ratings yet

Summer Zucchini Salad

This summer zucchini salad is a refreshing and vibrant dish that highlights the crispness of fresh zucchini and the peppery crunch of radishes. Perfect for warm weather dining, it's easy to prepare and makes a delicious side dish or light meal that celebrates seasonal produce.
Prep Time20 minutes mins
Total Time20 minutes mins
Course: Salad
Servings: 4

Ingredients

  • 4 zucchini/s (small, or two large)
  • 1 tsp sea salt
  • 4-5 radish/s -sliced
  • ¼ bunch/s fresh basil leaves -torn or finely chopped
  • ¼ bunch/s fresh parsley leaves -finely chopped
  • 40 g parmesan cheese (¼ cup) shaved
  • 25 g flaked almonds (¼ cup) toasted

Dressing

  • ½ lemon/s -juice and zest
  • 3 tbsp extra virgin olive oil -extra virgin
  • Sea salt and freshly ground black pepper -to taste

Instructions

  • Using a vegetable peeler or mandolin, shave the zucchini into ribbons and toss in the sea salt. Set aside for 10-15 minutes (whilst you chop/prepare the rest of the ingredients).
  • For the dressing, place all of the ingredients in a small jar and shake to combine.
  • Rinse your zucchini well and drain in a sieve.
  • Toss the zucchini with the radish, basil, parsley and dressing.  Arrange on a serving plate or bowl.
  • Top with the shaved parmesan and almonds and serve immediately.

Serve

  • With grilled tempeh, fish, chicken or meat.

Notes

Dairy-free and vegan

Omit the parmesan.

Nut-free

Replace the almonds with toasted sunflower seeds.

Add quinoa

Add a cup of cooked quinoa (and double the dressing) for a bigger, protein rich salad ‘meal’.

Spice-free radish

To remove the heat from the radish, slice and soak in the dressing for a few minutes or more, prior to serving. Many kids I know have come around to this normally off limits vegetable by doing this.
 

Like this salad - let me know by posting a comment below!


Tomato Basil Bruschetta

February 4, 2015 | 30 Minute Meals, Vegetarian

Whether you grow your own or shop for them at your local fruit and vegetable market, tomatoes are in their prime in the summertime making this the best time to make the most of their sweet flavour with this Tomato Basil Bruschetta!

It just so happens that basil is also in its prime in summer. Not only are they perfect companions in the garden (plant them next to one another for a great crop), their flavour compliments one another on your plate too.

Tomato basil bruschetta is a classic Italian appetiser that’s fresh, delicious, and incredibly simple to make. It’s the perfect way to celebrate fresh, ripe tomatoes and fragrant basil, bringing a taste of summer to your table in just a few easy steps.

Health benefits

Tomatoes are a rich source of the antioxidant lycopene. Lycopene is a wonderful antioxidant, important for cardiovascular and bone health.  Basil has exhibited protective effects against DNA damage, is anti-bacterial and anti-inflammatory. Like tomatoes, it also contains cardio-protective nutrients. Paired with healthy fats from extra virgin olive oil, this bruschetta is as nutritious as it is delicious, making it a healthy choice for snacking or entertaining.

Ingredients

This tomato-basil bruschetta recipe shines with fresh vine-ripened tomatoes (or you can also use roma tomatoes, cherry tomatoes or grape tomatoes), aromatic basil, and a good-quality extra virgin olive oil. A splash of red wine vinegar adds tang, and sourdough bread slices provides the perfect crispy base for this vibrant topping. Don’t forget to rub the toasted bread with garlic for an extra burst of flavour and goodness.

How to make Tomato Bruschetta

I really think this is the best bruschetta recipe. Dice the tomatoes and toss them with torn basil, olive oil, and red wine vinegar. Season with salt and pepper and set aside. Grill slices of sourdough, rub with cloves garlic, and then spoon the tomato mixture on top. Serve immediately for a quick and delicious appetiser that’s sure to impress.

Serving suggestions and how to store

Serve your bruschetta fresh off the grill for the best texture and flavour. It’s ideal as a starter or a snack, but if you want to store the components, keep the tomato mixture separate in an airtight container in the fridge. Assemble the bruschetta just before serving for the freshest taste.

Vary Tomato Basil Bruschetta to suit

For a gluten-free version, swap out the sourdough for gluten-free bread. If you’re looking for a grain-free option, this tomato and basil mix works beautifully as a salsa over protein like grilled beef, fish, or chicken. You can also add shaved parmesan or fresh mozzarella for a cheesy twist! To make canapés, serve on baguette slices.

Take a look at the variations (below the main recipe) for suggestions to alter the recipe to suit many specific dietary requirements.

If you love this, then try this Fresh Tomato, Olive and Basil Spaghetti.

This Tomato Basil Bruschetta makes the most of summer tomatoes and basil - a match made in heaven. It is easy and quick to make and a real family fave!
Print Recipe
No ratings yet

Tomato and Basil Bruschetta

This Tomato and Basil Bruschetta is a fast, tasty and healthy lunch or light meal. The char flavour through the sourdough with the garlic, basil and tomato is just divine. 
Prep Time15 minutes mins
Cook Time5 minutes mins
Total Time20 minutes mins
Course: Main Course
Cuisine: Italian
Servings: 4

Ingredients

  • 5-6 vine ripened tomatoe/s (large) at room temperature is when they are most flavoursome
  • ¼ bunch/s fresh basil leaves -picked from stems and torn or finely chopped (preferably with a ceramic knife so they don't oxidise or blacken)
  • 3 tbsp extra virgin olive oil -extra virgin
  • 2 tsp red wine vinegar
  • Sea salt and freshly ground black pepper -to taste
  • 4 slices sourdough bread
  • 1 clove/s garlic -whole peeled
Metric - US Customary

Instructions

  • Halve your tomatoes lengthways and remove most of the seeds with a spoon.
  • With the flat side down, dice the tomatoes (approx. 1cm dice), with a sharp or serrated knife as you don't want to mush the tomatoes and place in a large bowl.
  • Tear or finely dice your basil leaves and add to the tomatoes.
  • Stir in the olive oil, vinegar and season well. Set aside.
  • Heat a char-grill on your stovetop or BBQ.
  • Drizzle a little olive oil over one side of the bread and rub all over.
  • Place on the hot char and toast both sides.
  • Now rub your garlic clove over the oiled side of the charred bread. This gives it an amazing garlic flavour (you're actually just making garlic bread).  How much you rub on depends on how much you like garlic.
  • Spoon the tomato salsa over the charred bread, making sure each piece also has a little drizzle of the juice.
  • Serve immediately.

Notes


Grain- free (and meaty)

This is delicious as a salsa over a thin slice of beef fillet, grilled fish or chicken to replace the bread.

Gluten-free

Use a gluten-free bread.

Add cheese

This is delicious with shaved parmesan or buffalo mozzarella.


I'd love to hear how you like this bruschetta? Post a comment or rate this recipe. 

Moroccan Lamb Burgers with a Mint Feta Dressing

January 22, 2015 | Budget Friendly, Make-ahead Meals, Red Meat, Freezable Meals

These Moroccan lamb burgers with a mint feta dressing bring bold flavours to your table with a delicious blend of spices. Perfect for a casual BBQ or an easy weeknight meal, they’re packed with flavour and can be customised to suit your dietary needs. You can also use this mince mix to make little meatballs to include in the school lunch.

Us Aussies love a burger on a BBQ. So I thought I’d share a recipe that’s easy enough for the kids to get involved and make, and one the whole family will love ahead of this long weekend.

Health benefits

Lamb is a great source of protein, iron, and healthy fats, while the spices provide anti-inflammatory benefits. The fresh mint and yogurt in the dressing add a light, tangy contrast, and you can easily make this recipe dairy-free if needed, keeping it healthy without compromising on taste.

Ingredients

This recipe is loaded with aromatic spices like cumin, coriander, and smoked paprika, along with zesty lemon to brighten the flavours. The mint feta dressing offers a refreshing twist, and there are easy swaps if you’re avoiding dairy.

How to make Moroccan Lamb Burgers

Mix the lamb mince with garlic, spices, and lemon zest to form patties, then cook them on the BBQ or in a pan. Blend together feta, yogurt, and mint for the dressing, adding harissa for extra heat if desired. Serve the burgers on buns or lettuce cups with a generous dollop of mint feta dressing.

Serving suggestions and how to store

Serve these Moroccan lamb burgers in a sourdough bun with salad or go grain-free by using lettuce cups or grilled mushrooms instead. Store leftover patties and dressing separately in airtight containers in the fridge, or freeze the patties for a quick future meal.

Vary Moroccan Lamb Burgers to suit

For a dairy-free option, substitute the feta and yogurt with mayonnaise. You can also skip the garlic and replace it with a pinch of chilli flakes if you prefer. This recipe is easy to adjust, so it fits a variety of dietary preferences without losing its vibrant flavours.

Take a look at the variations (below the main recipe) for suggestions to alter the recipe to suit your specific dietary requirements.

These gluten & grain-free Moroccan Lamb Burgers are so easy to make, can be pre-made & are great cooked on the BBQ. Great for school lunches too.
Print Recipe
5 from 1 vote

Moroccan Lamb Burgers with a Mint Feta Dressing

My Moroccan Lamb Burgers with a Mint Feta Dressing is a tasty, easy to make burger. Perfect for a fast lunch or dinner. 
Prep Time15 minutes mins
Cook Time15 minutes mins
Total Time30 minutes mins
Course: Main Course
Servings: 6

Ingredients

Burger ingredients:

  • 500 g lamb mince
  • 1 clove/s garlic -crushed
  • 1 tsp ground cumin
  • 1 tsp ground coriander
  • 1 tsp garam masala
  • 1 tsp smoked paprika
  • 1 lemon/s -zest finely grated
  • Sea salt and freshly ground black pepper -to taste

Mint feta dressing ingredients:

  • 100 g feta cheese -crumbled
  • 2 tbsp natural, Greek or coconut yoghurt
  • ¼ bunch/s fresh mint leaves -finely chopped
  • ½-1 tsp harissa paste (optional)

Serve

  • 6 burger buns
  • Salad (to serve)

Instructions

For the burger patties:

  • In a large mixing bowl or food processor, simply mix all of the burger ingredients together until they are well combined (TMX reverse, speed 2-3, using the spatula to push down).
  • Form into burger patties and cook immediately or refrigerate to cook later, either  on the BBQ or in a frypan.

For the Mint and Feta dressing:

  • Blend the feta, yoghurt, and mint together until well combined (TMX - chop mint 5 sec, speed 6. Add the rest of the ingredients and blend 5 sec, speed 3-4)
  • Swirl through the harissa (optional).

Serve

  • the lamb patty on a sourdough roll with salad and the mint and feta dressing
  • or for gluten and grain free, serve in a lettuce cup or between two grilled field mushrooms

Make-ahead

  • Re-heat in a low oven until just hot.

Store

  • Store burger patties and dressing in separate airtight containers in the fridge.
  • Can also be frozen either the raw patties or cooked. Fully de-frost before cooking/ re-heating.

Notes

Dairy-free

Substitute the feta and yoghurt with homemade or whole-egg mayonnaise.

Garlic-free

Replace the garlic with a pinch of chilli flakes.


As always, I welcome your feed back and questions.


Healthy Lamingtons

January 19, 2015 | Baked Sweets, Desserts

What better way to celebrate being Australian than with this healthy lamington recipe? I’m really not a fan of traditional lamingtons – probably because I like a sweet with some substance. But this recipe I REALLY love.

So I’ve put this recipe together with several options.  I’ve made a double-decker style lamington with a layer of chocolate in between (pictured). You could also layer with a good quality jam or just make a lamington slice if you like.

I’ve taste tested these with a couple of lamington lovers and been given a big thumbs up – my husband thinks these may be the best sweet recipe I’ve posted yet!

Health benefits

By using nutrient-rich ingredients like coconut oil, cacao powder (or cocoa powder), and almond meal, these lamingtons offer healthy fats, antioxidants, and fibre. You can also opt for low-fructose sweeteners like rice malt syrup, making them a better-for-you alternative to traditional lamingtons without compromising on taste.

Ingredients

This recipe is flexible, allowing you to choose between three different cake options (to suit your dietary requirements) and two types of chocolate sauce coatings. You can go gluten-free, dairy-free or even fructose-free depending on your dietary preferences, so it’s perfect for those with food sensitivities or anyone looking for a healthier treat.

How to make this healthy lamington recipe

Start by baking your chosen cake in the oven and allowing it to cool completely. Then, prepare the chocolate coating (either a dairy-free version or a traditional ganache). Cut the cake into squares, dip each piece into the chocolate, and roll them in desiccated coconut. Once coated, pop the lamingtons on a tray and into the fridge to set.

Serving suggestions and how to store

Serve these lamingtons straight from the fridge for a cool, delicious treat. They store well in an airtight container in the fridge, making them a great make-ahead dessert for parties or as a healthier snack option during the week.

Vary this healthy lamington recipe to suit

For a fructose-friendly version, make your own chocolate coating using rice malt syrup. If you’re dairy-free, use the dairy-free chocolate coating instead of ganache. These variations make it easy to customise the recipe to suit your specific dietary requirements without sacrificing flavour.

For more delicious, healthy and easy to make wholefood treats, click HERE.

What better way to celebrate Australia Day than with a healthy lamington recipe? Gluten-free, dairy-free and refined sugar free.
Print Recipe
4.88 from 8 votes

Healthy Lamington

These healthy lamingtons are a nutritious twist on a classic treat, made with wholesome ingredients that cater to a variety of dietary needs. Whether you're gluten-free, dairy-free, or looking for a lower-sugar option, this recipe has you covered with multiple cake and chocolate coating choices.
Prep Time30 minutes mins
Cook Time30 minutes mins
Total Time1 hour hr
Course: Dessert, Snack
Servings: 6 large lamingtons

Ingredients

Cake

  • For the cake, you can choose either:
  • Easy Healthy Cake - which is gluten, grain, dairy-free with fructose free option (suits Paleo)
  • Vanilla Bean Cup Cake - which is gluten, nut and grain-free with dairy and fructose-free options (legume-based)
  • Vegan Vanilla Cake - vegan and option for gluten-free

Chocolate coating (you have two options here)...

1) Dairy-free chocolate (I find this coats better than the ganache):

  • 2 tbsp cacao powder -unsweetened Dutch process or raw
  • 100 g coconut oil (½ cup) 
  • 2-4 tbsp rice malt syrup, honey or maple syrup
  • 2 tbsp canned coconut milk

2) Chocolate ganache:

  • 100 g dark chocolate (85% is my preference)
  • 50 g cream -or coconut milk

Instructions

  • Bake your choice of cake into a lined tin (approx. 30-20cm) for 15-20 minutes.
  • Allow to cool on a cake rack and then trim the edges.
  • You can cut into small squares for little lamingtons. For big ones like pictured, I halved the cake, sat one on top of the other and cut into six squares.
  • Pop the cake in the fridge for 10 minutes or so to chill while you make the chocolate.
  • Now make the chocolate sauce...
  • For the dairy-free option, place all the ingredients into a small pot. Over a very low heat mix together well (you are just melting the ingredients to luke warm).
  • You don't want to let this sit for too long or the ingredients will separate.  If this happens just give it a good stir before dunking your cake.
  • For the ganache if you choose that, place a ceramic or glass bowl over a pot of just boiled water. Add the chocolate and cream and mix together until melted.
  • Place the chocolate in a shallow bowl.
  • In another shallow bowl place about a cup of desiccated coconut and prepare to get messy! I always work next to my sink in case I need to rinse off.
  • Place a baking tray lined with baking paper next to the bowls.
  • Dip all four sides of the cake in the chocolate followed buy the coconut and place on the baking tray. If you are making them with chocolate middles, I dipped the two middle sides in the chocolate, placed them together and then coated the rest.
  • Work quickly, you don't want to soak them, just lightly coat them.
  • Place in the fridge until you are ready to serve them.

Store

  • Store in an airtight container in the fridge.

Notes

Fructose friendly 

Make your own dipping chocolate and choose rice malt syrup as your sweetener. 

Dairy-free

Make your own dipping chocolate.
 

I'd love you to let me know what you think of my healthy take on this classic by posting a comment below.

Easy, Healthy Cake Recipe (with lots of flavour variations)

January 12, 2015 | After School Snacks, Baked Sweets

During school holidays, I tend to bake a few more nut based recipes. This is an easy, healthy cake recipe that I just keep coming back to – one because it is so delicious and two because it is so versatile (vanilla one day, citrus or chocolate the next). I’m so excited to share this one because I know it is going to become a firm Well Nourished recipe favourite.

I often make two cakes and layer with a cream cheese frosting, chocolate ganache or cream and chia berry jam for a special, delicious birthday cake.

Health benefits

This is one sustaining, protein and fibre rich gluten-free and dairy-free cake. Almonds are a rich source of monounsaturated fats, many fat-soluble vitamins and a plethora of minerals. They are a very concentrated source of many health giving Phyto (plant) chemicals and are also a great protein source along with the eggs.

Ingredients

This cake uses simple ingredients like almond meal, large eggs, and your choice of natural sweeteners. It’s gluten-free and refined sugar-free, with options to use rice malt syrup, honey, or maple syrup, depending on your preference.

How to make this easy healthy cake

Start by mixing almond meal, sweetener, and egg yolks, rising agents and vanilla extract in a food processor, electric mixer or medium bowl then fold in whisked egg whites to keep the cake light and fluffy. Pour the batter into a well prepared cake pan. After baking at 180°C/350°F for 20-25 minutes, let it cool before serving. For a shortcut, you can skip separating the eggs, but it will make the cake denser.

Serving suggestions and how to store

Serve this cake with double cream, natural Greek yoghurt, or a dairy-free option like coconut yoghurt. It’s perfect for a light dessert or an afternoon treat. Like all cakes it’s best enjoyed fresh but you can store it in an airtight container in the fridge, or freezer.

Vary this easy healthy cake to suit your needs

For a low-fructose version, opt for rice malt syrup as your sweetener. Add lemon zest or orange zest for a citrus cake, or brush the top with syrup for a tea cake or syrup cake variation. You can also make it a chocolate cake by adding raw cacao, or swap the almond meal for hazelnut meal if you need an almond-free option.

Take a look at the variations (below the main recipe) for suggestions to alter the recipe to suit many specific dietary requirements.

For more delicious, healthy and easy to make wholefood treats, click HERE.

Basic healthy cake
Print Recipe
4.88 from 32 votes

Easy, Healthy Cake Recipe (with lots of flavour variations)

This easy, healthy cake recipe is your go-to for a light and fluffy dessert that’s naturally gluten-free and refined sugar-free. Whether you’re serving it up as a tea cake or topping it with syrup, this cake is versatile enough for any occasion and can be easily adapted to suit different dietary needs.
Prep Time15 minutes mins
Cook Time25 minutes mins
Total Time40 minutes mins
Course: Dessert, Snack
Servings: 6

Ingredients

  • 170 g almond meal (1¾ cup loosely packed) 
  • 170 g rice malt syrup, honey or maple syrup (½ cup)
  • 4 egg/s (large) at room temperature and carefully separated
  • ½ tsp bicarbonate of soda
  • ½ tsp sea salt
  • 1 tsp vanilla -powder, extract or essence
  • ½ tsp cream of tartar
Metric - US Customary

Instructions

  • Preheat your oven to 180°C/350°F (fan-forced). Grease a 23cm springform round cake tin well.  Shake a little almond meal over the base and sides too to if you like to make it really non-stick.
  • In a food processor mix the almond meal, sweetener of choice, egg yolks, bicarbonate of soda, sea salt, and vanilla until well combined. If using a Thermomix blend 30 seconds, speed 4. Set aside in a large mixing bowl.
  • In a clean and a completely dry food processor or bowl, whisk your egg whites. You are wanting to form strong peaks (like for a meringue).  I generally do this by whisking it until it becomes foamy. If using a Thermomix butterfly inserted, 20 seconds, speed 3.  
  • Then add the cream of tartar and whisk or beat until peaks form. If using a Thermomix butterfly inserted, 1½ minutes approx., speed 4.  Stop beating as soon as strong white peaks form.
  • Gently fold half of the egg white into the almond batter. Fold in the remaining egg white and pop in the oven for 20-25 minutes or until cooked in the middle.
  • Remove the outer ring from the tin and allow to cool before removing the base.

Tip

  • Personally, I'm generally a throw it all in kind of baker. But by separating the egg white, you will achieve a much lighter cake. So I believe it is worth a little extra effort to beat the egg white.  If you do have an egg white disaster or can't be bothered, you will just have a heavier, but still delicious cake.

Serve

  • With double cream or sour cream
  • With full-fat natural or unsweetened Greek yoghurt
  • For dairy free, serve with coconut yoghurt or cashew nut cream

Store

  • Store in an airtight container in the fridge or freezer.

Notes

Low-fructose

Choose rice malt syrup as your sweetener.

Citrus cake

Add the zest of 2-3 oranges, lemons or lime to infuse that flavour into the cake.  Once the cake is cooked, mix ¼ cup of juice with ¼ cup of sweetener over a low heat until combined.  Pierce the top of the cake with a skewer a few times and drizzle over the syrup.

Tea cake

Brush the top of the warm cake with melted butter or coconut oil and top with a spice/sugar mix (equal parts of mixed spice and coconut sugar)

Syrup cake

Warm the sweetener of your choice and brush over the cake whilst still warm.  Feel free to get creative and infuse it with and herbs or spices you like.  I often heat the syrup with a few leaves of lemon balm or lemon myrtle from my garden and serve topped with berries and syrup (as pictured).

Chocolate cake

Add a tablespoon of raw cacao to the almond meal batter.

Almond-free

Replace the almonds with hazelnut meal.


As I test other flavour combos I will add to the variations above.  Do you like this cake? Be sure to let me know by posting a comment below. I love hearing from you!

Healthy Trifle

December 10, 2014 | Holidays & Entertaining, Desserts

Trifle is a dessert that brings back very fond memories for me. It was my Nanas favourite dessert and she was always the nominated bearer of trifle at any family celebration and always at Christmas time. I haven’t eaten trifle in a very long time, but I have been asked by a few readers to come up with a healthy, intolerance friendly trifle so here it is.

Traditional trifles vary from the very, very bad (those made with processed ingredients like jelly, ready to eat custard and those horrendous 30+ ingredient jam rolls with a shelf life of many years), to the not so bad with each of the ingredients being homemade, albeit loaded with refined sugar.

My trifle is all made from scratch, a little finicky but certainly not at all difficult. I have endeavoured to cover most of the main dietary intolerances but feel free to add any I’ve missed (in the comments below).

It’s certainly nourishing without scrimping on deliciousness. So without further-a-do, a Well Nourished Trifle…

Health benefits

Packed with natural ingredients like raspberries, coconut milk, and grass-fed gelatin, this trifle is not just tasty, but also nourishing. It’s rich in collagen from the gelatin, healthy fats from the coconut, and full of vitamins and antioxidants from the fresh fruits. A healthier dessert choice that’s still a crowd-pleaser.

Ingredients

This trifle has layers of homemade jelly, home made sponge cake, custard (either traditional or vegan), and a creamy topping of your choice. Use natural sweeteners like rice malt syrup or honey, and customise the recipe to suit your dietary preferences. Whether you opt for coconut milk in your custard or whipped cream for the topping, this dessert offers wholesome, delicious ingredients.

How to make this Healthy Trifle recipe

Start by making the jelly with raspberries, sweetener, and grass-fed gelatin. Bake your chosen sponge, cut it into cubes, and soak it in sherry or a non-alcoholic syrup. For the custard, you can make a traditional egg-based one or a vegan version with mango and coconut milk. Assemble by layering the jelly, cake, custard, and creamy topping, then finish with fresh fruit and edible flowers. I love using fresh berries like strawberries and blueberries to make a berry trifle.

Serving suggestions and how to store

This trifle looks stunning in a glass bowl. trifle dish or individual glasses. For added texture, top with fresh fruit like berries or passionfruit. You can make it ahead of time and store in the fridge until you’re ready to serve. Leftovers should be kept in an airtight container in the fridge and enjoyed within a few days.

Vary this to suit your dietary needs

For a low-fructose option, use rice malt syrup and low-fructose fruits. Vegans can opt for the vegan custard, make the jelly with agar-agar, and use a vegan-friendly cake. This recipe is highly adaptable, so you can easily swap ingredients to suit gluten-free, dairy-free, or low-sugar diets.

Recipe notes

Gelatin:

For the gelatin, I use THIS gelatin. Because gelatin is derived from animals, I like to know I am consuming the best quality product with the least chemical loading.

Sponge cake:

For the sponge you have a few cake options:
1. Vanilla Bean Cup Cake which is gluten, nut and grain-free with dairy and fructose-free options (legume-based)

2. Basic Healthy Cake recipe which is gluten, grain, dairy-free with fructose free option (suits Paleo)

3. Vegan Vanilla Cake recipe is vegan, made with spelt or a gluten-free flour.

4. Simple Vanilla Cake a sweeter cake made with olive oil

For more delicious, healthy and easy to make wholefood treats, click HERE.

Healthy Trifle
Print Recipe
4.46 from 11 votes

Healthy Trifle

This healthy trifle is a delicious twist on the classic dessert, made with natural sweeteners, gluten-free options, and loads of fresh fruit. Perfect for holiday gatherings or a lighter treat, this recipe is flexible, so you can customise it to suit your dietary needs without sacrificing any of that indulgent, layered goodness.
Prep Time40 minutes mins
Cook Time30 minutes mins
Total Time1 hour hr 10 minutes mins
Course: Dessert
Servings: 6 -8

Ingredients

Jelly

  • 500 ml water (2 cups) boiling from the kettle
  • 85 g rice malt syrup, honey or maple syrup (¼ cup)
  • 200 g raspberries (2 cups) defrosted if frozen, pureed and pushed through a sieve to remove the seeds
  • 2 tbsp grass-fed or organic gelatin (see recipe notes above)

Sponge

  • Choose either:
  • Vanilla Bean Cup Cake OR
  • Easy Healthy Cake OR
  • Vegan Vanilla Cake (recipes linked above)

Custard (choose your preference)

Vegan, dairy, gluten, egg and grain-free custard

  • 2 mango/s -peeled and flesh pureed
  • 1 tsp vanilla -powder, extract or essence
  • 125 ml canned coconut milk (½ cup)

Traditional gluten-free custard (with dairy-free option)

  • 2 tbsp rice malt syrup or maple syrup
  • 2 egg/s
  • 2 tbsp cornflour -gluten-free (or arrowroot for grain-free)
  • 1 tbsp vanilla -powder, extract or essence
  • 500 ml milk (of choice) (2 cups)

Creamy topping

  • 250 ml cream (1 cup)whipped, or full-fat natural yoghurt, coconut yoghurt or cashew cream.

Serve

  • fresh fruit

Instructions

Jelly

  • Combine the hot water and sweetener until it is dissolved.
  • Sprinkle the gelatin over the raspberry puree and mix until well combined.
  • Add the hot water/syrup mixture and stir well until the gelatin is dissolved.
  • Pour into a glass container and refrigerate to set.

Sponge

  • Bake your sponge and once cooled cut into cubes.
  • It is entirely up to you, but you can do as my Nana would have and soak the cubes in sherry. Or for a non-alcoholic syrup, combine 85 grams (¼ cup) of maple syrup or rice syrup with ¼ cup of boiling hot water stirring until combined. Add the juice of either a lime or orange and spoon over the cubes to soak your cake as you assemble it.

Custard

    Vegan, dairy, gluten, egg and grain-free custard

    • Blend the mango, vanilla, and coconut milk until well combined.

    Traditional gluten-free custard

    • Heat your chosen milk and sweetener until just starting to simmer.
    • Remove from the heat.
    • In a small bowl, whisk together the eggs and cornflour (or arrowroot). Add the vanilla.
    • Slowly add to the hot milk whilst whisking.
    • Return the pot to a low heat and stir continually until the custard thickens to your desired consistency.
    • If you do end up with any lumps, you can pass it through a sieve.

    To assemble

    • Place a layer of jelly in the bottom of the bowl or glass.
    • Arrange the cake on top, spoon over the sherry or non-alcoholic syrup and then cover with a layer of custard.
    • Add another layer of jelly followed by a layer of whipped cream, full-fat natural yoghurt, Coyo coconut yoghurt (vegan and dairy-free), or cashew nut cream (vegan and dairy free).
    • Top with fruit and edible flowers and refrigerate until you are ready to serve.

    Store

    • Store in an airtight container in the fridge.

    Notes

    Low-fructose

    Choose rice malt syrup as your sweetener and low fructose fruits.

    Vegan

    Choose the vegan custard, make the jelly with agar agar and use a vegan cake (I don't have a recipe for this but there are plenty online).
     

    I'd love to hear what version you've tried and how you liked it. Post a comment below.

    Half Shell Scallops

    December 3, 2014 | Fish & Seafood, Holidays & Entertaining

    So with Christmas Day fast approaching, I thought I’d share one of my favourite ‘celebration’ starters. These Half Shell Scallops are such a simple, yet impressive start to a Christmas Day feast or other special occasions. Better still, they are SO simple and fast to make – prep to plate in less than 10 minutes (5 if you have good knife skills)! Goes to prove even ‘special’ can be too easy!

    Seafood is such an Australian Christmas tradition, but I’m so fussy with seafood. I don’t do crustaceans (shame because growing up, my grandfather, uncle, and cousin were all cray-fisherman off the coast of WA). But scallops, when well cooked, I just love!  The key with them is to add flavour without overpowering their own sweet, melt in the mouth taste and I think this recipe does that perfectly.

    Hope you enjoy this delicious starter!

    Health benefits

    Scallops are rich in lean protein and packed with vitamins and minerals like B12 and selenium. Paired with healthy fats from butter or ghee, and a sprinkle of heart-healthy almonds or macadamia nuts, this gluten-free dish is as nutritious as it is delicious.

    Ingredients

    You’ll need fresh half shell scallops, melted butter or ghee, garlic, lemon zest, fresh parsley leaves, and slivered almonds. A few simple, high-quality ingredients go a long way in making this dish shine.

    How to make Half Shell Scallops

    Start by preheating your grill (broiler) to 180°C/350°F. Arrange the scallops on a baking tray and top with a delicious mix of butter, garlic, lemon zest, and parsley. Sprinkle with slivered almonds and pop under the grill for just 3 minutes. You can also cook them on the BBQ (on high) for a quick summer alternative.

    Serving suggestions and how to store

    Serve these scallops with lemon cheeks (and a good squeeze of lemon juice), a sprinkle of parsley, and a pinch of sea salt. For a pop of colour, add edible flowers like garlic flowers. If you have leftovers (though unlikely!), store them in an airtight container in the fridge for up to 24 hours.

    Vary this half shell scallops recipe to suit 

    For a dairy-free version, use ghee or macadamia oil instead of butter. You can swap slivered almonds for crushed macadamia nuts, or if you need a nut-free option, try fresh breadcrumbs or skip the topping altogether.

    Take a look at the variations below for all the details as well as suggestions to alter the recipe to suit your specific dietary requirements.

    Half Shell Scallops are SO simple & fast to make, prep to plate in 10 minutes. Perfect for a fast Christmas day or celebratory starter.
    Print Recipe
    5 from 8 votes

    Half Shell Scallops

    These half shell scallops are an easy, elegant dish that will impress at any dinner party. With just a handful of ingredients and minimal prep time, they’re perfect for entertaining or a fancy yet simple weeknight meal.
    Prep Time10 minutes mins
    Cook Time3 minutes mins
    Total Time13 minutes mins
    Course: Appetizer
    Cuisine: French
    Servings: 4

    Ingredients

    • 12 half shell scallops -I have used QLD scallops with no roe because I don't like it (told you I was fussy)
    • 40 g butter, ghee or macadamia oil -melted
    • 1 clove/s garlic -peeled and crushed
    • 1 lemon/s -zest finely grated
    • 2 tbsp flat leaf parsley -finely chopped
    • 30 g slivered almonds (¼ cup)

    Instructions

    • Preheat your grill to high 180℃/350°F (fan-forced).
    • Arrange your scallops on a large baking tray.
    • Mix together the butter, garlic, lemon zest and parsley.
    • Spoon a little blob of the mixture onto the flesh of each scallop.
    • Top with a pinch of slivered almonds.
    • Pop under the pre-heated grill for 3 minutes (yes they cook super fast)

    BBQ

    • Last year on Christmas day our oven was full of the turkey and other goodies, so we preheated the BBQ on a high heat and cooked them in there with the lid closed for a couple of minutes.

    Serve

    • With lemon wedges (a good squeeze of lemon is a must), scattered parsley leaves and a sprinkling of sea salt. I added some garlic flowers and other edible flowers.

    Notes

    Dairy-free

    Replace the butter with ghee (my preference) or macadamia nut oil.

    Macadamia

    You can replace the almonds with crushed macadamia nuts (I love this version a lot).

    Nut-free

    Replace the nuts with fresh bread crumbs or just leave off.
     

    I'd love too hear if you try this special starter. Post a comment below or rate this recipe.

    Healthy White Chocolate Truffles

    December 2, 2014 | Holidays & Entertaining, No-bake Sweets

    For all of the white chocolate lovers out there, these healthy white chocolate truffles are a creamy, melt-in-your-mouth treat that’s perfect for when you’re craving something sweet but want to keep it nutritious. Made with simple, wholesome ingredients, they’re the perfect gluten-free and dairy-free sweet treat! You could also make these as a gift – they taste that good! Just remember to keep them refrigerated!

    Health benefits

    Packed with good fats from cacao butter, coconut oil, and almond meal, these truffles are a great source of energy and nutrients. Almond meal adds protein and fibre, while the use of rice malt syrup keeps the sugar content lower than traditional white chocolate truffles.

    Ingredients

    The key ingredients in this coconut truffle recipe include rich cacao butter, coconut oil, a natural sweetener like rice malt syrup or maple syrup, vanilla extract, almond meal, and desiccated coconut for texture. The vanilla gives these truffles a lovely, fragrant aroma.

    How to make White Chocolate Coconut Truffles

    To whip up these vegan white chocolate truffles, simply melt the cacao butter and coconut oil, then mix in the sweetener and vanilla. You can adjust the sweetness by adding more syrup if you’d like. Stir in the almond meal and desiccated coconut until everything is well combined. You can also mix in a food processor or Thermomix. Scoop up about a tablespoon of dough and roll into balls and place on a baking tray lined with baking paper (parchment paper). Or to reduce the prep time, press the mixture into a slice tin. Then pop them in the freezer to chill and firm up.

    Serving suggestions and how to store

    For a fun twist, roll your truffles in toasted desiccated coconut or add a roasted macadamia nut to the center for a surprise crunch. Store them in the refrigerator or freezer in an airtight container, so they’re always ready when you need a quick, healthy snack.

    Vary healthy white chocolate truffles to suit

    If you’re out of cacao butter, you can swap it with coconut oil. For a warm, spiced flavour, add cinnamon and mixed spice. Or add a macadamia nuts in the centre.  To keep it low-fructose, opt for rice malt syrup as your sweetener. If you’re craving something different, check out my Chocolate Hazelnut Truffle recipe!

    Take a look at the variations (below the main recipe) for suggestions to alter the recipe to suit your specific dietary requirements.

    For more delicious, healthy and easy to make wholefood treats, click HERE.

    These Healthy White Chocolate Truffles are for all of the white chocolate lovers out there. Dairy-free, gluten-free, vegan & delicious!
    Print Recipe
    5 from 3 votes

    Healthy White Chocolate Truffles

    These quick and easy to make White Chocolate Truffles are a healthy blend of whole food ingredients to make one very delicious treat. 
    Prep Time20 minutes mins
    Total Time20 minutes mins
    Course: Dessert, Snack
    Servings: 50 (approx.)

    Ingredients

    • 100 g cacao butter -melted
    • 100 g coconut oil -melted
    • 170 g rice malt syrup or maple syrup (½ cup)
    • 1 tsp vanilla -powder, extract or essence
    • 80 g desiccated coconut (1 cup) 
    • 400 g almond meal (approx. 4 cups) 
    Metric - US Customary

    Instructions

    • Mix the cacao butter, coconut oil, sweetener and vanilla together until well combined.  If the weather is cool you may need to do this over a very low heat (or in a metal bowl over a pot of simmering water).
    • Add in the rest of the ingredients and mix well until combined (I mixed mine in my Thermomix).
    • Check the constancy of the mix, if it is not firm enough to roll into balls add a little more almond meal.
    • If you'd prefer you can press this into a slice tin lined with baking paper, chill and then cut into squares or 'bliss bites' as I like to call them.
    • I rolled/topped mine with toasted desiccated coconut, you could also use shredded coconut. Place on a tray lined with baking paper.
    • Then place into the freezer right away and chill until firm.

    Thermomix Method

    • Add the cacao butter, coconut oil, sweetener and vanilla to the Thermomix bowl. Combine 2 minutes, 37deg, speed 2. You may need more time depending on the ambient temperature.
    • Add in the rest of the ingredients and mix well until combined, 20-30 seconds, speed 3-4, using the Thermomix spatula through the lid to help incorporate.
    • Check the constancy of the mix, if it is not firm enough to roll into balls add a little more almond meal.
    • If you'd prefer you can press this into a slice tin lined with baking paper, chill and then cut into squares or 'bliss bites' as I like to call them.
    • I rolled/topped mine with toasted desiccated coconut, you could also use shredded coconut. Place on a tray lined with baking paper.
    • Then place into the freezer right away and chill until firm.

    Store

    • Store in the fridge or freezer in an airtight container.

    Notes

    No cacao butter

    Replace with coconut oil.

    Spice 'em up

    Add a teaspoon of cinnamon powder and a teaspoon of mixed spice.

    Macadamia centre

    I rolled mine around a roasted macadamia nut because I love them!

    Low-fructose

    Choose rice malt as your sweetener.
    For a Chocolate Hazelnut Truffle
    Take a look at THIS delicious recipe.


    Hope you love this delicious recipe - post your comment or rate this recipe.

    Mango and Coconut Parfait (with Salted Pineapple)

    November 25, 2014 | No-bake Sweets, Desserts

    This refreshing mango and coconut parfait is the perfect tropical treat. It’s a layered dessert that combines the natural sweetness of mango with creamy coconut, topped with a salty, buttery pineapple for a delicious finish. Simple, yet impressive! It is refined sugar-free, gluten-free, dairy-free and grain-free (complete with a low-fructose option too).

    Health benefits

    I don’t need to tell you that store bought jelly, is loaded with sugar (or yuk artificial sweeteners), artificial flavours and colours. Basically a chemical cocktail of disease-causing nothing-ness.

    Real, homemade jelly is the exact opposite – nourishing, healing and plain good for you. A simple combo of fruit or another whole food and gelatin.

    Gelatin is made from the bone and connective tissue of animals that has been dried and turned into a powder. I have written about its benefits of gelatin in this post about bone broth.

    The biggest benefit of eating gelatin, in my opinion, is that it is a gut healer, which means better nutrient absorption (so greater nourishment) all round.  Also, if your gut is well, then your nervous system is better supported too. It reduces inflammation, improves the joint integrity and for the vain amongst you – it improves the condition of your skin, hair, and nails.  In fact, it’s said to be better then botox (and erase wrinkles, stretch marks, and cellulite) – now I’ve got your attention!

    I like using THIS GELATIN because gelatin is derived from animals, I like to know I am consuming the best quality product with the least chemical loading.

    So now for a delicious way to enjoy gelatin…

    Ingredients

    The star ingredients of this recipe include ripe mango, creamy coconut milk, and grass-fed gelatin to give the parfait its smooth, jelly-like texture. It’s naturally sweetened with a touch of rice malt syrup or honey, making it both tasty and nourishing.

    How to make this mango parfait

    Start by puréeing the mango flesh in a high speed blender. Mix the mango puree with gelatin and boiling water to create the first layer. Once set in the fridge, make the coconut layer by warming half the coconut milk with vanilla and sweetener, then mixing with the remaining gelatin. Layer it over the mango and let it chill until ready to serve.

    Serving suggestions and how to store the mango coconut parfait

    Top your parfait with salted pineapple for an extra burst of flavour, or simply garnish it with toasted coconut flakes, mint leaves, passionfruit, or berries. Store covered in the fridge, and it will keep well for a few days—perfect for prepping ahead!

    Vary this to suit your dietary needs

    To make this low-fructose, swap out the mango for raspberries and use rice malt syrup as your sweetener. For a vegan option, try using agar-agar in place of gelatin (though it hasn’t been tested with this recipe yet). To make it coconut-free, replace the coconut milk with cream. If you’d like to make it into a slice, set the layers in a lined slice tin instead of glasses.

    For more delicious, healthy and easy to make wholefood treats, click HERE.

    Mango coconut parfait
    Print Recipe
    4.75 from 8 votes

    Mango and Coconut Parfait (with Salted Pineapple)

    One of my most favourite desserts, this Mango and Coconut Parfait (with Salted Pineapple) is really very easy to make and such a lovely, light way to finish off a meal. 
    Prep Time15 minutes mins
    Cook Time15 minutes mins
    Chill1 hour hr
    Total Time1 hour hr 30 minutes mins
    Course: Dessert
    Servings: 4

    Ingredients

    Mango layer

    • 1 mango/s -peeled and flesh removed
    • 1 tbsp grass-fed or organic gelatin - I buy THIS brand
    • 250 ml boiling water (1 cup)

    Coconut layer

    • 270 ml canned coconut milk (I like Ayam brand)
    • 1 tbsp grass-fed or organic gelatin
    • 1 tsp vanilla -powder, extract or essence
    • 2 tbsp rice malt syrup, honey or maple syrup -optional

    Instructions

    Mango layer

    • In a powerful blender or food processor purée the mango until smooth. Sprinkle over the gelatin and mix through.
    • Add the boiling water and mix well until the gelatine has dissolved.
    • Pour into 4-6 glasses and refrigerate to set.
    • Once set make your coconut layer.

    Coconut layer

    • Place half the coconut milk in a small pot with the vanilla and sweetener and heat, stirring until the sweetener dissolves (only a minute or so) then remove from the heat immediately.
    • Sprinkle the gelatin over the unheated half of the coconut milk, mix together until dissolved and then add to the hot coconut milk, mixing until combined and the gelatin is dissolved.
    • Allow to cool a little and pour a layer on top of the mango jelly.
    • Return to the fridge to set.
    • Chill until you are ready to serve.

    Serve

    • I've served this with salted pineapple (diced about half a cup of  pineapple into small cubes and cook over a high heat with a tablespoon of salted butter for a few minutes).  If you'd like a more caramelised pineapple, add a tablespoon of sweetener as well as the butter.
    • Toasted coconut flakes
    • Passionfruit or berries would be lovely too

    Store

    • Covered in the fridge.

    Notes

    Low-fructose

    Replace the mango with 1 cup of raspberries, pureed and pushed through a sieve (to remove the pips). Chose rice malt syrup as your sweetener and serve with more berries. This is a good option if mango is out of season or not available to you/

    Vegan

    You can replace the gelatin with agar-agar (I haven't recipe tested as yet).

    Make a gummy slice

    You can make a slice with one or both layers by setting it in a lined slice tin. 

    Coconut-free

    Replace the coconut milk with cream. 
     

    I love, love, love creating delicious goodies with gelatin. I'd love to hear how you like this recipe. Post a comment or rate this recipe below!

    Cabbage, Pea and Mint Salad

    November 19, 2014 | Vegetarian, Salads

    I love this light and super tasty Cabbage, Pea and Mint Salad. With the warmer weather in full swing (at least, it is here in QLD), one of my favourite past-times is creating the ultimate salad. This week I picked a beautiful green cabbage and the last of my sugar snap peas from my veggie patch which has inspired this creation. It is perfect for BBQ’s and entertaining as it can be prepared ahead. It’s vegetarian, grain, gluten-free and low-fructose with a variation for vegan and dairy-free.

    Health benefits

    This salad is full of nutrition. Like it’s other cruciferous cousins, cabbage is a rich source of many micronutrients (vitamins and mineral) and fibre (3.5g per serve). It also contains glucosinolates (sulphur containing plant chemicals) many of which have been researched for their promising anti-cancer properties. It also yields about 4g protein per serve.

    Ingredients

    Using simple ingredients like fresh white cabbage, peas, mint leaves, and a lemony dressing, this salad comes together effortlessly. It’s gluten-free and easy to adapt for different dietary needs. I think it’s better than a traditional slaw.

    How to make this cabbage pea salad

    In a large bowl, combine finely shredded cabbage, peas, mint leaves, and thinly sliced radish. Mix up the dressing ingredients… lemon-infused extra-virgin olive oil, red wine vinegar, lemon juice, and sea salt in a jar, and toss it through the salad. Finish by sprinkling over the grated parmesan and serve immediately.

    Serving suggestions and how to store

    This cabbage salad is best served fresh but can be made ahead by preparing the veggies and adding the dressing and parmesan just before serving. Store any leftovers in an airtight container in the fridge for up to two days.

    Vary this to suit your dietary needs

    For a dairy-free or vegan version, swap the parmesan for a mix of ground macadamia nuts, nutritional yeast, and a pinch of salt. Don’t like radishes? Soak them in lemon juice to mellow out the flavour, or replace them with red capsicum for extra crunch. Take a look at the variations (below the main recipe) for suggestions to alter the recipe to suit many specific dietary requirements.

    For lots more sides and salad inspo, take a look at my hugely popular ebook ËœWell Nourished Sides and Salads’– where vegetables become the hero of the dish! It’s great value at just $9.95, click HERE to take a look.

    Cabbage, mint pea salad
    Print Recipe
    4.67 from 9 votes

    Cabbage, Pea and Mint Salad

    This fresh and crunchy cabbage, pea, and mint salad is a light yet delicious side dish perfect for summer. With the sweetness of peas, the zing of radish, and the aromatic freshness of mint, it’s a quick salad that pairs well with almost any meal.
    Prep Time15 minutes mins
    Total Time15 minutes mins
    Servings: 4

    Ingredients

    • ½ green cabbage (I used a sugarloaf) or ¼ of a large, finely shredded
    • 75 g fresh peas (½ cup) you can use frozen blanched quickly in hot water or finely sliced snow peas
    • ¼ bunch/s fresh mint leaves -picked off the stems
    • 4 radish/s -halved and sliced thinly
    • 50 g parmesan cheese (½ cup) finely grated

    Dressing

    • 2 tbsp lemon-infused olive oil (or extra virgin oilve oil)
    • 1 tsp red wine vinegar (or raspberry vinegar is lovely too)
    • 1 tsp lemon juice
    • ¼ tsp sea salt

    Instructions

    • In a large salad bowl combine the cabbage, peas, mint and radish.
    • Mix the ingredients for the dressing in a small bowl or shake in a jar.
    • Toss through the salad to coat it evenly.
    • Then mix through the parmesan and serve immediately.

    Tip

    • To make ahead, combine the vegetables in a bowl and mix with the dressing and parmesan at the last minute.

    Store

    • Store in an airtight container in the fridge.

    Notes

    Dairy-free and vegan

    Replace the parmesan with ¼ cup  ground macadamia nuts mixed with a tablespoon of nutritional yeast and a good pinch of sea salt.

    Don't like the radish?

    If you or your kids are not a fan of radish, slice them and then soak in lemon juice and a little sea salt for 10 minutes before adding to the salad.  No heat and a divine citrus flavour is the result.

    Extra veggies

    I often also add red capsicum to this salad.

    Note about Lemon oil

    I like the Cobram Estate brand of lemon olive oil  in most supermarkets. Otherwise just use regular olive oil.


    This is one of my personal faves. Let me know how you enjoy it, post a comment or rate this recipe below. 

    Healthy Satay Sauce (sans peanuts)

    November 4, 2014 | Make-ahead Meals, Freezable Meals, Vegetarian, Sauces and Dressings

    I love recipes that are versatile and I think this healthy Satay Sauce is just that. Like all of my recipes it is very simple to make and I really love the delicate balance of Asian flavours which are perfect for both a light summer-time meal and a warming winter meal.

    This healthy satay sauce swaps out peanuts for creamy cashews, creating a deliciously rich and nutty sauce that pairs perfectly with grilled meats, veggies, or even rice paper rolls. It’s quick to make and packed with fresh flavours from ginger, garlic, and lemongrass. It’s perfect for those with allergies to peanuts.

    Health benefits

    I like to make this with cashew nuts. Cashews bring healthy fats, protein, and essential vitamins to the table, while the ginger, garlic, and lemongrass support digestion and boost immune health. Coconut milk adds creaminess without dairy, making this satay sauce lighter but still rich and satisfying.

    My Satay recipe is of the whole food kind, unlike many of the store bought ‘simmer’ style sauces. These processed sauces are nowhere near as tasty and contain dangerous additives and massive amounts of sodium and sugar (about half a cup of the sweet stuff in most jars I looked at). Two of the concerning additives I came across repeatedly are Caramel 1, which according to Additive Alert by Julie Eady, is linked to ‘gastrointestinal problems and hypersensitivity’ and 407 which is ‘a suspected carcinogen, linked to ulcerative colitis, damaging to the immune system and there is a concern re- birth defects.’ They also warn ‘do not give to infants and young children.’

    So let’s just nourish our bodies every which way and make our own with this fast, simple recipe!

    Ingredients

    Made with simple, whole food ingredients like cashews, coconut milk, garlic, ginger, lemongrass, and tamari, this sauce is naturally gluten-free and adaptable to different tastes and dietary preferences.

    How to make peanut-free satay sauce

    To make this satay sauce recipe, pulse the toasted cashews in a food processor or high speed blender, then add the onion, garlic, ginger, and lemongrass to make a rough paste. Cook this mixture in coconut oil until softened, then stir in the coconut milk, chopped cashews, and other seasonings. Simmer until the sauce thickens, then adjust the flavours to taste.

    Serving suggestions and how to store

    Serve this satay sauce drizzled over grilled meat (chicken satay anyone?) as a dipping sauce for fresh spring rolls, paired with steamed veggies or mixed through stir-fries or noodles. Leftovers can be stored in an airtight container in the fridge for up to a week, or frozen for future use.

    Vary healthy satay sauce to suit

    For a vegetarian option, serve this sauce with Gado Gado-style veggies and boiled eggs. For a vegan twist, pair it with tempeh and vegetables. You can also thin it out with more coconut milk for a lighter sauce or spice it up with extra chilli for added heat.

    Take a look at the variations (below the main recipe) for suggestions to alter the recipe to suit your specific dietary requirements.

    This healthy satay sauce is a really simple alternative to the awful, sugar & additive laden supermarket sauces. But it's made without peanuts
    Print Recipe
    5 from 1 vote

    Healthy Satay Sauce (sans peanuts)

    This is a quick, easy and delicious version of the classic, made with cashews rather than peanuts. 
    Prep Time20 minutes mins
    Cook Time15 minutes mins
    Total Time35 minutes mins
    Course: Main Course
    Cuisine: Asian
    Servings: 1 cups

    Ingredients

    • 100 g raw cashew nuts (â…” cup) lightly toasted
    • 1 red onion/s -peeled and halved
    • 2 clove/s garlic -crushed or finely diced
    • 1 tsp ginger root -peeled
    • 2 stalk/s lemongrass -inner core only
    • 1 tbsp coconut oil (or ghee or butter)
    • 125 ml canned coconut milk (½ cup)
    • 1 tbsp rice malt syrup (optional)
    • 1 red chilli/s -finely diced  (optional)
    • 1 tbsp tamari
    • ½ lime/s -juice

    Instructions

    • In a food processor, pulse the cashews until they are just chopped (I like a bit of texture or the Satay will be too creamy). Set aside.
    • Now add the red onion, garlic, ginger and lemongrass to the processor and process to a rough paste (if you don't have a processor you can finely grate them or pound in a mortar and pestle).
    • Over a low heat, melt your fat and add the onion mix. Saute for a few minutes until the onion starts to soften.
    • Then add the chopped cashews, coconut milk, optional chili, sweetener and 125ml (1/2 cup of water).
    • Simmer for 5-10 minutes or until the sauce thickens.
    • Stir in the tamari and lime juice and taste it. Adjust the heat (chilli), saltiness (tamari), sweetness (rice syrup or coconut sugar) and sour flavours (lime juice) to your taste, if necessary.
    • Delicious served one of the ways below and with lime cheeks and fresh coriander leaves.

    Traditional

    • Thin the sauce with water or more coconut milk and drizzle it over satay sticks

    Vegetarian

    • Indonesian Gado Gado style is a quick, healthy summertime meal (as pictured). I use a mix of steamed and raw vegetables and boiled eggs. Here we have raw red cabbage, celery, cucumber, and capsicum. Steamed cauliflower, broccoli, asparagus (I'd usually add green beans too). The nice thing about eating this way is that the whole family can share and pick and choose what they want

    Vegan

    • This is delicious served with vegetables (as above) and tempeh

    Wraps or rice paper rolls

    • Grill some meat, toss with the satay sauce and wrap in mountain bread or rice paper rolls with lots of  julienned vegetables

    Lettuce cups

    • Grill some meat, toss with the satay sauce and serve with salad, Asian herbs, and vegetables in whole cos or iceberg lettuce cups

    Store

    • Store in an airtight container in the fridge.
    • Can also be frozen.

    Make-ahead

    • Re-heat in a pot over a low heat until just hot.

    Notes

    Cashew-free

    Sub with peanuts.

    Nut-free

    Sub toasted sunflower seeds and 1 tablespoon of tahini.

    Low-fructose

    Use rice malt syrup as your sweetener.

    Soy-free

    Replace the tahini with liquid or coconut aminos.

    No-spice (heat)

    Leave out the chilli (and ginger if really sensitive).

    Quinoa Stuffed Mushrooms

    August 20, 2014 | Make-ahead Meals, Vegetarian

    These Quinoa Stuffed Mushrooms are a delicious, gluten-free and grain-free, vegetarian meal and a real family favourite. Friends have touted this a ‘restaurant quality’ meal, but they couldn’t be simpler to make. Line up flat mushrooms on a baking sheet or dish, stuffing with a flavoursome mix of onion, spinach and feta and topping with crunchy walnuts and chia seeds. Bake in the oven for 20 minutes and you have an impressive result with very little effort. 

    Health benefits

    Mushrooms are a nutritious vegetable and one of the few sources of vitamin D. The garlic and red onion are wonderful immune building, detoxifying vegetables. The quinoa is a complete protein and fibre rich seed. More plant-based fibre and nutrition are provided by the spinach and walnuts. The chia is another excellent source of fibre, protein and essential fatty acids.

    Ingredients

    The key ingredients in this recipe are of course quinoa and mushrooms! Portobello or field mushrooms are used as a large, flat base and filled with a flavoursome mixture of the stems, onion, spinach, thyme and feta. This is then topped with walnuts which roast in the oven as it is baked, giving an extra flavoursome and crunchy topping. To complete the meal, the stuffed mushrooms are dressed with a zesty garlic and lemon dressing.

    How to make Quinoa Stuffed Mushrooms

    While your oven is preheating, rinse and cook the quinoa. Rinsing is important to wash off any saponins that can otherwise make the quinoa taste bitter. Drain well then transfer to a saucepan, cover with water and bring to a simmer. When the water has been absorbed, place a lid on the saucepan and turn off the heat. This traps the steam, completing the cooking without risking burning the quinoa. While the quinoa is cooking, you can de-stem the mushrooms and chop the stems finely, dice the onion and chop the spinach and fresh thyme. Once the quinoa is cooked, this can be added to the chopped vegetables as well as the feta cheese. Stir together well then press firmly onto the mushrooms on the baking sheet or dish lined with parchment paper. Top with the chopped walnuts and chia if you like, then bake. While baking, prepare the dressing if you are including this. I love the flavours of the dressing to add a bit of fresh zesty lemon to the dish.

    Vary Quinoa Stuffed Mushrooms to suit

    This recipe lends itself to many variations! I’ve included nut-free for school lunches, dairy-free, vegan and garlic-free. If you’re out of quinoa, that’s okay too! Rice or buckwheat also work for this stuffing. For green-avoiding people, there’s an easy substitute for the fresh spinach and if mushrooms really aren’t your thing, you can even swap them to make stuffed tomatoes or capsicums. The instructions are easy to follow with these variations so have a good look to suit your needs.

    Serving suggestions and how to store

    Serve your quinoa stuffed mushrooms warm with a sprinkle of fresh rocket and a drizzle of zesty dressing. If you have leftovers, they store beautifully in an airtight container in the fridge—just reheat them in a low oven until they’re warmed through. 

    More delicious, easy to make vegetarian meals HERE.

    Quinoa Stuffed Mushrooms -a simple, delicious vegetarian meal & a real family favourite. It's gluten-free with variations for dairy-free
    Print Recipe
    4.86 from 7 votes

    Quinoa Stuffed Mushrooms

    One of my favourite meatless Monday meals, these Quinoa Stuffed Mushrooms are really tasty and quite simple to make. Plant powered nourishment!
    Prep Time25 minutes mins
    Cook Time20 minutes mins
    Total Time45 minutes mins
    Course: Appetizer, Main Course
    Servings: 4

    Ingredients

    For the stuffed mushrooms:

    • 135 g quinoa (¾ cups)
    • 8 large portobello or field mushrooms -stalks removed and set aside
    • ½ red onion/s (small) finely diced
    • 30 g baby spinach - or kale leaves, finely chopped (approx. handful)
    • 1 tbsp fresh thyme leaves -picked off the stalks (or 1 teaspoon of dried)
    • 100 g feta cheese -or goats curd, crumbled
    • 60 g walnuts (½ cup) roughly chopped
    • 1 tbsp chia seeds (optional)

    For the dressing (optional):

    • 1 clove/s garlic -unpeeled (roasted with the mushrooms)
    • 1 lemon/s -(small) zest and 2 tablespoons of juice
    • 60 ml extra virgin olive oil -extra virgin (4 tbsp)
    Metric - US Customary

    Instructions

    • Preheat your oven to 180º C/350°F (fan-forced).
    • Rinse the quinoa in a fine sieve really well for at least 1 minute (this removes the bitter saponins from the quinoa). If you have time to soak the quinoa in water with a splash of apple cider vinegar (for up to 12 hours) this will improve its digestibility.
      Cook the quinoa by placing it into a pot with 1½ cups of water.
    • Bring the mixture to a boil over medium-high heat, then decrease the heat a bit to maintain a gentle simmer. Cook uncovered until the quinoa has absorbed all of the water, about 10 to 12 minutes.
    • Remove the pot from heat, cover, and let the quinoa steam for 5 minutes. This step gives the quinoa time to pop open and the little white spiral to appear. After 5 minutes, remove the lid and fluff the quinoa with a fork.
    • Chop the mushrooms stalks up and combine in a bowl with the quinoa, onion, spinach or kale and thyme leaves.
    • Now mix through the feta or goats curd. Taste and season with sea salt and freshly ground black pepper.
    • Spoon onto the mushrooms, pressing it into place and then top with the walnuts and sprinkle with the chia seeds.
    • Place them in a baking tray with the whole clove of garlic and roast for 20 minutes.
    • For the dressing mix together the zest, lemon juice and olive oil, and once cooked, squeeze out the soft centre of the roasted garlic and mix into the dressing.

    Serve

    • With rocket and a drizzle of dressing.

    Make-ahead

    • Re-heat in a low oven until just hot.

    Store

    • Store in an airtight container in the fridge.

    Notes

    Nut-free

    Leftovers are great for school lunches. To make them nut-free substitute the walnuts with sunflower seeds or just omit altogether.

    Dairy-free and vegan

    Replace the feta or goat cheese with a thick cashew nut cream. Recipe here.

    Garlic-free

    Omit the garlic in the dressing.

    No quinoa

    No worries, you can replace it with brown rice or buckwheat.

    Kids hate green

    Replace the spinach with grated carrot.

    Don't do mushrooms?

    Then you may not have read this far - but, you could substitute with half a tomato or capsicum with the centre scooped out.


    Hope you like this recipe?  I love to receive your feedback, write a comment below to show your support!

    Self-saucing Chocolate Pudding

    August 13, 2014 | Baked Sweets, Desserts

    This low sugar self-saucing chocolate pudding is a perfect winter dessert – so I thought I’d better sneak it onto the blog before the weather starts to warm up! It is so easy to make and the result is a moist, gooey chocolate centre and a light, fluffy cake on top. Certainly not an everyday food, but a lovely refined sugar-free chocolate hit. I’ve also included variations for gluten, grain, dairy-free and low-fructose. My kids go crazy for this simple dessert!

    Health benefits

    While this pudding is definitely a treat, using wholemeal spelt flour and natural sweeteners like rice malt syrup or honey makes it a healthier option compared to traditional chocolate puddings. Cacao is rich in antioxidants and can give your mood a boost, so there’s a little extra goodness packed into every bite.

    Ingredients in 

    You’ll need butter, milk, an egg, baking powder, coconut sugar or rapadura, cacao powder (or cocoa powder), and wholemeal spelt flour for the cake. The sauce comes together with rice malt syrup, cacao, and boiling water for that signature self-saucing effect. It’s a simple ingredient list that creates something magical.

    How to make this healthier chocolate self-saucing pudding

    Start by preheating your oven and greasing your ovenproof baking dish or ramekins. Blend or whisk together the wet ingredients in a medium bowl with the sugar and cacao, fold in the spelt flour and gently stir until combined. Pour the pudding batter into your prepared dish or ramekins and carefully pour the sauce mixture over the top of the batter using the back of a spoon to slow the flow. Bake for 20-30 minutes until the top is set and the sauce is bubbling underneath.

    If you own a Thermomix, we’ve also included Thermomix instructions for this recipe.

    Serving suggestions and how to store

    This pudding is best served fresh out of the oven while the chocolate sauce is still hot and gooey. Pair it with double cream, coconut cream or vanilla ice cream and add some fresh berries for a refreshing contrast. If you have leftovers (unlikely!), store them in an airtight container in the fridge and reheat gently.

    Vary this low sugar self-saucing chocolate pudding to suit 

    To make this self-saucing chocolate pudding dairy-free, use coconut milk and replace butter with macadamia nut oil or coconut oil. For a gluten-free version, swap the spelt flour for a blend of almond meal and buckwheat flour. Low-fructose? Try pure stevia instead of coconut sugar. 

    Take a look at the variations (below the main recipe) for suggestions to alter the recipe to suit your specific dietary requirements.

    For more delicious, healthy and easy to make wholefood treats, click HERE.

    Low Sugar Self-Saucing Chocolate Pudding, a delicious refined sugar free gooey chocolate treat with variations for fructose, gluten, grain & dairy free
    Print Recipe
    4.70 from 30 votes

    Self-saucing Chocolate Pudding

    This self-saucing chocolate pudding is the ultimate indulgence, with a rich, gooey chocolate centre and a light, fluffy cake on top. It’s perfect for a cozy dessert that’s easy to throw together but feels like a special treat. Serve it hot out of the oven with cream or berries for a delicious dessert.
    Prep Time15 minutes mins
    Cook Time20 minutes mins
    Total Time35 minutes mins
    Course: Dessert
    Servings: 4

    Ingredients

    • 80 g butter -melted
    • 120 ml milk (of choice) (½ cup)
    • 1 large egg/s
    • 2 tsp baking powder
    • 2 tbsp coconut sugar or rapadura
    • 2 tbsp cacao powder -unsweetened Dutch process or raw
    • 115 g wholemeal spelt flour (1 cup) see gluten-free below

    For the sauce

    • 170 g rice malt syrup, honey or maple syrup (½ cup)
    • 2 tbsp cacao powder -unsweetened Dutch process or raw
    • 250 ml boiling water (1 cup)

    Instructions

    • Preheat your oven to 180º C/350°F (fan forced). Grease an 8 cup capacity ovenproof dish or four large ramekins.
    • In a food processor or blender mix together the melted butter, milk, egg, baking powder, coconut sugar and cacao until frothy and very well combined. 
    • If using a Thermomix, melt the butter 1 minute, temp 80, speed 3. Add the milk, egg, baking powder, sugar, and cacao and mix 30 seconds, speed 5.
    • Fold through the spelt flour gently until just combined (don't over-mix or it will become rubbery).
    • If using a Thermomix, mix 10 seconds, interval speed, fold in flour from side
    • In a large jug, dissolve the rice malt syrup and cacao in the boiling water.
    • Place the cake batter into the oven proof dish or divide between the ramekins.
    • Slowly pour the sauce over the back of a large metal spoon to cover the cake mix.
    • Place your dish or ramekin on a tray in case the sauce bubbles over and bake for approximately 20 minutes (for the ramekins) and 30 minutes if using a large dish.
    • Serve hot out of the oven with double cream and berries.

    Store

    • Best hot and fresh out of the oven but can also be stored airtight in the fridge and reheated in a low oven.

    Notes

    Dairy-free

    Use coconut milk and swap the butter for 80ml of macadamia nut oil or coconut oil. Serve with coconut cream.

    Grain and gluten-free

    Swap the spelt for half a cup of almond meal and half a cup of buckwheat flour.

    Low-fructose

    Exchange the coconut sugar for pure stevia (to taste).

    Coconut-free

    Choose rapadura as your sweetener.
     

    I'd love to hear how you like this scrumptious pudding. Post a comment or rate the recipe below. 

    Char-grilled Brussels Sprouts

    August 7, 2014 | Vegetarian, Side dishes

    These Char-grilled Brussels Sprouts have become a favourite in our household. So much so my kids ask me to buy them every time I’m grocery shopping. As much as they eat most vegetables – they would rarely actually request them for dinner!

    My husband and I both reminisce how much we hated Brussels Sprouts as kids. So why do my kids absolutely love them? We were eating out on holiday one year and I took a punt and ordered a side serve of this much-maligned vegetable; I just like the way it read on the menu (char-grilled, mustard, lemon…flavours we all like).

    The rest they say is history and here, I share my kids favourite brussels sprouts recipe (which we now have to count onto plates to make sure everyone has an equal amount).

    Heath benefits or char-grilled brussels sprouts

    Brussels Sprouts are from the Brassica family of vegetables – the same family as the cruciferous vegetable broccoli, kale and cabbage. They are a great source of dietary fibre, vitamins c and vitamin K making them great for gut health and immunity. Cruciferous vegetables contain cancer-fighting antioxidants called glucosinolates, but Brussels sprouts top them all when it comes to the total content. Brussels sprouts provide essential nutrient support for the body’s detox, antioxidant and anti-inflammatory pathways, all of which are important for fighting cancer. In Traditional Chinese Medicine, they are prescribed to help with digestion.

    By serving with a fat (like olive oil), it assists the absorption of the fat soluble vitamins.

    Ingredients

    You’ll need fresh Brussels sprouts, dijon mustard, lemon-infused olive oil, red wine vinegar, and seasonings like sea salt and black pepper. If you don’t have lemon infused olive oil, replace it with regular olive oil and a tablespoon of lemon juice. These simple ingredients come together for a delicious, nutrient-rich side dish that’s easy to whip up.

    How to make Char-grilled Brussels Sprouts

    Start by trimming and halving your Brussels sprouts. Heat your BBQ or chargrill to high and cook the sprouts quickly on the hot grill until the outer leaves start to blacken. In a small bowl, mix the mustard, lemon extra virgin olive oil, and vinegar, then toss it with the hot sprouts. Serve them immediately for the best flavour and texture.

    Serving suggestions and how to store

    These char-grilled Brussels sprouts are best served fresh and hot right off the grill. They make a great side dish for grilled meats or as part of a vegetarian meal. If you have leftovers, store them in an airtight container in the refrigerator for up to two days, and reheat them on the stove or in the oven to keep the crispiness.

    Other ways to enjoy Brussels sprouts

    The best way to cook Brussels – first and foremost is QUICKLY. Overcooking them results in the releases of the stinky (though very healthy) glucosinolates which has most likely turned you off this vegetables in the past. Other ways I like to enjoy them include stir-fried, roasted and lightly steamed.
     
    Other flavours that work well with Brussels Sprouts:
    • Toss through with crispy bacon or pancetta
    • Mix with caramelised onion and balsamic vinegar
    • Nice with grated parmesan or another strong flavoured cheese
    • A drizzle of any acidic dressing is lovely too
    Char-grilled Brussels Sprouts with a lemon oil & mustard dressing are my kids favourite vegetable. It's all in the flavour combos, so yummy
    Print Recipe
    5 from 2 votes

    Char-grilled Brussels Sprouts

    Char-grilled Brussels sprouts are a quick and tasty way to enjoy this often underrated vegetable. They develop a smoky, crispy exterior that pairs perfectly with a tangy mustard dressing. This recipe is perfect for a BBQ side dish or a light, healthy snack. Once you’ve tried Brussels sprouts cooked this way, they’ll become a regular feature in your meal rotation!
    Prep Time10 minutes mins
    Cook Time5 minutes mins
    Total Time15 minutes mins
    Course: Side Dish
    Servings: 4 sides

    Ingredients

    • 12-15 brussels sprouts
    • 1 tsp dijon mustard
    • 3 tbsp lemon-infused olive oil (I like Cobram Estate brand from all supermarkets)
    • 2 tsp red wine vinegar
    • Sea salt and freshly ground black pepper - to taste

    Instructions

    • Prepare you Brussels Sprouts by trimming the stalks and stripping the outer leaves. Cut lengthways in half.
    • Heat the chargrill on your BBQ to high.
    • Cook the sprouts very quickly, just until the outer leaves are blackening.
    • In a small bowl mix the mustard, lemon infused olive oil and vinegar.
    • Toss through the Brussels Sprouts to coat and serve immediately.

    Notes

    No lemon infused oil

    No problem. Use olive oil with a tablespoon of lemon juice instead. 
     
    For lots more sides and salad inspo, take a look at my hugely popular ebook ˜Well Nourished Sides and Salads’- where vegetables become the hero of the dish! It’s great value at just $9.95, click HERE to take a look.
     

    Is this a vegetable you like, or not?  How else do you like your sprouts or if you try this and would like to let me know how it was received, post your comment below?

     
    • <
    • Page 1
    • Interim pages omitted …
    • Page 15
    • Page 16
    • Page 17
    • Page 18
    • Page 19
    • Interim pages omitted …
    • Page 21
    • >

    Primary Sidebar

    Join the community

    Social Media

    Join over 140,000 followers

    Nourish Your Inbox

    Nourish Your Inbox!

    Christmas Meal Planning Ebook

    Sign up today for your FREE:
    • Chocolate Ebook
    • Subscribers Only Special Offers
    • Practical Health & Nutrition Tips
    • New Whole Food Recipes

    WN App

    Join the Family

    Join the Family

    Join The Family

    The Well Nourished Family Membership is your complete solution to your families health and wellbeing. With 1200+ whole food recipes and SO MUCH MORE. Join for a limited time for over 80% OFF!

    JOIN & SAVE 80%

    Upgrade Your Membership – Recipe Only

    Health Programs & Courses – Public

    Health Programs & Courses

    Health Programs & Courses

    Whether you’re looking for effortless meal creation, lunchbox inspiration or strategies to raise adventurous eaters, our expert-led resources will guide you every step of the way.

    Find Out More

    Programs and Courses – FAM only

    Affiliate promo – public

    Become an Affiliate

    Looking to partner with a respected, Australian-run health and wellness brand to expand your reach and your income?

    Find out More

    Featured Lunchbox Ebook – Public

    From the Shop

    See More

    Footer

    Logos

    Well Nourished HomepageWell Nourished

    As featured on

    Footer-social

    Connect with us

    • About Well Nourished
    • Sitemap
    • Contact
    • Privacy Policy
    • Website Terms of Use
    • Affiliates

    © Well Nourished 2026

    A Firstnature site

    Not feeling quite yourself?
    If you're dealing with skin flares, gut issues, fatigue or joint pain, this five-minute quiz will help you understand what's actually driving it.
    TAKE QUIZ

    Rate This Recipe

    Your vote:


    A rating is required
    A name is required
    An email is required