
Fish is not only a really healthy source of protein and essential fats, it’s also super quick to cook so it’s a great choice for your weekly meal plan if you are time poor. It is best to obviously source a sustainably caught, local fish. If you are after a variety that is only farmed,…
grainfree
Lamb – simple ways to enjoy it
There are many ways to enjoy the many cuts of lamb. This guide ‘Lamb – simple ways to enjoy it’ lists the most common cuts of lamb and the best way to cook them. Lamb is a protein my family would eat about once a week. Simply prepared with a lovely side or salad is one…
Chicken – simple ways to enjoy it
There are many ways to enjoy the many cuts of chicken. This guide ‘Chicken – simple ways to enjoy it’ lists the most common cuts of chicken and the best way to cook them. Chicken is one of my favourite proteins. My family would eat it 2-3 times per week. Simply prepared chicken and a lovely…
Beef – Simple ways to enjoy it
There are many ways to enjoy the many cuts of beef. This guide ‘Beef – Simple ways to enjoy it’ lists the most common cuts of beef and the best way to cook them. The cut of meat you choose will have a unique amount of fat, tenderness and flavour depending on what part of the…
Turkey Sage Spaghetti Meatballs
This Turkey Sage Spaghetti with Meatballs is my twist on Jamie Oliver’s famous “recipe to save your life”. Jamie nominated his Classic Tomato Spaghetti for me (and a small group of cooks) to reinvent. Now, it’s hard to mess with a classic, but the naturopath in me couldn’t resist adding a boost of protein and vegetables to turn this simple staple into a more balanced, nutritionally complete meal.
So that’s exactly what I did and not only is this Turkey Sage Spaghetti Meatballs a very nourishing meal, it’s also absolutely delicious and really very quick and simple to make. It can also be made ahead and reheated to serve.
Health benefits
Turkey is a vitamin and mineral rich source of protein. It is a rich source of tryptophan which is a precursor of the neurotransmitter serotonin, our feel-good hormone. It’s also a great source of vitamin B12, which makes it a great option for those who suffer from anxiety and mood disorders. I like to cook with it occasionally to add a little nutritional variety to my families diet. The assortment of vegetables included in the meatballs and sauce contributes lots of plant-based fibre and nutrition.
You can serve this dish the traditional way, with whole wheat or gluten-free spaghetti. Or for even more nutritional bang for your buck, serve it with zoodles (courgettes/zucchini spiralized) or quinoa. Whatever your preference, these are SO delicious!
What you need to make this Spaghetti Meatball recipe
You’ll need turkey mince, fresh sage, almond meal, an egg, and a few staple veggies like onion, garlic, and spinach for the meatballs. The tomato sauce uses roma tomatoes (or canned), fresh basil, onion, garlic, and olive oil for a delicious, authentic Italian touch.
How to make Turkey Sage Spaghetti Meatballs
Start by cooking the tomato sauce with diced onion, cloves garlic, and tomatoes, allowing it to simmer to bring out the flavours. While the sauce is simmering, mix the meatball ingredients in a large bowl, roll them into golf ball-sized portions, and cook them in a hot pan. Once browned, simmer the meatballs in the sauce until cooked through.
Serving suggestions and how to store
Serve these meatballs with your favourite pasta, gluten-free spaghetti, or zoodles, topped with fresh basil (or parsley) and grated Parmesan or nutritional yeast. They also pair well with a simple green salad. Leftovers can be stored in the fridge in an airtight container or frozen for easy meals later on.
Vary turkey sage spaghetti meatballs to suit your needs
For nut-free meatballs, swap almond meal with breadcrumbs. If you need an egg-free version, just leave out the egg. You can also replace onion with fennel or omit garlic, using cumin and cayenne for extra flavour. Check out the variations below the main recipe for all of my tips on how to adapt it to your specific dietary needs.
PS- this dish is photographed in the stunning Solidteknics safe, non-stick, everlasting cookware. More about it HERE.
For more delicious, easy to make healthy meals, click HERE.

Turkey Sage Spaghetti Meatballs
Turkey sage spaghetti meatballs are a wholesome twist on a classic family favourite. With tender turkey mince, fresh sage, and a rich homemade tomato sauce, these meatballs are delicious served over spaghetti or zoodles for a gluten-free option. This is a go-to recipe when you're looking for something comforting and nutritious.
Servings: 6
Ingredients
Tomato Sauce
- 1 bunch/s fresh basil leaves
- 1 onion/s -finely diced
- 2 clove/s garlic -finely sliced
- 1 kg roma tomatoe/s (or 2 x 400g tins of chopped tomatoes)
- 1 tbsp red wine vinegar (or balsamic vinegar)
- 1 tbsp extra virgin olive oil -extra virgin
Turkey and Sage Meatballs
- 1 rasher/s bacon - short cut, finely diced
- 1 red onion/s -finely diced
- 1 clove/s garlic -crushed
- 30 g baby spinach -finely chopped (1 cup approx.)
- 1 carrot/s (large) grated
- 500 g turkey mince
- 50 g almond meal (½ cup)
- 1 egg/s
- 2 tbsp fresh sage leaves (or 1 tablespoon dried sage)
- Sea salt and freshly ground black pepper -to taste
- 300 g spaghetti - I love quinoa and rice spaghetti
Instructions
Start with the tomato sauce:
- Pick the basil leaves from the stalks, finely chop the stalks and set aside the basil leaves which you can also roughly chop or tear.
- Peel and finely dice the onion and garlic. I generally chop this in the Thermomix garlic 5 seconds, speed 5 then add the onion, 10 seconds speed 5. I then add this to a small pot (to make the sauce) and without washing the Thermomix, use the bowl to make the meatballs.
- Put a saucepan on a medium heat and add 1 tablespoon of olive oil and the onion and garlic. Cook for around 7 minutes, or until soft and lightly golden.
- If using fresh, cut the tomatoes in half, then roughly chop them or carefully open the tins of tomatoes.
- Stir in the basil stalks for a few minutes, then add the fresh or tinned tomatoes and the vinegar.
- Season with a tiny pinch of salt and pepper, then continue to simmer for around 20 minutes (for canned tomatoes) or 30 minutes for fresh, stirring occasionally.
- Once cooked, remove from the heat and stir in the basil leaves (reserving a few to garnish).
- Meanwhile…
Prepare the meatballs:
- Prepare (chop or grate) your bacon, onion, garlic, spinach and carrot (by hand or in a food processor). Thermomix garlic first 5 seconds speed 5, then the onion, bacon, carrot and spinach, 20 seconds speed 4-5 (until chopped finely).
- Place in a large mixing bowl with the turkey mince, almond meal, egg, sage and seasoning. Thermomix add the mince, almond meal, egg, sage and seasoning and mix 30 seconds, on reverse speed 3 (you may need to scrape the sides to make sure the ingredients are evenly combined).
- Wash your hands well and squeeze the mixture to combine all of the meatball ingredients.
- Roll it into approx. golf ball sized meatballs and set aside until ready to cook.
- To cook, place a little olive oil in a large non-stick or cast iron pan and heat over a medium-high heat. Cook the meatballs for about 5 minutes or until brown, turning to cook on both sides.
- Once the meatballs are almost cooked, pour over the tomato sauce and let simmer for 5 minutes or until the meatballs are cooked firm.
Serve
- With the reserved basil leaves and finely grated Parmesan cheese (or nutritional yeast for dairy-free).
- With al dente whole wheat or gluten-free pasta, zoodles or quinoa.
- I also serve with a simple green salad.
Make-ahead
- Re-heat in a pot over a low heat until just hot.
Store
- Store in an airtight container in the fridge.
- Can also be frozen (cooked meatballs in sauce). Or, you can freeze the meatballs prior to cooking.
Notes
Nut-free
Replace the almond meal with breadcrumbs.Egg-free
Simply omit the egg.Onion-free
Replace the onion with finely diced fennel in the sauce and omit in the meatballs.Garlic-free
Replace the garlic with a teaspoon of ground cumin and a pinch of cayenne in the sauce and the meatballs. Check out all 10 twists on Jamie's Classic Tomato Spaghetti HERE.Enjoy and I'd love to hear how you liked it. Post a comment below!
Garlic Mushroom Omelette Wrap
This simple, delicious Garlic Mushroom Omelette Wrap recipe is SUPER special. You see it’s the first of ten recipes I’ll be sharing with JamieOliver.com for Jamie’s Food Revolution campaign starting this Friday 20th May 2016.
A few months back I was one of ten lucky people, chosen worldwide to put my spin on ten of Jamie’s recipes that will save your life. The first is a Cheese Omelette and this is my spin… a Garlic Mushroom Omelette Wrap. It is a delicious, nutrient dense ‘anytime meal’ that my whole family adores and I hope you love it too!
Health benefits
Mushrooms are a wonderful source of antioxidants, fibre, vitamin D and a powerful immune boosting food. The garlic offers more immune support as does the protein from the cheese and egg. Spinach and thyme add a fresh touch along with extra vitamins and minerals. This is one healthy combo!
Ingredients
This wrap uses simple ingredients: butter or oil, mushrooms, garlic, fresh thyme, baby spinach, eggs, and cheddar cheese. A dash of sherry vinegar or a substitute adds a subtle tang.
How to make a Garlic Mushroom Omelette Wrap
This recipe serves 1 person, so multiply the ingredients to feed as many as you need. In a hot pan, melt butter or oil and sauté garlic, mushrooms, and thyme until golden. Add vinegar and spinach to wilt, then set aside. Beat the eggs, season, and pour them into the pan to form a thin omelette. Sprinkle with cheese, add the mushroom mix, and fold the omelette into a egg wrap.
Serving suggestions and how to store
Serve this wrap fresh from the pan or wrap it in foil for an easy, on-the-go meal. Leftovers can be stored in the fridge and gently reheated in a pan or microwave.
Vary this to suit your dietary needs
For a dairy-free option, skip the cheese, or use a dairy-free alternative. Swap cheddar with your favourite cheese, like feta, for a different flavour. To keep it gluten-free, ensure your vinegar is gluten-free.
Take a look at the variations (below the main recipe) for suggestions to alter the recipe to suit many specific dietary requirements.
For more delicious, quick easy and healthy breakfast recipes, click HERE.

Garlic Mushroom Omelette Wrap
My Garlic Mushroom Omelette Wrap is a delicious, nutrient dense dish that my whole family adores. It's great for brekkie or for a fast lunch or dinner.
Servings: 1
Ingredients
- 20 g butter, ghee or olive oil
- 150 g mushrooms -any combination, I like Swiss Brown, shiitake and oyster, sliced or torn
- 1 clove/s garlic -finely chopped
- ½ tsp fresh thyme leaves
- ½ tsp sherry vinegar -can substitute red wine vinegar with a pinch of sweetener dissolved into it
- 10 g baby spinach (approx. 1 handful/s)
- 2 egg/s
- 10 g cheddar cheese
Instructions
- Heat a large non-stick or cast iron pan over a medium-high heat and add the butter, ghee or olive oil.
- Once it has melted add the garlic, mushrooms, thyme and a good pinch of sea salt and black pepper. Stir well so that the mushrooms are coated in the butter.
- Cook for 3-4 minutes stirring occasionally, until the mushrooms soften and brown.
- Add the vinegar and spinach and stir for 30 seconds to just wilt the spinach. Set aside.
- Crack the eggs into a mixing bowl, season with a pinch of sea salt and black pepper, then beat well with a fork until fully combined.
- Add a little more butter to the hot pan, then carefully pour in the eggs.
- Tilt the pan so that the egg thinly coats the base of the pan.
- Grate the cheese onto a board and sprinkle over the egg.
- Now add the mushrooms to the centre of the omelette wrap and fold in the edges to form a parcel.
Notes
Dairy-free
Just leave out the cheese. You can also swap the cheddar with goat or cows feta or any other cheese you like really.Gluten-free
Ensure the vinegar you use is gluten-free.Tips
You can wrap this in foil for a meal on the go. To make a thicker, more sturdy wrap, double the eggs.Let us know how you enjoy this delicious recipe. Post a comment and rate this recipe below!
Kids in the Kitchen
Encouraging kids to cook is so important! Loads of kids love following my kids on Youtube. Here’s a video recipe of my Mushroom Omelette wrap.
Nut Falafel with a Tahini Drizzle
These Nut Falafel with a tahini drizzle are a creative twist on the classic, using cashews and sunflower seeds for a delicious, nutty flavour and a satisfying crunch. They’re perfect for wraps, salads, or enjoyed solo.
They are a really simple, tasty vegan meal or snack and I often get the kids to do all the rolling because it’s a perfect job for little hands. I’ve had loads of fails with more traditional falafels over the years, but these little balls of yum, never let me down. I hope you like them too.
Health benefits
Packed with protein, healthy fats, and fibre, these nut-based falafels offer a nutritious alternative to traditional chickpea falafel. Cashews and sunflower seeds provide essential minerals like magnesium and zinc, while tahini adds calcium and healthy fats.
Ingredients
This gluten-free, dairy-free, legume-free falafel recipe calls for cashews, sunflower seeds, tahini, fresh mint, red capsicum, garlic, and ground cumin, giving a delicious blend. Coating the falafel in sesame seeds before baking adds a toasty finish.
How to make nut falafel with a Tahini Drizzle
Start by preheating the oven and placing sesame seeds on a plate for rolling. In a food processor, pulse all falafel ingredients except sesame seeds until you have a coarse paste. Shape the falafel batter into balls, roll in sesame seeds, and bake in the oven until golden. For the tahini drizzle, whisk tahini, lemon juice, sweetener, salt, and enough water to reach your desired thickness. If you own a Thermomix, we’ve also included Thermomix instructions for this recipe.
Serving suggestions and how to store
Serve these falafels warm or cold in a pita wrap or lettuce cup with the tahini sauce (or hummus if you’d prefer). I love to add diced tomatoes, fresh parsley or coriander (cilantro), cucumber or even tzatziki. Store leftovers in the fridge in an airtight container, and reheat gently in a low oven. Uncooked falafels can be frozen and baked straight from frozen.
Vary this nut falafel to suit your needs
For a garlic-free option, substitute garlic with more cumin and a pinch of cayenne for heat. To make it vegan and fructose-friendly, choose rice malt syrup as the sweetener in the sauce.
Take a look at the variations (below the main recipe) for suggestions to alter the recipe to suit many specific dietary requirements.
For more delicious, easy to make vegetarian recipes, click HERE.

Nut Falafel with a tahini drizzle
This quick and easy legume free falafel makes for a delicious lunch or dinner.
Servings: 4
Ingredients
- 75 g raw cashew nuts (½ cup)
- 70 g sunflower seeds (½ cup)
- 1 tbsp hulled tahini
- ¼ bunch/s fresh mint leaves
- 1 tsp ground cumin
- ¼ red capsicum/s - roughly chopped
- 1 clove/s garlic
- Sea salt and freshly ground black pepper - to taste
- 35 g sesame seeds (¼ cup) for coating
Tahini Drizzle
- 3 tbsp hulled tahini
- 1 lemon/s (small) juice
- 1 tsp rice malt syrup or honey
- ½ tsp sea salt - or to taste
- Water - to thin sauce
Instructions
- Preheat oven to 220℃/430°F (fan-forced). Place approx. ¼ cup of sesame seeds onto a plate.
- To make the falafel balls, process all of the ingredients (except the sesame seeds) in a powerful food processor until it forms a course paste. If using a Thermomix blend 30 seconds, speed 6, scraping the sides until combined.
- Form balls (with about a tablespoon of paste) and roll into the sesame seeds.
- Place onto a lined baking tray for about 20 minutes or until golden brown.
- To make the Tahini drizzle, combine all of the ingredients adding enough water (tablespoon by tablespoon) to make a thick sauce.
Serve
- Serve hot or cold in a wrap or on a bed of salad.
Make-ahead
- Re-heat in a low oven until just hot.
Store
- Store in an airtight container in the fridge.
- The uncooked falafel can also be frozen (bake from frozen).
Notes
Garlic-free
Replace the garlic with a teaspoon of ground cumin and a pinch of cayenne.Vegan and fructose friendly
Choose rice malt as your sweetener (in the sauce).I'd love to hear how you like this legume free falafel. Post a comment or rate this recipe.
Three Ingredient Brownie
This three-ingredient brownie recipe is quick and easy to make with just ripe bananas, nut butter, and cacao powder – perfect for a delicious, wholesome treat that’s naturally sweetened without any added sugar.
There’s nothing better than a simple recipe that ticks both the taste and nutrition boxes. Plus, it seriously doesn’t get any quicker or easier than this.
Health benefits
These healthy brownies are a nourishing snack for active kids because the nut butter provides them with protein, healthy fats and complex carbohydrate and the bananas, as well as being an amazing source of complex carbohydrate, are rich in minerals which are often depleted during heavy activity. The cacao makes them chocolatey good and is also a great source of antioxidants Together, they make for a balanced snack or dessert that satisfies without the sugar rush.
Ingredients
With only three ingredients—bananas, nut butter, and raw cacao powder (or unsweetened cocoa powder)—these brownies are simple to make yet packed with flavour. I personally love these made with almond butter or hazelnut butter but you can use peanut butter. Be sure to use very ripe bananas to achieve the natural sweetness needed. The more ripe the bananas, the sweeter these will be. As there are no other sweeteners in this recipe, ripe bananas are a must.
How to make this three ingredient brownie recipe
The instructions just couldn’t be simpler and with a five minute prep time these are a no brainer. Start by preheating the oven and lining a small brownie tin with baking paper (parchment paper). Blend the bananas, nut butter, and cacao powder in a powerful food processor or high speed blender until smooth, then pour the brownie batter into the tin. Bake until firm to the touch (or a toothpick inserted into the middle comes out clean), then cool and slice.
Serving suggestions and how to store
Serve these gluten-free, grain-free, dairy-free brownies as they are, or add a dollop of coconut yogurt or a sprinkle of crushed nuts on top. Store them in an airtight container in the fridge for up to a week, or freeze for up to a month to enjoy later.
Vary this three ingredient brownie to suit your needs
To make these nut-free, swap the nut butter for sunflower seed butter.
Take a look at the variations (below the main recipe) for suggestions to alter the recipe to suit nut-free.
For more delicious, easy to make sweet treats, click HERE.

Three Ingredient Brownies
Who'd have thought just three simple ingredients could produce such a delicious, decadent treat? Plus they are gluten, grain and dairy-free.
Servings: 8 brownies
Ingredients
- 6 banana/s - very ripe (2 cups approx.)
- 250 g nut butter (1 cup)
- 60 g cacao powder (½ cup) unsweetened Dutch process or raw
Instructions
- Preheat your oven to 180℃/350℉ (fan-forced) and line a small brownie tin (approx. 17 x 27cm) with baking paper.
- Mix all of the ingredients together in a powerful blender or food processor. If using a Thermomix, blend 15sec, speed 5-6.
- Pour into the lined tin and bake for 25-30 minutes or until firm to touch.
- Allow to cool and slice into squares. These can be frozen for up to a month.
Store
- Store in an airtight container in the fridge or freezer.
Notes
Nut-free
You could try sunflower butter (I've not recipe tested as yet). For 150 pages of nut-free recipes and lunchbox inspiration, take a look at my best selling ebook 'The Well Nourished Lunchbox'. Click HERE to find out more.I'd love to hear how you like these gorgeous, simple brownies. Post a comment or rate the recipe.
Zucchini Mint Haloumi Fritters
These zucchini mint haloumi fritters are a quick and delicious way to use up summer zucchini, paired with the fresh taste of mint and the salty goodness of haloumi.
I love a good fritter and this recipe is one of my absolute favourites. It’s fast and easy to make and is absolutely delicious, perfect for breakfast, lunch or dinner! Leftovers are also great for the lunchbox.
Health benefits
Although vegetarian, this is one protein-rich fritter! Zucchini is a high-fibre vegetable containing a decent amount of potassium and vitamin C. The mint is a powerful antioxidant and a great digestive herb, making these fritters a nutritious and satisfying choice.
Ingredients
Made with simple ingredients like grated zucchini, fresh mint, and crumbled haloumi cheese, these fritters are gluten-free and packed with wholesome flavours.
How to make zucchini fritters
To make these gluten-free fritters, simply mix the grated zucchini (with moisture squeezed out), onion, clove garlic, mint, haloumi, lemon zest and eggs. Add the flour to form a batter and cook batches immediately in a pan until golden on both sides. It’s important to flip the fritters only once the bottom is golden brown and crisp. If you flip them before they are properly cooked on the base they may fall apart so please be patient. If you own a Thermomix, we’ve also included Thermomix instructions for this recipe.
Serving suggestions and how to store
Serve your fritters with a fresh green salad and a squeeze of lemon. Store them in an airtight container in the fridge for up to three days, or freeze for longer.
Vary zucchini mint halloumi fritters to suit your needs
For a legume-free option, swap the besan flour for spelt flour or almond meal. You can also replace the onion with fennel and garlic with cumin if needed.
Take a look at the variations (below the main recipe) for suggestions to alter the recipe to suit many specific dietary requirements.
For more delicious, easy to make meals, click HERE.

Zucchini Mint Haloumi Fritters
These easy to make Zucchini Mint Haloumi Fritters are a quick and easy to make nourishing meal. Have them for breakfast, lunch or dinner.
Servings: 4
Ingredients
- 500 g zucchini/s - grated, moisture wrung from it
- 1 red onion/s - finely chopped
- 1 clove/s garlic - crushed
- ¼ bunch/s fresh mint leaves - picked off the stems and finely chopped
- 180 g haloumi - crumbled
- 1 lemon/s - zest (& quartered to serve)
- Sea salt and freshly ground black pepper - to taste
- 3 egg/s - whisked a little
- 50 g besan flour (chickpea flour) see alternatives below
Instructions
- Combine the (wrung) grated zucchini, onion, garlic, mint and crumbled haloumi together in a large mixing bowl or food processor.
- Add the zest, salt, pepper and eggs and mix to combine.
- Lastly add the flour and mix well. The vegetables are just coated by the flour and egg.
- It's important to cook immediately or the batter will release moisture. If the zucchini does release more liquid, add more flour to form a thick batter.
- Add a little ghee, butter or olive oil to a fry pan and heat over a moderate heat. Add the batter (approx. heaped tablespoon), flatten and cook until brown.
- Flip the fritters only once the bottom is golden brown and crisp. If you flip them before they are properly cooked on the base they may fall apart so be patient.
Thermomix
- Chop the zucchini, 5 seconds, speed 5. Wring out the moisture well and set aside.
- Add garlic to the bowl, chop 3 seconds, speed 6. Add the onion, chop 5 seconds, speed 5.
- Add the mint leaves, chop 5 seconds, speed 5.
- Now chop the haloumi (broken into quarters), 5 seconds, speed 5.
- Add the zucchini back into the bowl and the rest of the ingredients. Blend, scraping the sides, 10 seconds, speed 4.
Serve
- With a leafy, green salad.
- Lemon wedges (use the lemon you zested)
Make-ahead
- Re-heat under a low grill or in a sandwich press. The are also great cold.
Store
- Store in an airtight container in the fridge.
- Can also be frozen.
Notes
Change the flour (legume-free)
A blend of wholemeal spelt flour and almond meal or a gluten-free premix are a good alternative (you will just need to increase the quantity of flour to make a thickish, pancake like batter).Onion and garlic-free
Replace the onion with finely diced fennel and the garlic with a pinch of cumin.I hope you love these as much as we do. I love to hear what you think. Feel free to post a comment or question below!
Anzac Macadamia Creams
These Anzac Macadamia Creams put a deliciously nutty twist on the classic Anzac biscuit. Nostalgic yet fresh, they pair the crunch of golden Anzacs with a smooth, naturally sweetened macadamia cream for an irresistible bite.
I came up with them when I wanted an Anzac-inspired dessert for special guests but didn’t have time for anything fussy. The result was these quick, easy sandwich biscuits – and they certainly didn’t disappoint. Best of all, you can make them ahead of time, so you’re free to enjoy the company (and the compliments) instead of being stuck in the kitchen once the party starts.
Health benefits
Macadamias are rich in healthy fats and provide a creamy texture without needing dairy, while my nourishing Anzac biscuits offer the goodness of oats and seeds. This recipe uses rice malt syrup, honey, or pure maple syrup for wholefood sweetness.
Ingredients
This recipe requires a batch of Anzac biscuits, toasted macadamia nuts, and a touch of vanilla and natural sweetener to create the cream filling. Here’s the recipe for my Nourishing Anzacs – these are nut-free. You can also use these Chocolate, Macadamia Anzacs for an extra decadent dessert.
How to make Macadamia Anzac biscuits
While your Anzac biscuits are baking, prepare the macadamia cream by processing the toasted macadamia nuts until they form a smooth paste, then adding sweetener and vanilla extract. Once the biscuits have cooled, spread or pipe the macadamia cream onto one biscuit and sandwich with another.
Serving suggestions and how to store
Serve these Anzac Macadamia Creams as an afternoon treat or dessert. They’re best stored in the fridge until you’re ready to enjoy them, keeping the cream nice and firm.
Vary these Anzac macadamia creams to suit your needs
Take a look at the variations (below the main recipe) for suggestions to alter the recipe to suit many specific dietary requirements.
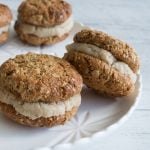
Anzac Macadamia Creams
These are a decadent twist on an Anzac biscuit - a delicious dessert for your Anzac day commemorations.
Servings: 6 biscuits
Ingredients
- 1 batch of Anzac Biscuits *recipes linked above
- 200 g macadamia nuts (1½ cups) toasted
- 1 tbsp rice malt syrup, honey or maple syrup
- ½ tsp vanilla -powder, extract or essence
Instructions
- While the biscuits are cooking, make your macadamia cream. In a food processor or high speed blender, grind your macadamia nuts to a fine crumb. If using a Thermomix 5 secs, speed 5.
- Add the sweetener and vanilla and process until it becomes a paste. If using a Thermomix, mix 5 seconds, speed 6.
- Spread between the cooled Anzacs and sandwich with another on top. You can also pipe the cream on top of each biscuit if you'd prefer.
Store
- Store in the fridge until ready to serve.
Notes
Chocolate cream
Add a tablespoon of cacao to the macadamia cream for a biscuit reminiscent of Kingston Creams.Berry nice
Mix in some smashed berries - yum!I'd love for you to post a comment to let me know how you like these divine bikkies.
Raspberry Coconut Bliss Balls
These raspberry coconut bliss balls are the perfect healthy snack you can whip up in minutes, making them ideal for busy days when you still want something nourishing. With just a handful of wholesome ingredients, they’re naturally sweet, bursting with flavour, and have that irresistible fruity freshness that pairs so beautifully with creamy coconut. They’re a great option when you’re craving something sweet but don’t want to reach for highly processed treats.
Best of all, they’re freezer-friendly, so you can make a big batch and have them ready to go whenever you need a quick snack, lunchbox filler, or post-workout bite. Whether you enjoy them straight from the fridge for a soft, chewy texture or frozen for a firmer bite, these bliss balls are sure to become a go-to in your healthy snack repertoire.
We often make these at Easter time when we need a quick and easy treat to break up the chocolate overload. My kids named them ‘Easter Bunny tails’ when they help me make them…because apparently raspberry coconut bliss balls ‘sounds boring’.
Health benefits
Packed with nutrient-dense ingredients like cashews and coconut, these gluten-free and dairy-free bliss balls are rich in healthy fats and fibre, while the raspberries provide a dose of antioxidants and vitamin C. They’re a great way to satisfy your sweet tooth with natural ingredients, offering sustained energy without refined sugar.
Take a look at the variations (below the main recipe) for suggestions to alter the recipe to suit your specific dietary requirements.
For more easy to make, healthy and delicious no-bake treats, click HERE.

Raspberry Coconut Bliss Balls
These raspberry coconut bliss balls are a quick, healthy snack made with simple, wholesome ingredients. They’re fruity, freezer-friendly, and perfect for satisfying sweet cravings naturally.
Servings: 10 balls
Ingredients
- 70 g raw cashew nuts (½ cup) nut-free below
- 100 g desiccated coconut (1 cup)
- 50 g frozen raspberries (½ cup)
- 2-3 tbsp rice malt syrup or maple syrup
- 1 lemon/s zest (optional)
- 25 g desiccated coconut (¼ cup) extra to roll them in
Instructions
- Grind your cashew nuts in a food processor (if using a Thermomix, grind for 5 seconds, speed 7)
- Add the coconut, raspberries, sweetener and optional lemon zest.
- Blend to combine well (If using a Thermomix blend for 10 seconds, speed 5) and form a thick paste.
- Roll into balls.
- Place a little extra coconut in a small bowl to coat the balls.
Store and serve
- I place them on a tray and snap freeze so they don't stick together when stored.
- Then store in an airtight container in the fridge or better still the freezer and serve from frozen.
- As with any raw treat, these don’t hold up to heat well. I always store them in the freezer and if packing in a lunchbox, pack from frozen and against an ice brick.
Notes
Nut-free
Substitute the cashews with toasted sunflower seeds or rolled oats (grind as you would the nuts but no longer gluten or grain-free if using oats). For 150 pages of nut-free recipes and lunchbox inspiration, take a look at my best selling ebook 'The Well Nourished Lunchbox'. Click HERE to read the rave reviews and find out more.Fructose-friendly
Choose rice malt syrup as your sweetener.Coconut-free
Substitute the coconut with more nut meal or oatmeal.Choc-raspberry
Can't help but want chocolate? Add a tablespoon of cacao to make them choc-raspberry.How do you family like this super simple bliss ball? Post a comment or rate this recipe.
Smoked Salmon Dip (in 5 minutes)
This smoked salmon dip is a simple and delicious snack that takes just five minutes to make. Perfect for spreading on toast, dipping with crackers, or adding to a snack platter, it’s a versatile recipe that’s both nutritious and easy to whip up when you’re short on time.
Health benefits
Most store bought dips contain dangerous vegetable oils so I always avoid them. This healthy dip contains the lovely anti-inflammatory fats and protein in salmon. Pairing it with full-fat natural yoghurt (or greek yogurt) instead of cream cheese adds a boost of probiotics for gut health and a dose of protein, while the fresh herbs and lemon zest add extra vitamins and antioxidants to keep your immune system strong.
Ingredients
With just a handful of fresh, whole ingredients like hot smoked salmon, yoghurt, fresh lemon juice and lemon zest, plus chives (or dill or parsley), this salmon dip recipe is not only delicious but also nourishing. Unlike store-bought dips, it’s packed with nutrition and free from preservatives, artificial additives, and unnecessary sugars, so you can enjoy it knowing exactly what’s in it.
What is ‘Hot’ smoked salmon?
Hot smoked salmon is smoked at a higher temperature, cooking the fillets of fish fully, resulting in a firm, flaky texture and a rich, smoky flavour. It’s ready to eat and great in salads or cooked dishes. Cold smoked salmon, on the other hand, is smoked at a lower temperature, which doesn’t cook the fish but cures it instead. This gives it a softer, silky texture and a more delicate, mild smoky flavour. It comes in thin slices where as the hot smoked salmon is sold in fillets. Both are available in major supermarkets and you definitely need a fillet of the hot smoked salmon for this dip.
How to make healthy Smoked Salmon Dip
Making this healthy smoked salmon dip couldn’t be easier. Simply place flaked salmon in a bowl, add the yoghurt, herbs, lemon, and capers, and mix it all together. No fancy equipment or food processor required—just five minutes and a fork! The quickest prep time ever!
Serving suggestions and how to store
Serve this dip with wholegrain crackers, veggie sticks (carrots, cucumbers, celery) or even spread it on sourdough toast or bagels for a quick, protein-packed breakfast or lunch. It stores well in an airtight container in the refrigerator for a couple of days, or you can freeze it for later if you want to make a bigger batch.
Vary this smoked salmon dip to suit your dietary needs
For a dairy-free version, swap out the yoghurt for a creamy cashew nut blend or your favourite plant-based yoghurt. You can also switch up the herbs to suit your taste—fresh dill, chives, or parsley all work beautifully in this recipe.
Take a look at the variations (below the main recipe) for suggestions to alter the recipe to suit many specific dietary requirements.
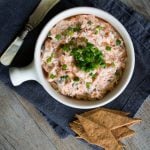
Smoked Salmon Dip (in 5 minutes)
A super quick, delicious dip that's sure to wow a crowd.
Servings: 1 cup
Ingredients
- 100 g hot smoked salmon or trout (approx. one fillet) flaked
- 3 tbsp natural or Greek yoghurt
- 1 tbsp Chives -or dill or parsley, finely diced (whatever you taste preference)
- ½ lemon/s -zest finely grated + 1 tbsp juice
- 1 tbsp capers
- Sea salt and freshly ground black pepper -to taste
Instructions
- Pop the fish into a bowl and gently flake apart with a fork.
- Add the rest of the ingredients and fold through until combined.
Serve
- Serve with your favourite healthy crackers or even on toast for breakfast or lunch.
Store
- Store in an airtight container in the fridge.
- Can also be frozen.
Notes
Dairy-free
Sub the yoghurt with cashew nut cream. I have an awesome selection of simple dips and savoury cracker recipes in my best selling ebook 'The Well Nourished Lunchbox'. Click HERE to find out more and read the amazing reviews.I'd love to hear how you like this dip. Post a comment or rate this recipe below.
Quinoa Tabbouleh
This Quinoa Tabbouleh is one of my absolute go-to salads—it’s incredibly easy to make, bursting with fresh flavours and versatile enough to pair with just about anything. Plus, it keeps well for a few days, so you can enjoy it as leftovers for lunch or dinner. Whether you’re serving it at a family gathering or packing it for work, this salad is a winner every time.
Health benefits
Quinoa is a complete protein and has an extraordinary nutrient profile. I’ve written more about why I love it here. Parsley is so much more than a garnish. It is a very rich source of vitamin K, C and also iron (double spinach). It also support digestion, detoxification and has one of the highest counts of antioxidants among plants. Best of all it is really easy to grow in a pot or in your herb garden! This recipe is a bit of a change from a traditional tabbouleh which is made with bulgur wheat and tomatoes, but it’s just as delicious and full of nutrition.
Ingredients
This gluten-free Quinoa Tabbouleh is my take on the classic middle eastern salad, made with simple, wholesome ingredients like quinoa, flat-leaf parsley, mint, red onion, capsicum, and cucumber. The dressing, made with garlic, fresh lemon juice and extra virgin olive oil, ties everything together with a bright, zesty finish.
How to make this Quinoa Tabbouleh salad
Making this quinoa tabbouleh is a breeze! Start by rinsing and cooking the quinoa until it’s light and fluffy. Let it cool while you chop the herbs and veggies. Mix everything together in a large bowl, then shake up the simple lemon and olive oil dressing to pour over the salad. It’s as easy as that—fresh, flavourful, and ready to enjoy.
Serving suggestions and how to store
Serve this quinoa tabbouleh as a side dish with grilled meats, or add in some hummus and pita bread for a feast. It’s also great in wraps or as a filling for fresh spring rolls. To store, keep it in an airtight container in the fridge for up to three days—just wait to add the dressing until right before serving to keep it fresh.
Vary this to suit your dietary needs
This salad is easy to customise! If you’re avoiding onions, simply leave them out. Garlic can be replaced with a dash of ground cumin and cayenne for a different flavour profile. To make it a heartier meal, toss in some grilled chicken, lamb, fish, or even add a poached egg on top. The possibilities are endless!
Check out the variations below the main recipe for tips on how to adapt it to your specific dietary needs.
For loads of delicious, healthy and easy to make salads, click HERE.

Quinoa Tabbouleh
A more nourishing version of the traditional version, this gluten-free Quinoa Tabbouleh is so delicious. I hope you love it as much as I do.
Servings: 4
Ingredients
- 170 g quinoa (1 cup) or approximately 3 cups cooked
- 1 red onion/s (small) finely diced
- ½ bunch/s fresh parsley leaves -finely diced
- ¼ bunch/s fresh mint leaves -finely diced
- 2 red capsicum/s -diced
- 1 Lebanese cucumber (small) diced (none in this photo as I can't stand it)
Dressing
- 1 clove/s garlic -finely diced or crushed
- 1 lemon/s -zest and juice (approx. ¼ cup juice)
- 120 ml extra virgin olive oil (½ cup) extra virgin
- Sea salt and freshly ground black pepper -to taste
Instructions
- Firstly rinse the quinoa in a fine sieve really well for at least 1 minute (this removes the bitter saponins from the quinoa). If you have time to soak the quinoa in water with a splash of apple cider vinegar (for up to 12 hours) this will improve its digestibility. Cook the quinoa by placing it into a pot with 2 cups of water.
- Bring the mixture to a boil over medium-high heat, then decrease the heat a bit to maintain a gentle simmer. Cook uncovered until the quinoa has absorbed all of the water, about 10 to 12 minutes.
- Remove the pot from heat, cover, and let the quinoa steam for 5 minutes. This step gives the quinoa time to pop open and the little white spiral to appear. After 5 minutes, remove the lid and fluff the quinoa with a fork. Allow to cool.
- Mix it together with all of the other ingredients.
- To make the dressing, combine all of the dressing ingredients in a jar and shake well until combined (it looks almost creamy).
Thermomix method
- Rinse the quinoa in a fine sieve really well for at least 1 minute. Add 700g water to TMX bowl. Tip quinoa into steamer basket and cook for 15 minutes, Varoma temp, speed 4, MC on, or until cooked.
- Use your TMX spatula to remove the steaming basket and tip quinoa onto a plate to cool. Tip out remaining steaming water.
- Chop the parsley and mint in your TMX 5 seconds speed 5.
- Combine the salad and then make your dressing (without rinsing it).
- Chop the garlic 5 seconds, speed 8.
- Add the lemon, zest, olive oil and seasoning and combine 10 seconds, speed 6.
Make-ahead
- You can make quinoa ahead of time, store in the fridge, and then make this salad very quickly!
- Make ahead but don’t dress until right before serving.
Store
- Store in an airtight container in the fridge.
Notes
Onion-free
Simply omit the onion.Garlic-free
Replace the garlic with ½ teaspoon ground cumin and a pinch of cayenne pepper.Make a meal of it
I love this salad as is, but there are so many ways to make it into a big meal...- add any grilled protein such as chicken, fish, lamb, tempeh
- add some hummus and pita bread for a feast
- lovely with toasted nuts or seeds added
- I love this with grilled chorizo and goat or feta cheese
- have it for breakfast with a poached egg
- delicious in a wrap with falafel
- I often use leftovers to fill fresh spring rolls.
I'd love to hear how you like this twist on the classic. Post a comment or rate this recipe.
Coconut Panna Cotta with Balsamic Strawberries
This Coconut Panna Cotta with Balsamic Strawberries is a light, creamy dessert that perfectly balances the richness of coconut milk with the sweet-tart flavours of balsamic strawberries. Simple yet elegant, it’s a refreshing end to any meal, ideal for impressing guests or enjoying as a treat for family.
I don’t eat desserts too often, but when I do, I’m really not a fan of rich or heavy desserts, especially after a big meal. Instead, I prefer a fresh, light dessert to finish off a day of eating. This Panna Cotta is really easy to make and best of all, can be made ahead so serving this special dessert requires no effort at all. Perfect when entertaining a crowd.
Health benefits
The many health benefits of coconut I’ve written about here. Gelatin is made from the bone and connective tissue of animals that has been dried and turned into a powder. I have written about the many health benefits of gelatin in this post about bone broth. Panna cotta is a delicious way to include additional, protein rich, gut healing gelatin in your diet.
Because gelatin is derived from animals, it’s essential to know you are consuming the best quality product with the least chemical loading. I like to use THIS grass-fed gelatin to make gummies or jelly. Strawberries bring natural sweetness along with vitamin C, fibre, and antioxidants, making this dessert pretty nourishing.
Ingredients
This low sugar panna cotta is made with unsweetened coconut milk, gelatin (or agar agar for a plant-based version), a natural sweetener like rice malt or pure maple syrup, and vanilla extract. I prefer the Ayam brand of coconut milk as it produces the best creamy flavour and the cans are also BPA free. The balsamic strawberries are simply marinated in balsamic vinegar and a bit of sweetener, adding a delightful contrast to the panna cotta’s creaminess.
How to make Coconut Panna Cotta with Balsamic Strawberries
Start by blooming the gelatin in coconut milk for a few minutes. Gently warm the coconut milk mixture just to luke warm until the gelatin dissolves, then stir in the sweetener and vanilla and remove from the heat. Pour into greased ramekins and refrigerate to set for about 4 hours. Meanwhile, marinate the strawberries in balsamic vinegar and sweetener about an hour before serving. Serve panna cotta topped with the marinated strawberries and a few mint leaves.
Serving suggestions and how to store
Serve this gluten-free and dairy-free panna cotta in individual ramekins, or if inverting onto a plate, dip the ramekins in warm water for a few seconds. For an elegant presentation, serve with fresh strawberries and a mint garnish. Store any leftovers in the fridge, covered, and enjoy within 2-3 days for the best taste and texture.
Vary this coconut panna cotta to suit your dietary needs
For a low-fructose option, use rice malt syrup instead of maple syrup. To make this vegan, try substituting agar agar for gelatin (note that setting times may vary). You can also serve it in one large bowl, like a trifle, for a crowd-friendly, no fuss dessert.
Take a look at the variations (below the main recipe) for suggestions to alter the recipe to suit many specific dietary requirements.
For more delicious, easy to make desserts, click HERE.

Coconut Panna Cotta with Balsamic Strawberries
This beautiful, light dessert is the best way to finish off a meal. I just adore creaminess of the panna cotta with the sweet acidity of the balsamic strawberries.
Servings: 4
Ingredients
Pana Cotta
- 540 ml canned coconut milk (2 x 270g cans)
- 2 tsp grass-fed or organic gelatin *my preferred source above
- 85 g rice malt syrup or maple syrup (¼ cup)
- 1 tsp vanilla -powder, extract or essence
Balsamic Strawberries
- 400 g strawberries -hulled and halved
- 1 tbsp balsamic vinegar
- 2 tbsp rice malt syrup or maple syrup
Instructions
- Place the coconut milk in a medium sized saucepan.
- Sprinkle over the gelatin and let it rest for 5 minutes (the gelatin will moisten and go crinkly).
- Pop on a very low heat and heat to luke warm for 3 or 4 minutes, stirring continually to dissolve the gelatin. Take care not to overheat it. It should only warm to body temperature (so you can easily stick your finger in it without burning).
- Once the gelatin is dissolved, whisk in the sweetener and vanilla until combined.
- Grease 4-6 small ramekins with coconut oil and divide the coconut milk mix between them. Pop in the fridge for about 4 hours to set. If you don’t want to invert it, you can serve it after approx. 1 hour.
- An hour before you serve your pannacotta, combine the balsamic and sweetener and mix through your strawberries to marinade.
- You can serve the pannacotta in the dish it is set in. Or, to invert your panna cotta from the mould, sit in a bowl of hot water for 3 seconds, run a knife just around the rim of the mould and invert onto a serving plate.
- I've also served this in one large glass bowl (like you would a trifle) for a big crowd.
- Top with berries and a few mint leaves and serve immediately.
Store
- Covered in the fridge.
Notes
Low fructose
Choose rice malt syrup as your sweetener.Vegetarian and vegan
Choose agar agar to replace the gelatin (I haven’t had a chance to recipe test this)Coconut-free
Replace the coconut milk with cream.I'd love to hear how you like this beautiful panna cotta. Post a comment or rate this recipe below.
Haloumi Asparagus Strawberry Salad
This haloumi asparagus strawberry salad is a fresh and delicious combination of savoury and sweet, perfect for a light lunch or side dish. The creamy, salty haloumi pairs beautifully with the crisp veggies and juicy strawberries, all tied together with a tangy lemon-balsamic dressing. It’s a simple, vibrant salad that’s sure to impress!
I love creating healthy, delicious salads. Gone are the days of iceberg lettuce, tomato and cucumber salads! So with the season of summer BBQ’s in mind, I thought I’d share this divine, colourful flavour combo.
Health benefits
Lots of plant-based goodness here! The Spinach is loaded with fibre, antioxidants and to many vitamins and minerals to list. The basil contains many essential vitamins, minerals and antioxidant flavonoids, two of which have been shown to protect cells and DNA from radiation. Asparagus contains anti-inflammatory and detoxifying compounds and as a rich source of chromium, is perfect for helping sugar cravings. The haloumi adds calcium, protein and deliciousness!
Ingredients
The salad is made with baby spinach, fresh basil, snow peas, asparagus, and sweet strawberries, topped with slices of grilled haloumi. The dressing is a zesty mix of lemon juice, balsamic vinegar, and lemon-infused olive oil, seasoned simply with sea salt and black pepper.
How to make this simple, delicious salad
Start by grilling the asparagus in a bit of olive oil until just tender, then set aside. Next, grill the haloumi until golden and crispy on both sides. On a serving platter, layer the baby spinach, basil leaves, snow peas, strawberries, and asparagus. Top with the grilled haloumi slices. To finish, shake or whisk together the lemon juice, balsamic vinegar, and olive oil for the dressing, then drizzle it over the salad just before serving.
Serving suggestions and how to store
This gluten-free, grain-free salad is best served immediately after dressing, making it a great option for a fresh lunch or dinner side. It pairs wonderfully with grilled meats or seafood, and the colours make it a standout dish at any gathering. Leftovers can be stored in the fridge for a day, but it’s best enjoyed fresh for optimal taste and texture.
Vary this to suit your dietary needs
To make this salad dairy-free, simply swap the haloumi for grilled firm tofu. You can also add other veggies like roasted capsicum (bell peppers) or swap spinach for rocket if you prefer. For extra crunch, sprinkle some toasted nuts or seeds on top.
For lots more sides and salad inspo, take a look at my hugely popular ebook ˜Well Nourished Sides and Salads’– where vegetables become the hero of the dish! It’s great value at just $9.95, click HERE to take a look.
For more sensational, healthy salad recipes, click HERE.

Haloumi Asparagus Strawberry Salad
This delicious Haloumi Asparagus Strawberry Salad is sure to impress - such a cracking combination of flavours.
Servings: 4
Ingredients
- 120 g baby spinach -washed
- ¼ bunch/s fresh basil leaves -washed and picked off the stems
- 10-15 snow peas -trimmed
- 1 bunch/s asparagus -halved
- 1 punnet strawberries -hulled and sliced
- 180 g haloumi -sliced thinly
Dressing
- 1 lemon/s -zest and 1 tbsp juice
- 1 tbsp aged balsamic vinegar
- 60 ml lemon-infused olive oil (¼ cup) can sub regular extra virgin olive oil
- Sea salt and freshly ground black pepper -to taste
Instructions
- In a frypan or a griddle, cook your asparagus over a low heat in a little olive oil. Once just cooked (take care not to overcook), set aside to cool.
- Now cook your haloumi on both sides until golden and crisp.
- On a large serving plate or platter arrange your baby spinach, strawberries, snow peas and asparagus and top with the grilled haloumi.
- To make the dressing, simply combine all ingredients together in jar or jug and shake/mix well.
- Dress just prior to serving.
Notes
Dairy-free
Replace the haloumi with firm tofu.I'd love to hear how you like this recipe. Post a comment and rate this recipe below.
Simple Sweet Potato Mash
This Simple Sweet Potato Mash is a versatile, budget friendly side dish that pairs well with a variety of meals. It’s easy to prepare, full of natural sweetness, and can be customised with different flavour variations to suit your taste.
I love this dish as it has minimal prep and there’s only one bowl to wash up at the end of it. Also the flavour of the mash can be altered to suit the type of meal you are preparing, so make sure you check out the optional extras below the main recipe.
Health benefits
Sweet potatoes are a fantastic source of fibre, complex carbohydrate and contain a range of essential vitamins (like A and C), minerals and antioxidants. Adding the fat (coconut oil, ghee or butter) ensures you are making the most of the wonderful fat soluble vitamins they contain.
Ingredients
For this mashed sweet potato recipe you only need sweet potatoes, butter or another fat (ghee or coconut oil), sea salt, and black pepper. For an extra twist, try one of the optional variations listed below.
How to make mashed sweet potatoes
Begin by preheating the oven to 200℃/400℉. Prick the sweet potatoes a few times (no need to peel them), then bake them until tender (about 30 minutes). The larger the sweet potato, the longer it will take to cook through. Once cooked, allow them to cool slightly, then scoop out the flesh into a bowl. Mash with butter, ghee, or coconut oil, and season to taste.
Serving suggestions and how to store
Serve this mash as a side to your favourite dishes or as a base for simply prepared protein. It can be stored in an airtight container in the fridge or freezer. To reheat, use a low heat on the stove or oven, adding a splash of milk if needed.
Vary this simple sweet potato mash to suit your needs
- Extra Creamy: Add sour cream, Greek yogurt, or coconut cream.
- Balsamic Mash: Drizzle with aged balsamic vinegar.
- Garlic Mash: Roast garlic with the potatoes and mash it in for extra flavour.
- Garam Masala or Cinnamon Mash: Add a sprinkle of garam masala or cinnamon for a warming twist.
- Pesto Mash: Stir through pesto for a Mediterranean flair.
- Smokey Mash: Add smoked paprika, or chilli powder for heat.
- Ginger Mash: Incorporate finely grated ginger for an Asian or Indian-inspired variation.
- Cheesy Mash: Incorporate about 30 grams parmesan cheese.
Time-saving tip
Double the amount of sweet potatoes and use the leftovers to make a simple vegan roasted sweet potato soup. Just add garlic and stock, then blend until smooth for a quick and nourishing meal.
For lots more sides and salad inspo, take a look at my hugely popular ebook ‘Well Nourished Sides and Salads’– where vegetables become the hero of the dish!
It’s great value at just $9.95, click HERE to take a look.
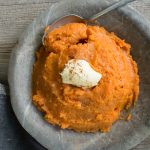
Simple Sweet Potato Mash
This Sweet Potato Mash is such a nourishing, delicious and easy to make side dish. Checkout the optional extras to make it the perfect partner for your main dish.
Servings: 1
Ingredients
- 1 sweet potato/s -skin on (unpeeled)
- 1 tbsp butter, ghee or coconut oil
- Sea salt and freshly ground black pepper -to taste
Instructions
- Preheat a fan forced oven to 200℃/400℉ (fan-forced).
- Take one or more sweet potatoes and prick them a couple of times with a knife or fork (so they don't explode). I work off one small sweet potato per person (or medium to large sweet potato for two). Try to keep them the same size if roasting more than one so they cook in the same amount of time.
- I sit mine on a tray lined with baking paper as they can ooze as they cook.
- Bake for about 30 minutes or until a knife or fork easily pieces the flesh. Larger potatoes will need longer.
- Allow to cool enough to handle, cut length ways and scoop or squeeze out the flesh into a bowl. Add the fat of your choice, season and mash with a fork or potato masher.
- Enjoy as is or add in your favourite optional extras.
Make-ahead
- It can be made ahead. Re-heat in a pot over a very low heat until just hot (add a splash of milk) or can also be re-heated in the oven.
Store
- Store in an airtight container in the fridge or freezer.
Notes
Dairy-free
Choose coconut oil or olive oil as your fat of choice.Raspberry Coconut Truffles
These Raspberry Coconut Truffles are a delicious blend of tart raspberries, creamy coconut, and rich dark chocolate. They’re a perfect no-bake treat that’s super easy to make too.
They are refined sugar-free, dairy-free and gluten-free and are just so delicious. The raspberry love heart in the centre makes it a perfect treat for your valentine on Valentines day. Think Bounty meets raspberry!
Health benefits
These chocolate truffles feature nutrient-rich ingredients like coconut milk and desiccated coconut, which offer healthy fats and fibre. The dark chocolate adds a dose of antioxidants, while the raspberries provide vitamin C and a tangy balance to the sweetness. You’ll find these truffles don’t include dates. Many people find dried fruit, particularly medjool dates, stimulate high blood sugars and really set off sugar cravings and energy/concentration slumps. That’s why you largely won’t find date loaded sweet recipes here at Well Nourished.
Ingredients
To make these healthy coconut truffles, you’ll need coconut milk, desiccated coconut, rice malt syrup (or honey/maple syrup), coconut oil, frozen raspberries, and melted dark chocolate. If you prefer to make your own raw chocolate, there’s a recipe link included for that option.
How to make chocolate raspberry truffles
Start by mixing the coconut milk, coconut, sweetener, and coconut oil in a medium bowl, blender or food processor until well combined. They should have the consistency of a paste that holds together when pressed. Press this mixture around the frozen raspberries and place on a baking tray lined with parchment paper. Chill in the freezer for 15 minutes. In the meantime, melt dark chocolate or prepare raw chocolate. Coat the coconut-covered raspberries in the melted chocolate, freeze again, and coat a second time for a thicker shell.
Serving suggestions and how to store
These raspberry coconut truffles are best stored in the fridge or freezer, as they tend to soften at room temperature. Serve them straight from the freezer for a yummy and indulgent snack.
Vary raspberry coconut truffles to suit
For a low-fructose version, opt for rice malt syrup as your sweetener. Vegans can use rice malt or maple syrup and make their own dairy-free raw chocolate for a completely plant-based treat.
Take a look at the variations (below the main recipe) for suggestions to alter the recipe to suit your specific dietary requirements.
For more easy to make, delicious no-bake treats, click HERE.

Raspberry Coconut Truffles
These pretty, delicious Raspberry Coconut Truffles are the perfect treat for a loved one and a lot easier to make than they look. Gluten, dairy and refined sugar-free.
Servings: 12 Truffles
Ingredients
- 120 ml canned coconut milk (½ cup)
- 120 g desiccated coconut (1½ cups)
- 2 tbsp rice malt syrup, honey or maple syrup
- 1 tbsp coconut oil - softened
- 12 frozen raspberries
- 100 g dark chocolate -melted or raw chocolate (recipe here)
Instructions
- Combine the coconut milk, coconut, sweetener and coconut oil by hand or in a food processor until well combined. If using a Thermomix blend 10 seconds, reverse speed 3. The mixture should be moist but hold together when pressed.
- Press the coconut mixture firmly around the frozen raspberry and place on a tray or plate lined with baking paper.
- Place on a baking tray or baking sheet lined with baking paper and pop in the freezer for 15 minutes or more.
- Whilst they are freezing, make some raw chocolate (recipe here) or melt regular dark chocolate by breaking it up and placing it in a ceramic or glass bowl sitting on top of a pot of just boiled water. Stir until it's melted.
- Remove the coconut covered raspberries from the freezer and coat in the chocolate (use two forks to move the truffles around in the chocolate to coat them).
- Place back on the tray and pop back in the freezer for 5 minutes until set.
- Dunk again for a second coating of chocolate. If using raw chocolate, mix it well again in case it has begun to separate and dunk them again so they should be well coated.
Store
- Set and store in the freezer until you are ready to gobble them up.
- If using the raw chocolate to coat - as with any raw chocolate treat, these will melt and fall apart at room temperature. For a more stable treat, coat them in melted dark chocolate.
Notes
Low- fructose
Choose rice malt syrup as your sweetener.Vegan
Choose rice malt or maple syrup as your sweetener and make your own raw, dairy-free chocolate.I'd love to hear how you loved these cuties. Post a comment or rate this recipe.
Toasted Seaweed Chips
These Toasted Seaweed Chips are a quick and healthy snack that’s full of umami flavour and a satisfying crunch. Made from yaki nori sheets and brushed with a tamari-sesame oil mix, they’re baked until crispy and perfect for snacking on.
A few months back I was doing a bit of shopping after school and even though they’d had afternoon tea, my kids were moaning that they were still hungry. My kids tend to do this every time we’re shopping and they spot something they fancy. This time they’d spied some Nori Chips and seeing as they love nori and they love chips, they worked out that these might be worth a try!
I of course checked out the ingredients, not happy with the vegetable oil (sunflower oil or canola oil I think), but otherwise okay, I conceded because I actually wanted to try them myself. So they were inhaled within seconds of opening and didn’t put a dent on their hunger (note to self to insist on buying nuts next time) and as delicious as they were, they were quite expensive.
So off to the kitchen I head on a mission to re-create my kids latest obsession with toasted seaweed chips. The delicious result I share with you today.
Health benefits
Nori seaweed is a nutrient powerhouse, packed with iodine for thyroid health, fibre, and essential vitamins and minerals like vitamin C and calcium. Some people call it a superfood. These homemade seaweed chips are a healthier, vegan, gluten-free alternative to many savoury snacks – and free of nasty vegetable oils.
Ingredients
All you need are yaki nori sheets (which are the sushi seaweed sheets in the supermarket that you usually roll around rice to make sushi), plus tamari (or a soy-free alternative like coconut aminos), and sesame oil. Optional toppings like sesame seeds, garlic powder or nutritional yeast can add an extra flavour boost. The simplicity of the ingredients makes these chips quick and easy to prepare.
How to make roasted seaweed snacks
Preheat your oven to 150℃/300℉. Mix tamari and sesame oil in a small bowl and with a pastry brush, brush the shiny side of each sheet of nori. Stack them in sets of three or four, sprinkle with optional toppings, and bake between two sheets of baking paper (weighed down with a baking sheet or pan) for 10-15 minutes until crispy. Cut into pieces with a sharp knife and enjoy!
Serving suggestions and how to store
These chips are perfect for munching on their own or as part of a snack plate. They are also lovely over a salad (add at the last minute). Store them in an airtight container with a moisture absorber to keep them crispy. I just recycle absorbers from other things I buy. They’re sensitive to humidity, so be sure to seal them tightly.
Vary toasted seaweed chips to suit your dietary needs
For a soy-free version, swap tamari for liquid aminos or coconut aminos. For sesame-free, replace the sesame oil with extra virgin olive oil or avocado oil. You can also leave out the optional toppings for a more minimalist snack.
Take a look at the variations (below the main recipe) for suggestions to alter the recipe to suit many specific dietary requirements.
For more delicious, healthy and easy to make savoury recipes, click HERE.
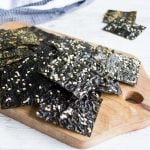
Toasted Seaweed Chips
These Toasted Seaweed Chips are a very moorish savoury snack that my whole family just loves - stopping at one is virtually impossible.
Ingredients
- 1 packet yaki nori sheets (sushi paper)*
- 1 tbsp tamari (or liquid or coconut aminos)
- 1 tbsp sesame oil
Optional toppings
- sesame seeds
- nutritional yeast
- garlic powder
Instructions
- Preheat a fan forced oven to 150℃/ 300℉.
- Mix your tamari and sesame oil together in a small bowl.
- Brush the shiny side of the nori sheet with the oil/tamari mix (right to the edges), sprinkle with optional toppings and place another sheet, rough side down on top. Repeat with two -three more sheets (to make a stack of three to four sheets).
- Place on a baking tray lined with baking paper and place another piece of baking paper on top. I weighed it down with another baking tray (filled with pastry weights). You don’t have to weigh it down, it just stops the sheets curling (but doesn’t effect the taste).
- Bake for 10-15 minutes until crisp at the edges.
- Cut with a large sharp knife (you can pry into single sheets or leave as a stack) and enjoy immediately.
Store
- Can be stored in an airtight container.
- These are very sensitive to humidity, so I always add the moisture absorber (repurposed from the packet of nori) to my container or they will loose their crispiness.
Notes
Soy-free
Choose aminos instead of tamari.Sesame-free
Replace the sesame oil with olive oil.How do you or your kids like these? I'd love your feedback, post a comment or rate this recipe!
Rainbow Detox Salad
Chopped salads are a favourite in our households because they are quick and easy to make and most importantly delicious. This Rainbow Detox Salad is packed with colourful veggies and bursting with fresh flavours. It’s a nutrient-dense, raw salad featuring cauliflower, broccoli, and carrot, with a creamy avocado and tahini dressing that ties it all together. Perfect for a light, refreshing meal or a side dish, it’s as beautiful as it is delicious.
This is a salad that often appeals to salad resistant kid and also toddlers because it’s texture is very different to eating the vegetables in their whole form. My daughter actually calls this ‘baby food’ salad because I often gave it to them when they were little (before they loved whole salads like they do now).
Why is it healthy?
The Rainbow Detox Salad is loaded with antioxidants, fibre, and vitamins. Broccoli and cauliflower both belong to the family of vegetables known as brassicas. They possess compounds that support both phases of liver detoxification (including the specific enzyme systems that processes known carcinogens).
Carrot, garlic, avocado, parsley, coriander are antioxidant rich and also support liver detoxification pathways. Pomegranate is a rich source of antioxidants. The fats in the avocado and tahini are anti-inflammatory and help to support the absorption of fat soluble vitamins. And the lime juice (or lemon juice) is rich in vitamin C.
There is 10g fibre, 7g protein per serve. Pair this salad with about 100g chicken, steak or tuna which adds about 25-30g extra protein making this a very nourishing meal.
Ingredients
This salad calls for fresh veggies like cauliflower, broccoli, and carrots, paired with herbs like parsley or coriander (cilantro). The creamy dressing is made from avocado, tahini, garlic, lime, and a touch of honey or rice malt syrup for sweetness. The pomegranate seeds on top add colour and flavour, making it a feast for the senses.
How to make this rainbow detox salad
To prepare, pulse the broccoli, cauliflower, carrot, and parsley in a food processor until finely chopped, being careful not to over-process. Then, blend the dressing ingredients—avocado, tahini, garlic, lime juice, and water—until smooth, adding water gradually for the desired consistency. Toss everything together and sprinkle with pomegranate seeds for a delicious and detoxifying salad.
Serving suggestions and how to store
Serve this rainbow detox salad immediately to enjoy the fresh crunch and vibrant flavours. It pairs wonderfully with grilled fish or chicken for a complete meal. If you have leftovers, store them in an airtight container in the fridge for up to a day, but note that the dressing is best enjoyed fresh.
Vary this rainbow detox salad to suit
You can easily modify this salad to suit your dietary preferences. For a garlic-free version, swap the garlic for grated ginger. If you need a sesame-free option, use almond butter instead of tahini. To make it fructose-friendly, opt for rice malt syrup as your sweetener instead of honey.
Take a look at the variations (below the main recipe) for suggestions to alter the recipe to suit many specific dietary requirements.
For lots more plant based recipe inspo, take a look at my hugely popular ebook ˜Well Nourished Sides and Salads’– where vegetables become the hero of the dish! It’s great value at just $9.95, click HERE to take a look.
For more delicious, healthy, easy to make salads click HERE.

Rainbow Detox Salad
This Rainbow Detox Salad is one nourishing salad - it truely is food as medicine without compromising on deliciousness.
Servings: 2
Ingredients
- ¼ head/s cauliflower -florets and stems
- ¼ head/s broccoli -florets and stems
- 1 carrot/s (large) roughly chopped
- ¼ bunch/s fresh parsley leaves -or coriander leaves
- ½ pomegranate -seeds (can sub raisins, craisens or fresh grapes), see method below for tips on removing the seeds from the pomegranate very easily
Dressing
- 1 clove/s garlic
- ½ avocado/s -flesh
- 1 tbsp hulled tahini
- ¼ tsp sea salt
- ground black pepper
- ½ lime/s -juice (or lemon)
- 1 tbsp rice malt syrup or honey (optional)
- 60 ml water (¼ cup approx.)
Instructions
- If your cauliflower and broccoli are small, use a half a head. If they are large stick with quarter.
- Place the broccoli, cauliflower, carrot, parsley or coriander in a food processor and pulse until just chopped. Set aside.
- If using a Thermomix, I use the turbo pulse button in short bursts. Please watch the consistency closely as you go (over-processing can result in a detox juice rather than salad)!
- You could also chop/grate by hand, obviously a bit more labour intensive.
- Now make your dressing. Personally, I don't bother to rinse my processor to make the dressing. Mix all of the ingredients (except the water) together until combined (if using a Thermomix 5-10 seconds, speed 4). Now add the water gradually until you get a thick consistency that can be drizzled over the chopped salad.
- Top with pomegranate seeds. The easiest way to remove the seeds is to cut the fruit in half, holding the cut side facing down in your palm. Bang the skin side of the fruit with a large metal spoon, the seeds should just fall out leaving the white pith behind.
- Drizzle over the dressing, toss and serve immediately.
Notes
Garlic-free
Replace the garlic with a 2cm piece of ginger root, finely grated.Sesame-free
Replace the tahini with almond butter or simply omit.Fructose-friendly
Choose rice malt as your sweetener.Love to hear if you and your family like this delicious and very nourishing salad? Please post a comment below.
Chocolate Fudge Ice Blocks
My kids love to make these Chocolate Fudge Ice Blocks in the summer and I love that they are enjoying a ‘healthy’ and nourishing treat. We’ve made lots of simple chocolate based ice blocks over the years but the ones with avocado have always been favourites. I think because it adds a fudge-like texture, and of course I’m not complaining, it’s a welcome inclusions as far as I’m concerned.
Health Benefits
Not only do these homemade fudge pops have the creamiest texture, they’re also a healthier alternative to store-bought versions (which non only are often loaded with nasty ingredients like high fructose corn syrup). Avocado is full of filling, healthy fats, while cacao powder adds a boost of antioxidants. Full-fat coconut milk provides a immune support plus a creamy texture without dairy, and you can choose your favourite natural sweetener like honey, rice malt syrup, or pure maple syrup to keep things refined sugar-free.
Ingredients
There are so many healthy ingredients in these fudge popsicles. You’ll need creamy avocado, rich coconut milk, and raw cacao or unsweetened cocoa powder to get that fudgy texture. Sweeten things up with rice malt syrup, honey, or maple syrup, and use coconut water for extra mineral rich sweetness. Blend these all together for a luscious chocolate treat!
How to make healthy chocolate ice creams
The instructions couldn’t be easier. Simply blend all the ingredients—avocado, coconut milk, cacao powder, sweetener and coconut water—until smooth and creamy. Pour the mixture into ice block moulds and pop them in the freezer. If you don’t have moulds, just pour the mix into little cups, add a popsicle stick, and freeze until solid.
Serving suggestions and how to store
These Chocolate Fudge Ice Blocks are perfect for an after-school snack or a cooling treat on a sunny day. Once frozen, they’ll last in the freezer for up to a month. If you don’t have popsicle molds, pop them into little cups with a lid to prevent freezer burn.
Vary this to suit your dietary needs
These are very allergy friendly, but feel free to swap ingredients to suit your dietary needs! If you’re avoiding coconut, use your favourite dairy or non-dairy milk. For a low-fructose option, stick to rice malt syrup, and if you’re avoiding cacao, try carob powder instead for a different flavour. For vegans, rice malt or maple syrup works great as a sweetener! If you’d like to add in a little protein, add a tablespoon or two of almond butter or peanut butter. Or add in a banana for a banana choc fudgsicles.
Take a look at the variations (below the main recipe) for suggestions to alter the recipe to suit many specific dietary requirements.
For more delicious, healthy ice block recipes, click HERE.

Chocolate Fudge Ice-blocks
These Chocolate Fudge Ice Blocks are the perfect creamy treat to satisfy your chocolate cravings on a hot day. They’re rich, fudgy, and packed with healthy fats from avocado and coconut milk. Plus, they’re super easy to make—just blend and freeze for a delicious homemade dessert that both kids and adults will love!
Servings: 6 ice blocks
Ingredients
- 1 avocado/s -flesh
- 270 ml canned coconut milk (I used Ayam brand)
- 60 g cacao powder (½ cup) unsweetened Dutch process or raw
- 85 g rice malt syrup, honey or maple syrup (¼ cup)
- 160 ml coconut water (⅔ cup)
Instructions
- In a high speed blender or Thermomix blend until smooth and creamy.
- Pour into ice block moulds and freeze until set. If you don't have moulds, pour into little cups, poke in a popsicle stick and freeze.
Notes
Coconut-free
Substitute with your preferred dairy or dairy-free milk.Low-fructose
Choose rice malt syrup as your sweetener.Cacao-free
Substitute carob powder.Vegan
Choose rice malt or maple syrup as your sweetener.Banana choc ice block
Add in one banana.Nutty popsicle
Add in a tablespoon or two of peanut butter or any nut butter.Hope your family likes these as much as we do!
Nut-free Cacao Bliss Balls
This super simple recipe is a special share from the ‘No-bake’ chapter of my gorgeous ebook ‘The Well Nourished Lunchbox’. These Nut-free Cacao Bliss Balls are a quick and easy to make treat, very nutritious and satisfies the strongest chocolate craving. They are nut-free, gluten-free, dairy-free, grain-free, egg-free and refined sugar-free; a bit of a change from the dried fruit, high-sugar energy balls or bars about.
Health benefits
These bliss balls are loaded with nutrient-rich seeds, providing a good dose of protein, fibre and healthy fats to keep you energised. The sunflower seeds are a wonderful source of vitamin E, many essential minerals, monounsaturated fats and protein. The pumpkin seeds super-charge this recipe with zinc and the sesame seeds with calcium. The chia seeds are a balanced blend of fibre, essential omega-3 fatty acids, protein and many phytonutrients. The principle medium chain fatty acids in coconut, lauric and capric acid, are anti-inflammatory and support immune and digestive health. The cacao adds antioxidants galore and the cinnamon stabilises blood sugars for a sustained energy release! Plus they’re refined sugar-free for the win! Many people find dried fruit, particularly medjool dates, really set off sugar cravings and energy/concentration slumps. That’s why you largely won’t find date loaded sweet recipes here at Well Nourished.
Bonus Points
Activate (soak and then dehydrate) your mixed seeds to make them more digestible and nutritious. Otherwise use lightly toasted seeds for a nuttier result.
Ingredients
You only need a few wholesome ingredients for these nut-free chocolate bliss balls, including mixed seeds, chia seeds, desiccated coconut, cacao (or cocoa powder) and a natural sweetener of your choice. They’re simple to make and can easily be customised with different ingredients to suit your taste and dietary needs.
How to make Nut-free Chocolate Bliss Balls
Making these nut-free bliss balls couldn’t be easier. Simply blend all the dry ingredients in a food processor, then mix in the coconut oil, vanilla, and sweetener. Roll them into balls (or press into a tin for an even quicker option – we call these Bliss Bites), pop them in the fridge or freezer to set, and you’re done! They’re such a great snack.
Serving suggestions and how to store
These nut-free cacao bliss balls are best stored in the fridge to keep them firm. You can also freeze them for up to three months, which makes them great for batch prepping. Toss them into lunch boxes straight from the freezer, and they’ll stay fresh until snack time (in warmer weather pack against an ice brick). Enjoy them on their own or pair with a cup of tea for an afternoon treat.
Vary nut-free cacao bliss balls to suit your dietary needs
To make these chocolate bliss balls low-fructose, opt for rice malt syrup as the sweetener. If you’re avoiding coconut, you can replace it with more ground seeds and use butter or ghee instead of coconut oil. For a cacao-free version, swap the cacao for carob powder, and if you’re vegan, stick to rice malt or maple syrup. You can also skip rolling them into balls and press the mixture into a tin for easy snack bars!
Take a look at the variations (below the main recipe) for suggestions to alter the recipe to suit your specific dietary requirements.
For more easy to make, delicious no-bake treats, click HERE.

Nut-free Cacao Bliss Balls
These nut-free cacao bliss balls are a delicious and healthy snack that’s perfect for lunch boxes, afternoon pick-me-ups, or post-workout treats. Packed with seeds, cacao, and natural sweeteners, they’re super easy to make and store, plus they’re free from nuts, making them a great option for anyone with allergies.
Servings: 20 balls
Ingredients
- 150 g mixed seeds (approx. 1 cup) ground (140g pumpkin and/or sunflower seeds plus 1 tablespoon linseed)
- 20 g chia seeds (2 tablespoons) ground
- 80 g desiccated coconut (1 cup)
- 30 g cacao powder (¼ cup) unsweetened Dutch process or raw
- 1 tsp ground cinnamon
- 85 g rice malt syrup, honey or maple syrup (¼ cup)
- 100 g coconut oil (½ cup)
- 1 tsp vanilla -powder, extract or essence
Instructions
- Start with grinding your seeds. If using a Thermomix, 10 seconds speed 10. Jut take care not to over grind them o they release oils (if you do, use less coconut oil).
- In a bowl or food processor combine the seeds, chia or flax, coconut, cacao and cinnamon. If using a Thermomix 10 seconds, speed 5.
- Add the sweetener, coconut oil and vanilla and mix until well combined. If using a Thermomix 10 seconds, speed 5.
- The mixture should be moist and hold together when squeezed. If it feels too oily add more seed meal (or just press into a lined tin, chill, slice and make bliss bites).
- Roll into small balls and toss in the extra coconut or cacao if desired. This is a great job for the kids.
- Place on a tray lined with baking paper and pop in the fridge or freezer to set.
Store and serve
- Store in an airtight container in the fridge for a few weeks, or freeze for up to three months.
- I pack these into the lunch box from frozen (against an ice brick). They will fall apart if not kept cool.
Notes
Low-fructose
Choose rice malt syrup as your sweetener.Coconut-free
Replace the desiccated coconut with more ground seeds and the coconut oil with butter or ghee.Cacao-free
Replace the cocoa with carob powder.Vegan
Choose rice malt or maple syrup as your sweetener.Time saving Tip
Sometimes I just don't have the patience to roll balls. This mixture can also be pressed into a tin lined with baking paper, chilled to set and then cut into squares and stored.I'd love to hear how your kids enjoy this recipe - post a comment or rate this recipe below.
Simple Ceviche
I like to keep things as simple as possible in the kitchen, but always without compromising taste and nourishment. Ceviche was a dish I became very familiar with when travelling the coastal parts of South America many moons ago. I fell in love with it then and my simple ceviche has become a firm favourite with my family since (this is one of a very few ways my fish fussy daughter will eat fish).
I generally make it for special occasions, but it’s so simple, I often ask myself why I don’t make it more often. I think this is a fabulous seafood starter for a hot Christmas day. Anything that doesn’t involve having the oven on any longer than need-be right?
Health benefits
Ceviche is not just a delicious raw fish dish; it’s also packed with health benefits! The fish provides high-quality protein and omega-3 fatty acids, which are great for heart health. Lime juice is loaded with vitamin C, and the addition of fresh herbs adds antioxidants and anti-inflammatory properties. Paired with avocado, which is full of healthy fats, this dish supports a balanced and nutritious diet.
Ingredients
For this ceviche, you’ll need firm white fish fillets like snapper, mahi-mahi kingfish, fresh lime juice, and coconut water to create a refreshing marinade. Add finely sliced spring onions, fresh coriander (cilantro), mint, and red chilli for a burst of flavour. Don’t forget the salsa, made with diced avocado, red capsicum, and lime juice, which adds a creamy and colourful touch!
How to make simple ceviche
Start by tossing your fish cubes in a bowl with half cup lime juice, coconut water, and all the herbs and chilli in a large bowl. Cover the bowl and let it chill in the fridge for about four hours, allowing the fish to marinate until it turns opaque. Once ready, serve the ceviche garnished with micro herbs and enjoy it with the avocado salsa and some crispy corn chips for a delightful crunch!
Serving suggestions and how to store
This easy ceviche recipe is best served chilled and enjoyed fresh. Pair it with good-quality corn chips (tortilla chips) or tostadas for a delicious appetiser or snack. If you have leftovers, store them in an airtight container in the fridge for up to a day, but keep in mind that the fish may become more “cooked” in the lime juice over time, so it’s best to eat it soon after preparation.
Vary this simple ceviche to suit your needs
Feel free to customise this ceviche to suit your taste! If you prefer a milder flavour, you can omit the chilli. For a twist, add diced mango or pineapple for a sweet touch. For onion-free, omit the spring onion. You can also use lemon juice to cure the fresh fish but I prefer lime juice personally.
Take a look at the variations below for all the details as well as suggestions to alter the recipe to suit your specific dietary requirements.
For more healthy, easy, delicious recipe click HERE.

Simple Ceviche
This Simple Ceviche is a refreshing dish that perfectly captures the vibrant flavours of summer! With tender pieces of fish “cooked” in zesty lime juice and complemented by the sweetness of coconut water, this ceviche is both light and satisfying. It's ideal for warm days, backyard gatherings, or a quick and healthy meal that feels a bit fancy without much effort.
Servings: 4
Ingredients
Ceviche
- 800 g firm white fish fillets - pin boned and cut into 1cm cubes (I like snapper or kingfish)
- 120 ml fresh lime juice (juice of approx. 3-4 limes)
- 370 ml coconut water (1½ cups)
- 4 spring onion/s - white part finely sliced
- 2 tbsp fresh coriander leaves - finely diced
- 2 tbsp fresh mint leaves - finely diced
- 1 small red chilli/s - seeds removed and finely sliced
- Sea salt and freshly ground black pepper - to taste
Salsa
- 1 avocado/s - diced
- 1 red capsicum/s - finely diced
- 1 tbsp fresh coriander leaves - finely chopped
- ½ lime/s - juice and zest
Instructions
- Toss the fish, lime juice, coconut water, spring onions, herbs and chilli in a small bowl.
- Cover and chill in the fridge for 4 hours (the lime juice will 'cook' the fish - you will see it go opaque).
- Garnish with herbs or micro herbs.
Serve
- Serve with good quality corn chips or tortilla chips and avocado salsa.
Notes
Onion-free
Simply omit the spring onion.I'd love to hear how you like this delicious dish. Post a comment below.
Pecan Pie Cookies
I’ve always loved Pecan Pie, but now days, I find it way to sweet; one mouthful and I’m well and truly done. So craving the flavour without the sweetness, I thought I’d come up with a less sugary alternative. These Pecan Pie Cookies are a delicious twist on the classic dessert, combining the rich flavours of pecan pie with the convenience of a cookie. Perfect for satisfying your sweet tooth, these cookies are a hit at gatherings or just for enjoying with your afternoon tea. Plus, they’re easy to whip up and will leave your kitchen smelling heavenly!
PS – I plan to bake a few batches to pop in pretty jars for Christmas presents, they make such a beautiful festive treat.
Health benefits
Take a look at the variations (below the main recipe) for suggestions to alter the recipe to suit your specific dietary requirements.
For more easy to make, heathy sweet treats, click HERE.

Pecan Pie Cookies
All of the flavours of a Pecan Pie in a cookie. It's easy to make, gluten, grain and refined sugar free.
Servings: 12 cookies
Ingredients
Base
- 150 g almond meal (1¼ firmly packed cups)
- 55 g macadamia nut oil (¼ cup)
- 85 g rice malt syrup or honey (¼ cup)
- 1 tsp vanilla -powder, extract or essence
- 1 tbsp water (very important to keep them from spreading)
Filling
- 10-15 pecan nuts (about 2 heaped tbsp), roasted and roughly chopped
- 1 tbsp nut butter (I used cashew nut butter)
- 3 tbsp rice malt syrup or maple syrup
- 1 tsp ground cinnamon
- Pinch ground cloves
- 15 pecan nuts -extra to top each cookie
Instructions
- Preheat your oven to 150℃/ 300℉ (fan-forced). Line a baking tray with safe baking paper (I love 'If You Care' brand).
- In a bowl or food processor, mix the ingredients for the base until well combined. If you have a Thermomix mix 10 seconds, speed 4. You should have a sticky, slightly oily dough that you can roll into balls. If not, add more almond meal, tablespoon by tablespoon.
- With damp hands, roll the dough into small balls (a bit smaller than a ping pong ball), place on your lined baking tray and press the middle with your thumb to make an indented centre.
- Now make the filling by mixing the ingredients together until well combined.
- Place about half a teaspoon onto each cookie, top with a whole pecan nut and bake for 15 minutes or until golden brown.
- If you'd like to caramelise the top, sprinkle with a little coconut sugar before baking.
- Allow to cool (they will firm up as they cool) and store in an airtight container.
Store
- Airtight in the fridge and can be frozen for up to 3 months.
Notes
Fructose friendly and vegan
Choose rice malt syrup as your sweetener.Nut-free
This is not the recipe for you. For 150 pages of nut-free recipes, take a look at my super popular ebook 'The Well Nourished Lunchbox'. Click HERE to find out more and read the rave reviews.I'd love to hear how you enjoy these delicious biscuits. Post a comment or rate this recipe below.
Mediterranean Potato Bake
This Mediterranean Potato Bake is a delicious dish that brings a taste of the Mediterranean to your dinner table. With tender potatoes infused with fresh herbs, garlic, and briny olives, this bake is the perfect side dish for any meal. Whether you’re serving it alongside grilled fish, meat, or at a summer BBQ, it’s sure to impress your family and friends with its vibrant flavours and crispy texture.
One of my life’s great pleasures is entertaining – I know many of you will think I’m quite mad, but I genuinely enjoy feeding a crowd. In the past, I loved a good fine dining occasion – catering for a three or four-course meal was exciting! But having kids certainly changed that! So now when I entertain, it tends to be more of an all-in feast – a lovely selection of fresh food served buffet style is my preference. I also try to stick with dishes that I can do the bulk of the preparation in advance, and this Mediterranean Potato Bake fits the bill.
Health benefits
Not only is this dish delicious, but it also packs a nutritious punch! Potatoes provide a great source of complex carbohydrates and essential vitamins, while the fresh herbs offer antioxidants and anti-inflammatory properties. Olives and capers add healthy fats and a burst of flavour, making this bake both satisfying and wholesome. Using olive oil as the fat brings healthy monounsaturated fats to the dish too.
Ingredients
To create this tasty bake, you’ll need potatoes (Dutch Creams, sebago or Kipflers work great), fresh herbs (like thyme, rosemary, and oregano, or a tablespoon of dried herb provencal), butter, ghee, or olive oil, finely chopped garlic, drained capers, vinegar (red wine or apple cider vinegar), pitted black olives (kalamata olives are a favourite), and a splash of extra virgin olive oil for drizzling. Don’t forget sea salt and freshly ground black pepper to taste!
How to make roasted mediterranean potatoes
Start by preheating your oven to 200℃/395℉. Boil the potatoes in a large pot until just cooked and fork tender. While the potatoes are cooking, chop your fresh herbs and combine them with your chosen fat, garlic cloves, capers, and vinegar in a small bowl. Once the potatoes are cooked, drain them and place them in an ovenproof baking dish, preferably in a single layer. Bash them up a little to create texture, then add the olives and herby dressing. Season and bake for 25 minutes or until the top is golden and crunchy. Drizzle with extra virgin olive oil, season again, and enjoy!
Serving suggestions and how to store
Garnish with fresh parsley leaves. This Mediterranean Potato Bake is perfect for serving alongside BBQs (chicken, lamb, beef) or roast dinners, paired with fresh salads for a complete meal. You can also enjoy it as a midweek dish with grilled meats or fish and a leafy green salad. If you have leftovers, store them in an airtight container in the fridge for a delicious side dish to enjoy later.
Vary Mediterranean Potato Bake to suit your dietary needs
This recipe is gluten-free, grain-free, dairy-free, vegan and nut-free. Feel free to customise this recipe to meet your dietary preferences! For a garlic-free version, substitute garlic with finely diced fennel for a delicious twist. If you’re looking for a vegan option, simply use extra virgin olive oil as your fat. For cheese lovers, adding grated parmesan cheese or crumbled feta cheese over the top adds a lovely cheesy flavour to the dish. Enjoy experimenting with different variations to make it your own!
For lots more sides and salad inspo, take a look at my hugely popular ebook ˜Well Nourished Sides and Salads’– where vegetables become the hero of the dish. It’s great value at just $9.95, click HERE to take a look

Mediterranean Potato Bake
A budget friendly side that's not only delicious, but also nourishing for your family. This Mediterranean Potato Bake is a great dish for when you're entertaining a large group too.
Servings: 6
Ingredients
- 1 kg potato/s (I use Dutch Creams or Kipflers)
- 2 tbsp fresh herbs (thyme, rosemary, oregano) OR 1 tablespoon of dried herb provencal
- 50 g butter, ghee or olive oil
- 2 clove/s garlic - finely chopped
- 2 tbsp capers - drained
- 1 tbsp vinegar (I use red wine or apple cider vinegar)
- 180 g black olives (1 cup) pitted kalamata are nice
- 1 tbsp extra virgin olive oil - extra virgin
- Sea salt and freshly ground black pepper - to taste
Serve
- ½ bunch/s parsley - chopped
Instructions
- Preheat your oven to 200℃/395℉ (fan-forced).
- In a large pot, boil your potatoes until just cooked (tender when you insert a knife).
- While your potatoes are cooking, chop your herbs and place them in a small bowl with the fat of your choice, garlic, capers and vinegar.
- Place the cooked and drained hot potatoes in an oven proof serving dish (bash the spuds up a little so they just start to break apart - they cook crunchier that way). Add the olives and the herby dressing.
- Season and bake for 25 minutes or until crunchy on top.
- Drizzle with a little bit of extra virgin olive oil, season with sea salt (only a little as the olives and capers are salty) and black pepper.
Serve
- Chopped parsley leaves
- I would serve this to accompany a BBQ or roast style meal with a few different salads (loads of beautiful salad recipes here). We often have this midweek with grilled fish or meat and a leafy green salad.
Store
- Store in an airtight container in the fridge.