• Skip to primary navigation
  • Skip to main content
  • Skip to primary sidebar
  • Skip to footer

Well Nourished HomepageWell Nourished

Simple recipes, whole foods, inspired health

  • Family Members
    • Recipe Filter
    • Quick Access Shopping List
    • Membership Tutorials
    • How to be Well Nourished
    • About Well Nourished
    • Where to Shop and what to Buy
    • FAQ
  • Family Members
    • Meal Plans
      • G’s Spring Meal Plan
      • G’s Autumn Meal Plan
      • My Weekly Planner
      • Quick Access Shopping List
      • Ingredient Alert
      • Prep Ahead Plans
      • Hosting Event Plans
      • Wellness & Health Plans
    • Recipe Filter
    • Courses & Community
    • Tips for family’s
      • Getting Kids On-board
      • Planning for Picky Eaters
      • New to Meal Planning
      • Meal Planning Tips & Tricks
    • Nourishing Resources
    • Members Offers
    • What’s New This Week
    • Events
    • Membership Tutorials
    • About Well Nourished
    • FAQ
  • Recipes
    • Meals
      • 30 Minute Meals
      • Budget Friendly
      • Chicken & Turkey
      • Fish & Seafood
      • Freezable Meals
      • Make-ahead Meals
      • Meat
      • Pasta and Noodles
      • Pork recipes
      • Slow Cooked
      • Vegetarian
    • Sweet Recipes
      • Baked Sweets
      • Desserts
      • Ice-blocks
      • No-bake Sweets
    • Breakfast
    • Healthy Lunchbox
    • After School Snacks
    • Savoury Snacks
    • Sides & Salads
      • Salads
      • Side Dishes
    • Soups
    • Drinks & Smoothies
    • Dips
    • Holidays & Entertaining
    • Sauces & Dressings
    • Sourdough Baking
    • Fermenting
    • Staples
    • Members only
    • Members only
  • Shop
    • Membership and Programs
    • Ebooks
    • Free Stuff
  • Affiliates
  • About
    • About Well Nourished
    • Testimonials
    • Join the Family
    • FAQ
  • Resources
    • Find a Practitioner
    • Find whole food
      • ACT
      • NSW
      • NT
      • SA
      • QLD
      • TAS
      • VIC
      • WA
    • Products and Services I Value
    • Whole foods pantry list
    • Ingredients Glossary
  • Wellness Hub
    • Inflammation
    • Perimenopause & Menopause
    • Healthy Kids
      • Healthy Baby
      • Healthy Toddler
      • Healthy Child
      • Immune support for kids
      • Digestion & Food Allergies
      • Healthy Lunchboxes
    • Budgeting & Planning
    • Digestion & Intolerance
    • Immune Health
    • Food as Medicine
    • Foods to Avoid
    • Healthy Habits
    • Sugar
    • Carbs, Protein, Fats
      • Carbohydrates
      • Fats
      • Protein
    • Healthy Food Choices
    • Healthy Home
    • Stress & Mood Disorders
    • Healthy Mind
    • Maternal health
    • Health Challenges
  • Login
    • Well Nourished Family
    • Courses & Community
    • Affiliate Login
  • My account

glutenfree

Raspberry Coconut Bliss Balls

March 22, 2016 | Healthy Lunchbox, After School Snacks, No-bake Sweets

These raspberry coconut bliss balls are the perfect healthy snack you can whip up in minutes, making them ideal for busy days when you still want something nourishing. With just a handful of wholesome ingredients, they’re naturally sweet, bursting with flavour, and have that irresistible fruity freshness that pairs so beautifully with creamy coconut. They’re a great option when you’re craving something sweet but don’t want to reach for highly processed treats.

Best of all, they’re freezer-friendly, so you can make a big batch and have them ready to go whenever you need a quick snack, lunchbox filler, or post-workout bite. Whether you enjoy them straight from the fridge for a soft, chewy texture or frozen for a firmer bite, these bliss balls are sure to become a go-to in your healthy snack repertoire.

We often make these at Easter time when we need a quick and easy treat to break up the chocolate overload. My kids named them ‘Easter Bunny tails’ when they help me make them…because apparently raspberry coconut bliss balls ‘sounds boring’.

Health benefits

Packed with nutrient-dense ingredients like cashews and coconut, these gluten-free and dairy-free bliss balls are rich in healthy fats and fibre, while the raspberries provide a dose of antioxidants and vitamin C. They’re a great way to satisfy your sweet tooth with natural ingredients, offering sustained energy without refined sugar.

Ingredients

This raspberry coconut bliss balls recipe calls for raw cashews, desiccated coconut, frozen raspberries, and a natural sweetener like rice malt syrup or maple syrup. The optional lemon zest adds a zingy freshness, and extra coconut for rolling gives a lovely finishing touch. These simple ingredients come together to create a healthy, fuss-free snack. Plus it’s very adaptable, check out the variations to even make it nut-free.

How to make raspberry coconut bliss balls

Making this delicious treat could not be quicker or easier! Simply blend the cashews into a fine meal, then add the coconut, frozen raspberries, sweetener, and lemon zest (if using). Process until it forms a thick paste. Roll the mixture into bite-sized balls. Place a little extra desiccated coconut in a small bowl, and roll balls to coat them. Then pop them in the freezer to firm up before enjoying these little energy bites!

If you own a Thermomix, we’ve also included Thermomix instructions for this recipe.

Make them even quicker still by making ‘bliss bites’ 

If you want to reduce the prep time even further – or just don’t feel like rolling individual balls – you can easily double this recipe and press the mixture firmly into a lined slice tin instead. Once chilled, simply cut it into bite-sized squares or bars to make what I like to call ‘Bliss Bites’. This method is perfect for when you’re short on time, want to make a big batch for the week ahead, or prefer a snack that’s a little less fiddly but just as delicious.

Serving suggestions and how to store

These bliss balls are best stored in an airtight container in the fridge for a few days or the freezer, where they’ll last for months, ready for whenever you need a snack. Serve them straight from the freezer for a cool treat, and they’ll hold up well in lunchboxes as long as they’re packed with an ice brick to keep them cool.

Vary these raspberry coconut bliss balls to suit 

For a nut-free version, simply replace the cashews with toasted sunflower seeds or oats. If you prefer a fructose-free option, opt for rice malt syrup as your sweetener. And for the chocoholics out there, adding a tablespoon of cacao powder will give you a delicious choc-raspberry twist!

Take a look at the variations (below the main recipe) for suggestions to alter the recipe to suit your specific dietary requirements.


For more easy to make, healthy and delicious no-bake treats, click HERE.

 
Raspberry coconut bliss balls - Want to break the chocolate overload this Easter? Why not try Raspberry Coconut Bliss Balls or simply "Easter Bunny Tails".
Print Recipe
4.66 from 41 votes

Raspberry Coconut Bliss Balls

These raspberry coconut bliss balls are a quick, healthy snack made with simple, wholesome ingredients. They’re fruity, freezer-friendly, and perfect for satisfying sweet cravings naturally.
Prep Time10 minutes mins
Chill1 hour hr
Total Time1 hour hr 10 minutes mins
Course: Snack
Servings: 10 balls

Ingredients

  • 70 g raw cashew nuts (½ cup) nut-free below
  • 100 g desiccated coconut (1 cup)
  • 50 g frozen raspberries (½ cup)
  • 2-3 tbsp rice malt syrup or maple syrup
  • 1 lemon/s zest (optional)
  • 25 g desiccated coconut (¼ cup) extra to roll them in

Instructions

  • Grind your cashew nuts in a food processor (if using a Thermomix, grind for 5 seconds, speed 7)
  • Add the coconut, raspberries, sweetener and optional lemon zest.
  • Blend to combine well (If using a Thermomix blend for 10 seconds, speed 5) and form a thick paste.
  • Roll into balls.
  • Place a little extra coconut in a small bowl to coat the balls.

Store and serve

  • I place them on a tray and snap freeze so they don't stick together when stored.
  • Then store in an airtight container in the fridge or better still the freezer and serve from frozen.
  • As with any raw treat, these don’t hold up to heat well. I always store them in the freezer and if packing in a lunchbox, pack from frozen and against an ice brick.
Notes

Nut-free

Substitute the cashews with toasted sunflower seeds or rolled oats (grind as you would the nuts but no longer gluten or grain-free if using oats). For 150 pages of nut-free recipes and lunchbox inspiration, take a look at my best selling ebook 'The Well Nourished Lunchbox'. Click HERE to read the rave reviews and find out more.

Fructose-friendly

Choose rice malt syrup as your sweetener.

Coconut-free

Substitute the coconut with more nut meal or oatmeal.

Choc-raspberry

Can't help but want chocolate? Add a tablespoon of cacao to make them choc-raspberry.


How do you family like this super simple bliss ball? Post a comment or rate this recipe.

Smoked Salmon Dip (in 5 minutes)

March 17, 2016 | Dips, Holidays & Entertaining

This smoked salmon dip is a simple and delicious snack that takes just five minutes to make. Perfect for spreading on toast, dipping with crackers, or adding to a snack platter, it’s a versatile recipe that’s both nutritious and easy to whip up when you’re short on time.

Health benefits

Most store bought dips contain dangerous vegetable oils so I always avoid them. This healthy dip contains the lovely anti-inflammatory fats and protein in salmon. Pairing it with full-fat natural yoghurt (or greek yogurt) instead of cream cheese adds a boost of probiotics for gut health and a dose of protein, while the fresh herbs and lemon zest add extra vitamins and antioxidants to keep your immune system strong.

Ingredients

With just a handful of fresh, whole ingredients like hot smoked salmon, yoghurt, fresh lemon juice and lemon zest, plus chives (or dill or parsley), this salmon dip recipe is not only delicious but also nourishing. Unlike store-bought dips, it’s packed with nutrition and free from preservatives, artificial additives, and unnecessary sugars, so you can enjoy it knowing exactly what’s in it.

What is ‘Hot’ smoked salmon?

Hot smoked salmon is smoked at a higher temperature, cooking the fillets of fish fully, resulting in a firm, flaky texture and a rich, smoky flavour. It’s ready to eat and great in salads or cooked dishes. Cold smoked salmon, on the other hand, is smoked at a lower temperature, which doesn’t cook the fish but cures it instead. This gives it a softer, silky texture and a more delicate, mild smoky flavour. It comes in thin slices where as the hot smoked salmon is sold in fillets. Both are available in major supermarkets and you definitely need a fillet of the hot smoked salmon for this dip.

How to make healthy Smoked Salmon Dip

Making this healthy smoked salmon dip couldn’t be easier. Simply place flaked salmon in a bowl, add the yoghurt, herbs, lemon, and capers, and mix it all together. No fancy equipment or food processor required—just five minutes and a fork! The quickest prep time ever!

Serving suggestions and how to store

Serve this dip with wholegrain crackers, veggie sticks (carrots, cucumbers, celery) or even spread it on sourdough toast or bagels for a quick, protein-packed breakfast or lunch. It stores well in an airtight container in the refrigerator for a couple of days, or you can freeze it for later if you want to make a bigger batch.

Vary this smoked salmon dip to suit your dietary needs

For a dairy-free version, swap out the yoghurt for a creamy cashew nut blend or your favourite plant-based yoghurt. You can also switch up the herbs to suit your taste—fresh dill, chives, or parsley all work beautifully in this recipe.

Take a look at the variations (below the main recipe) for suggestions to alter the recipe to suit many specific dietary requirements.

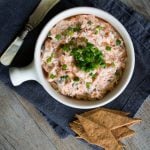
This healthy Smoked Salmon Dip takes minutes to prepare and is so delicious. It's the perfect, nourishing dip when entertaining.
Print Recipe
4.45 from 9 votes

Smoked Salmon Dip (in 5 minutes)

A super quick, delicious dip that's sure to wow a crowd. 
Prep Time5 minutes mins
Total Time5 minutes mins
Course: Appetizer
Servings: 1 cup

Ingredients

  • 100 g hot smoked salmon or trout (approx. one fillet) flaked
  • 3 tbsp natural or Greek yoghurt
  • 1 tbsp Chives -or dill or parsley, finely diced (whatever you taste preference)
  • ½ lemon/s -zest finely grated + 1 tbsp juice
  • 1 tbsp capers
  • Sea salt and freshly ground black pepper -to taste

Instructions

  • Pop the fish into a bowl and gently flake apart with a fork.
  • Add the rest of the ingredients and fold through until combined.

Serve

  • Serve with your favourite healthy crackers or even on toast for breakfast or lunch.

Store

  • Store in an airtight container in the fridge.
  • Can also be frozen.

Notes

Dairy-free

Sub the yoghurt with cashew nut cream.
I have an awesome selection of simple dips and savoury cracker recipes in my best selling ebook 'The Well Nourished Lunchbox'. Click HERE to find out more and read the amazing reviews.

I'd love to hear how you like this dip. Post a comment or rate this recipe below.

Quinoa Tabbouleh

March 10, 2016 | Budget Friendly, Make-ahead Meals, Vegetarian, Salads

This Quinoa Tabbouleh is one of my absolute go-to salads—it’s incredibly easy to make, bursting with fresh flavours and versatile enough to pair with just about anything. Plus, it keeps well for a few days, so you can enjoy it as leftovers for lunch or dinner. Whether you’re serving it at a family gathering or packing it for work, this salad is a winner every time.

Health benefits

Quinoa is a complete protein and has an extraordinary nutrient profile. I’ve written more about why I love it here. Parsley is so much more than a garnish. It is a very rich source of vitamin K, C and also iron (double spinach). It also support digestion, detoxification and has one of the highest counts of antioxidants among plants. Best of all it is really easy to grow in a pot or in your herb garden! This recipe is a bit of a change from a traditional tabbouleh which is made with bulgur wheat and tomatoes, but it’s just as delicious and full of nutrition.

Ingredients

This gluten-free Quinoa Tabbouleh is my take on the classic middle eastern salad, made with simple, wholesome ingredients like quinoa, flat-leaf parsley, mint, red onion, capsicum, and cucumber. The dressing, made with garlic, fresh lemon juice and extra virgin olive oil, ties everything together with a bright, zesty finish. 

How to make this Quinoa Tabbouleh salad

Making this quinoa tabbouleh is a breeze! Start by rinsing and cooking the quinoa until it’s light and fluffy. Let it cool while you chop the herbs and veggies. Mix everything together in a large bowl, then shake up the simple lemon and olive oil dressing to pour over the salad. It’s as easy as that—fresh, flavourful, and ready to enjoy.

Serving suggestions and how to store

Serve this quinoa tabbouleh as a side dish with grilled meats, or add in some hummus and pita bread for a feast. It’s also great in wraps or as a filling for fresh spring rolls. To store, keep it in an airtight container in the fridge for up to three days—just wait to add the dressing until right before serving to keep it fresh.

Vary this to suit your dietary needs

This salad is easy to customise! If you’re avoiding onions, simply leave them out. Garlic can be replaced with a dash of ground cumin and cayenne for a different flavour profile. To make it a heartier meal, toss in some grilled chicken, lamb, fish, or even add a poached egg on top. The possibilities are endless!

Check out the variations below the main recipe for tips on how to adapt it to your specific dietary needs.


For loads of delicious, healthy and easy to make salads, click HERE.

This Quinoa Tabbouleh is a delicious and nourishing salad that's super easy to make. Dare I say it's even better than the original!
Print Recipe
5 from 7 votes

Quinoa Tabbouleh

A more nourishing version of the traditional version, this gluten-free Quinoa Tabbouleh is so delicious. I hope you love it as much as I do. 
Prep Time10 minutes mins
Cook Time15 minutes mins
Total Time25 minutes mins
Course: Salad
Servings: 4

Ingredients

  • 170 g quinoa (1 cup) or approximately 3 cups cooked
  • 1 red onion/s (small) finely diced
  • ½ bunch/s fresh parsley leaves -finely diced
  • ¼ bunch/s fresh mint leaves -finely diced
  • 2 red capsicum/s -diced
  • 1 Lebanese cucumber (small) diced (none in this photo as I can't stand it)

Dressing

  • 1 clove/s garlic -finely diced or crushed
  • 1 lemon/s -zest and juice (approx. ¼ cup juice)
  • 120 ml extra virgin olive oil (½ cup) extra virgin
  • Sea salt and freshly ground black pepper -to taste
Metric - US Customary

Instructions

  • Firstly rinse the quinoa in a fine sieve really well for at least 1 minute (this removes the bitter saponins from the quinoa). If you have time to soak the quinoa in water with a splash of apple cider vinegar (for up to 12 hours) this will improve its digestibility.
    Cook the quinoa by placing it into a pot with 2 cups of water.
  • Bring the mixture to a boil over medium-high heat, then decrease the heat a bit to maintain a gentle simmer. Cook uncovered until the quinoa has absorbed all of the water, about 10 to 12 minutes.
  • Remove the pot from heat, cover, and let the quinoa steam for 5 minutes. This step gives the quinoa time to pop open and the little white spiral to appear. After 5 minutes, remove the lid and fluff the quinoa with a fork. Allow to cool.
  • Mix it together with all of the other ingredients.
  • To make the dressing, combine all of the dressing ingredients in a jar and shake well until combined (it looks almost creamy).

Thermomix method

  • Rinse the quinoa in a fine sieve really well for at least 1 minute. Add 700g water to TMX bowl. Tip quinoa into steamer basket and cook for 15 minutes, Varoma temp, speed 4, MC on, or until cooked.
  • Use your TMX spatula to remove the steaming basket and tip quinoa onto a plate to cool. Tip out remaining steaming water.
  • Chop the parsley and mint in your TMX 5 seconds speed 5.
  • Combine the salad and then make your dressing (without rinsing it).
  • Chop the garlic 5 seconds, speed 8.
  • Add the lemon, zest, olive oil and seasoning and combine 10 seconds, speed 6.

Make-ahead

  • You can make quinoa ahead of time, store in the fridge, and then make this salad very quickly!
  • Make ahead but don’t dress until right before serving.

Store

  • Store in an airtight container in the fridge.

Notes

Onion-free

Simply omit the onion.

Garlic-free

Replace the garlic with ½ teaspoon ground cumin and a pinch of cayenne pepper.

Make a meal of it

I love this salad as is, but there are so many ways to make it into a big meal...
  • add any grilled protein such as chicken, fish, lamb, tempeh
  • add some hummus and pita bread for a feast
  • lovely with toasted nuts or seeds added
  • I love this with grilled chorizo and goat or feta cheese
  • have it for breakfast with a poached egg
  • delicious in a wrap with falafel
  • I often use leftovers to fill fresh spring rolls.
 
For more sides and salad inspo, check out my awesome ebook 'Well Nourished Sides and Salads' - just $9.95, click HERE to shop.


I'd love to hear how you like this twist on the classic. Post a comment or rate this recipe.

Coconut Panna Cotta with Balsamic Strawberries

March 3, 2016 | No-bake Sweets, Desserts

This Coconut Panna Cotta with Balsamic Strawberries is a light, creamy dessert that perfectly balances the richness of coconut milk with the sweet-tart flavours of balsamic strawberries. Simple yet elegant, it’s a refreshing end to any meal, ideal for impressing guests or enjoying as a treat for family.

I don’t eat desserts too often, but when I do, I’m really not a fan of rich or heavy desserts, especially after a big meal. Instead, I prefer a fresh, light dessert to finish off a day of eating. This Panna Cotta is really easy to make and best of all, can be made ahead so serving this special dessert requires no effort at all. Perfect when entertaining a crowd.

Health benefits

The many health benefits of coconut I’ve written about here. Gelatin is made from the bone and connective tissue of animals that has been dried and turned into a powder. I have written about the many health benefits of gelatin in this post about bone broth. Panna cotta is a delicious way to include additional, protein rich, gut healing gelatin in your diet.

Because gelatin is derived from animals, it’s essential to know you are consuming the best quality product with the least chemical loading. I like to use THIS grass-fed gelatin to make gummies or jelly. Strawberries bring natural sweetness along with vitamin C, fibre, and antioxidants, making this dessert pretty nourishing.

Ingredients

This low sugar panna cotta is made with unsweetened coconut milk, gelatin (or agar agar for a plant-based version), a natural sweetener like rice malt or pure maple syrup, and vanilla extract. I prefer the Ayam brand of coconut milk as it produces the best creamy flavour and the cans are also BPA free. The balsamic strawberries are simply marinated in balsamic vinegar and a bit of sweetener, adding a delightful contrast to the panna cotta’s creaminess.

How to make Coconut Panna Cotta with Balsamic Strawberries

Start by blooming the gelatin in coconut milk for a few minutes. Gently warm the coconut milk mixture just to luke warm until the gelatin dissolves, then stir in the sweetener and vanilla and remove from the heat. Pour into greased ramekins and refrigerate to set for about 4 hours. Meanwhile, marinate the strawberries in balsamic vinegar and sweetener about an hour before serving. Serve panna cotta topped with the marinated strawberries and a few mint leaves.

Serving suggestions and how to store

Serve this gluten-free and dairy-free panna cotta in individual ramekins, or if inverting onto a plate, dip the ramekins in warm water for a few seconds. For an elegant presentation, serve with fresh strawberries and a mint garnish. Store any leftovers in the fridge, covered, and enjoy within 2-3 days for the best taste and texture.

Vary this coconut panna cotta to suit your dietary needs

For a low-fructose option, use rice malt syrup instead of maple syrup. To make this vegan, try substituting agar agar for gelatin (note that setting times may vary). You can also serve it in one large bowl, like a trifle, for a crowd-friendly, no fuss dessert.

Take a look at the variations (below the main recipe) for suggestions to alter the recipe to suit many specific dietary requirements.


For more delicious, easy to make desserts, click HERE.

This fresh, low-sugar, dairy-free and gluten-free coconut panna cotta is really easy to make and best of all, can be made in advance.
Print Recipe
5 from 4 votes

Coconut Panna Cotta with Balsamic Strawberries

This beautiful, light dessert is the best way to finish off a meal. I just adore creaminess of the panna cotta with the sweet acidity of the balsamic strawberries. 
Prep Time15 minutes mins
Cook Time5 minutes mins
Chill1 hour hr
Total Time1 hour hr 20 minutes mins
Course: Dessert
Cuisine: French
Servings: 4

Ingredients

Pana Cotta

  • 540 ml canned coconut milk (2 x 270g cans)
  • 2 tsp grass-fed or organic gelatin *my preferred source above
  • 85 g rice malt syrup or maple syrup (¼ cup)
  • 1 tsp vanilla -powder, extract or essence

Balsamic Strawberries

  • 400 g strawberries -hulled and halved
  • 1 tbsp balsamic vinegar
  • 2 tbsp rice malt syrup or maple syrup

Instructions

  • Place the coconut milk in a medium sized saucepan.
  • Sprinkle over the gelatin and let it rest for 5 minutes (the gelatin will moisten and go crinkly).
  • Pop on a very low heat and heat to luke warm for 3 or 4 minutes, stirring continually to dissolve the gelatin. Take care not to overheat it. It should only warm to body temperature (so you can easily stick your finger in it without burning).
  • Once the gelatin is dissolved, whisk in the sweetener and vanilla until combined.
  • Grease 4-6 small ramekins with coconut oil and divide the coconut milk mix between them. Pop in the fridge for about 4 hours to set. If you don’t want to invert it, you can serve it after approx. 1 hour.
  • An hour before you serve your pannacotta, combine the balsamic and sweetener and mix through your strawberries to marinade.
  • You can serve the pannacotta in the dish it is set in. Or, to invert your panna cotta from the mould, sit in a bowl of hot water for 3 seconds, run a knife just around the rim of the mould and invert onto a serving plate.
  • I've also served this in one large glass bowl (like you would a trifle) for a big crowd.
  • Top with berries and a few mint leaves and serve immediately.

Store

  • Covered in the fridge.

Notes

Low fructose

Choose rice malt syrup as your sweetener.

Vegetarian and vegan

Choose agar agar to replace the gelatin (I haven’t had a chance to recipe test this)

Coconut-free

Replace the coconut milk with cream.
 

I'd love to hear how you like this beautiful panna cotta. Post a comment or rate this recipe below. 

Haloumi Asparagus Strawberry Salad

February 25, 2016 | Vegetarian, Salads

This haloumi asparagus strawberry salad is a fresh and delicious combination of savoury and sweet, perfect for a light lunch or side dish. The creamy, salty haloumi pairs beautifully with the crisp veggies and juicy strawberries, all tied together with a tangy lemon-balsamic dressing. It’s a simple, vibrant salad that’s sure to impress!

I love creating healthy, delicious salads. Gone are the days of iceberg lettuce, tomato and cucumber salads! So with the season of summer BBQ’s in mind, I thought I’d share this divine, colourful flavour combo.

Health benefits

Lots of plant-based goodness here! The Spinach is loaded with fibre, antioxidants and to many vitamins and minerals to list. The basil contains many essential vitamins, minerals and antioxidant flavonoids, two of which have been shown to protect cells and DNA from radiation. Asparagus contains anti-inflammatory and detoxifying  compounds and as a rich source of chromium, is perfect for helping sugar cravings. The haloumi adds calcium, protein and deliciousness!

Ingredients

The salad is made with baby spinach, fresh basil, snow peas, asparagus, and sweet strawberries, topped with slices of grilled haloumi. The dressing is a zesty mix of lemon juice, balsamic vinegar, and lemon-infused olive oil, seasoned simply with sea salt and black pepper.

How to make this simple, delicious salad

Start by grilling the asparagus in a bit of olive oil until just tender, then set aside. Next, grill the haloumi until golden and crispy on both sides. On a serving platter, layer the baby spinach, basil leaves, snow peas, strawberries, and asparagus. Top with the grilled haloumi slices. To finish, shake or whisk together the lemon juice, balsamic vinegar, and olive oil for the dressing, then drizzle it over the salad just before serving.

Serving suggestions and how to store

This gluten-free, grain-free salad is best served immediately after dressing, making it a great option for a fresh lunch or dinner side. It pairs wonderfully with grilled meats or seafood, and the colours make it a standout dish at any gathering. Leftovers can be stored in the fridge for a day, but it’s best enjoyed fresh for optimal taste and texture.

Vary this to suit your dietary needs

To make this salad dairy-free, simply swap the haloumi for grilled firm tofu. You can also add other veggies like roasted capsicum (bell peppers) or swap spinach for rocket if you prefer. For extra crunch, sprinkle some toasted nuts or seeds on top.


For lots more sides and salad inspo, take a look at my hugely popular ebook ˜Well Nourished Sides and Salads’– where vegetables become the hero of the dish! It’s great value at just $9.95, click HERE to take a look.


For more sensational, healthy salad recipes, click HERE.

This Haloumi Asparagus Strawberry Salad is a delicious combination of flavours and is packed full of goodness too.
Print Recipe
4 from 4 votes

Haloumi Asparagus Strawberry Salad

This delicious Haloumi Asparagus Strawberry Salad is sure to impress - such a cracking combination of flavours.
Prep Time10 minutes mins
Cook Time5 minutes mins
Total Time15 minutes mins
Course: Salad
Servings: 4

Ingredients

  • 120 g baby spinach -washed
  • ¼ bunch/s fresh basil leaves -washed and picked off the stems
  • 10-15 snow peas -trimmed
  • 1 bunch/s asparagus -halved
  • 1 punnet strawberries -hulled and sliced
  • 180 g haloumi -sliced thinly

Dressing

  • 1 lemon/s -zest and 1 tbsp juice
  • 1 tbsp aged balsamic vinegar
  • 60 ml lemon-infused olive oil (¼ cup) can sub regular extra virgin olive oil
  • Sea salt and freshly ground black pepper -to taste

Instructions

  • In a frypan or a griddle,  cook your asparagus over a low heat in a little olive oil. Once just cooked (take care not to overcook), set aside to cool.
  • Now cook your haloumi on both sides until golden and crisp.
  • On a large serving plate or platter arrange your baby spinach, strawberries, snow peas and asparagus and top with the grilled haloumi.
  • To make the dressing, simply combine all ingredients together in  jar or jug and shake/mix well.
  • Dress just prior to serving.

Notes

Dairy-free

Replace the haloumi with firm tofu.


I'd love to hear how you like this recipe. Post a comment and rate this recipe below. 

Simple Sweet Potato Mash

February 18, 2016 | Side dishes

This Simple Sweet Potato Mash is a versatile, budget friendly side dish that pairs well with a variety of meals. It’s easy to prepare, full of natural sweetness, and can be customised with different flavour variations to suit your taste.

I love this dish as it has minimal prep and there’s only one bowl to wash up at the end of it. Also the flavour of the mash can be altered to suit the type of meal you are preparing, so make sure you check out the optional extras below the main recipe.

Health benefits

Sweet potatoes are a fantastic source of fibre, complex carbohydrate and contain a range of essential vitamins (like A and C), minerals and antioxidants. Adding the fat (coconut oil, ghee or butter) ensures you are making the most of the wonderful fat soluble vitamins they contain.

Ingredients

For this mashed sweet potato recipe you only need sweet potatoes, butter or another fat (ghee or coconut oil), sea salt, and black pepper. For an extra twist, try one of the optional variations listed below.

How to make mashed sweet potatoes

Begin by preheating the oven to 200℃/400℉. Prick the sweet potatoes a few times (no need to peel them), then bake them until tender (about 30 minutes). The larger the sweet potato, the longer it will take to cook through. Once cooked, allow them to cool slightly, then scoop out the flesh into a bowl. Mash with butter, ghee, or coconut oil, and season to taste.

Serving suggestions and how to store

Serve this mash as a side to your favourite dishes or as a base for simply prepared protein. It can be stored in an airtight container in the fridge or freezer. To reheat, use a low heat on the stove or oven, adding a splash of milk if needed.

Vary this simple sweet potato mash to suit your needs

  • Extra Creamy: Add sour cream, Greek yogurt, or coconut cream.
  • Balsamic Mash: Drizzle with aged balsamic vinegar.
  • Garlic Mash: Roast garlic with the potatoes and mash it in for extra flavour.
  • Garam Masala or Cinnamon Mash: Add a sprinkle of garam masala or cinnamon for a warming twist.
  • Pesto Mash: Stir through pesto for a Mediterranean flair.
  • Smokey Mash: Add smoked paprika, or chilli powder for heat.
  • Ginger Mash: Incorporate finely grated ginger for an Asian or Indian-inspired variation.
  • Cheesy Mash: Incorporate about 30 grams parmesan cheese.

Time-saving tip

Double the amount of sweet potatoes and use the leftovers to make a simple vegan roasted sweet potato soup. Just add garlic and stock, then blend until smooth for a quick and nourishing meal.


For lots more sides and salad inspo, take a look at my hugely popular ebook ‘Well Nourished Sides and Salads’– where vegetables become the hero of the dish!

It’s great value at just $9.95, click HERE to take a look.

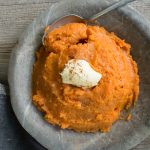
One very simple, inexpensive side that features regular on our table is this simple sweet potato mash. Easy to make and delicious
Print Recipe
5 from 1 vote

Simple Sweet Potato Mash

This Sweet Potato Mash is such a nourishing, delicious and easy to make side dish. Checkout the optional extras to make it the perfect partner for your main dish. 
Prep Time5 minutes mins
Cook Time30 minutes mins
Total Time35 minutes mins
Course: Side Dish
Servings: 1

Ingredients

  • 1 sweet potato/s -skin on (unpeeled)
  • 1 tbsp butter, ghee or coconut oil
  • Sea salt and freshly ground black pepper -to taste

Instructions

  • Preheat a fan forced oven to 200℃/400℉ (fan-forced).
  • Take one or more sweet potatoes and prick them a couple of times with a knife or fork (so they don't explode). I work off one small sweet potato per person (or medium to large sweet potato for two). Try to keep them the same size if roasting more than one so they cook in the same amount of time.
  • I sit mine on a tray lined with baking paper as they can ooze as they cook.
  • Bake for about 30 minutes or until a knife or fork easily pieces the flesh. Larger potatoes will need longer.
  • Allow to cool enough to handle, cut length ways and scoop or squeeze out the flesh into a bowl. Add the fat of your choice, season and mash with a fork or potato masher.
  • Enjoy as is or add in your favourite optional extras.

Make-ahead

  • It can be made ahead. Re-heat in a pot over a very low heat until just hot (add a splash of milk) or can also be re-heated in the oven.

Store

  • Store in an airtight container in the fridge or freezer.

Notes

Dairy-free

Choose coconut oil or olive oil as your fat of choice.
 

Raspberry Coconut Truffles

February 11, 2016 | No-bake Sweets

These Raspberry Coconut Truffles are a delicious blend of tart raspberries, creamy coconut, and rich dark chocolate. They’re a perfect no-bake treat that’s super easy to make too.

They are refined sugar-free, dairy-free and gluten-free and are just so delicious. The raspberry love heart in the centre makes it a perfect treat for your valentine on Valentines day. Think Bounty meets raspberry!

Health benefits

These chocolate truffles feature nutrient-rich ingredients like coconut milk and desiccated coconut, which offer healthy fats and fibre. The dark chocolate adds a dose of antioxidants, while the raspberries provide vitamin C and a tangy balance to the sweetness. You’ll find these truffles don’t include dates. Many people find dried fruit, particularly medjool dates, stimulate high blood sugars and really set off sugar cravings and energy/concentration slumps. That’s why you largely won’t find date loaded sweet recipes here at Well Nourished.

Ingredients

To make these healthy coconut truffles, you’ll need coconut milk, desiccated coconut, rice malt syrup (or honey/maple syrup), coconut oil, frozen raspberries, and melted dark chocolate. If you prefer to make your own raw chocolate, there’s a recipe link included for that option.

How to make chocolate raspberry truffles

Start by mixing the coconut milk, coconut, sweetener, and coconut oil in a medium bowl, blender or food processor until well combined. They should have the consistency of a paste that holds together when pressed. Press this mixture around the frozen raspberries and place on a baking tray lined with parchment paper. Chill in the freezer for 15 minutes. In the meantime, melt dark chocolate or prepare raw chocolate. Coat the coconut-covered raspberries in the melted chocolate, freeze again, and coat a second time for a thicker shell.

Serving suggestions and how to store

These raspberry coconut truffles are best stored in the fridge or freezer, as they tend to soften at room temperature. Serve them straight from the freezer for a yummy and indulgent snack.

Vary raspberry coconut truffles to suit

For a low-fructose version, opt for rice malt syrup as your sweetener. Vegans can use rice malt or maple syrup and make their own dairy-free raw chocolate for a completely plant-based treat.

Take a look at the variations (below the main recipe) for suggestions to alter the recipe to suit your specific dietary requirements.


For more easy to make, delicious no-bake treats, click HERE.

These no-bake, refined sugar-free raspberry coconut truffles are so delicious & very easy to make. Such a healthy treat!
Print Recipe
5 from 1 vote

Raspberry Coconut Truffles

These pretty, delicious Raspberry Coconut Truffles are the perfect treat for a loved one and a lot easier to make than they look. Gluten, dairy and refined sugar-free. 
Prep Time20 minutes mins
Chill10 minutes mins
Total Time30 minutes mins
Course: Dessert
Servings: 12 Truffles

Ingredients

  • 120 ml canned coconut milk (½ cup)
  • 120 g desiccated coconut (1½ cups)
  • 2 tbsp rice malt syrup, honey or maple syrup
  • 1 tbsp coconut oil - softened
  • 12 frozen raspberries
  • 100 g dark chocolate -melted or raw chocolate (recipe here)

Instructions

  • Combine the coconut milk, coconut, sweetener and coconut oil by hand or in a food processor until well combined. If using a Thermomix blend 10 seconds, reverse speed 3. The mixture should be moist but hold together when pressed.
  • Press the coconut mixture firmly around the frozen raspberry and place on a  tray or plate lined with baking paper.
  • Place on a baking tray or baking sheet lined with baking paper and pop in the freezer for 15 minutes or more.
  • Whilst they are freezing, make some raw chocolate (recipe here) or melt regular dark chocolate by breaking it up and placing it in a ceramic or glass bowl sitting on top of a pot of just boiled water. Stir until it's melted.
  • Remove the coconut covered raspberries from the freezer and coat in the chocolate (use two forks to move the truffles around in the chocolate to coat them).
  • Place back on the tray and pop back in the freezer for 5 minutes until set.
  • Dunk again for a second coating of chocolate. If using raw chocolate, mix it well again in case it has begun to separate and dunk them again so they should be well coated.

Store

  • Set and store in the freezer until you are ready to gobble them up.
  • If using the raw chocolate to coat - as with any raw chocolate treat, these will melt and fall apart at room temperature. For a more stable treat, coat them in melted dark chocolate.

Notes

Low- fructose

Choose rice malt syrup as your sweetener.

Vegan

Choose rice malt or maple syrup as your sweetener and make your own raw, dairy-free chocolate.


I'd love to hear how you loved these cuties. Post a comment or rate this recipe.

Toasted Seaweed Chips

February 4, 2016 | Healthy Lunchbox, Savoury Snacks

These Toasted Seaweed Chips are a quick and healthy snack that’s full of umami flavour and a satisfying crunch. Made from yaki nori sheets and brushed with a tamari-sesame oil mix, they’re baked until crispy and perfect for snacking on.

A few months back I was doing a bit of shopping after school and even though they’d had afternoon tea, my kids were moaning that they were still hungry. My kids tend to do this every time we’re shopping and they spot something they fancy. This time they’d spied some Nori Chips and seeing as they love nori and they love chips, they worked out that these might be worth a try!

I of course checked out the ingredients, not happy with the vegetable oil (sunflower oil or canola oil I think), but otherwise okay, I conceded because I actually wanted to try them myself. So they were inhaled within seconds of opening and didn’t put a dent on their hunger (note to self to insist on buying nuts next time) and as delicious as they were, they were quite expensive.

So off to the kitchen I head on a mission to re-create my kids latest obsession with toasted seaweed chips. The delicious result I share with you today.

Health benefits

Nori seaweed is a nutrient powerhouse, packed with iodine for thyroid health, fibre, and essential vitamins and minerals like vitamin C and calcium. Some people call it a superfood. These homemade seaweed chips are a healthier, vegan, gluten-free alternative to many savoury snacks – and free of nasty vegetable oils.

Ingredients

All you need are yaki nori sheets (which are the sushi seaweed sheets in the supermarket that you usually roll around rice to make sushi), plus tamari (or a soy-free alternative like coconut aminos), and sesame oil. Optional toppings like sesame seeds, garlic powder or nutritional yeast can add an extra flavour boost. The simplicity of the ingredients makes these chips quick and easy to prepare.

How to make roasted seaweed snacks

Preheat your oven to 150℃/300℉. Mix tamari and sesame oil in a small bowl and with a pastry brush, brush the shiny side of each sheet of nori. Stack them in sets of three or four, sprinkle with optional toppings, and bake between two sheets of baking paper (weighed down with a baking sheet or pan) for 10-15 minutes until crispy. Cut into pieces with a sharp knife and enjoy!

Serving suggestions and how to store

These chips are perfect for munching on their own or as part of a snack plate. They are also lovely over a salad (add at the last minute). Store them in an airtight container with a moisture absorber to keep them crispy. I just recycle absorbers from other things I buy. They’re sensitive to humidity, so be sure to seal them tightly.

Vary toasted seaweed chips to suit your dietary needs

For a soy-free version, swap tamari for liquid aminos or coconut aminos. For sesame-free, replace the sesame oil with extra virgin olive oil or avocado oil. You can also leave out the optional toppings for a more minimalist snack.

Take a look at the variations (below the main recipe) for suggestions to alter the recipe to suit many specific dietary requirements.


For more delicious, healthy and easy to make savoury recipes, click HERE.

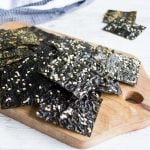
These Toasted Seaweed (Nori) Chips are an easy to make healthy and nutrient dense snack that my kids absolutely love. 
Print Recipe
4.55 from 22 votes

Toasted Seaweed Chips

These Toasted Seaweed Chips are a very moorish savoury snack that my whole family just loves - stopping at one is virtually impossible. 
Prep Time10 minutes mins
Cook Time15 minutes mins
Total Time25 minutes mins
Course: Snack
Cuisine: Japanese

Ingredients

  • 1 packet yaki nori sheets (sushi paper)*
  • 1 tbsp tamari (or liquid or coconut aminos)
  • 1 tbsp sesame oil

Optional toppings

  • sesame seeds
  • nutritional yeast
  • garlic powder

Instructions

  • Preheat a fan forced oven to 150℃/ 300℉.
  • Mix your tamari and sesame oil together in a small bowl.
  • Brush the shiny side of the nori sheet with the oil/tamari mix (right to the edges), sprinkle with optional toppings and place another sheet, rough side down on top. Repeat with two -three more sheets (to make a stack of three to four sheets).
  • Place on a baking tray lined with baking paper and place another piece of baking paper on top. I weighed it down with another baking tray (filled with pastry weights). You don’t have to weigh it down, it just stops the sheets curling (but doesn’t effect the taste).
  • Bake for 10-15 minutes until crisp at the edges.
  • Cut with a large sharp knife (you can pry into single sheets or leave as a stack) and enjoy immediately.

Store

  • Can be stored in an airtight container.
  • These are very sensitive to humidity, so I always add the moisture absorber (repurposed from the packet of nori) to my container or they will loose their crispiness.

Notes

Soy-free

Choose aminos instead of tamari.

Sesame-free

Replace the sesame oil with olive oil.


How do you or your kids like these? I'd love your feedback, post a comment or rate this recipe!

Rainbow Detox Salad

January 28, 2016 | Vegetarian, Salads

Chopped salads are a favourite in our households because they are quick and easy to make and most importantly delicious. This Rainbow Detox Salad is packed with colourful veggies and bursting with fresh flavours. It’s a nutrient-dense, raw salad featuring cauliflower, broccoli, and carrot, with a creamy avocado and tahini dressing that ties it all together. Perfect for a light, refreshing meal or a side dish, it’s as beautiful as it is delicious.

This is a salad that often appeals to salad resistant kid and also toddlers because it’s texture is very different to eating the vegetables in their whole form. My daughter actually calls this ‘baby food’ salad because I often gave it to them when they were little (before they loved whole salads like they do now).

Why is it healthy?

The Rainbow Detox Salad is loaded with antioxidants, fibre, and vitamins. Broccoli and cauliflower both belong to the family of vegetables known as brassicas. They possess compounds that support both phases of liver detoxification (including the specific enzyme systems that processes known carcinogens).

Carrot, garlic, avocado, parsley, coriander are antioxidant rich and also support liver detoxification pathways. Pomegranate is a rich source of antioxidants. The fats in the avocado and tahini are anti-inflammatory and help to support the absorption of fat soluble vitamins. And the lime juice (or lemon juice) is rich in vitamin C.

There is 10g fibre, 7g protein per serve. Pair this salad with about 100g chicken, steak or tuna which adds about 25-30g extra protein making this a very nourishing meal.

Ingredients

This salad calls for fresh veggies like cauliflower, broccoli, and carrots, paired with herbs like parsley or coriander (cilantro). The creamy dressing is made from avocado, tahini, garlic, lime, and a touch of honey or rice malt syrup for sweetness. The pomegranate seeds on top add colour and flavour, making it a feast for the senses.

How to make this rainbow detox salad

To prepare, pulse the broccoli, cauliflower, carrot, and parsley in a food processor until finely chopped, being careful not to over-process. Then, blend the dressing ingredients—avocado, tahini, garlic, lime juice, and water—until smooth, adding water gradually for the desired consistency. Toss everything together and sprinkle with pomegranate seeds for a delicious and detoxifying salad.

Serving suggestions and how to store

Serve this rainbow detox salad immediately to enjoy the fresh crunch and vibrant flavours. It pairs wonderfully with grilled fish or chicken for a complete meal. If you have leftovers, store them in an airtight container in the fridge for up to a day, but note that the dressing is best enjoyed fresh.

Vary this rainbow detox salad to suit

You can easily modify this salad to suit your dietary preferences. For a garlic-free version, swap the garlic for grated ginger. If you need a sesame-free option, use almond butter instead of tahini. To make it fructose-friendly, opt for rice malt syrup as your sweetener instead of honey.

Take a look at the variations (below the main recipe) for suggestions to alter the recipe to suit many specific dietary requirements.

For lots more plant based recipe inspo, take a look at my hugely popular ebook ˜Well Nourished Sides and Salads’– where vegetables become the hero of the dish! It’s great value at just $9.95, click HERE to take a look.


For more delicious, healthy, easy to make salads click HERE.

This Rainbow Detox Salad is an easy to make, super healthy salad that the whole family (even salad resistant kids) will love.
Print Recipe
4 from 1 vote

Rainbow Detox Salad

This Rainbow Detox Salad is one nourishing salad - it truely is food as medicine without compromising on deliciousness. 
Prep Time15 minutes mins
Total Time15 minutes mins
Course: Salad
Servings: 2

Ingredients

  • ¼ head/s cauliflower -florets and stems
  • ¼ head/s broccoli -florets and stems
  • 1 carrot/s (large) roughly chopped
  • ¼ bunch/s fresh parsley leaves -or coriander leaves
  • ½ pomegranate -seeds (can sub raisins, craisens or fresh grapes), see method below for tips on removing the seeds from the pomegranate very easily

Dressing

  • 1 clove/s garlic
  • ½  avocado/s -flesh
  • 1 tbsp hulled tahini 
  • ¼ tsp sea salt
  • ground black pepper
  • ½  lime/s -juice (or lemon)
  • 1 tbsp rice malt syrup or honey (optional)
  • 60 ml water (¼ cup approx.)

Instructions

  • If your cauliflower and broccoli are small, use a half a head. If they are large stick with quarter.
  • Place the broccoli, cauliflower, carrot, parsley or coriander in a food processor and pulse until just chopped. Set aside.
  • If using a Thermomix, I use the turbo pulse button in short bursts. Please watch the consistency closely as you go (over-processing can result in a detox juice rather than salad)!
  • You could also chop/grate by hand, obviously a bit more labour intensive.
  • Now make your dressing. Personally, I don't bother to rinse my processor to make the dressing. Mix all of the ingredients (except the water) together until combined (if using a Thermomix 5-10 seconds, speed 4). Now add the water gradually until you get a thick consistency that can be drizzled over the chopped salad.
  • Top with pomegranate seeds. The easiest way to remove the seeds is to cut the fruit in half, holding the cut side facing down in your palm. Bang the skin side of the fruit with a large metal spoon, the seeds should just fall out leaving the white pith behind.
  • Drizzle over the dressing, toss and serve immediately.

Notes

Garlic-free

Replace the garlic with a 2cm piece of ginger root, finely grated.

Sesame-free

Replace the tahini with almond butter or simply omit. 

Fructose-friendly

Choose rice malt as your sweetener. 


Love to hear if you and your family like this delicious and very nourishing salad? Please post a comment below.

Chocolate Fudge Ice Blocks

January 20, 2016 | After School Snacks, Ice-blocks

My kids love to make these Chocolate Fudge Ice Blocks in the summer and I love that they are enjoying a ‘healthy’ and nourishing treat. We’ve made lots of simple chocolate based ice blocks over the years but the ones with avocado have always been favourites. I think because it adds a fudge-like texture, and of course I’m not complaining, it’s a welcome inclusions as far as I’m concerned.

Health Benefits

Not only do these homemade fudge pops have the creamiest texture, they’re also a healthier alternative to store-bought versions (which non only are often loaded with nasty ingredients like high fructose corn syrup). Avocado is full of filling, healthy fats, while cacao powder adds a boost of antioxidants. Full-fat coconut milk provides a immune support plus a creamy texture without dairy, and you can choose your favourite natural sweetener like honey, rice malt syrup, or pure maple syrup to keep things refined sugar-free.

Ingredients

There are so many healthy ingredients in these fudge popsicles. You’ll need creamy avocado, rich coconut milk, and raw cacao or unsweetened cocoa powder to get that fudgy texture. Sweeten things up with rice malt syrup, honey, or maple syrup, and use coconut water for extra mineral rich sweetness. Blend these all together for a luscious chocolate treat!

How to make healthy chocolate ice creams

The instructions couldn’t be easier. Simply blend all the ingredients—avocado, coconut milk, cacao powder, sweetener and coconut water—until smooth and creamy. Pour the mixture into ice block moulds and pop them in the freezer. If you don’t have moulds, just pour the mix into little cups, add a popsicle stick, and freeze until solid.

Serving suggestions and how to store

These Chocolate Fudge Ice Blocks are perfect for an after-school snack or a cooling treat on a sunny day. Once frozen, they’ll last in the freezer for up to a month. If you don’t have popsicle molds, pop them into little cups with a lid to prevent freezer burn.

Vary this to suit your dietary needs

These are very allergy friendly, but feel free to swap ingredients to suit your dietary needs! If you’re avoiding coconut, use your favourite dairy or non-dairy milk. For a low-fructose option, stick to rice malt syrup, and if you’re avoiding cacao, try carob powder instead for a different flavour. For vegans, rice malt or maple syrup works great as a sweetener! If you’d like to add in a little protein, add a tablespoon or two of almond butter or peanut butter. Or add in a banana for a banana choc fudgsicles.

Take a look at the variations (below the main recipe) for suggestions to alter the recipe to suit many specific dietary requirements.


For more delicious, healthy ice block recipes, click HERE.

Chocolate Fudge Ice Blocks are the perfect treat to satisfy your sweet tooth. They’re packed with healthy fats from avocado and coconut milk.
Print Recipe
4.50 from 10 votes

Chocolate Fudge Ice-blocks

These Chocolate Fudge Ice Blocks are the perfect creamy treat to satisfy your chocolate cravings on a hot day. They’re rich, fudgy, and packed with healthy fats from avocado and coconut milk. Plus, they’re super easy to make—just blend and freeze for a delicious homemade dessert that both kids and adults will love!
Prep Time10 minutes mins
Total Time1 hour hr 10 minutes mins
Course: Dessert, Snack
Servings: 6 ice blocks

Ingredients

  • 1 avocado/s -flesh
  • 270 ml canned coconut milk (I used Ayam brand)
  • 60 g cacao powder (½ cup) unsweetened Dutch process or raw
  • 85 g rice malt syrup, honey or maple syrup (¼ cup)
  • 160 ml coconut water (⅔ cup)

Instructions

  • In a high speed blender or Thermomix blend until smooth and creamy.
  • Pour into ice block moulds and freeze until set. If you don't have moulds, pour into little cups, poke in a popsicle stick and freeze.

Notes

Coconut-free

Substitute with your preferred dairy or dairy-free milk.

Low-fructose

Choose rice malt syrup as your sweetener.

Cacao-free

Substitute carob powder.

Vegan

Choose rice malt or maple syrup as your sweetener.

Banana choc ice block

Add in one banana. 

Nutty popsicle

Add in a tablespoon or two of peanut butter or any nut butter.


Hope your family likes these as much as we do!

Nut-free Cacao Bliss Balls

December 6, 2015 | Healthy Lunchbox, No-bake Sweets

This super simple recipe is a special share from the ‘No-bake’ chapter of my gorgeous ebook ‘The Well Nourished Lunchbox’. These Nut-free Cacao Bliss Balls are a quick and easy to make treat, very nutritious and satisfies the strongest chocolate craving. They are nut-free, gluten-free, dairy-free, grain-free, egg-free and refined sugar-free; a bit of a change from the dried fruit, high-sugar energy balls or bars about.

Health benefits

These bliss balls are loaded with nutrient-rich seeds, providing a good dose of protein, fibre and healthy fats to keep you energised. The sunflower seeds are a wonderful source of vitamin E, many essential minerals, monounsaturated fats and protein. The pumpkin seeds super-charge this recipe with zinc and the sesame seeds with calcium. The chia seeds are a balanced blend of fibre, essential omega-3 fatty acids, protein and many phytonutrients. The principle medium chain fatty acids in coconut, lauric and capric acid, are anti-inflammatory and support immune and digestive health. The cacao adds antioxidants galore and the cinnamon stabilises blood sugars for a sustained energy release! Plus they’re refined sugar-free for the win! Many people find dried fruit, particularly medjool dates, really set off sugar cravings and energy/concentration slumps. That’s why you largely won’t find date loaded sweet recipes here at Well Nourished. 

Bonus Points

Activate (soak and then dehydrate) your mixed seeds to make them more digestible and nutritious. Otherwise use lightly toasted seeds for a nuttier result.

Ingredients

You only need a few wholesome ingredients for these nut-free chocolate bliss balls, including mixed seeds, chia seeds, desiccated coconut, cacao (or cocoa powder) and a natural sweetener of your choice. They’re simple to make and can easily be customised with different ingredients to suit your taste and dietary needs.

How to make Nut-free Chocolate Bliss Balls

Making these nut-free bliss balls couldn’t be easier. Simply blend all the dry ingredients in a food processor, then mix in the coconut oil, vanilla, and sweetener. Roll them into balls (or press into a tin for an even quicker option – we call these Bliss Bites), pop them in the fridge or freezer to set, and you’re done! They’re such a great snack. 

Serving suggestions and how to store

These nut-free cacao bliss balls are best stored in the fridge to keep them firm. You can also freeze them for up to three months, which makes them great for batch prepping. Toss them into lunch boxes straight from the freezer, and they’ll stay fresh until snack time (in warmer weather pack against an ice brick). Enjoy them on their own or pair with a cup of tea for an afternoon treat.

Vary nut-free cacao bliss balls to suit your dietary needs

To make these chocolate bliss balls low-fructose, opt for rice malt syrup as the sweetener. If you’re avoiding coconut, you can replace it with more ground seeds and use butter or ghee instead of coconut oil. For a cacao-free version, swap the cacao for carob powder, and if you’re vegan, stick to rice malt or maple syrup. You can also skip rolling them into balls and press the mixture into a tin for easy snack bars!

Take a look at the variations (below the main recipe) for suggestions to alter the recipe to suit your specific dietary requirements.


For more easy to make, delicious no-bake treats, click HERE.

These easy to make Nut-free Cacao Bliss Balls are a bit of a change from the dried fruit, high-sugar energy balls or bars about.
Print Recipe
4.89 from 9 votes

Nut-free Cacao Bliss Balls

These nut-free cacao bliss balls are a delicious and healthy snack that’s perfect for lunch boxes, afternoon pick-me-ups, or post-workout treats. Packed with seeds, cacao, and natural sweeteners, they’re super easy to make and store, plus they’re free from nuts, making them a great option for anyone with allergies.
Prep Time10 minutes mins
Total Time20 minutes mins
Course: Snack
Servings: 20 balls

Ingredients

  • 150 g mixed seeds (approx. 1 cup) ground (140g pumpkin and/or sunflower seeds plus 1 tablespoon linseed)
  • 20 g chia seeds (2 tablespoons) ground
  • 80 g desiccated coconut (1 cup)
  • 30 g cacao powder (¼ cup) unsweetened Dutch process or raw
  • 1 tsp ground cinnamon
  • 85 g rice malt syrup, honey or maple syrup (¼ cup)
  • 100 g coconut oil (½ cup)
  • 1 tsp vanilla -powder, extract or essence

Instructions

  • Start with grinding your seeds. If using a Thermomix, 10 seconds speed 10. Jut take care not to over grind them o they release oils (if you do, use less coconut oil).
  • In a bowl or food processor combine the seeds, chia or flax, coconut, cacao and cinnamon. If using a Thermomix 10 seconds, speed 5.
  • Add the sweetener, coconut oil and vanilla and mix until well combined. If using a Thermomix 10 seconds, speed 5.
  • The mixture should be moist and hold together when squeezed. If it feels too oily add more seed meal (or just press into a lined tin, chill, slice and make bliss bites).
  • Roll into small balls and toss in the extra coconut or cacao if desired. This is a great job for the kids.
  • Place on a tray lined with baking paper and pop in the fridge or freezer to set.

Store and serve

  • Store in an airtight container in the fridge for a few weeks, or freeze for up to three months.
  • I pack these into the lunch box from frozen (against an ice brick). They will fall apart if not kept cool.

Notes

Low-fructose

Choose rice malt syrup as your sweetener.

Coconut-free

Replace the desiccated coconut with more ground seeds and the coconut oil with butter or ghee.

Cacao-free

Replace the cocoa with carob powder.

Vegan

Choose rice malt or maple syrup as your sweetener.

Time saving Tip

Sometimes I just don't have the patience to roll balls.  This mixture can also be pressed into a tin lined with baking paper, chilled to set and then cut into squares and stored.
 

I'd love to hear how your kids enjoy this recipe - post a comment or rate this recipe below. 

Simple Ceviche

December 1, 2015 | Fish & Seafood

I like to keep things as simple as possible in the kitchen, but always without compromising taste and nourishment. Ceviche was a dish I became very familiar with when travelling the coastal parts of South America many moons ago. I fell in love with it then and my simple ceviche has become a firm favourite with my family since (this is one of a very few ways my fish fussy daughter will eat fish).

I generally make it for special occasions, but it’s so simple, I often ask myself why I don’t make it more often. I think this is a fabulous seafood starter for a hot Christmas day. Anything that doesn’t involve having the oven on any longer than need-be right?

Health benefits

Ceviche is not just a delicious raw fish dish; it’s also packed with health benefits! The fish provides high-quality protein and omega-3 fatty acids, which are great for heart health. Lime juice is loaded with vitamin C, and the addition of fresh herbs adds antioxidants and anti-inflammatory properties. Paired with avocado, which is full of healthy fats, this dish supports a balanced and nutritious diet.

Ingredients

For this ceviche, you’ll need firm white fish fillets like snapper, mahi-mahi kingfish, fresh lime juice, and coconut water to create a refreshing marinade. Add finely sliced spring onions, fresh coriander (cilantro), mint, and red chilli for a burst of flavour. Don’t forget the salsa, made with diced avocado, red capsicum, and lime juice, which adds a creamy and colourful touch!

How to make simple ceviche

Start by tossing your fish cubes in a bowl with half cup lime juice, coconut water, and all the herbs and chilli in a large bowl. Cover the bowl and let it chill in the fridge for about four hours, allowing the fish to marinate until it turns opaque. Once ready, serve the ceviche garnished with micro herbs and enjoy it with the avocado salsa and some crispy corn chips for a delightful crunch!

Serving suggestions and how to store

This easy ceviche recipe is best served chilled and enjoyed fresh. Pair it with good-quality corn chips (tortilla chips) or tostadas for a delicious appetiser or snack. If you have leftovers, store them in an airtight container in the fridge for up to a day, but keep in mind that the fish may become more “cooked” in the lime juice over time, so it’s best to eat it soon after preparation.

Vary this simple ceviche to suit your needs

Feel free to customise this ceviche to suit your taste! If you prefer a milder flavour, you can omit the chilli. For a twist, add diced mango or pineapple for a sweet touch. For onion-free, omit the spring onion. You can also use lemon juice to cure the fresh fish but I prefer lime juice personally.

Take a look at the variations below for all the details as well as suggestions to alter the recipe to suit your specific dietary requirements.


For more healthy, easy, delicious recipe click HERE.

Ceviche
Print Recipe
No ratings yet

Simple Ceviche

This Simple Ceviche is a refreshing dish that perfectly captures the vibrant flavours of summer! With tender pieces of fish “cooked” in zesty lime juice and complemented by the sweetness of coconut water, this ceviche is both light and satisfying. It's ideal for warm days, backyard gatherings, or a quick and healthy meal that feels a bit fancy without much effort.
Prep Time15 minutes mins
Cure time4 hours hrs
Total Time4 hours hrs 15 minutes mins
Course: Appetizer, Main Course
Servings: 4

Ingredients

Ceviche

  • 800 g firm white fish fillets - pin boned and cut into 1cm cubes (I like snapper or kingfish)
  • 120 ml fresh lime juice (juice of approx. 3-4 limes)
  • 370 ml coconut water (1½ cups)
  • 4 spring onion/s - white part finely sliced
  • 2 tbsp fresh coriander leaves - finely diced
  • 2 tbsp fresh mint leaves - finely diced
  • 1 small red chilli/s - seeds removed and finely sliced
  • Sea salt and freshly ground black pepper - to taste

Salsa

  • 1 avocado/s - diced
  • 1 red capsicum/s - finely diced
  • 1 tbsp fresh coriander leaves - finely chopped
  • ½ lime/s - juice and zest

Instructions

  • Toss the fish, lime juice, coconut water, spring onions, herbs and chilli in a small bowl.
  • Cover and chill in the fridge for 4 hours (the lime juice will 'cook' the fish - you will see it go opaque).
  • Garnish with herbs or micro herbs.

Serve

  • Serve with good quality corn chips or tortilla chips and  avocado salsa.

Notes

Onion-free

Simply omit the spring onion. 


I'd love to hear how you like this delicious dish. Post a comment below. 

Pecan Pie Cookies

November 24, 2015 | After School Snacks, Baked Sweets, Holidays & Entertaining

I’ve always loved Pecan Pie, but now days, I find it way to sweet; one mouthful and I’m well and truly done. So craving the flavour without the sweetness, I thought I’d come up with a less sugary alternative. These Pecan Pie Cookies are a delicious twist on the classic dessert, combining the rich flavours of pecan pie with the convenience of a cookie. Perfect for satisfying your sweet tooth, these cookies are a hit at gatherings or just for enjoying with your afternoon tea. Plus, they’re easy to whip up and will leave your kitchen smelling heavenly!

PS – I plan to bake a few batches to pop in pretty jars for Christmas presents, they make such a beautiful festive treat.

Health benefits

Packed with wholesome ingredients like almond meal and nut butter, these pecan pie cookies offer healthy fats and protein to keep you satisfied. Almond meal is a great source of vitamin E and magnesium, while pecans provide antioxidants and healthy fats, making these cookies a delicious treat.

Ingredients

For the base, you’ll need almond meal, macadamia nut oil, rice malt syrup or honey, vanilla extract and water to help bind everything together. The filling is where the magic happens, with roasted pecans, nut butter, rice malt syrup or maple syrup, and warm spices like cinnamon and cloves. Don’t forget the extra pecans for topping!

How to make Pecan Cookies

Start by preheating your oven and lining a baking tray with parchment paper. Mix the base ingredients until they form a sticky dough, then roll into balls and press them down to create an indentation. For the filling, combine the nut butter, syrups, and spices, then spoon it into each cookie’s centere before topping with a pecan. Bake until golden brown, cool, and enjoy!

Serving suggestions and how to store

These cookies are perfect for serving at parties, alongside your favorite tea or coffee, or as a sweet treat anytime. Store them in an airtight container in the fridge to keep them fresh, or freeze them for up to three months for a delightful snack later on.

Vary these pecan pie cookies to suit

If you’re looking for a fructose-friendly and vegan option, simply swap the sweetener for rice malt syrup. Unfortunately, if you have nut allergies, this recipe won’t work for you, but we do have lots of other nut-free recipe on the website.

Take a look at the variations (below the main recipe) for suggestions to alter the recipe to suit your specific dietary requirements.


For more easy to make, heathy sweet treats, click HERE.

These delicious Pecan Pie Cookies are a healthy alternative to super sweet pecan pie. Gluten-free, grain-free, dairy-free and egg-free
Print Recipe
5 from 6 votes

Pecan Pie Cookies

All of the flavours of a Pecan Pie in a cookie. It's easy to make, gluten, grain and refined sugar free. 
Prep Time15 minutes mins
Cook Time15 minutes mins
Total Time30 minutes mins
Course: Snack
Servings: 12 cookies

Ingredients

Base

  • 150 g almond meal (1¼ firmly packed cups) 
  • 55 g macadamia nut oil (¼ cup) 
  • 85 g rice malt syrup or honey (¼ cup)
  • 1 tsp vanilla -powder, extract or essence
  • 1 tbsp water (very important to keep them from spreading)

Filling

  • 10-15 pecan nuts (about 2 heaped tbsp), roasted and roughly chopped
  • 1 tbsp nut butter (I used cashew nut butter)
  • 3 tbsp rice malt syrup or maple syrup
  • 1 tsp ground cinnamon
  • Pinch ground cloves
  • 15 pecan nuts -extra to top each cookie

Instructions

  • Preheat your oven to 150℃/ 300℉ (fan-forced). Line a baking tray with safe baking paper (I love 'If You Care' brand).
  • In a bowl or food processor, mix the ingredients for the base until well combined. If you have a Thermomix mix 10 seconds, speed 4. You should have a sticky, slightly oily dough that you can roll into balls. If not, add more almond meal, tablespoon by tablespoon.
  • With damp hands, roll the dough into small balls (a bit smaller than a ping pong ball), place on your lined baking tray and press the middle with your thumb to make an indented centre.
  • Now make the filling by mixing the ingredients together until well combined.
  • Place about half a teaspoon onto each cookie, top with a whole pecan nut and bake for 15 minutes or until golden brown.
  • If you'd like to caramelise the top, sprinkle with a little coconut sugar before baking.
  • Allow to cool (they will firm up as they cool) and store in an airtight container.

Store

  • Airtight in the fridge and can be frozen for up to 3 months.

Notes

Fructose friendly and vegan

Choose rice malt syrup as your sweetener.

Nut-free

This is not the recipe for you. For 150 pages of nut-free recipes, take a look at my super popular ebook 'The Well Nourished Lunchbox'. Click HERE to find out more and read the rave reviews.


I'd love to hear how you enjoy these delicious biscuits. Post a comment or rate this recipe below.

Mediterranean Potato Bake

November 18, 2015 | Side dishes

This Mediterranean Potato Bake is a delicious dish that brings a taste of the Mediterranean to your dinner table. With tender potatoes infused with fresh herbs, garlic, and briny olives, this bake is the perfect side dish for any meal. Whether you’re serving it alongside grilled fish, meat, or at a summer BBQ, it’s sure to impress your family and friends with its vibrant flavours and crispy texture.

One of my life’s great pleasures is entertaining – I know many of you will think I’m quite mad, but I genuinely enjoy feeding a crowd. In the past, I loved a good fine dining occasion – catering for a three or four-course meal was exciting! But having kids certainly changed that! So now when I entertain, it tends to be more of an all-in feast – a lovely selection of fresh food served buffet style is my preference. I also try to stick with dishes that I can do the bulk of the preparation in advance, and this Mediterranean Potato Bake fits the bill.

Health benefits

Not only is this dish delicious, but it also packs a nutritious punch! Potatoes provide a great source of complex carbohydrates and essential vitamins, while the fresh herbs offer antioxidants and anti-inflammatory properties. Olives and capers add healthy fats and a burst of flavour, making this bake both satisfying and wholesome. Using olive oil as the fat brings healthy monounsaturated fats to the dish too.

Ingredients

To create this tasty bake, you’ll need potatoes (Dutch Creams, sebago or Kipflers work great), fresh herbs (like thyme, rosemary, and oregano, or a tablespoon of dried herb provencal), butter, ghee, or olive oil, finely chopped garlic, drained capers, vinegar (red wine or apple cider vinegar), pitted black olives (kalamata olives are a favourite), and a splash of extra virgin olive oil for drizzling. Don’t forget sea salt and freshly ground black pepper to taste!

How to make roasted mediterranean potatoes

Start by preheating your oven to 200℃/395℉. Boil the potatoes in a large pot until just cooked and fork tender. While the potatoes are cooking, chop your fresh herbs and combine them with your chosen fat, garlic cloves, capers, and vinegar in a small bowl. Once the potatoes are cooked, drain them and place them in an ovenproof baking dish, preferably in a single layer. Bash them up a little to create texture, then add the olives and herby dressing. Season and bake for 25 minutes or until the top is golden and crunchy. Drizzle with extra virgin olive oil, season again, and enjoy!

Serving suggestions and how to store

Garnish with fresh parsley leaves. This Mediterranean Potato Bake is perfect for serving alongside BBQs (chicken, lamb, beef) or roast dinners, paired with fresh salads for a complete meal. You can also enjoy it as a midweek dish with grilled meats or fish and a leafy green salad. If you have leftovers, store them in an airtight container in the fridge for a delicious side dish to enjoy later.

Vary Mediterranean Potato Bake to suit your dietary needs

This recipe is gluten-free, grain-free, dairy-free, vegan and nut-free. Feel free to customise this recipe to meet your dietary preferences! For a garlic-free version, substitute garlic with finely diced fennel for a delicious twist. If you’re looking for a vegan option, simply use extra virgin olive oil as your fat. For cheese lovers, adding grated parmesan cheese or crumbled feta cheese over the top adds a lovely cheesy flavour to the dish. Enjoy experimenting with different variations to make it your own!

For lots more sides and salad inspo, take a look at my hugely popular ebook ˜Well Nourished Sides and Salads’– where vegetables become the hero of the dish. It’s great value at just $9.95, click HERE to take a look

This Mediterranean Potato Bake is a delicious, easy to prepare side dish that's perfect for feeding a crowd. Gluten-free, dairy-free.
Print Recipe
4.88 from 8 votes

Mediterranean Potato Bake

A budget friendly side that's not only delicious, but also nourishing for your family. This Mediterranean Potato Bake is a great dish for when you're entertaining a large group too. 
Prep Time10 minutes mins
Cook Time35 minutes mins
Total Time45 minutes mins
Course: Side Dish
Cuisine: Mediterranean
Servings: 6

Ingredients

  • 1 kg potato/s (I use Dutch Creams or Kipflers)
  • 2 tbsp fresh herbs (thyme, rosemary, oregano) OR 1 tablespoon of dried herb provencal
  • 50 g butter, ghee or olive oil
  • 2 clove/s garlic - finely chopped
  • 2 tbsp capers - drained
  • 1 tbsp vinegar (I use red wine or apple cider vinegar)
  • 180 g black olives (1 cup) pitted kalamata are nice
  • 1 tbsp extra virgin olive oil - extra virgin
  • Sea salt and freshly ground black pepper - to taste

Serve

  • ½ bunch/s parsley - chopped

Instructions

  • Preheat your oven to 200℃/395℉ (fan-forced).
  • In a large pot, boil your potatoes until just cooked (tender when you insert a knife).
  • While your potatoes are cooking, chop your herbs and place them in a small bowl with the fat of your choice, garlic, capers and vinegar.
  • Place the cooked and drained hot potatoes in an oven proof serving dish (bash the spuds up a little so they just start to break apart - they cook crunchier that way). Add the olives and the herby dressing.
  • Season and bake for 25 minutes or until crunchy on top.
  • Drizzle with a little bit of extra virgin olive oil, season with sea salt (only a little as the olives and capers are salty) and black pepper.

Serve

  • Chopped parsley leaves
  • I would serve this to accompany a BBQ or roast style meal with a few different salads (loads of beautiful salad recipes here). We often have this midweek with grilled fish or meat and a leafy green salad.

Store

  • Store in an airtight container in the fridge.

Notes

Garlic-free

Replace the garlic with half a bulb of finely diced fennel - it's really delicious. 

Vegan

Choose extra virgin olive oil as your fat.

Make it cheesy

This is lovely with grated parmesan or feta cheese crumbled over it.


Have you tried this delicious side? Let me know how you liked it in the comments below or rate this recipe.

Coco-Beet Berry Smoothie

November 11, 2015 | Drinks & Smoothies

This Coco-Beet Berry Smoothie is a delicious and nutritious drink that’s perfect for breakfast or as a satisfying snack. With a blend of frozen berries, cacao powder, and the earthy sweetness of beetroot, this smoothie is not only packed with flavour but also loaded with antioxidants, healthy fats, and essential vitamins. It’s an easy way to start your day on a healthy note or enjoy a refreshing pick-me-up anytime!

Most mornings, my 7yr old son (the most laid back individual in the world and not particularly partial to anything to domesticated), makes the family a smoothie. Usually, he sticks to favourite combinations like berry, spinach, banana or pineapple, spinach, lime and mint; but occasionally, with a little guidance he likes to get creative.

My only stipulation with the morning smoothie is that it has a little veg in it (and he usually picks spinach or avocado). But one day recently he decided that we should try beetroot in the smoothie. A few weeks on, we’ve been fine-tuning this recipe and I think we’ve got to the really delicious stage, worthy of officially sharing.

Health benefits

This smoothie is a powerhouse of nutrition!  Beetroot is an anti-inflammatory, antioxidant, detoxifying and extremely nutrient rich vegetable. Research suggests it improves stamina and sports performance (this fact alone appeals to my sport loving kids). Berries provide carbohydrates, vitamin C and antioxidants that help fight inflammation and support your immune system, while cacao powder adds a rich chocolate flavour along with magnesium for energy. The coconut water is rehydrating and the nut butter a great source of healthy fats and protein, keeping you full and satisfied.

Ingredients

To whip up this delicious beetroot smoothie, gather frozen raspberries (or frozen strawberries or a mix), cacao powder, peanut butter (or your favourite nut butter), rice malt syrup (honey or maple syrup), fresh beets, and coconut water.

How to make this beet smoothie recipe

Simply peel the beetroot and blend all the ingredients together in a high-powered blender until smooth. If you’re using a Thermomix, just blend for about 30 seconds on speed 9. It’s that easy! Pour into a glass and enjoy immediately for a refreshing and nutritious treat.

Serving suggestions and how to store

This coco-beet berry smoothie is best enjoyed fresh. If made with frozen berries it’s thick enough to turn into a smoothie bowl. If you have leftovers, you can freeze them into little cups or ice-block molds for a great snack another day.

Vary this coco-beet berry smoothie to suit

This smoothie is gluten-free, dairy-free and grain-free. But feel free to customise it to suit your dietary preferences! If you’re avoiding coconut, simply swap out the coconut water for your favourite milk (dairy or almond milk or coconut milk). For a nut-free version, replace the nut butter with tahini or omit it altogether. If you’re watching your fructose intake or are vegan, use rice malt syrup as your sweetener. You can also boost the protein content by adding a scoop of wholefoods protein powder for an extra nutritious kick!

Take a look at the variations (below the main recipe) for suggestions to alter the recipe to suit your specific dietary requirements.

Coco-Beet Berry Smoothie - this delicious gluten-free and dairy-free smoothie is packed full of nutrition.
Print Recipe
5 from 4 votes

Coco-beet Berry Smoothie

This Coco-beet Berry Smoothie is a delicious way to include the super nourishing vegetable beetroot into your day. Try it, you won't be disappointed. 
Prep Time5 minutes mins
Total Time5 minutes mins
Course: Drinks
Servings: 2

Ingredients

  • 100 g frozen raspberries (1 cup) or strawberries or a mix
  • 2 tbsp cacao powder (unsweetened Dutch process or raw)
  • 2 tbsp peanut butter (or any other nut butter)
  • 1-2 tbsp rice malt syrup, honey or maple syrup
  • ½ small raw beetroot -peeled and diced
  • 250 ml coconut water (1 cup) or Coco Quench is nice too

Instructions

  • Blend together in a high powered blender until smooth. Thermomix 30 seconds, speed 9.
  • Enjoy as part of a very healthy breakfast or snack.

Store

  • Leftovers can be frozen into little cups or ice-block moulds for a snack another day.

Notes

Coconut-free

Replace the coconut water with a nut-milk.

Nut-free

Replace the nut butter with tahini (or just leave it out).

Low-fructose

Choose rice malt syrup as your sweetener.

Boost the protein

Stir through your favourite protein powder. I love using this collagen protein—it’s flavourless, so it works beautifully across all kinds of recipes without altering the taste.


I'd love to hear how you like this veggie boosted smoothie. Post a comment to let me know.

Mum’s Lemon Chicken

November 4, 2015 | Budget Friendly, Make-ahead Meals, Chicken, Vegetarian

On a recent trip to Perth, my mum cooked me many delicious dinners, but this one was a standout. She threw it together (she’s a kitchen freestyler, just like me) and it was so good I knew I had to share it with you. It’s budget friendly, incredibly easy to make and tastes divine. When I tested the recipe at home, my whole family adored it – so here it is: my mum’s Lemon Chicken.

My mum has always been a great cook; well except for a short time when she was following the Pritikin Diet. She stopped cooking in fat and if you’ve ever eaten a roast chicken, skin removed and cooked in nothing but water, you’ll know just how ordinary it is – chicken and potatoes definitely need fat and salt to taste good! As you can tell, I’m a little scarred by that fat-free stage of my childhood!

This lemon chicken recipe is a crowd-pleaser, bursting with flavour and perfect for family dinners or meal prep. With succulent drumsticks roasted to perfection and infused with zesty lemon, smoked paprika, and aromatic herbs, it’s an easy one-pan dish that brings comfort to the table. Plus, it’s versatile enough to pair with a variety of sides, making it a fantastic addition to your weekly meal rotation.

Health benefits

This lemon chicken is not only delicious but also packed with nutrition. Chicken drumsticks are a great source of protein, essential for muscle repair and growth. The addition of turmeric adds anti-inflammatory benefits, while the colourful veggies like carrots, celery, and potatoes provide carbohydrates, fibre, vitamins, and minerals that support overall health. Plus, using natural sweeteners like honey or rice malt syrup keeps it refined sugar-free.

Ingredients

To create this easy baked lemon chicken dish, gather chicken drumsticks (or Marylands or bone-in chicken thighs), butter, ghee, or coconut oil, rice malt syrup or honey, smoked paprika, diced red onions, chicken broth or stock, sliced garlic cloves, diced celery sticks, sliced carrots, peeled and roughly diced potatoes, ground cumin, grated fresh turmeric (or dried), chopped fresh rosemary (or dried), a pinch of chilli flakes (optional), lemon slices, and sea salt and freshly ground black pepper to taste.

How to make baked lemon chicken 

Begin by preheating your oven to 180°C (350°F). In a big bowl, toss the chicken with the sweetener, smoked paprika, and a pinch of sea salt. In a large baking dish over medium heat, sauté the diced onion in butter or ghee until translucent. Push the onion aside and brown the chicken on all sides before removing it from heat. Add the chicken stock, garlic, celery, carrots, potatoes, cumin, turmeric, rosemary, and optional chilli flakes, mixing gently. Arrange lemon wedges among the chicken and bake for 1 hour until the chicken is tender.

Serving suggestions and how to store

Serve this lemon baked chicken with all the delicious pan juices over a bed of wilted greens, cauliflower rice, quinoa, or your choice of mashed potatoes for a comforting meal. Or simply serve with a side salad. Store any leftovers in an airtight container in the fridge for up to 3 days or freeze for longer storage. Reheat covered in a low oven until hot.

Vary lemon chicken to suit your dietary needs

Feel free to customise this recipe to fit your dietary preferences! For a vegetarian version, swap the chicken for large halved field mushrooms and add canned chickpeas towards the end of cooking. If you’re avoiding onions, replace them with finely diced fennel. To make it garlic-free, simply omit the garlic or add an extra teaspoon of ground cumin for flavour. Additionally, you can experiment with different vegetables to tailor the dish to your liking!

Take a look at the variations (below the main recipe) for suggestions to alter the recipe to suit your specific dietary requirements.


For more healthy, delicious and easy to make meals – click HERE.

How to eat whole foods on a tight budget ($10 a day), with limited time to cook & only a small, basic kitchen. I show you how I did this
Print Recipe
4.88 from 24 votes

Mums Lemon Chicken

This is my kind of meal, one with a little bit of prep that I can throw in the oven and forget until it's cooked. This one pan Lemon Chicken is a delicious, nourishing meal.
Prep Time15 minutes mins
Cook Time1 hour hr
Total Time1 hour hr 15 minutes mins
Course: Main Course
Servings: 4

Ingredients

  • 12 chicken drumsticks (or Marylands)
  • 2 tbsp butter, ghee or coconut oil
  • 1 tbsp rice malt syrup or honey
  • 1 tbsp smoked paprika
  • 2 red onion/s -peeled and diced
  • 250 ml chicken broth or stock (1 cup)
  • 2 clove/s garlic -peeled and sliced
  • 2 stick/s celery -diced
  • 2 carrot/s -sliced
  • 2 potato/s (Dutch cream or Kipfler) peeled and roughly diced
  • 1 tsp ground cumin
  • 1 tsp fresh turmeric root -grated (or ½ teaspoon dried)
  • 1 tsp fresh rosemary leaves -chopped (or ½ teaspoon dried)
  • Pinch chilli flakes (optional)
  • 1 lemon/s (large) -sliced into about 8 wedges**
  • Sea salt and freshly ground black pepper -to taste
Metric - US Customary

Instructions

  • Preheat your oven to 180°C / 350°F (fan-forced).
  • In a big bowl, toss the chicken with the sweetener, paprika and a pinch of sea salt to coat it.
  • Place a large baking dish (I use a cast iron one) on your stove top and over a low to moderate heat, sauté the onion in a little butter to ghee (or olive oil for dairy-free) until just translucent.
  • Push the onion to the side (away from the heat), turn up the heat and brown your chicken on all sides. Remove from the heat.
  • Add the bone broth, garlic, celery, carrots, potatoes, cumin, turmeric, rosemary and optional chilli flakes.
  • Gently mix it through the chicken and season again if needed.
  • Arrange the lemon wedges, flesh side down between the pieces of chicken. **** If your lemon has a really thick pith / white part (more than 5mm) then don't add as the pith can impart a bitter flavour to the pan juices. Instead add a little lemon juice to the pan juices after cooking.
  • Pop in the preheated oven and bake for 1 hour.

Serve with all of the delicious pan juices...

  • On a bed of greens (they will wilt under the casserole).
  • With fresh parsley or peas. I love a green hit with any meal. 
  • On cauliflower rice, quinoa or rice (for gluten-free) or cous cous (if okay with gluten).
  • Over mashed potato or sweet potato.

Extra fast, lazy version

  • Just throw it all in the roasting pan and straight into the oven. You may need to pop it under the grill prior to serving to crisp up and brown the chicken. 

Make-ahead

  • Re-heat (covered) in a low oven until just hot.

Store

  • Store in an airtight container in the fridge.
  • Can also be frozen.

Grab Bag Formula Method

  • If you've done the **Grab Bag Formula Short Course, this is the method to convert this recipe...
  • Place the drumsticks first then the rest of the ingredients (except the lemon juice) into the Grab Bag.
  • Carefully seal your Grab Bag. I close most of the seal then press out as much air as I can then complete the seal. Place the Grab Bag in the freezer.
  • To cook, remove the Grab Bag from the freezer, place on a baking tray and thaw in the fridge overnight.
  • Tip the contents of the Grab Bag into a large oven proof dish (with a tight fitting lid) or Dutch oven. It may still be a bit frozen; that’s okay.
  • Place the lid on the pot, set your oven to 160°C/320°F (fan-forced) and cook for 2½ hours.
  • Add the lemon juice to the pan juices and season. Taste and adjust as needed.
  • ** The Grab Bag Formula Short Course is available to purchase for just AU$46 HERE.
    OR
    If you are a full-access Well Nourished Family member, the course is included in your membership and you can access in the members portal - HERE.

Notes

Vegetarian

Replace the chicken with large field mushrooms (halved), reduce the cook time to 45 minutes and add in a can of drained chickpeas for the last 15 minutes of cooking. Also use vegetable stock. Serve with rice or quinoa to ensure a complete protein.

Onion-free

Replace the red onion with one finely diced bulb of fennel.

Garlic-free

You can simply omit the garlic or add an extra teaspoon of ground cumin.

Fructose-friendly

Choose rice malt as your sweetener. 

Different veggies

Feel free to experiment with different vegetables.
 

I hope you love this dish as much as I do and I'd love to hear from you. Write a comment or rate this recipe.

Lemon Drops

October 29, 2015 | Ice-blocks

This Lemon Drops recipe one of the simplest, healthiest and most delicious treats I make.  Seeing as many of you have told me that you have an abundance of lemons from your backyard trees, I thought now would be a good time to share it.

So much of my passion for food and cooking comes from growing, picking and cooking food with my nana. Even into adulthood, my Saturday routine was to finish consulting in my Naturopathic clinic by mid-day and drive straight to my Nans for lunch. In winter, we’d bunker down and watch the footy. In summer, we’d sit out back in the sun or we’d do a bit of gardening.

One very strong memory I hold dear was helping my Nan pot a new lemon tree, not too long before she passed away. To this day, my Nans’ lemon tree lives on in my mums little courtyard, its fruit as abundant as always. Mum actually tried to graft it so I too could have a little piece of Nans’ tree (sadly it didn’t work out). Maybe this is why I just love lemons!

Health benefits

Lemons are a vitamin C and antioxidant rich fruit and a concentrated source of nourishment. For more about the health benefits of lemons (plus recipes using lemons) click here. Coconut oil is a delicious, immune supportive and healing fat that I’ve raved about here. By using natural sweeteners like honey or maple syrup, you can enjoy a delicious treat without the refined sugars.

Ingredients

To make these zesty lemon drops, you’ll need semi-solid coconut oil, the juice and zest of 1 small lemon (approximately ¼ cup), and 1-2 tablespoons of rice malt syrup, honey, or maple syrup to add just the right amount of sweetness.

How to make Lemon Drops

Start by mixing the coconut oil, lemon juice, lemon zest, and sweetener in a blender or food processor until you achieve a thick, icing-like consistency. If you’re using a Thermomix, blend for 30 seconds on speed 4. Pour the mixture into a silicone mold or a small tray lined with baking paper; you can even pipe it for a fun presentation. Place it in the freezer for about 15 minutes, or until firm, then pop them out or cut into cubes.

Serving suggestions and how to store

Enjoy these lemon drops straight from the freezer whenever you need a refreshing pick-me-up. They’re perfect as a post-workout snack or a yummy sweet treat. Store them in an airtight container in the freezer to keep them firm and ready to enjoy whenever you like.

Vary this to suit your dietary needs

You can easily customise these lemon drops to fit your dietary preferences. For a fructose-friendly option, opt for rice malt syrup as your sweetener. If you’re looking for a vegan treat, both rice malt syrup and maple syrup work perfectly as substitutes for honey. Feel free to experiment with different citrus fruits for a fun twist on flavor!

Take a look at the variations (below the main recipe) for suggestions to alter the recipe to suit your specific dietary requirements.

Lemon drops
Print Recipe
5 from 1 vote

Lemon Drops

These lemon drops are a zesty treat that’s perfect for a quick energy boost or a sweet snack. Made with just a handful of simple ingredients like coconut oil, fresh lemon juice, and a touch of sweetness, they’re incredibly easy to whip up in just a few minutes. Enjoy these bright bites straight from the freezer for a cool, invigorating treat!
Prep Time5 minutes mins
Freeze1 hour hr
Total Time1 hour hr 5 minutes mins
Course: Snack
Servings: 12 drops

Ingredients

  • 105 g coconut oil (½ cup) semi-solid is best (pop in the fridge or warm for a few minutes if you need to)
  • 1 small lemon/s (approx. ¼ cup of juice) and zest
  • 1-2 tbsp rice malt syrup, honey or maple syrup

Instructions

  • Mix the ingredients together in a blender or food processor until well combined and thick (like icing sugar). If using a Thermomix, mix 30 seconds, speed 4.
  • Pour into a silicone mould or a small tray (lined with baking paper). You could also pipe this if you'd like to get creative.
  • Pop into the freezer for 15 minutes or so, until set firm.
  • Push from the mould or cut into cubes.

Store

  • Store and eat straight from the freezer. Try to stop at one.

Notes

Fructose-friendly

Choose rice malt syrup as your sweetener.

Vegan

Choose rice malt or maple syrup as your sweetener.
 

I'd love to hear how you like this super simple treat. Post a comment below.

Middle Eastern Beef Brisket

October 21, 2015 | Make-ahead Meals, Red Meat, Freezable Meals, Slow Cooked

This Middle Eastern beef brisket is a flavour-packed dish that transforms a budget friendly cut of meat into a tender, aromatic feast. It is really quick to prepare, but does require a lot of time to cook, so plan ahead for this meal.

The basic recipe will leave you with a ‘pulled’ style of meat which you can serve with salad, in a burger, wrap or tortilla, or on a bed of creamy mashed potato. The tahini sauce adds a lovely earthy-citrus hit to balance the richness of the meat. I hope you enjoy this really versatile and very satisfying meal.

Health benefits

Beef brisket is rich in protein and essential nutrients like iron and zinc, which are vital for overall health. The combination of spices not only adds depth of flavour but also provides antioxidant benefits, while tahini adds healthy fats and calcium, making this dish both nutritious and satisfying.

Ingredients

To make this Middle Eastern beef brisket, you’ll need a blend of spices (smoked paprika, cumin, coriander, cinnamon, cardamom, and cloves), a 1 kg beef brisket, chicken stock or bone broth, onion, garlic cloves, and a simple tahini sauce made with hulled tahini, lemon juice, and water.

How to make Middle Eastern Beef Brisket

Preheat your oven to 150°C (300°F) and mix the spices, salt, and pepper in a small bowl. Rub the brisket with the spice blend and place it in a Dutch oven or casserole dish. Add sliced onions, garlic, and pour in the stock until it almost covers the meat. Cover tightly and slow cook for about 4 hours, turning the brisket halfway through. Finish by uncovering and increasing the heat to caramelise the meat for about 20-30 minutes, then drizzle with homemade tahini sauce before serving.

Serving suggestions and how to store

Serve this brisket buffet-style or on a platter, allowing everyone to create their own meals in lettuce cups, tortillas, or over grains (like couscous or rice). Store leftovers in an airtight container in the fridge for up to 3 days, or freeze shredded meat for future meals. Reheat gently in the oven or on the stove with a splash of broth.

Vary Middle Eastern Beef Brisket to suit your dietary needs

This pulled beef recipe is gluten-free, dairy-free, nut-free and grain-free. For those with specific dietary needs, you can easily modify this recipe: omit the onion for fennel, replace garlic with chilli flakes for a kick, or substitute tahini with almond butter for a sesame-free option. Additionally, feel free to adjust the spices according to your flavour preferences! 

Take a look at the variations (below the main recipe) for suggestions to alter the recipe to suit many specific dietary requirements.


For more delicious, easy to make slow cooked meals click HERE.

Middle Eastern Beef Brisket - this budget friendly, easy to prepare meal is versatile and delicious. Gluten-free, dairy-free & grain-free.
Print Recipe
4.74 from 38 votes

Middle Eastern Beef Brisket

This Middle Eastern Beef Brisket features on my dinner table very regularly. I love it because I can simply prepare it and then let it slow cook in my oven so dinner is done when I'm late home from after school activities. 
Prep Time10 minutes mins
Cook Time5 hours hrs
Total Time5 hours hrs 10 minutes mins
Course: Main Course
Servings: 4

Ingredients

  • 2 tsp smoked paprika
  • 2 tsp ground cumin
  • 1 tsp ground coriander
  • 1 tsp ground cinnamon
  • 1 tsp ground cardamom
  • ¼ tsp ground cloves
  • Sea salt and freshly ground black pepper - to taste
  • 1 kg beef brisket (approx.)
  • 370 ml chicken broth or stock (1½ cups) or water
  • 1 onion/s - halved and sliced
  • 2 clove/s garlic - sliced

Tahini Sauce

  • 3 tbsp hulled tahini 
  • 1 lemon/s (small) juice
  • ¼ tsp ground cumin
  • Pinch sea salt
  • water - to thin sauce
Metric - US Customary

Instructions

  • Preheat your oven to 150°C/300°F (fan-forced).
  • In a small bowl mix together the spices, salt and pepper.
  • Rub the beef with about 1½ tablespoons of the spice blend to coat it and place in a medium sized Dutch oven, casserole dish (with a lid) or roasting pan. Place the remaining spice mix in a small jar for your next brisket.
  • Add the garlic, onion and pour over the stock (it should cover or almost cover the meat).
  • Cover with a lid or foil wrapped tightly to seal.
  • Cook for about 2 hours, turn the meat and cook for another 2 hours (approx. total 4 hours cook time). Remove from the oven and rest with the lid on for 30 minutes.
  • It is cooked perfectly when the meat easily pulls apart. If you have a larger or particularly tough cut it may need a slightly longer cook time
  • If there is lots of excess liquid int he pot, remove the lid or foil and turn the oven up to 200°C. Pull the meat apart and cook for approximately 20 minutes to caramelise and thicken the sauce (only if required).
  • To make your tahini sauce, combine all of the tahini sauce ingredients together. Add the water tablespoon by tablespoon until you have a slightly runny sauce that can be drizzled over the meat.

Slow Cooker

  • This can certainly cooked in a slow cooker. However, as the speed and temperature varies between the many brands of slow cookers, base the amount of liquid you add and the cook time on a similar style of recipe in the guide book for your specific slow cooker. The general rule of thumb is to halve the liquid and double the cook time, but understanding your own slow cooker is the best guide.

Serve this buffet style so you can build your own meal. Here are some ways we eat this...

  • In a lettuce cup with julienne vegetables
  • In a burger, wrap or tortilla with lots of salad/grated veggies
  • On a creamy mashed potato or cauliflower puree with steamed green vegetables
  • Over rice, quinoa or cous cous.
  • Or any way you like really

Make-ahead

  • Re-heat (covered) in a low oven until just hot or in a pot with a splash of bone broth.

Store

  • Store in an airtight container in the fridge.
  • Shredded meat can also be frozen.

Grab Bag Formula Method

  • If you've done the **Grab Bag Formula Short Course, this is the method to convert this recipe...
  • Place the beef brisket, spices, seasoning, stock, onion and garlic into your Grab Bag. Carefully seal your Grab Bag. I close most of the seal then press out as much air as I can then complete the seal. Place the Grab Bag in the freezer.
  • To cook, remove the Grab Bag from the freezer, place on a baking tray and thaw in the fridge overnight.
  • Tip the contents of the Grab Bag into a large oven proof dish (with a tight fitting lid) or Dutch oven. It may still be a bit frozen; that’s okay.
  • Place the lid on the pot, set your oven to 150°C/300°F (fan-forced) and cook for about 2 hours. Turn the meat and cook for another 2-3 hours (total 4-5 hours cook time). It is cooked when the meat easily falls apart when pulled at. Remove the lid and turn the oven up to 200°C. Pull the meat apart and cook for approximately 30 minutes to caramelise and thicken the sauce.
  • ** The Grab Bag Formula Short Course is available to purchase for just AU$46 HERE.
    OR
    If you are a full-access Well Nourished Family member, the course is included in your membership and you can access in the members portal - HERE.

Notes

Onion-free

Replace the onion with a small bulb of finely diced fennel.

Garlic-free

Replace the garlic with a pinch of chilli flakes. 

Sesame-free

Replace the tahini with almond butter.


This recipe is a firm family favourite. If you like it as much as we do, add a comment or rate this recipe. 

Two Ingredient Coconut Cookies

October 12, 2015 | Healthy Lunchbox, Baked Sweets

These two-ingredient cookies are a simple and delicious treat that combines the natural sweetness of ripe bananas with toasted coconut. Perfect for a quick snack or a healthier dessert, they’re easy to whip up with just two pantry staples! Plus, they’re gluten-free and dairy-free, making them suitable for various dietary preferences. Enjoy these cookies as is, or get creative by turning them into yummy ice cream sandwiches!

Health benefits

These cookies are a fantastic source of natural energy, thanks to the fiber in shredded coconut and the natural sugars in bananas. They also provide healthy fats and nutrients, making them a guilt-free snack option that satisfies your sweet tooth.

Ingredients

The only two ingredients you need for these cookies are shredded coconut and a ripe banana. The more ripe the banana the more concentrated its natural sugars are. This makes them especially perfect for baking. Simple, wholesome, and delicious!

How to make Two Ingredient Coconut Cookies

To make these easy cookies, start by preheating your oven to 180°C (350°F) and lining a baking tray with baking paper. Toast the shredded coconut in a pan over medium heat until it’s lightly browned. Then, blend the toasted coconut with the ripe banana until it forms a fine mixture. Shape it into discs and bake until golden, which usually takes about 25 minutes.

Serving suggestions and how to store

These cookies are best enjoyed fresh but can be stored in the fridge for up to 3 days or frozen for a month. If they become soft, simply pop them in the freezer to crisp up!

Vary this to suit your dietary needs

You can also add a pinch of cinnamon or a dash of vanilla extract for extra flavor. If you’re looking for added protein, consider mixing in a scoop of your favourite protein powder!

The lovely Stace, from A Healthy Mum has been so generous to share a fabulous recipe from her ebook ‘A Healthy Lunchbox.’ The simple things in life are often the best. Made with just two ingredients, these cookies are a perfect balance of good fats and natural sugars. Combined, the result is something very delicious.


Two ingredient coconut cookie
Print Recipe
4.63 from 8 votes

Two Ingredient Coconut Cookies

Two Ingredients in these super simple cookies - need I say more?
Prep Time5 minutes mins
Cook Time25 minutes mins
Total Time30 minutes mins
Course: Snack
Servings: 6 cookies

Ingredients

  • 75 g shredded coconut (¾ cup)
  • 1 banana/s -must be ripe

Instructions

  • Preheat your oven to 180°C/350℉ (fan forced) and line a baking tray with a sheet of baking paper. Toast the coconut in a pan over a medium heat until it is lightly browned.
  • Add the banana to a blender with the toasted coconut. Pulse until the mixture comes together and the coconut is fine.
  • Shape the mixture into discs and space apart evenly on the baking tray. If the mixture is runny, spoon it onto the tray. Bake the cookies until golden (approximately 25 minutes).

Serving Suggestion

  • These cookies are delicious served as is or for something extra special, use them to make healthy ice cream sandwiches. If they go soft, pop them in the freezer and they will crisp up nicely.

Store

  • In the fridge for 3 days or freezer for 1 month

Notes


I'd love to hear how you like these simple snacks - post a comment below.

Raw Snickers Bar

October 6, 2015 | After School Snacks, No-bake Sweets

There are times when a specific flavour combination gets stuck in my mind, and that’s often how a new recipe takes shape. While peanuts aren’t usually my go-to, I recently found myself craving them – especially after receiving multiple requests from Snickers bar fans for a healthier, raw snickers bar. This recipe is what came out of that craving.

Originally, I designed it with three distinct layers (nougat layer, caramel layer and chocolate). But to save time in the kitchen, I simplified it to just two: the caramel-nougat filling and the chocolate layer. You can make this as a slice or shape it into chocolate bars. Personally, I prefer the slice—less fuss, more enjoyment!

Plus, this recipe is free of dried fruits like medjool dates, making it a fantastic fructose-free treat. I hope you love this gluten-free, grain-free, dairy-free treat as much as my family and I do!

Health benefits of this raw snickers bar

These vegan snickers bars are rich in healthy fats from coconut oil and almond meal, this treat also provides a good dose of plant-based protein from peanut butter and tahini. Almonds add a satisfying crunch along with fibre, magnesium, and vitamin E. This combination of protein, fats and fibres mean these snickers bars really do satisfy!

Ingredients

The base layer is made with peanut butter, tahini, rice malt syrup or maple syrup, melted coconut oil, almond meal, toasted almonds, and a pinch of sea salt. The chocolate layer consists of coconut oil, raw cacao powder, and rice malt syrup. All put together to taste just like a snickers!

How to make healthy snickers bars

To make this raw snickers slice, start by blending the ingredients for the base layer in a food processor until smooth, then press it into a slice tin lined with baking paper (parchment paper). Press the toasted almonds into the base and freeze. For the chocolate, mix coconut oil, rice malt syrup, and cacao powder, then pour over the base and return to the freezer to set. Once firm, slice and enjoy! See the instructions below to make a raw snickers ‘bar’ (so coated in chocolate on all sides).

If you own a Thermomix, we’ve also included Thermomix instructions for this recipe.

Serving suggestions and how to store

Keep these treats stored in and airtight container in the fridge or freezer for best texture and longevity. They can be enjoyed straight from the freezer for a more solid, chewy texture, or from the fridge for a softer bite. Like all raw treats, they need to be kept chilled or they can melt!

Vary this raw snickers bar to suit your dietary needs

For a fructose-friendly version, use rice malt syrup as your sweetener. If you prefer a sesame-free option, substitute tahini with more peanut butter or another nut butter. For a coconut-free version, replace the coconut oil with ghee or cacao butter.

Take a look at the variations (below the main recipe) for suggestions to alter the recipe to suit your specific dietary requirements.


For more quick and easy to make no-bake sweet treats, click HERE.

This Raw Snickers Bar recipe is a yum, healthy twist on a classic treat, using wholesome ingredients. It's gluten-free, grain-free and vegan.
Print Recipe
4.91 from 22 votes

Raw Snickers Bar

This Raw Snickers Bar recipe offers a delicious, healthy twist on a classic treat, using wholesome ingredients and natural sweetness, making it a great snack for satisfying cravings without refined sugars.
Prep Time15 minutes mins
Chill30 minutes mins
Total Time45 minutes mins
Course: Dessert, Snack
Servings: 12

Ingredients

Base layer

  • 125 g peanut butter (½ cup)
  • 125 g hulled tahini  (½ cup)
  • 85 g rice malt syrup or maple syrup (¼ cup)
  • 100 g coconut oil (½ cup)
  • 100 g almond meal (1 cup)
  • Pinch sea salt
  • 50 g raw almonds (½ cup) toasted

Chocolate layer or coating

  • 200 g coconut oil (1 cup) softened
  • 85 g rice malt syrup or maple syrup (¼ cup)
  • 30 g cacao powder (¼ cup) unsweetened Dutch process or raw

Instructions

  • Start with the base layer. In a food processor, mix the peanut butter, tahini, sweetener, coconut oil, sea salt and almond meal until well combined (If you have a Thermomix, mix 30 seconds, speed 4).
  • Press into a slice tin (mine is 20 x 30cm), lined with baking paper.
  • Place the almonds on top and press into the filling. Pop in the freezer until firm.
  • To make the chocolate, mix the melted coconut oil, rice malt and cacao in a small mixing bowl until combined (only takes a minute). If the ingredients are cold and not combining well you may need to warm slightly by sitting the bowl over a pot of steaming hot water. 
  • For a snickers slice, pour over the base layer and return to the freezer immediately, for 20-30 minutes to set.
  • To make a bar, you will need to cut your filling once set into the size bar you want, then working quickly toss it in the raw chocolate to coat. Place the bars on a tray lined with baking paper and pop back in the freezer to set for a minute or so. Repeat until it coated to your liking. It will need at least two coats if using raw chocolate (and only one if using melted dark chocolate).
  • Once set cut and store in the fridge or freezer.

Store

  • Like any raw treats, these need to be kept refrigerated or frozen. Personally, I like to store and eat from frozen.

Notes

Fructose friendly

Choose rice malt syrup as your sweetener.

Almond-free

Sub with whole roasted peanuts.

Sesame-free

Replace the sesame with a nut butter (either more peanut or another nut).

Coconut-free

You could sub with butter, ghee or cacao butter (it will change the texture and flavour a little but will still be lovely. 

Vegan

Choose rice malt or maple syrup as your sweetener.

Nut-free

This is not the recipe for you as the peanut flavour is hard to replicate without them. But for 150 pages of nut-free recipes, take a look at my super popular ebook 'The Well Nourished Lunchbox'. Click HERE to find out more and read the rave reviews.

Chocolate shortcut

You can also use melted dark chocolate for the chocolate layer (though no longer dairy-free and refined sugar-free). To melt, place the chocolate in a glass or ceramic bowl and sit on top of a pot of just boiled water. Stir until the chocolate has melted. 


I LOVE this recipe - how about you? Please post a comment or rate his recipe if you do too.

Smoked Salmon Pea Broccoli Pasta

September 16, 2015 | 30 Minute Meals, Pasta and Noodles, Fish & Seafood

We tend not to eat a heap of pasta, but it does make for a really fast meal occasionally. So it’s handy to have a few easy, delicious flavour combos like this lemony, Smoked Salmon Pea Broccoli Pasta recipe to call on.

This recipe came about after I bought some hot smoked salmon from our local farmers market (it’s also available in supermarkets), which I generally keep in the fridge to whip up a salad (like this one).

But it was a beautiful sunny Sunday and we were reminiscing about a long gone (but memorable) holiday in Italy – when the urge for pasta struck. So here it is, a delicious quick and easy to make Italian inspired meal…

Health benefits

This creamy smoked salmon pasta recipe is packed full of nutrition with omega-3 fatty acids and protein from the salmon, fibre from the peas and broccoli, and a touch of healthy fats from butter, it’s both nourishing and satisfying. The addition of sour cream or crème fraîche provides a creamy texture while maintaining a light feel.

Ingredients

The dish comes together with pasta (or zoodles for a grain-free option), hot smoked salmon, peas, broccoli, and a creamy sauce of butter, sour cream, and lemon zest, with a splash of white wine for depth.

What is ‘Hot’ smoked salmon?

Hot smoked salmon is smoked at a higher temperature, cooking the fillets of fish fully, resulting in a firm, flaky texture and a rich, smoky flavour. It’s ready to eat and great in salads or cooked dishes. Cold smoked salmon, on the other hand, is smoked at a lower temperature, which doesn’t cook the fish but cures it instead. This gives it a softer, silky texture and a more delicate, mild smoky flavour. It comes in thin slices where as the hot smoked salmon is sold in fillets. Both are available in major supermarkets.

How to make this smoked salmon pasta

Cook the pasta (or prepare zoodles if using) then drain well. Sauté onion and garlic in butter, add broccoli and peas, then deglaze with wine. Stir in remaining butter, sour cream, and lemon, then fold in the smoked salmon. Gently mix the pasta or zoodles through the sauce and serve immediately.

Serving suggestions and how to store

Serve this Smoked Salmon Pea Broccoli Pasta warm with a leafy salad for a well-rounded meal. It can also be enjoyed cold as a pasta salad, making it great for leftovers. Store any remaining pasta in an airtight container in the fridge.

Vary this Smoked Salmon Pea Broccoli Pasta to suit 

For dairy-free, use olive oil and coconut cream instead of butter and sour cream. Use gluten-free pasta for a gluten-free option, or serve with zoodles to make it grain-free. If you’re avoiding onion, swap it for fennel, and if you prefer not to use wine, replace it with stock and a splash of vinegar for a similar flavour profile. I also love this with a couple tablespoons of capers mixed through. Feel free to serve with grated parmesan cheese too. 

Take a look at the variations below for all the details as well as suggestions to alter the recipe to suit your specific dietary requirements.


For more delicious, nourishing and easy to make meals click HERE.

This Smoked Salmon Pea Broccoli Pasta is a really simple, delicious meal. It’s a perfect dish for a quick weeknight dinner that feels gourmet
Print Recipe
5 from 8 votes

Smoked Salmon Pea Broccoli Pasta

This Smoked Salmon Pea Broccoli Pasta is a simple, delicious meal, combining pasta with rich smoked salmon and vibrant green veggies. It’s a perfect dish for a quick weeknight dinner that feels gourmet.
Prep Time10 minutes mins
Cook Time15 minutes mins
Total Time25 minutes mins
Course: Main Course
Servings: 4

Ingredients

  • 50 g butter
  • 1 red onion/s -finely diced
  • 1 clove/s garlic -finely chopped or crushed
  • 150 g peas (1 cup) frozen or fresh
  • 1 broccoli (small head) broken into small florets
  • 60 ml dry white wine (¼ cup)
  • 2 tbsp sour cream -or creme fraiche (see dairy-free below)
  • ½ lemon/s -juice and zest
  • 1 fillet/s hot smoked salmon fillet/s
  • Sea salt and freshly ground black pepper -to taste
  • 300 g pasta -or approx. 3 cups of zoodles

Instructions

  • Fill a large pot with water and bring to the boil. Once boiling cook your pasta.
  • In a pan, sauté the onion and garlic in 25g of the butter over a low heat until soft and translucent (try no to brown it).
  • Add broccoli and stir-fry for a couple of minutes to just start to soften it then add the peas.
  • Turn the heat to high and add the wine (it should sizzle and reduce instantly).
  • Turn off the heat immediately and add the remaining butter, sour cream, lemon juice and zest and mix to combine. Season to taste.
  • Break the salmon into chunks and add to the peas/broccoli sauce.
  • When the pasta is al dente, strain (rinse if necessary) and gently fold through the sauce.
  • If using zoodles, obviously you don't need to cook them, just toss gently through the sauce to heat.

Serve

  • Completely optional, but this is lovely finished with grated parmesan cheese.
  • Immediately with a big leafy salad
  • You can also allow to cool and eat as a pasta salad (good for leftovers)

Store

  • Store in an airtight container in the fridge.

Notes

Dairy-free

Sub the butter for olive oil and the sour cream for coconut cream.

Grain-free

Serve on zoodles.

Gluten-free

Choose a gluten-free pasta.

Onion-free

Replace the onion with a small bulb of finely diced fennel.

No wine

Replace the wine with stock or bone broth and a teaspoon of vinegar. 

Add capers

I love this with a couple tablespoons of capers mixed through.
 

Id love to hear how you like this simple meal. Post a comment or rate this recipe. 

Blueberry Rocket Almond Salad

September 9, 2015 | Vegetarian, Salads

This Blueberry Rocket Almond Salad is a vibrant and refreshing dish perfect for a light lunch or a side. The combination of sweet blueberries, crunchy almonds and creamy feta makes it irresistible.

My local market has big buckets of fresh blueberries for sale at the moment, so this salad was born from my need to use my berries at every given opportunity. This is a great side salad or a meal in itself.

Kids in the kitchen

When my kids were little they hated anything green and leafy. So I started giving them a turn of spinning the salad spinner (they were about two). I served the leaves they spun every night as part of dinner, and low-and-behold, they eventually started to eat salad leaves (without fuss or encouragement) and enjoy them. Now they absolutely love salad leaves, even the spicy ones like rocket and mustard greens.

I also always made sure there were a couple of ingredients in the salad I knew they liked (mixed in with the greens) which made the idea of salad a lot more appealing. The blueberries here may just be your draw card.

Please to remember to persist and offer salads in many ways – they will eventually come around and like my kids, enjoy eating them.

Health benefits

Rich in antioxidants from blueberries and packed with fibre and healthy fats from quinoa and almonds, this salad provides a balanced mix of nutrients. The rocket leaves (arugula) are also a great source of vitamins A and K.

Ingredients

Rocket leaves, snow peas, blueberries, quinoa, toasted flaked almonds, and crumbled feta come together for this salad. The dressing is a zesty blend of lemon juice, olive oil, vinegar, and a hint of sweetness from rice malt syrup or honey.

How to make blueberry rocket almond salad

Combine all the salad ingredients in a large bowl. For the dressing, shake the lemon juice, olive oil, vinegar, and sweetener in a jar. Pour the dressing over the salad just before serving for maximum freshness.

Serving suggestions and how to store

This salad is delicious on its own or as a side dish with grilled fish or chicken. Store leftovers in an airtight container in the fridge, and add the dressing just before eating to keep the salad fresh.

Vary this blueberry rocket almond salad to suit

For a dairy-free or vegan option, omit the feta or replace it with vegan cheese. For a nut-free version, swap almonds with toasted sunflower seeds. Use rice malt syrup to make it fructose-friendly.

Take a look at the variations (below the main recipe) for suggestions to alter the recipe to suit many specific dietary requirements.

For lots more sides and salad inspo, take a look at my hugely popular ebook ˜Well Nourished Sides and Salads’– where vegetables become the hero of the dish! It also includes lots of tips to get kids involved and loving their veggies. It’s great value at just $9.95, click HERE to take a look.


For more delicious, easy to make healthy salad recipes, click HERE.

This Blueberry Rocket Almond Salad is perfect for a light lunch or side. The combo of blueberries, almonds & feta makes it irresistible.
Print Recipe
4.50 from 6 votes

Blueberry Rocket Almond Salad

This Blueberry Rocket Almond Salad is a delicious, nourishing flavour combination and a beautiful accompaniment to any meal. 
Prep Time10 minutes mins
Total Time10 minutes mins
Course: Salad
Servings: 4

Ingredients

  • 25 g rocket leaves - washed (1 cup)
  • 10 snow peas
  • ½ cup/s blueberries
  • 1 cup/s quinoa - cooked
  • 40 g flaked almonds (¼ cup) toasted
  • 40 g feta cheese (¼ cup) cow feta or goat, crumbled

Dressing

  • 1 lemon/s (small) juice and zest
  • 60 ml extra virgin olive oil (¼ cup)
  • 1 tsp red wine vinegar - or raspberry vinegar
  • 1 tsp rice malt syrup or honey

Instructions

  • For the salad, combine the ingredients together in your salad bowl.
  • For the dressing, shake the ingredients together in a jar.
  • Dress the salad just prior to serving.

Notes

Dairy-free and vegan

Just omit the feta or replace it with a vegan cheese. 

Nut-free

Replace the almonds with toasted sunflower seeds.

Fructose-friendly

Choose rice malt as your sweetener. 


Love to hear how you like this salad? Also, feel free to share your tips for encouraging your kids to love their salad.

Baked Berry Custard

September 3, 2015 | Breakfast, Baked Sweets

Always keen for a shortcut, I love creating meals that you can quickly assemble then throw in the oven, set the timer and forget. Like most mums I juggle a million of things so I really don’t have the time or patience to stand over the stove stirring or working my way through loads of steps and stages… hence this Baked Berry Custard is such a winner!

I’ve had a few custard mishaps in my day – where I’ve turned away from the stove top, only to ruin a batch. So a healthy baked custard is my answer and to be honest, my whole family actually prefer the consistency of it too.

This Baked Berry Custard is a light and nutritious dessert or breakfast option, blending creamy custard with the natural sweetness of fresh berries. It’s simple to prepare and can be customised to suit different dietary needs. I really hope your family loves this also.

Health benefits

Packed with protein from eggs and full-fat yoghurt, this egg custard recipe provides essential nutrients, while the berries add antioxidants and fibre. It’s also a low sugar custard and refined sugar-free. 

Ingredients

The recipe calls for eggs, natural yoghurt, rice malt syrup or maple syrup, vanilla extract, lemon zest, and your choice of fresh berries (blueberries, raspberries, or strawberries).

How to make this baked egg custard

Mix the eggs, sweetener, yoghurt, vanilla, and lemon zest until frothy. Grease four ramekins and divide the mixture evenly. Arrange the berries on top, place the ramekins in a water bath (which is a baking pan filled with hot water), and bake at 200°C until the custard is set.

If you own a Thermomix, we’ve also included Thermomix instructions for this recipe.

Serving suggestions and how to store

Serve the custard as is or top it with muesli, stewed fruit, toasted coconut, or even chocolate shavings for an indulgent touch. Store any leftovers covered in the fridge.

Vary baked berry custard to suit your needs

For a dairy-free option, replace the yoghurt with coconut milk. To keep it low in fructose, use rice malt syrup as the sweetener.

Take a look at the variations (below the main recipe) for suggestions to alter the recipe to suit your specific dietary requirements.

For more quick, healthy breakfast recipes, click HERE.

Blueberry egg custard
Print Recipe
4.86 from 14 votes

Baked Berry Custard

This Baked Berry Custard recipe is a simple, nutritious breakfast or sweeten it up a little more and turn it into a decadent dessert. 
Prep Time10 minutes mins
Cook Time30 minutes mins
Total Time40 minutes mins
Course: Breakfast, Dessert
Servings: 4

Ingredients

  • 4 egg/s
  • 3 tbsp rice malt syrup or maple syrup (I find this enough, but you can add up to a ¼ cup for a sweeter custard)
  • 250 g natural or Greek yoghurt (1 cup)
  • ½ tsp vanilla -powder, extract or essence
  • 1 lemon/s -zest finely grated
  • 20 fresh blueberries (raspberries or pieces of strawberry)

Instructions

  • Preheat your oven to 200℃/395℉ (fan-forced).
  • In a food processor or blender, mix the eggs, sweetener, yoghurt, vanilla and lemon zest for 30 seconds (until well combined and frothy - like a smoothie). If using a Thermomix, blend 30sec, speed 4.
  • Grease the ramekins with a little butter or coconut oil.
  • Divide the mixture between the four ramekins and place in a water bath. I use a large ovenproof stainless steel fry pan (with a lid), filled to about ¾ of the way up the sides of the ramekins.
  • Arrange the fruit between the ramekins.
  • Cover with the lid and bake for about 30 minutes or until set in the middle. A good indicator is that the middle rises a little.

Serving suggestions

  • Obviously, as is is just fine
  • At breakfast, I often serve with a little of my toasted muesli on top
  • Nice with stewed or fresh fruit
  • Lovely with toasted coconut or nuts for dessert
  • Melted raw chocolate or shavings would make this much more decadent

Store

  • Covered in the fridge.

Notes

Dairy-free

Replace the yoghurt with coconut milk (I used the Ayam brand)

Low-fructose

Choose the rice malt syrup as your sweetener

Timesaving Tip

No need to wash the pan you use for the water bath (it's only boiled the water) - simple dry and store. You can also make these on the stove top, in a steam basket or steam oven - just make sure the water doesn't bubble up over the edge of the ramekins.
 

I'd love to hear how you enjoyed this -post a comment or rate this recipe.

Lemon, Tuna and Quinoa Salad

August 26, 2015 | Salads

Every time I cook a batch of quinoa, I always make extra so I can make a salad for the kids and I for lunch the next day. Our favourite combo is this lemon tuna quinoa salad – it’s fresh, zesty and really quick and easy to throw together. Feel free to add in any raw or cooked vegetable you like, this is a very versatile recipe.

To source the most sustainable brands of tuna (in Australia), click here.

Health benefits

Quinoa is a complete protein and a great source of fibre, I’ve written about here.  Tuna adds lean protein and omega-3 fatty acids, while the fresh veggies provide vitamins, minerals, and antioxidants.

Ingredients

This gluten-free recipe combines cooked and cooled quinoa, canned tuna, cherry tomatoes, leafy greens, carrot, and fresh herbs, all dressed with a tangy lemon vinaigrette made with lemon zest and juice, olive oil, red wine vinegar, and smoked paprika.

How to make lemon tuna quinoa salad

Start by rinsing and cooking the quinoa in a saucepan, letting it steam and cool. Shake the dressing ingredients together in a jar. Mix the cooked quinoa and tuna in a large bowl, then gradually add the dressing. Fold in the cherry tomatoes, carrots, greens, and fresh herbs. Toss well to serve.

Serving suggestions and how to store

Serve this salad as a main dish or a side with some crusty bread. It can be stored in an airtight container in the fridge for up to 2 days.

Vary lemon tuna quinoa salad to suit your needs

For a vegan or vegetarian version, replace the tuna with tofu or tempeh. You can also add nuts, seeds, or crumbled feta for extra flavour and texture. If tuna isn’t your thing, try substituting it with shredded chicken or beef.

Take a look at the variations (below the main recipe) for suggestions to alter the recipe to suit many specific dietary requirements.

Lemon Tuna Quinoa Salad is a light, protein-packed meal perfect for a quick lunch or dinner. It's nutritious, delicious & easy to make.
Print Recipe
5 from 4 votes

Lemon, Tuna and Quinoa Salad

This Lemon, Tuna, and Quinoa Salad is a light, refreshing, and protein-packed meal perfect for a quick lunch or dinner. With fresh herbs, crunchy veggies, and a zesty lemon dressing, it's nutritious and delicious.
Prep Time20 minutes mins
Total Time20 minutes mins
Course: Salad
Servings: 2

Ingredients

  • 130 g quinoa - or 2 cups cooked
  • 185 g can tuna -drained
  • 10 cherry tomatoes -halved
  • 25 g leafy greens (1 cup)
  • ¼ bunch/s fresh coriander or mint leaves -leaves picked off stems
  • 1 carrot/s (large) grated or julienned

Dressing

  • ½ lemon/s -zest and juice
  • 60 ml extra virgin olive oil extra virgin (or roughly double the quantity of oil to lemon juice) (¼ cup)
  • 1 tsp red wine vinegar
  • Sea salt and freshly ground black pepper -to taste
  • ¼ tsp smoked paprika
Metric - US Customary

Instructions

  • Firstly rinse the quinoa in a fine sieve really well for at least 1 minute (this removes the bitter saponins from the quinoa). Cook the quinoa by placing it into a pot with 1½ cups of water.
  • Bring the mixture to a boil over medium-high heat, then decrease the heat a bit to maintain a gentle simmer. Cook uncovered until the quinoa has absorbed all of the water, about 10 to 12 minutes.
  • Remove the pot from heat, cover, and let the quinoa steam for 5 minutes. This step gives the quinoa time to pop open and the little white spiral to appear. After 5 minutes, remove the lid and fluff the quinoa with a fork. Allow to cool.
  • Place all of the dressing ingredients into a jar and shake well to combine.
  • In a large bowl mix together the quinoa and tuna.
  • Mix through the dressing, adding gradually until the quinoa and tuna are well coated but not drowning in dressing.
  • Now fold through the tomatoes, carrot, leafy greens and herbs. Enjoy!

Store

  • Store in an airtight container in the fridge.

Notes

Vegan and vegetarian 

Omit the tuna and add in thinly sliced tofu or tempeh and toasted nuts.

Don't like tuna

Replace it with another cooked meat like shredded or diced chicken, lamb or beef.

Add nuts, seeds or dukkah

This is lovely topped with toasted nuts, seeds or even dukkah to add in a nice crunch.

Add feta or goat feta

This is delicious with feta mixed through too.
 
For lots more sides and salad inspo, take a look at my hugely popular ebook ˜Well Nourished Sides and Salads’- where vegetables become the hero of the dish!
It’s great value at just $9.95, click HERE to take a look.
 

Post your comments or rate this recipe below.

  • <
  • Page 1
  • Interim pages omitted …
  • Page 42
  • Page 43
  • Page 44
  • Page 45
  • Page 46
  • Interim pages omitted …
  • Page 49
  • >

Primary Sidebar

Join the community

Social Media

Join over 140,000 followers

Nourish Your Inbox

Nourish Your Inbox!

Christmas Meal Planning Ebook

Sign up today for your FREE:
• Chocolate Ebook
• Subscribers Only Special Offers
• Practical Health & Nutrition Tips
• New Whole Food Recipes

WN App

Join the Family

Join the Family

Join The Family

The Well Nourished Family Membership is your complete solution to your families health and wellbeing. With 1200+ whole food recipes and SO MUCH MORE. Join for a limited time for over 80% OFF!

JOIN & SAVE 80%

Upgrade Your Membership – Recipe Only

Health Programs & Courses – Public

Health Programs & Courses

Health Programs & Courses

Whether you’re looking for effortless meal creation, lunchbox inspiration or strategies to raise adventurous eaters, our expert-led resources will guide you every step of the way.

Find Out More

Programs and Courses – FAM only

Affiliate promo – public

Become an Affiliate

Looking to partner with a respected, Australian-run health and wellness brand to expand your reach and your income?

Find out More

Featured Lunchbox Ebook – Public

From the Shop

See More

Footer

Logos

Well Nourished HomepageWell Nourished

As featured on

Footer-social

Connect with us

  • About Well Nourished
  • Sitemap
  • Contact
  • Privacy Policy
  • Website Terms of Use
  • Affiliates

© Well Nourished 2026

A Firstnature site

Not feeling quite yourself?
If you're dealing with skin flares, gut issues, fatigue or joint pain, this five-minute quiz will help you understand what's actually driving it.
TAKE QUIZ

Rate This Recipe

Your vote:


A rating is required
A name is required
An email is required